Wallet is a fork of MyEtherWallet that allows you to manage various aspects of your Urbit ships, such as launching, starting, depositing, transferring, voting, etc. through the Etheruem PKI. In this README, you will find a guide for running the application locally and for setting up a development environment.
Wallet will allow you to interact with the Urbit constitution on the Ethereum blockchain. The best way to do this is to run a copy of Wallet locally and connect it to an Ethereum address and a node that you trust. How you run Wallet will depend on what kind of Ethereum wallet you'd like to connect to.
- If you're using a mnemonic, a private key or a UTC keystore file to connect to an Ethereum wallet, you can merely click on the index.html file found at /dist/index.html in this repo.
If you're using a hardware wallet or Metamask, you have to run a simple webserver
using the script provided at /bin/serve.py. In order to run it, cd into the /bin
directory and run the following commands
openssl req -new -x509 -keyout localhost.pem -out localhost.pem -days 3650 -nodespython ./serve.py ./localhost.pem
Once you open Wallet, you'll want to connect your Ethereum wallet, following the appropriate flow on the homepage.
The address to which Wallet is connected will be indicated at the header of the page. By default, Wallet is connected to an Ethereum node provided by MyEtherWallet. To change this, click on the "node" indicator in the header. If you'd prefer to create your transactions Offline, this option is also available in the node dialogue.
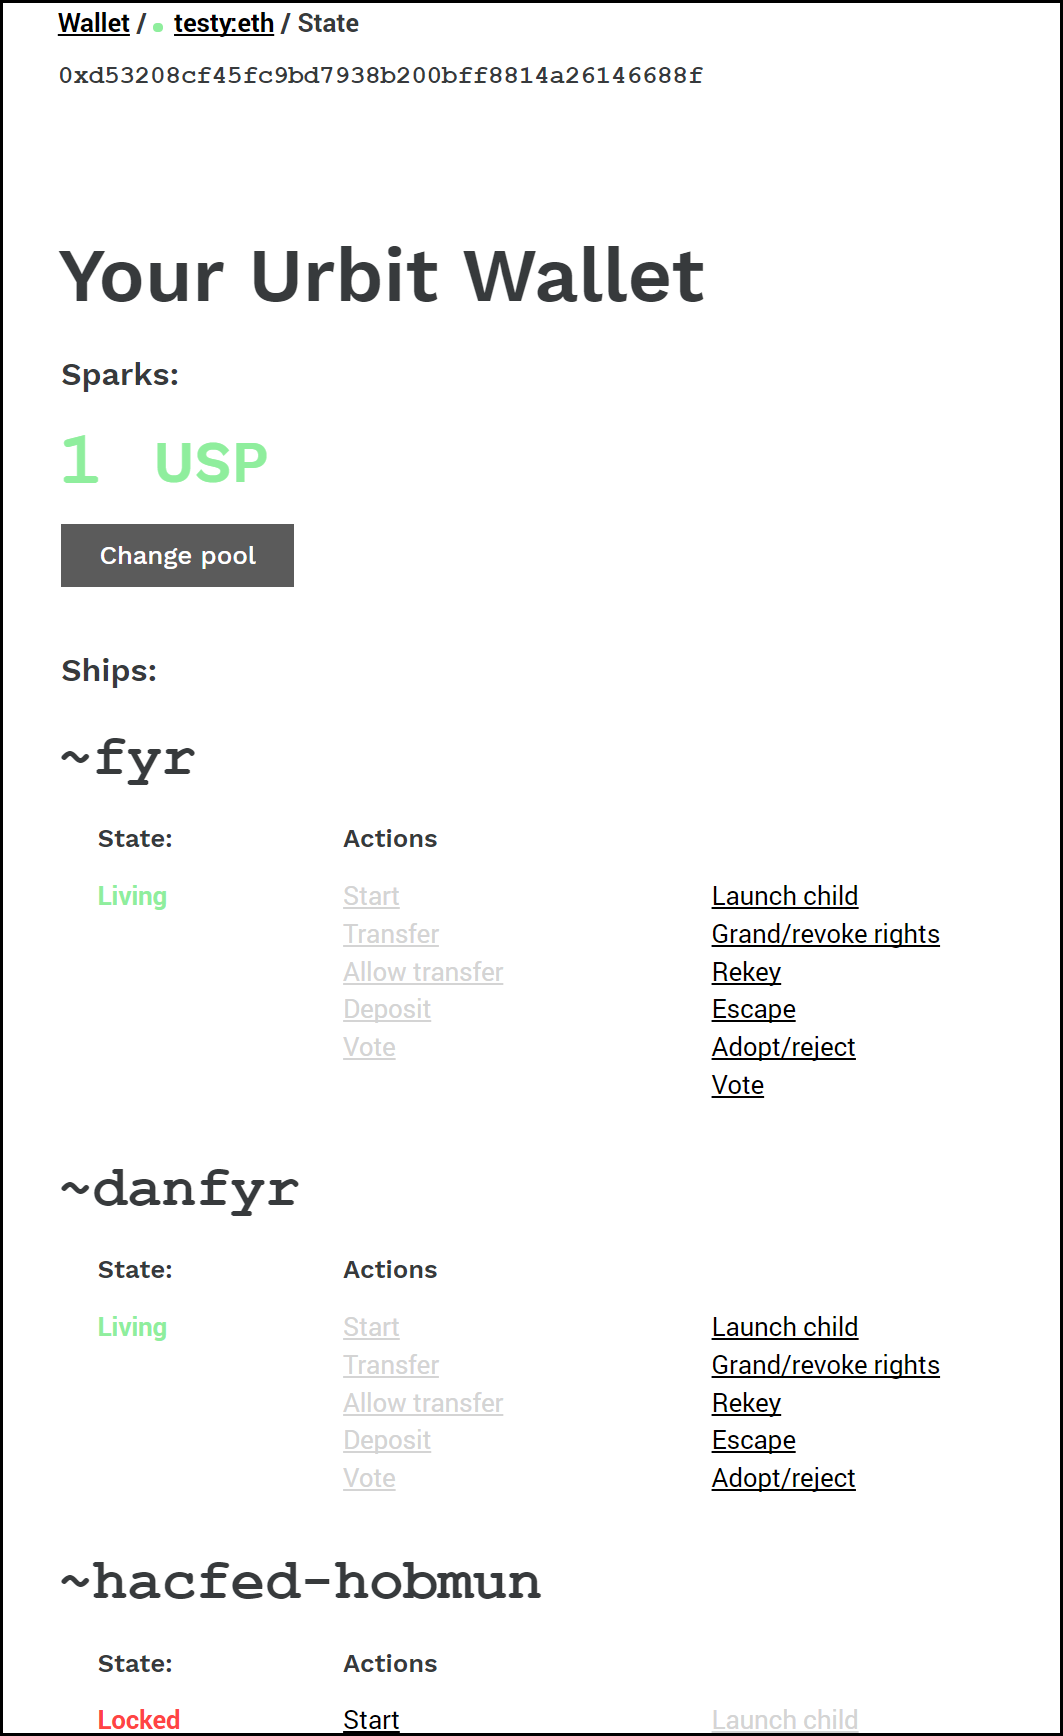
The "State" screen of the Urbit wallet will show a list of Ships that you own, along with actions available for that Ship. It will also allow you to connect to a Pool, which is an exchange for exchanging Stars for Spark Tokens and vice versa. If a Pool is connected, you will see your address' Spark balance.
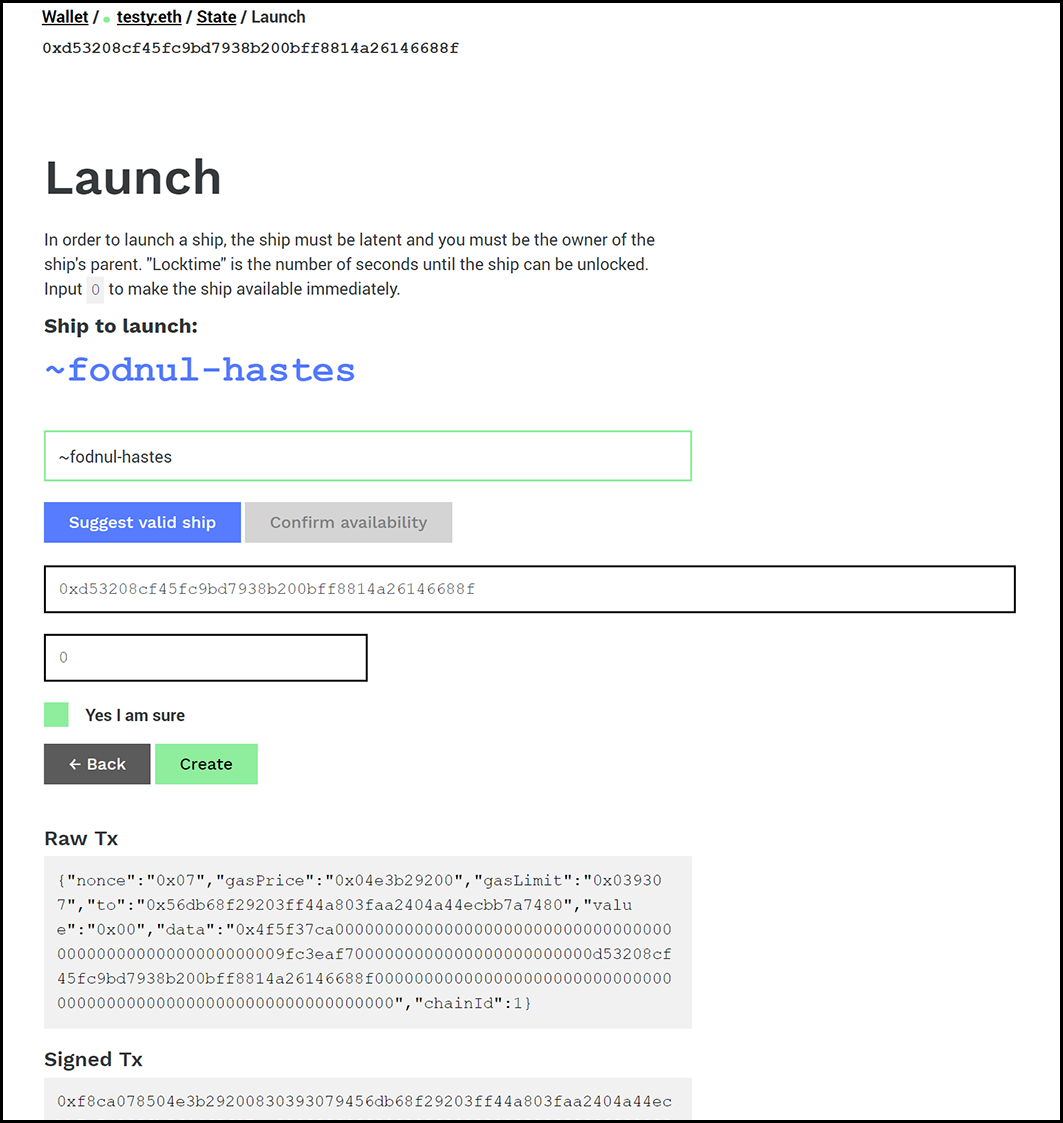
Below each ship, you will see a list of actions that corresponds to that ship's type (Galaxy, Star, Planet) and state (Locked or Living). In the default online mode clicking on an action will take you to a transaction screen, where you will be asked to provide additional information for that transaction. For example, if you'd like to launch a child ship, say a planet from your star, then you will be asked which address the new ship should belong to and how long (in seconds) the ship should be locked before it can be started.
Once you've filled out the appropriate fields, you will be able to "Create" a transaction. This does not send the transaction to the blockchain, but merely creates and signs the transaction. The display will show both the signed and unsigned transactions for approval. Once you've created a transaction, you can press "Send," which will send the transaction to the Ethereum node to which your wallet is connected and you'll be shown a confirmation (or warning) dialogue, giving you the hash of the transaction.
When you're done, you can navigate back to the State screen to execute other transactions.
If you'd prefer to construct your transactions offline, click on the node indicator in the header and select "Offline." This will disconnect Wallet from the node.
In offline mode, all transactions are listed and available. The transaction screens are identical, execept that nonce, gasLimit and gasPrice have to be entered manually (because these estimations require a node). Once you've filled the transaction fields, clicking "Create" will create and sign your transaction. At this point, you should copy and paste your transaction into another client to send to a node.
In offline mode, there is no validation of your transaction parameters, and there is no way to submit a transaction directly to a node. If you select this mode, you should have another way to submit transactions to the chain and you should independently confirm that your transaction is valid. For example, if you create a "Launch Child" transaction offline, please make sure that you own the parent ship. Refer to the constitution for the constraints on each transaction.
- cd into the repo directory and
npm install npm run dev- This command will watch the
app/directory and build into thedist/directory. - Open the file at
dist/index.htmlin a browser, ORcdintobin/and runpython ./serve.py. Use the latter if you'd like to test with either the Ledger wallet or Metamask
In order to test the functionality of the Wallet, you'll need a testnet running the Urbit constitution.
- Clone the constitution
- cd into the repo and
npm install npm install -g ganache-cli- Run a local
ganachenode, boot using the following command to ensure a matching seed:
ganache-cli -m "benefit crew supreme gesture quantum web media hazard theory mercy wing kitten" - Run
truffle deployfrom the constitution's directory to deploy to your local node. - For wallet access, click "Mnemonic" as your method and enter the mnemonic described in step 2, and unlock your wallet.
- In order to connect to your testnet, click the Node indicator in the header (usually defaults to ETH). Click through the wizard to set up a custom node. The placeholders will be the default for the testrpc node.
- You are now authenticated and can perform operations that require that. By default, your address is
0x6deffb0cafdb11d175f123f6891aa64f01c24f7d. Go give yourself a galaxy.
Constitution owner (is allowed to create galaxies): 0x6deffb0cafdb11d175f123f6891aa64f01c24f7d
Test pool: 0xb71c0b6cee1bcae56dfe95cd9d3e41ddd7eafc43

