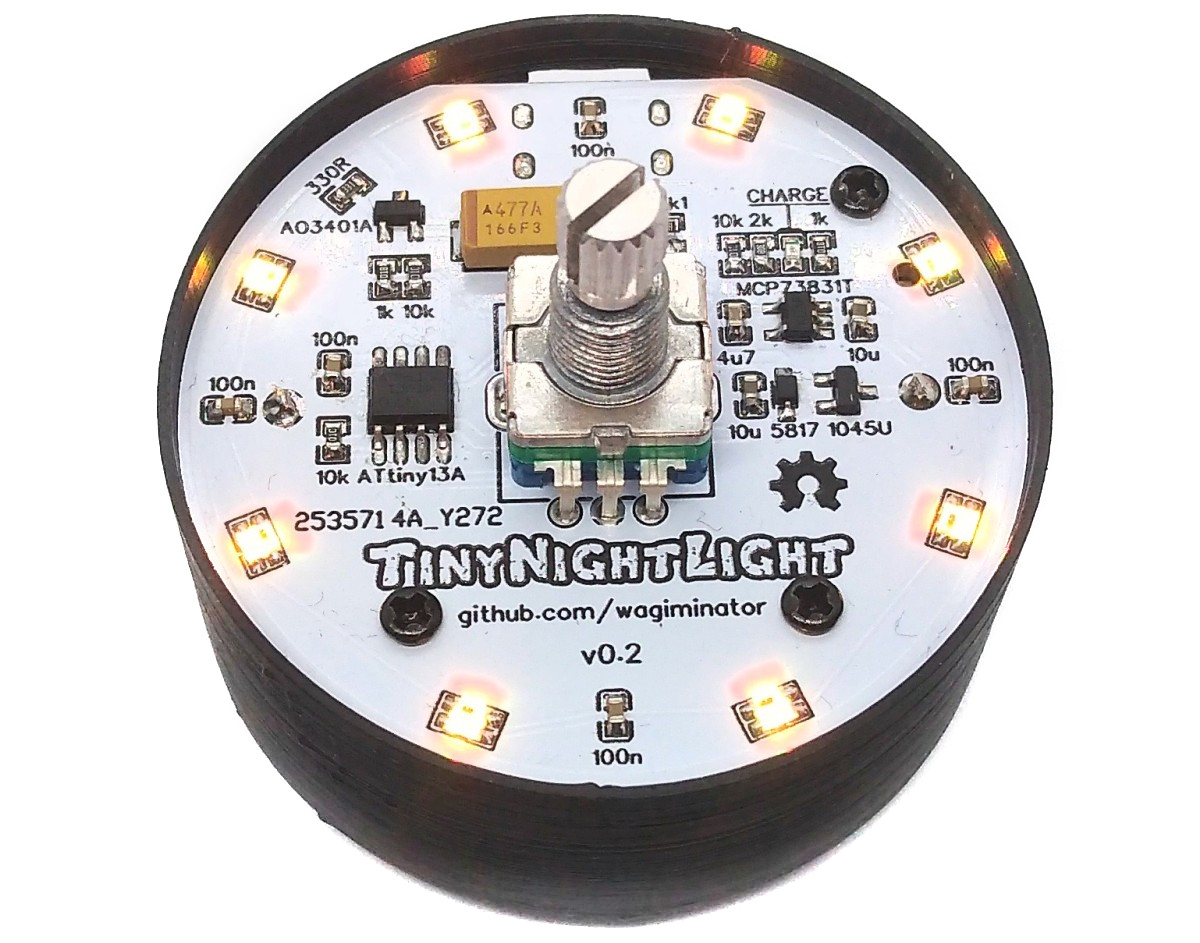
TinyNightLight is a rotary encoder controlled and battery powered nightlight with NeoPixels based on the ATtiny13A.
- Design Files (EasyEDA): https://easyeda.com/wagiminator/attiny13-tinynightlight_copy
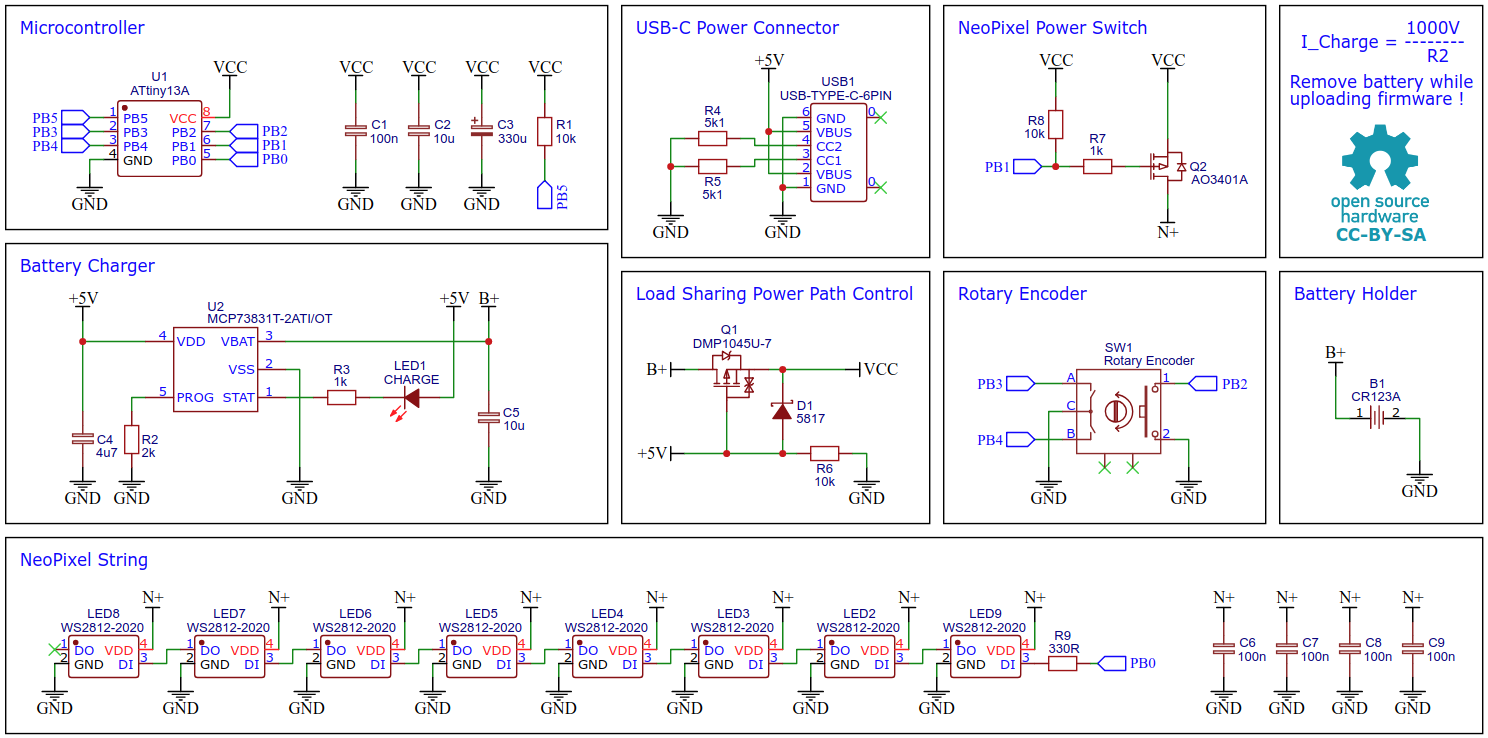
WS2812-2020 is an intelligent control LED light source, which integrates the control circuit and RGB chip in a small 2020 package. It internally contains an intelligent digital port data latch, a signal conditioning gain driver circuit, a precision oscillator and a voltage-programmable constant current control part, which effectively ensures that the pixel point light color level is consistent. Make sure you use the 5mA variant.
For battery charging the MCP73831 is used. The MCP73831 is a highly advanced linear charge management controller for use in space-limited, cost-sensitive applications. It employs a constant-current/constant-voltage charge algorithm with selectable preconditioning and charge termination. The constant current value is set with one external resistor (I = 1000V / R2). Charging is done via the built-in USB-C connector. The MCP73831 can be replaced by the much cheaper TP4054 without further modifications.
The device can be operated both by battery and external power. The load sharing power path control system interrupts the connection between the battery and the load when an external power supply is connected. In this case, the device is powered by the external power supply while the battery is being charged. This protects the battery and increases its lifespan. Without an external power supply, the device is powered directly by the battery.
The NeoPixel implementation is based on NeoController.
Since there is no ICSP header on the board, you have to program the ATtiny either before soldering using an SOP adapter, or after soldering using an EEPROM clip. The AVR Programmer Adapter can help with this. Remove the battery before connecting the device to the programmer.
- Make sure you have installed MicroCore.
- Go to Tools -> Board -> MicroCore and select ATtiny13.
- Go to Tools and choose the following board options:
- Clock: 9.6 MHz internal osc.
- BOD: BOD 2.7V
- Timing: Micros disabled
- Connect your programmer to your PC and to the ATtiny.
- Go to Tools -> Programmer and select your ISP programmer (e.g. USBasp).
- Go to Tools -> Burn Bootloader to burn the fuses.
- Open the TinyNightLight sketch and click Upload.
- Make sure you have installed avrdude.
- Connect your programmer to your PC and to the ATtiny.
- Open a terminal.
- Navigate to the folder with the hex-file.
- Execute the following command (if necessary replace "usbasp" with the programmer you use):
avrdude -c usbasp -p t13 -U lfuse:w:0x3a:m -U hfuse:w:0xfb:m -U flash:w:tinynightlight.hex
- Make sure you have installed avr-gcc toolchain and avrdude.
- Connect your programmer to your PC and to the ATtiny.
- Open a terminal.
- Navigate to the folder with the makefile and the sketch.
- Run
PROGRMR=usbasp make installto compile, burn the fuses and upload the firmware (change PROGRMR accordingly).
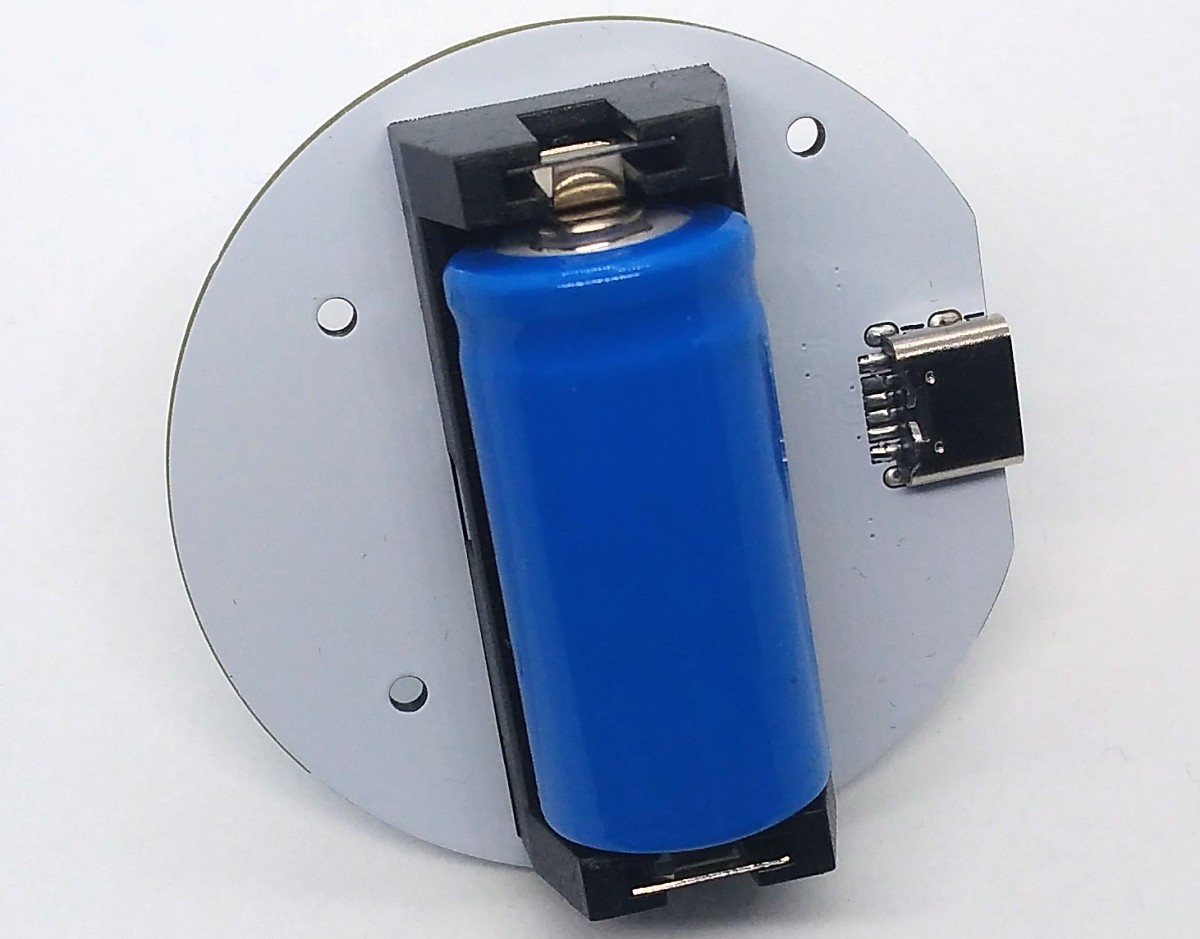
Place a 3.7V protected 16340 (LR123A) Li-Ion battery in the holder. The battery can be charged via the USB-C port. A red LED lights up during charging. It goes out when charging is complete.
The device has four different states, which can be switched between by pressing the rotary encoder button.
| State | Description |
|---|---|
| 0 | All LEDs are off and the ATtiny is in sleep mode. |
| 1 | All LEDs light up white. The brightness can be changed by turning the rotary encoder. The brightness set by this is also retained for the following states. |
| 2 | The LEDs show a color animation with the previously set brightness. The speed of the animation can be adjusted using the rotary encoder. |
| 3 | All LEDs show the same color with the previously set brightness. The color can be changed by turning the rotary encoder. |


This work is licensed under Creative Commons Attribution-ShareAlike 3.0 Unported License. (http://creativecommons.org/licenses/by-sa/3.0/)