./gatewayfolder: OpenThread Smarthome Application Gateway's source files../freeboardfolder: Web UI's source files. Just fork from freeboard by zxytddd, exactly the same../scriptsfolder: Linux Shell scripts for intalling and running for gateway../install/ot_gw_install.sh: for OpenThread Gateway installation../startup/ot_gw_startup.sh: for OpenThread Gateway starting, including wpantund, wpanctl and Nodejs gateway../components_start/wpantund_start.sh: only for wpantund starting.wpanctl_start.sh: only for wpanctl starting and joining Thead network automatically.gateway_start.sh: only for Nodejs gateway starting.
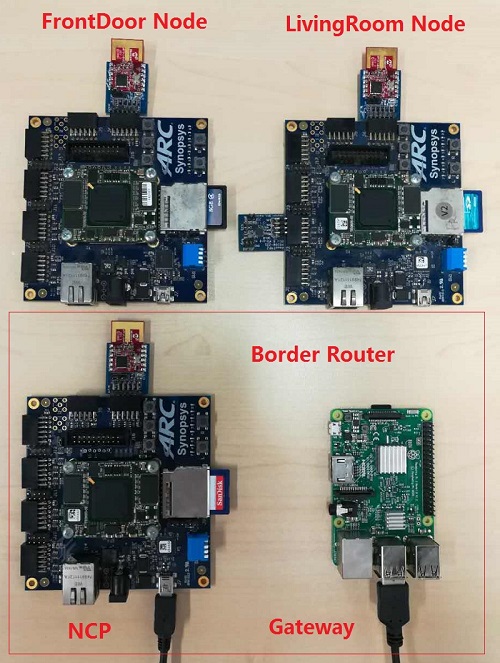
- 2 x DesignWare ARC EM Starter Kit(EMSK), recommended version 2.3
- 2 x Digilent Pmod RF2
- 2 x SD card
- 1 x Raspberry Pi 3 (running recent Raspbian Stretch Lite)
- 1 x microUSB-USB cable
- 1 x Ethernet cable
- Connect EMSK with Raspi via USB cable.
- Connect Raspi with PC Host via Ethernet cable, for supporting the remote operation to the Raspi on PC, based on ssh here.
Run two Thread Nodes, including the frontDoor Node and livingRoom Node. See embARC OpenThread Smarthome Application's README to learn how to start them.
Before installing Gateway, it is recommanded to reinstall the operating system (recent Raspbian Stretch Lite) on the Raspi, and leave the default username (pi) and password (raspberry). And ensure that the Raspi is able to access the network (Shared network with PC via Ethernet cable here).
sudo apt-get update
sudo apt-get install git
cd ~
git clone https://github.com/XiangcaiHuang/ot_smarthome_gw.git
cd ~/ot_smarthome_gw/gateway/
sudo npm install

cd ~/ot_smarthome_gw/scripts/install/
sudo chmod +x ot_gw_install.sh
./ot_gw_install.sh
The installation process takes about 1 ~ 2 hours for the first time, wait with patience please. And it will reboot after installation finished. After that, the Gateway (wpantund, wpanctl, Nodejs gateway) and NCP will run automatically after the power supplied to the Raspi (The NCP powered by Raspi via USB cable). It is due to the installation process modifys the /etc/rc.local which is a shell script always run after Linux starts.
Notice:
The socket path must be identified when starts the Gateway (wpantund), like here it is ttyUSB1, which is a descriptor stands for NCP's UART interface. It is better to check it before install Gateway. Enter ls /dev/ in the Command Line Interface of the Raspi to find it out. There may be two ttyUSB*, such as ttyUSB0 and ttyUSB1. Only one of them is right. If it is not ttyUSB1, modify the scripts of
./scripts/startup/ot_gw_startup.sh,./scripts/components_start/wpantund_start.shas the following shows:SOCKET_PATH=/dev/ttyUSB1See embARC OpenThread NCP example's README for more information.
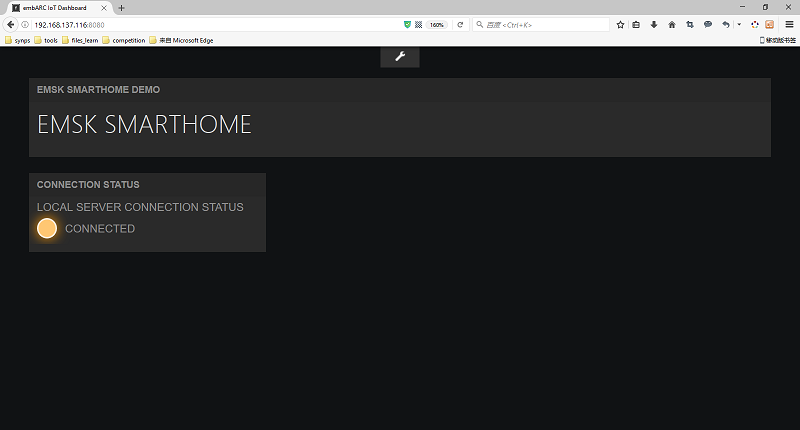
If the installation is successful and the system is running now, then the UI can be accessed by enter Raspi's IPv4 address and port in the browser, like 192.168.137.116:8080 here.
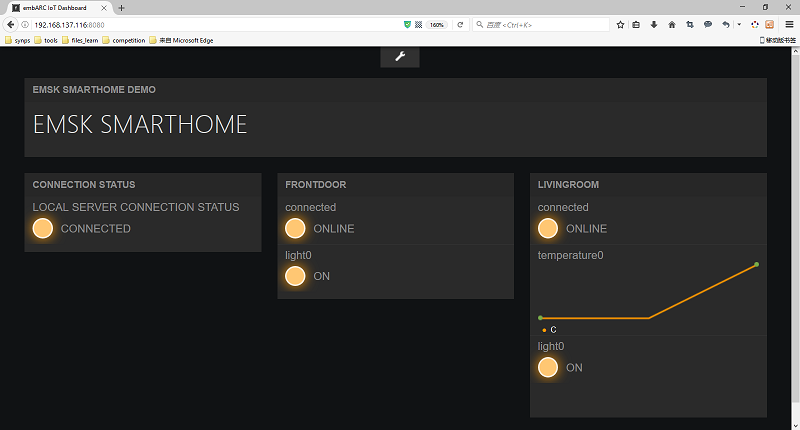
Now, there are nothing about the two Nodes on the UI. Press the Button L on any Node, then the components will be loaded.
Notice:
Sometimes, the Gateway might start failed after installation reboot. Don't have to install again in this situation, Just try to reboot the Raspi again.
- On the frontDoor Node
- Press Button L to control the Lock and send its status to UI. LED0 shows the Lock status.
- On the livingRoom Node
- Press Button L to control the Light and send its status to UI. LED0 shows the Light status.
- Press Button R to start/stop sending the Temperature value to UI every 5s. LED1 blinking when it reports data.
- On the Freeboard UI
- Control Lock status and Light status by clicking on the according components.
Notice:
Before restart Gateway, it is better to restart all Thread Nodes.
See embARC OpenThread Smarthome Application's README for more information.


