Behavioral Cloning Project
The goals / steps of this project are the following:
- Use the simulator to collect data of good driving behavior
- Build, a convolution neural network in Keras that predicts steering angles from images
- Train and validate the model with a training and validation set
- Test that the model successfully drives around track one without leaving the road
- Summarize the results with a written report
1. Files in this repo are described as follows. These files can be used to run the simulator in autonomous mode.
- model.py: The code in model.py contains the script to create and train the model. The model provided can be used to successfully operate the simulation. The code in model.py uses a Python generator.
- model_noGenerator.py: The code in model_noGenerator.py contains the script to create and train the model. The model provided can be used to successfully operate the simulation. The code in model_noGenerator.py does not use a Python generator.
- drive.py for driving the car in autonomous mode
- model.h5 containing a trained convolution neural network
- model_noGen.h5 containing a trained convolution neural network (without Python generator)
- README.md summarizing the results
Using the Udacity provided simulator and my drive.py file, the car can be driven autonomously around the track by executing
python drive.py model.h5The model.py file contains the code for training and saving the convolution neural network. The file shows the pipeline I used for training and validating the model, and it contains comments to explain how the code works.
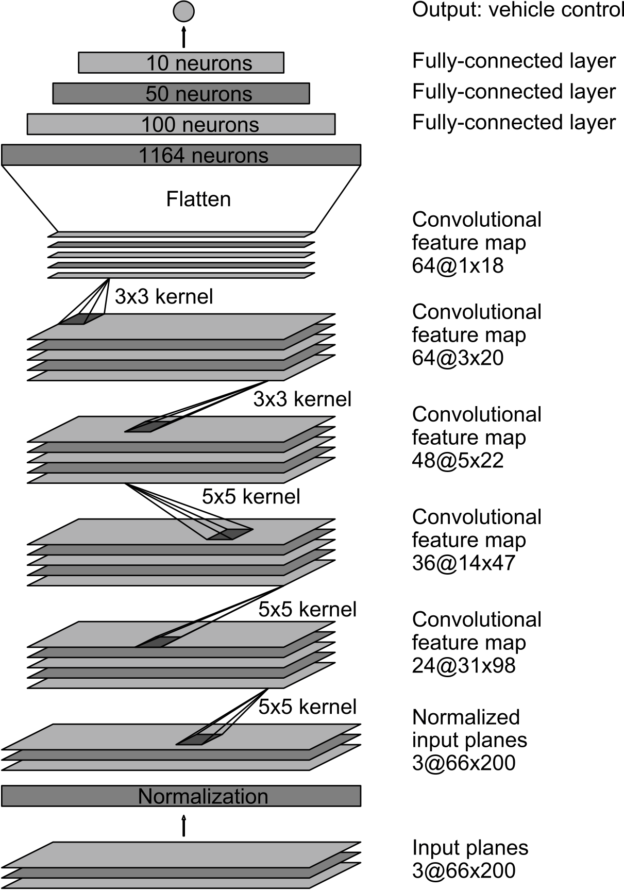
The following model architecture is used with modification. This model is used by the NVIDIA’s self-driving car team, which consists 5 convolutional layers and 3 fully-connected layers. My modification includes the add of Dropout and the change of neuron number of the last fully-connected layer from 10 to 16.
The model includes RELU layers to introduce nonlinearity. The data is normalized in the model using a Keras lambda layer and cropped.
The model uses 3 epochs, and the batch-size is 192. An Adam optimizer is used. It is trained on AWS EC2 instance 'g2.2xlarge' (GRID K520 GPU).
The training loss and validation loss are:
| EPOCH | TIME | training loss | validation loss |
|---|---|---|---|
| 1 | 88s | 0.0199 | 0.0196 |
| 2 | 78s | 0.0174 | 0.0185 |
| 3 | 78s | 0.0166 | 0.0178 |
Similar to the model in model_noGenerator.py, the model in model.py consists 4 convolutional layers and 3 fully-connected layers. Dropout is used after each fully-connected layer. The batch-size is 32 and the number of epochs is 10.
The training loss and validation loss are:
| EPOCH | TIME | training loss | validation loss |
|---|---|---|---|
| 1 | 14s | 0.0311 | 0.0219 |
| 2 | 12s | 0.0208 | 0.0198 |
| 3 | 12s | 0.0206 | 0.0201 |
| 4 | 12s | 0.0187 | 0.0162 |
| 5 | 12s | 0.0202 | 0.0177 |
| 6 | 12s | 0.0190 | 0.0193 |
| 7 | 12s | 0.0193 | 0.0161 |
| 8 | 12s | 0.0174 | 0.0184 |
| 9 | 12s | 0.0169 | 0.0162 |
| 10 | 12s | 0.0171 | 0.0158 |
The model contains dropout layers in order to reduce overfitting.
The model was trained and validated on different data sets to ensure that the model was not overfitting. The model was tested by running it through the simulator and ensuring that the vehicle could stay on the track.
The model used an adam optimizer, so the learning rate was not tuned manually.
At first, I did not incorporate Python generator to my model (model_noGenerator.py). The model was trained in 3 epochs and 192 batch-size and the performance of simulation is very good. The car never pops up onto ledges or rolls over any surfaces.
Then, I incorporated Python generator to my model (model.py). When the epochs number is 3 and the batch-size is 32, the car always pops up onto ledges or rolls over any surfaces (red and white) when it makes a sharp turn. Since I know there is nothing wrong with my network architecture, I think the problem is due to limited training data. When I changed the batch-size to 256 (the number of epochs keeps to be 3), there is an error with respect to 'out of memory'. When I changed the batch-size to 64 or 128 (the number of epochs is configured to be 3 or 4), the car still pops up onto ledges or rolls over any surfaces when it makes sharp turns. Finally, I changed the epoch number to 10 and the batch-size 32. Even though the training loss and validation loss fluctuate, they are in the trend of going down. Early stopping can be used, but the parameters of stopping criteria should be tuned. Early stopping is not used in this model.
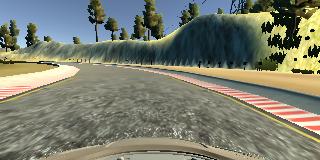
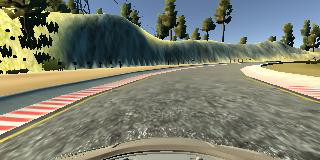
Training data was chosen to keep the vehicle driving on the road. I used a combination of center lane driving, recovering from the left and right sides of the road. The images are flipped and the sign of the steering is taken the negative value to augment the data.
FileZilla is used to manage the local and remote data and files.
The overall strategy for deriving a model architecture was to train the network to learn the driving behavior and finally enable the network to drive a car on the given track in the simulator.
My first step was to use a convolution neural network model similar to the CNN in NVIDIA’s self-driving car team. I thought this model might be appropriate because it is used for end-to-end learning for self-driving cars.
The given sample training data is used to train the network.
After the collection process, I had 48216 number of data points in model_noGenerator.py (train on 38572 samples, validate on 9644 samples). I then preprocessed this data by using a lambda layer to parallelize image normalization and cropping the images to an area of interest containing roads while excluding the sky and the hood of the car.
In order to gauge how well the model was working, I split my image and steering angle data into a training and validation set.
Here are example images of center lane driving, images from the left side and right sides of the road respectively:
| Center | Left | Right |
|---|---|---|
 |
 |
 |
Here is an image that has then been flipped:
| Original image | Flipped image |
|---|---|
 |
 |
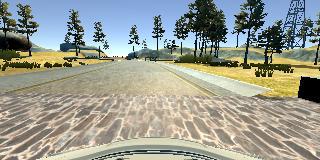
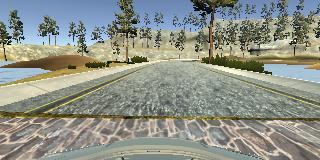
Here are images that the car is drived in the counter-clockwise direction (the car turns to the right frequently) and clockwise direction (the car turns to the left frequently):
| counter-clockwise | clockwise |
|---|---|
 |
 |
To combat the overfitting, I add dropout to the network and augment the data set by flipping images.
Then I tune the size of the last fully-connected layer, the epoch number and the batch size, which has been described and discussed above.
The final step was to run the simulator to see how well the car was driving around track one. The network is tested to drive the car in the counter-clockwise direction and clockwise direction respectively. I also tested the network by manually driving the car close to one side of the road and letting it drive autonomously. Driving on a straight road is simple, but the car may pop up onto ledges or roll over any surfaces when it makes sharp turns. I tested the network by manually driving the car to sharp curves and letting it drive the curves autonomously. The car is able to drive autonomously around the track without leaving the road in all these scenarios.
The autonomous driving video (simulation result) is recorded.
The following video shows the result by using model_noGenerator.py in the scenario of driving in the counter-clockwise direction. (By clicking the image, you will be directed to Youtube. MUSIC in the video.)
The following video shows the result by using model_noGenerator.py in the scenario of driving in the clockwise direction.
The following video shows the result by using model.py in the scenarios of 1) driving in the counter-clockwise direction, 2) driving in the clockwise direction, and 3) driving on the roads of sharp turns.
-
Other model architectures can be used to achieve similar performance. The model should be tested on more track scenarios.
-
The 2nd track will be used to generate data and train the network.
-
The steering angle is the only control decision variable used in this network as output. In the future, the throttle, break, and speed can be used with the steering angle as a control vector (multiple outputs in the network) to design the model architecture and train the network.
-
To learn more about how the data is processed and the network trained, the following works can be referred to: ref1, ref2, ref3, ref4.
