vinyl2digital - PyPi Package
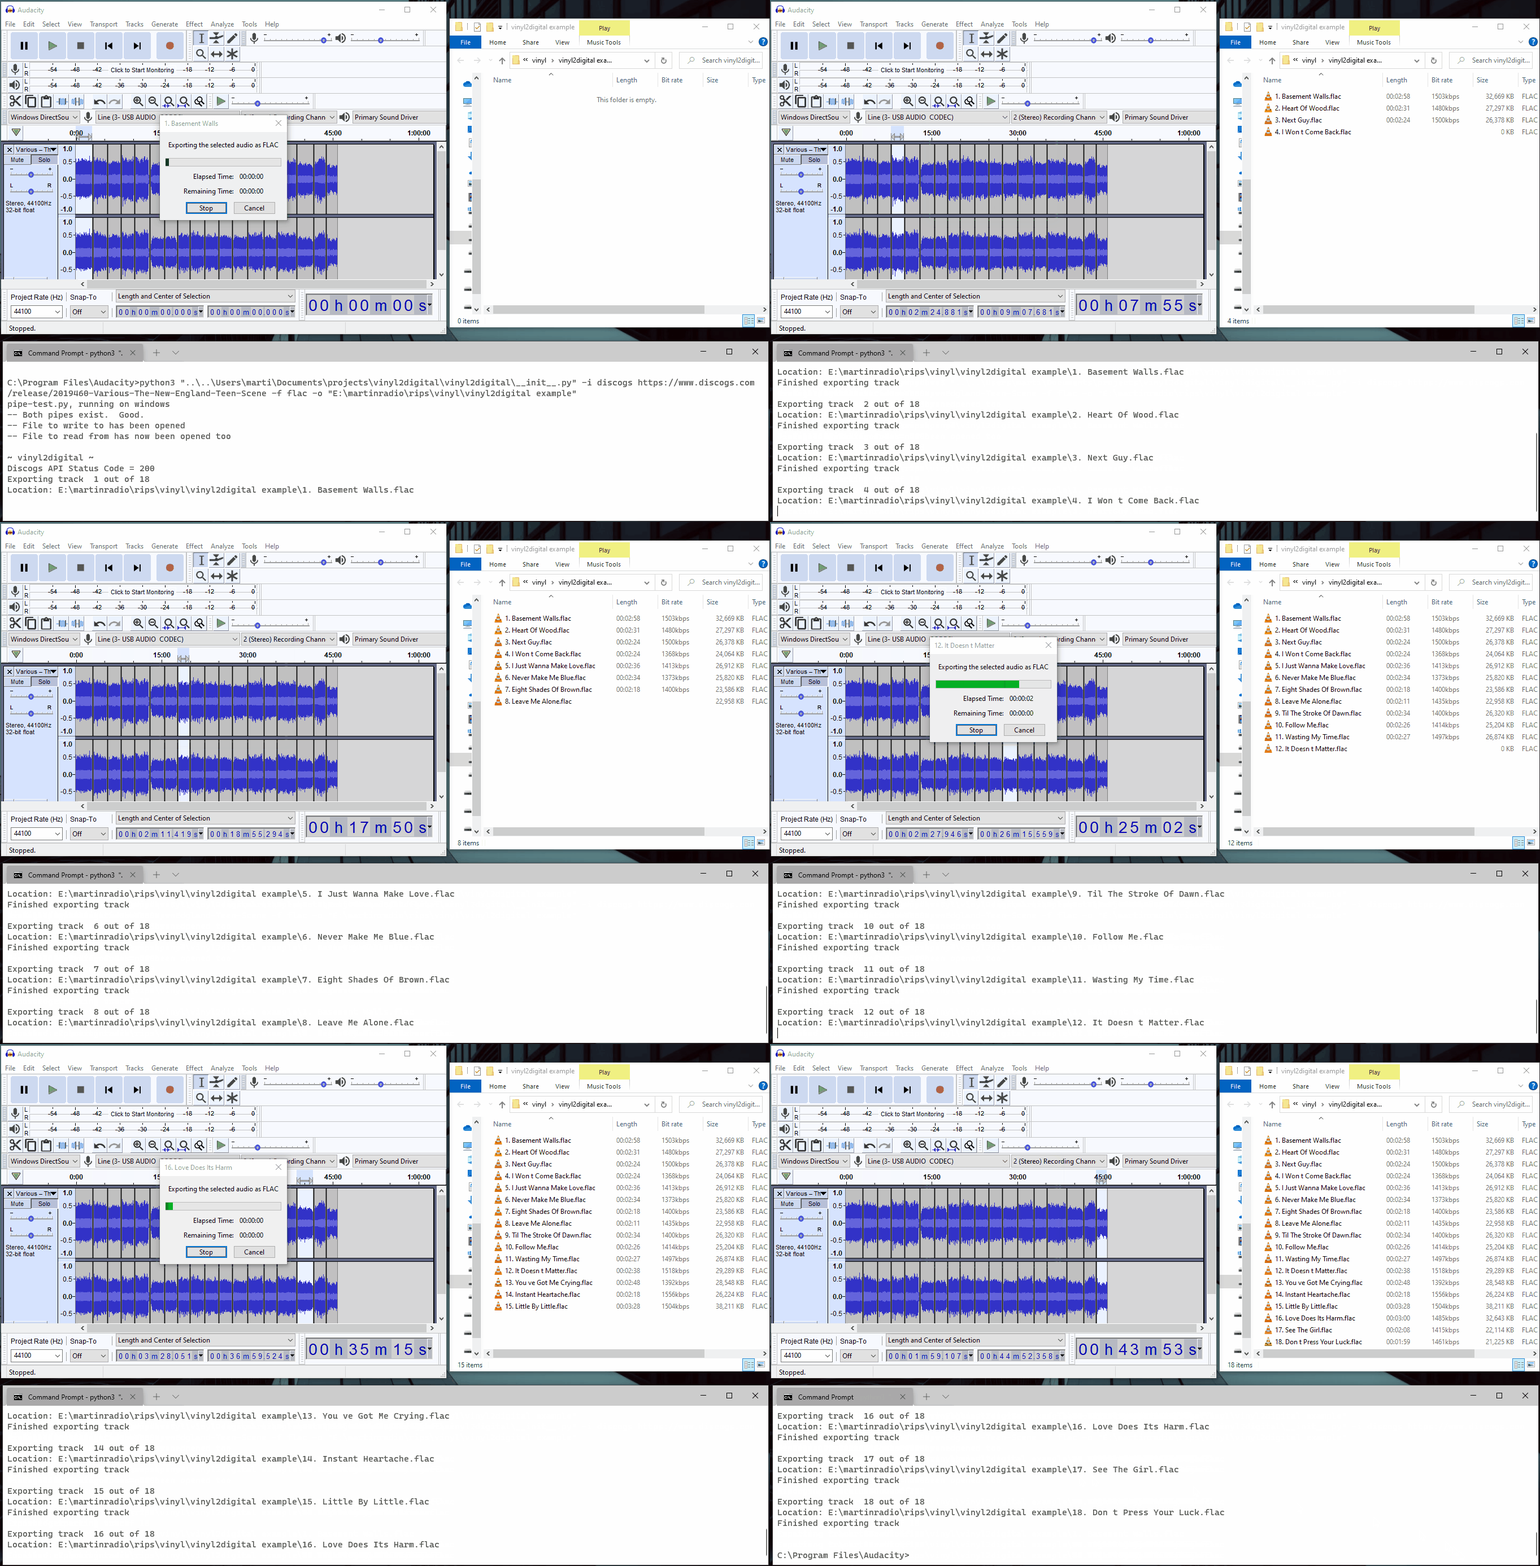
Vinyl2Digital is a Python3 Pip Package for batch rendering multiple audio files using the Audacity mod-script-pipe.
Table of content
Installation
- Install the package with this command:
pip install vinyl2digital
Setup
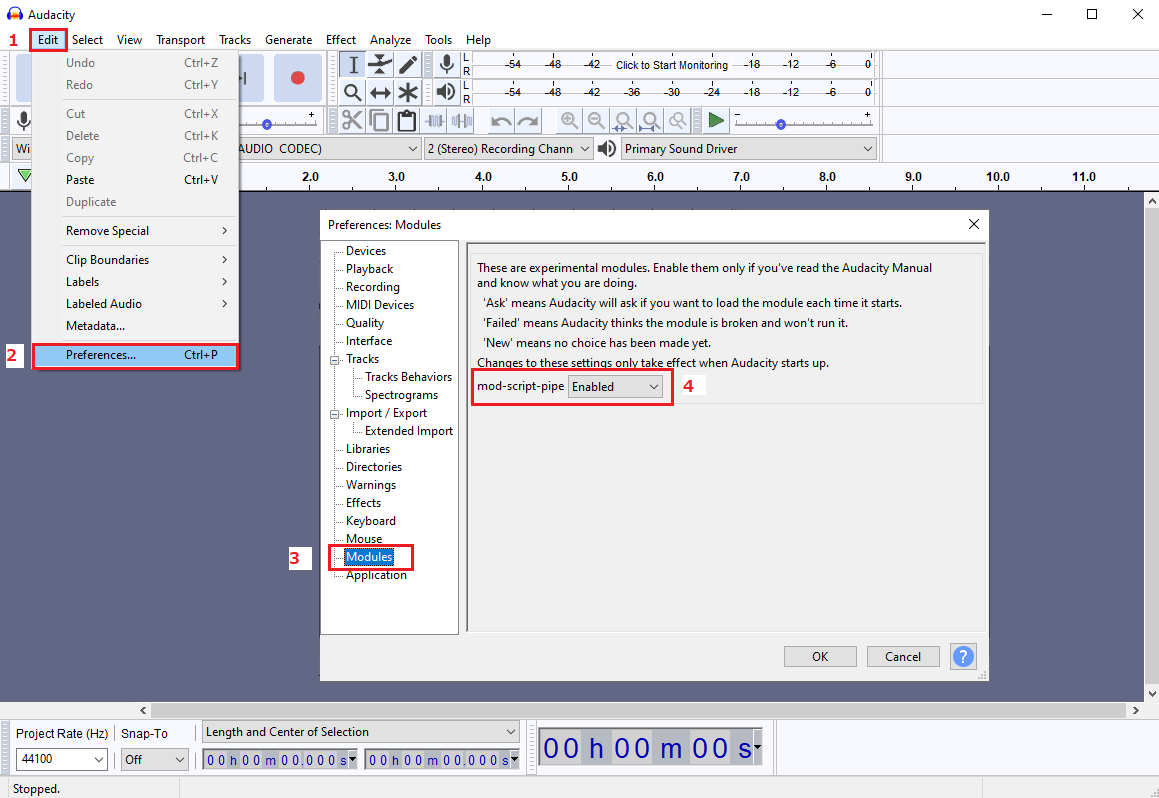
- Enable mod-script-pipe in Audacity
- Launch Audacity from your terminal
- Windows Command Prompt Admin
- Navigate to Audacity executable location
cd C:\Program Files\Audacity> - Launch Audacity:
start audacity.exe
- Navigate to Audacity executable location
- Mac/Linux:
open -a Audacity
- Windows Command Prompt Admin
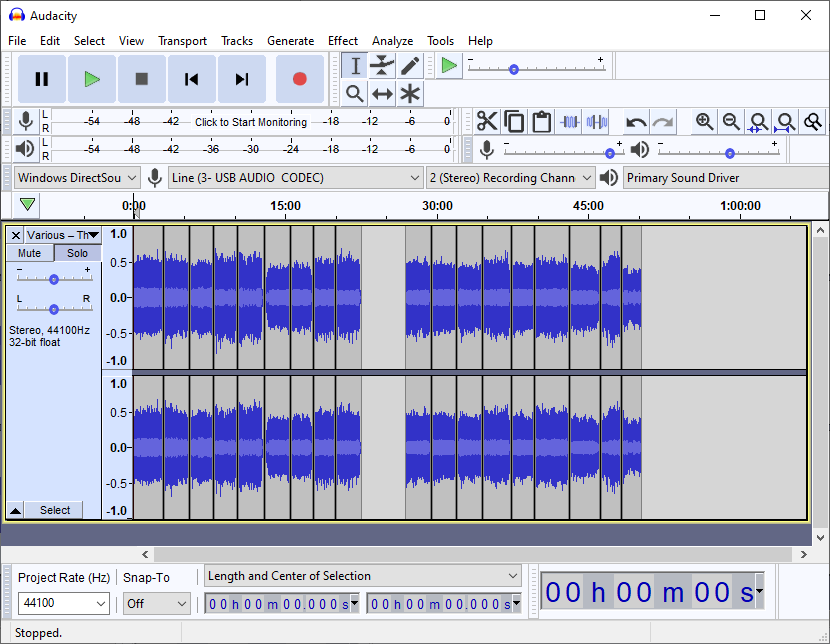
- Record your audio and splice each track into its own selection (place cursor and press Ctrl+i)
python -m vinyl2digital -t
- You should now be able to use the vinyl2digital package from the command line to connect with Audacity and batch render multiple audio files one after the other.
Flags
Help
-h- View the help page
-t- Test your connection to the Audacity mod-script-pipe
Input
-i discogs https://www.discogs.com/master/14720- Take a Discogs URL as input for determining how may audio files to export and what metadata to use
-i 12- Export 12 tracks using default filenames
Output Audio Format
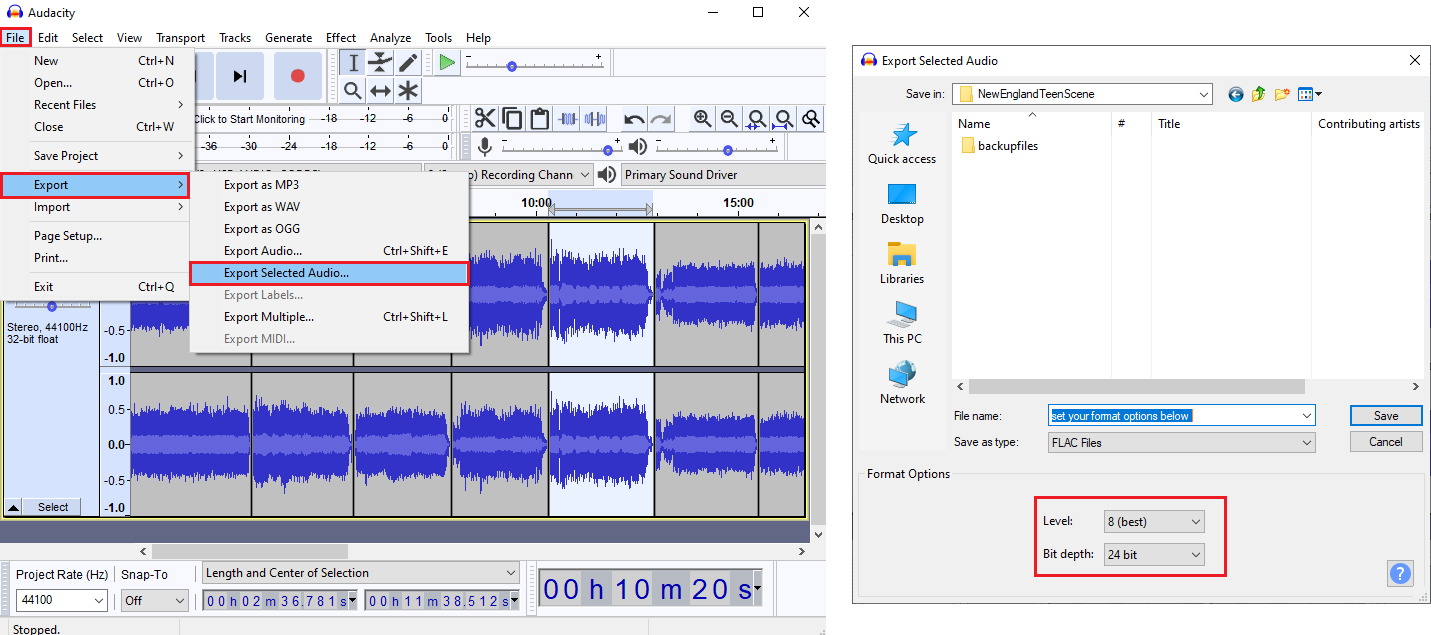
-f flac- Export selections as flac audio files
-f mp3- Export selections as mp3 audio files
Output
-o "E:\martinradio\rips\vinyl\NewEnglandTeenScene"- Set filepath output location
Examples
- Here are some example commands for vinyl2digital on Win10 command prompt:
-
Export tracks as flac using a Discogs URL
python -m vinyl2digital -i discogs https://www.discogs.com/release/2019460-Various-The-New-England-Teen-Scene -f flac -o "E:\martinradio\rips\vinyl\NewEnglandTeenScene"
-
Export 5 tracks as mp3 using default filenames
python -m vinyl2digital -i 5 -f mp3 -o "E:\martinradio\rips\vinyl\NewEnglandTeenScene"
Development
- In order to develop and test this code locally clone this github repo:
git clone https://github.com/MartinBarker/vinyl2digital.git
- Install the necessary packages:
os, sys, requests, json, time, re - Run locally:
python3 "vinyl2digital/vinyl2digital/__init__.py" -h
Releasing a new version:
- Chance package version number (
setup.py)
$ python -m pip install --upgrade build
$ python -m build
- This will create the dist/ folder with a new packaged tar
python3 setup.py sdist bdist_wheel
pip3 install twine
python3 -m twine upload dist/*


