- Static pages
- React (optional)
- Vue (still on development)
- Node.js
- API
- Web Server
- CLI
- Node.js API serving static pages using React (optional)
Download by order
In VSCode
-
Press F1 and go to
- 'Sync: Advanced Options'
- 'Download settings from public Gist'
-
Press F1 again and go to
- 'Sync: Download settings'
- Write this code
6f8c59082e58b005f1dd38a7236eeeaf
Now just download the boilerplate code you wish to use!
- Open terminal on the root directory and write:
npm install
- For the instructions write on the terminal:
npm start help
It's done!
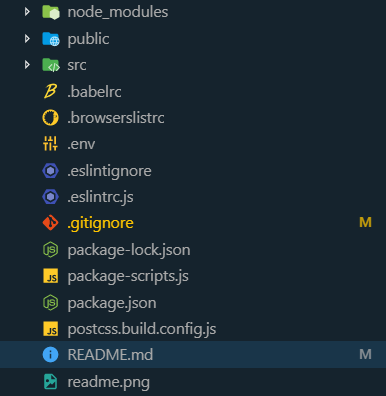
You will see a similar file structure to this one depending on the project you choose!

- Make sure you have EsLint installed in your Code Editor
- Enable
eslint.autoFixOnSave - Change your development port on the
PORTvariable insidepackage-scripts.js
Note: If you have prettier installed in your code editor then disable it for Javascript
"prettier.disableLanguages": ["javascript"]
If you want to host your own MongoDB server go to the package-scripts.js find the line responsible for MongoDB and add the path for your MongoDB
Depending on the boilerplate project you choose you will have some or all of these options
To run any of these commands write npm start followed by:
help- See all commands available for current projectbuild- Build Node or DOM or both projects for productionnode- Development mode for Node.jsnode.build- Build Node.js projectnode.build.run- Build Node.js project and run servernode.test- Mocha testnode.test.watch- Mocha test watchernode.debug- Debug Node.js projectdom- Development mode for DOMdom.build- Build DOM projectdom.build.run- Build DOM project and run servereslint- Run Eslint FixlocalTunnel- Expose localhost port 3000update- Package interactive updater
Example: npm start node
You can code normally as you would in any project with some aditions
- Babel
- Imports
import './example.js'Import a whole fileimport exported_data from './example.js'Import exported objects, functions or primitive valuesexport default exported_dataExport statement- For more info on imports and exports click here
- View Libraries
- Stylesheets
- SASS
- CSS-Nano
- Autoprefixer
- Import the compiled sass file in your JS file like this
import './style.css' - For more info on the sass syntax click here
- Formatting and linting
- Web Server
- Express.js
- BrowserSync
- LocalTunnel for exposing localhost online
- Testing
- Utils
- 1.0.0 :
- Organized code and added comments for public
- Added NPS for better npm scripts management
Anthony White – me@anthonywhite.eu
Distributed under the MIT license. See LICENSE for more information.
- Fork it (https://github.com/AnthonySLWhite/DevEnvironment/fork)
- Create your feature branch (
git checkout -b feature/fooBar) - Commit your changes (
git commit -am 'Add some fooBar') - Push to the branch (
git push origin feature/fooBar) - Create a new Pull Request