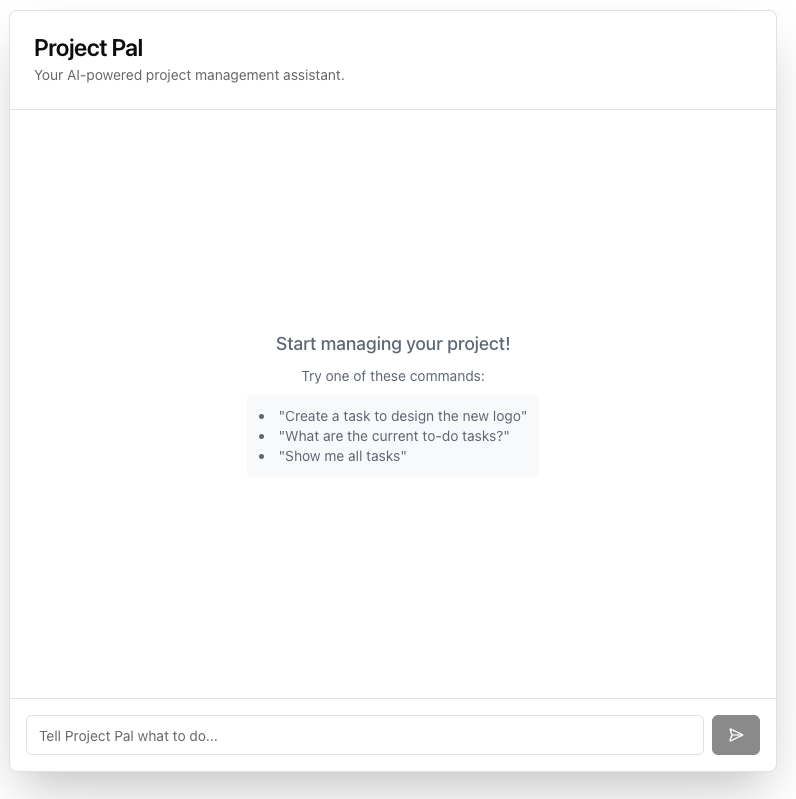
Project Pal is a full-stack Next.js application that demonstrates how to build a powerful, AI-driven chatbot capable of performing real-world actions. It uses the Model Context Protocol (MCP) to securely connect a large language model (LLM) to a set of tools, allowing users to manage project tasks using natural language.
- Conversational Interface: Manage your project tasks by talking to an AI in plain English.
- AI-Powered Actions: The AI can create and retrieve tasks from a database.
- Secure Tool Use with MCP: Built on the Model Context Protocol, ensuring a secure and decoupled architecture between the AI and the application's business logic.
- Dual API for Decoupled Architecture: The backend provides two specialized endpoints to serve both the built-in Next.js frontend and any external Single Page Application (SPA).
- Modern Tech Stack: Built with Next.js (App Router), the Vercel AI SDK, and shadcn/ui.
This application is designed with a decoupled architecture, making it highly flexible.
- The MCP Server (
/api/mcp): A secure, headless API that exposes "tools" (likecreate_taskandget_tasks). It contains all the business logic and is the only part of the app that communicates with the database. - The Chat Endpoints:
/api/chat(Streaming): This endpoint provides a streaming response, designed for the built-in Next.js frontend using the Vercel AI SDK'suseChathook for a real-time "typing" effect./api/chat-spa(JSON): This endpoint provides a standard JSON response, designed for external clients like a React, Vue, or Angular SPA.
- The UI (
/app/page.tsx): A client-side chat interface built with React, shadcn/ui, and the Vercel AI SDK'suseChathook.
This separation ensures that the AI model never has direct access to your database and that you can support multiple frontend clients with a single backend.
Follow these steps to get the application running locally.
git clone https://github.com/webmasterdevlin/mcp-example.git
cd mcp-examplenpm installCreate a file named .env.local in the root of your project and add your OpenAI API key:
# .env.local
OPENAI_API_KEY="sk-..."
You can get an API key from the OpenAI Platform.
npm run devOpen http://localhost:3000 in your browser to see the application.
This project is built to serve not only its own frontend but also any external Single Page Application (SPA).
To connect your external SPA, make POST requests to the dedicated /api/chat-spa endpoint. This endpoint accepts a JSON body with a messages array and returns a single JSON object with the AI's response.
Example fetch call from a React/Vue/Svelte app:
const response = await fetch('http://localhost:3000/api/chat-spa', {
  method: 'POST',
  headers: { 'Content-Type': 'application/json' },
  body: JSON.stringify({ messages: yourChatHistoryArray })
});
const data = await response.json();
// data.message will contain the AI's responseBy default, the application uses a temporary, in-memory mock database that resets with every server restart. To save your tasks permanently, you must connect a real database.
-
Create a Supabase Project: Go to supabase.com, create a new project, and wait for it to be provisioned.
-
Create the
tasksTable: In your Supabase project, go to the SQL Editor, create a new query, and run the following script:CREATE TABLE tasks ( id BIGINT PRIMARY KEY GENERATED ALWAYS AS IDENTITY, title TEXT NOT NULL, status TEXT NOT NULL DEFAULT 'todo', priority TEXT NOT NULL DEFAULT 'medium', created_at TIMESTAMPTZ NOT NULL DEFAULT NOW() );
-
Get API Credentials: Go to Project Settings > API. Find and copy your Project URL and your
anonpublic API Key. -
Update Environment Variables: Add your Supabase credentials to your
.env.localfile:# .env.local OPENAI_API_KEY="sk-..." NEXT_PUBLIC_SUPABASE_URL="YOUR_PROJECT_URL_HERE" NEXT_PUBLIC_SUPABASE_ANON_KEY="YOUR_ANON_KEY_HERE"
-
Restart your server. The application is already configured to use these variables and will automatically connect to your Supabase database.
The principle is the same for any database:
- Add your database connection details to
.env.local. - Install the necessary database client library (e.g.,
pgfor PostgreSQL,mysql2for MySQL). - Create a client instance in a new file (e.g.,
lib/db.ts). - Go to
/app/api/mcp/route.tsand replace the Supabase logic inside theget_tasksandcreate_tasktools with the equivalent queries for your database.
This application is a proof-of-concept and is missing several features you'd want in a production application:
- User Authentication: Currently, all tasks are global. There is no concept of individual users. You would need to add an authentication system (like NextAuth.js or Supabase Auth) to manage user-specific tasks.
- More Sophisticated Tools: The AI can only create and get tasks. A real application would need tools for updating, deleting, and assigning tasks.
- UI Feedback for Tool Calls: While the AI is thinking, the UI could provide more specific feedback, like "Creating your task..." instead of just a generic thinking indicator.
- Robust Error Handling: While the server logs errors, the UI doesn't display them to the user in a friendly way.
- Persistent Chat History: The conversation history is lost on every page refresh. You would need to store the AI and UI state in a database to make conversations persistent.
