This Quick Start was created by HashiCorp in collaboration with Amazon Web Services (AWS). AWS Quick Starts are automated reference deployments that use AWS CloudFormation templates to deploy key technologies on AWS, following AWS best practices.
This Quick Start helps you to deploy HashiCorp Vault servers and clients via Vault Helm chart on Amazon Elastic Kubernetes Service (Amazon EKS). HashiCorp Vault is a product that centrally secures, stores and controls access to tokens, passwords, certificates, and encryption keys through a UI, CLI, or an HTTP API. Vault's core use cases include:
- Secrets management: Securely manage and deploy secrets across different environments, applications, and services.
- Encryption and data protection: Manage encryption and keys for developers and operators across different environments, applications, and services.
- Privileged-access management: Secure workloads for application-to-application and user-to-application credential management across different environments and services.
HashiCorp Vault is designed for DevOps professionals and application developers who want to manage their secrets, data, and key-value stores. It's deployed via Vault Helm chart, which contains all of the resource definitions to install and configure Vault inside of a Kubernetes cluster. This Quick Start reference deployment guide provides step-by-step instructions for deploying HashiCorp Consul on Amazon EKS.
Please know that we may share who uses AWS Quick Starts with the AWS Partner Network (APN) Partner that collaborated with AWS on the content of the Quick Start.
Service networking professionals and application developers who want to securely connect services, monitor, and automate them on Amazon EKS.
Deploying this Quick Start with default parameters into an existing Amazon EKS cluster builds the following environment. For a diagram of the new VPC and new EKS cluster deployment options, see the Amazon EKS Quick Start documentation.
 Figure 1: Quick Start architecture for HashiCorp Consul on Amazon EKS
As shown in Figure 1, the Quick Start sets up the following:
In AWS:
- Elastic Load Balancer.
- Amazon Certificate Manager(ACM) certificate.
- boot-vault IAM Role.
- vault-server IAM Role.
- AWS Secrets Manager Secret to store the Vault root secret.
- Auto-unseal Key Management Service(KMS) Key.
In Kubernetes:
- Dedicated nodegroup for Vault
- namespace for Vault.
- Internal Vault TLS certificate.
- Vault service:
- Vault server pods
- Vault service
- Vault UI service
You are responsible for the cost of the AWS services used while running this Quick Start reference deployment. There is no additional cost for using the Quick Start.
The AWS CloudFormation template for this Quick Start includes configuration parameters that you can customize. Some of these settings may affect the cost of deployment. For cost estimates, see the pricing pages for each AWS service you will use. Prices are subject to change.
Tip: We recommend that you enable the AWS Cost and Usage Report. This report delivers billing metrics to an Amazon Simple Storage Service (Amazon S3) bucket in your account. It provides cost estimates based on usage throughout each month and finalizes the data at the end of the month. For more information about the report, see the AWS documentation.
This Quick Start assumes familiarity with Amazon EKS, AWS CloudFormation and Kubernetes.
If you don’t already have an AWS account, create one at https://aws.amazon.com by following the on-screen instructions.
If you are deploying onto an existing EKS cluster that was not created by the Amazon EKS Quick Start, you will need to configure the cluster to allow this Quick Start to manage your EKS cluster. The requirements are detailed in Step 2 of the Deployment steps section of this document.
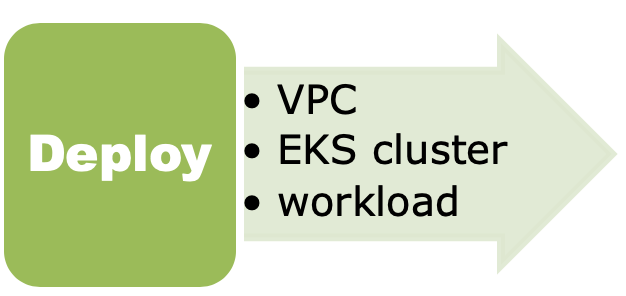
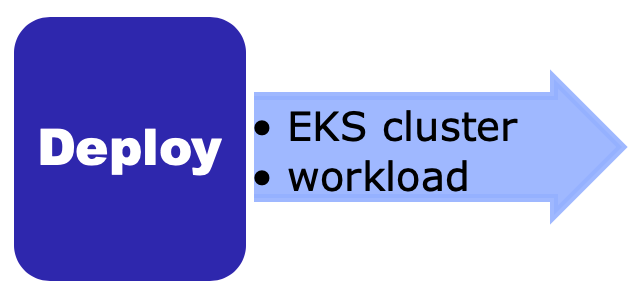
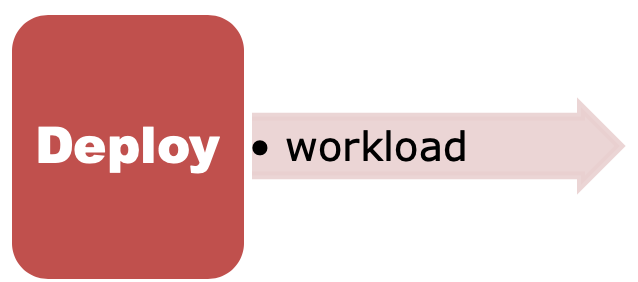
This Quick Start provides three deployment options:
- Deploy Vault into a new VPC (end-to-end deployment). This option builds a new AWS environment consisting of the VPC, subnets, NAT gateways, security groups, bastion hosts, EKS cluster, a node group, and other infrastructure components. It then deploys Consul into this new EKS cluster.
- Deploy Vault into a new EKS cluster in an existing VPC. This option builds a new AWS EKS cluster, a node group, and other infrastructure components into an existing VPC. It then deploys Consul into this new EKS cluster.
- Deploy Vault into an existing EKS cluster. This option provisions Consul in your existing AWS infrastructure.
- Sign in to your AWS account at https://aws.amazon.com with an IAM user role that has the necessary permissions. For details, see Planning the deployment earlier in this guide.
- Make sure that your AWS account is configured correctly, as discussed in the Technical requirements section.
Note: This step is only required if you are launching this Quick Start into an existing EKS cluster that was not created using the Amazon EKS Quick Start. If you would like to create a new EKS cluster with your deployment, skip to step 3.
- Sign in to your AWS account, and launch the cluster preparation template.
- The template is launched in the N. Virginia (us-east-1) AWS Region by default. To change the Region choose another Region from list in the upper-right corner of the navigation bar.
- On the Create stack page, keep the default setting for the template URL, and then choose Next.
- On the Specify stack details page, change the stack name if needed. Enter the name of the EKS cluster you would like to deploy to, as well as the Subnet ID's and security group ID associated with the cluster. These can be obtained from the EKS Cluster console.
- On the options page, you can specify tags (key-value pairs) for resources in your stack and set advanced options. When you’re done, choose Next.
- On the Review page, review and confirm the template settings. Under Capabilities, select the two check boxes to acknowledge that the template creates IAM resources and might require the ability to automatically expand macros.
- Choose Create stack to deploy the stack.
- Monitor the status of the stack until the status reaches CREATE_COMPLETE.
- From the Outputs section of the stack, note the KubernetesRoleArn and the HelmRoleArn.
- Add the roles to the aws-auth config map in your cluster, specifying system:masters for the groups, by following the steps in the EKS documentation. This allows the Quick Start to manage your cluster via AWS CloudFormation.
Note: You are responsible for the cost of the AWS services used while running this Quick Start reference deployment. There is no additional cost for using this Quick Start. For full details, see the pricing pages for each AWS service used by this Quick Start. Prices are subject to change.
- Sign in to your AWS account, and choose one of the following options to launch the AWS CloudFormation template. For help with choosing an option, see deployment options earlier in this guide.
 |
 |
 |
|---|---|---|
| Deploy into a new VPC and new EKS cluster | Deploy into a new EKS cluster in an existing VPC | Deploy into an existing EKS cluster |
Each new cluster deployments takes about 2 hours to complete. Existing cluster deployments take around 10 minutes.
- The template is launched in the N. Virginia (us-east-1) AWS Region by default. To change the Region choose another Region from list in the upper-right corner of the navigation bar.
- On the Create stack page, keep the default setting for the template URL, and then choose Next.
- On the Specify stack details page, change the stack name if needed. Review the parameters for the template, a reference is provided in the Parameters section of this document. Provide values for the parameters that require input. For all other parameters, review the default settings and customize them as necessary. When you finish reviewing and customizing the parameters, choose Next.
- On the options page, you can specify tags (key-value pairs) for resources in your stack and set advanced options. When you’re done, choose Next.
- On the Review page, review and confirm the template settings. Under Capabilities, select the two check boxes to acknowledge that the template creates IAM resources and might require the ability to automatically expand macros.
- Choose Create stack to deploy the stack.
- Monitor the status of the stack. When the status is CREATE_COMPLETE, the Consul cluster is ready.
These are the items to test after the quickstart is deployed.
-
Kubernetes Consul deployment namespace and dedicated node selection: The deployment creates a namespace named
vault-serverby default. To verify the namespace in kuberkenes, please run the following:$ kubectl get ns NAME STATUS AGE consul-qs Active 4d3h default Active 4d7h kube-node-lease Active 4d7h kube-public Active 4d7h kube-system Active 4d7h vault-server Active 30mThe deployment builds kuberntes server pods of the
vault-servernamespace on dedicated nodes. To verify the dedicated nodes, please run the following:$ kubectl get pods -o wide -n vault-server NAME READY STATUS RESTARTS AGE IP NODE NOMINATED NODE READINESS GATES boot-vault-sg-01f5e0c0d6458ed88-5hrf8 0/1 Completed 0 25m 10.0.32.188 ip-10-0-60-134.eu-north-1.compute.internal <none> <none> boot-vault-sg-01f5e0c0d6458ed88-dfwkp 0/1 Error 0 27m 10.0.59.145 ip-10-0-60-134.eu-north-1.compute.internal <none> <none> certificate-vault-sg-01f5e0c0d6458ed88-24h6n 0/1 Completed 0 29m 10.0.30.86 ip-10-0-16-209.eu-north-1.compute.internal <none> <none> vault-sg-01f5e0c0d6458ed88-0 1/1 Running 0 26m 10.0.12.215 ip-10-0-6-233.eu-north-1.compute.internal <none> <none> vault-sg-01f5e0c0d6458ed88-1 1/1 Running 0 26m 10.0.64.124 ip-10-0-86-92.eu-north-1.compute.internal <none> <none> vault-sg-01f5e0c0d6458ed88-2 1/1 Running 0 26m 10.0.55.38 ip-10-0-60-134.eu-north-1.compute.internal <none> <none> vault-sg-01f5e0c0d6458ed88-agent-injector-b76f744b6-6pjp9 1/1 Running 0 26m 10.0.86.51 ip-10-0-86-92.eu-north-1.compute.internal <none> <none> -
Kubernetes services: The deployment creates a minimum of 7 services as follows:
$ kubectl get svc -n vault-server NAME TYPE CLUSTER-IP EXTERNAL-IP PORT(S) AGE vault-sg-01f5e0c0d6458ed88 ClusterIP 172.20.238.238 <none> 8200/TCP,8201/TCP 27m vault-sg-01f5e0c0d6458ed88-active ClusterIP 172.20.9.90 <none> 8200/TCP,8201/TCP 27m vault-sg-01f5e0c0d6458ed88-agent-injector-svc ClusterIP 172.20.235.220 <none> 443/TCP 27m vault-sg-01f5e0c0d6458ed88-internal ClusterIP None <none> 8200/TCP,8201/TCP 27m vault-sg-01f5e0c0d6458ed88-standby ClusterIP 172.20.169.201 <none> 8200/TCP,8201/TCP 27m vault-sg-01f5e0c0d6458ed88-ui LoadBalancer 172.20.59.230 a4b85f61771234af08061c887f26001d-1681023831.eu-north-1.elb.amazonaws.com 443:32436/TCP 27m -
Vault HA configuration: Verify the Vault HA configuration by running the following:
$ kubectl exec -ti -n vault-server vault-sg-01f5e0c0d6458ed88-0 -- /bin/sh
/ $ export VAULT_SKIP_VERIFY=true
/ $ vault login s.JWF4aKPvElAEzFZZzojl9cgZ
Success! You are now authenticated. The token information displayed below
is already stored in the token helper. You do NOT need to run "vault login"
again. Future Vault requests will automatically use this token.

Key                  Value
---                  -----
token                s.JWF4aKPvElAEzFZZzojl9cgZ
token_accessor       xceUAbCKAAS86OKupBK2Bhlr
token_duration       ∞
token_renewable      false
token_policies       ["root"]
identity_policies    []
policies             ["root"]
/ $ vault status
Key                      Value
---                      -----
Recovery Seal Type       shamir
Initialized              true
Sealed                   false
Total Recovery Shares    5
Threshold                3
Version                  1.5.3
Cluster Name             vault-cluster-9abfeb1c
Cluster ID               f04374ee-3ebe-4e0f-fa50-892d48421e70
HA Enabled               true
HA Cluster               https://vault-sg-01f5e0c0d6458ed88-0.vault-sg-01f5e0c0d6458ed88-internal:8201
HA Mode                  active
Raft Committed Index     119
Raft Applied Index       119
Observer the HA Enabled, HA Cluster and HA mode configuration entries from the above.
-
Vault UI SSL certificate: This is done by verifying the DNS endpoint of the deployment and checking for the SSL cert installation
$ openssl s_client -connect lonconsul.gargana.myinstance.com:443 CONNECTED(00000007) depth=2 C = US, O = Amazon, CN = Amazon Root CA 1 verify return:1 depth=1 C = US, O = Amazon, OU = Server CA 1B, CN = Amazon verify return:1 depth=0 CN = lonconsul.gargana.myinstance.com verify return:1 --- Certificate chain 0 s:CN = lonconsul.gargana.myinstance.com i:C = US, O = Amazon, OU = Server CA 1B, CN = Amazon 1 s:C = US, O = Amazon, OU = Server CA 1B, CN = Amazon i:C = US, O = Amazon, CN = Amazon Root CA 1 2 s:C = US, O = Amazon, CN = Amazon Root CA 1 i:C = US, ST = Arizona, L = Scottsdale, O = "Starfield Technologies, Inc.", CN = Starfield Services Root Certificate Authority - G2 3 s:C = US, ST = Arizona, L = Scottsdale, O = "Starfield Technologies, Inc.", CN = Starfield Services Root Certificate Authority - G2 i:C = US, O = "Starfield Technologies, Inc.", OU = Starfield Class 2 Certification Authority --- Server certificate -----BEGIN CERTIFICATE----- MIIFrDCCBJSgAwIBAgIQA+/KZ0HG5aT6xAZLv0NjlDANBgkqhkiG9w0BAQsFADBG MQswCQYDVQQGEwJVUzEPMA0GA1UEChMGQW1hem9uMRUwEwYDVQQLEwxTZXJ2ZXIg Q0EgMUIxDzANBgNVBAMTBkFtYXpvbjAeFw0yMDEwMTUwMDAwMDBaFw0yMTExMTMy MzU5NTlaMCsxKTAnBgNVBAMTIGxvbmNvbnN1bC5nYXJnYW5hLm15aW5zdGFuY2Uu Y29tMIIBIjANBgkqhkiG9w0BAQEFAAOCAQ8AMIIBCgKCAQEA7ZwqhfY7fU/ui+i6 WCGffE/Dl+upf6W9aoiLU+8T7PxI0Pgr30uNPmXHfrYGlqUVAfwAWrfAKKGShuGZ hhmg18YpRIo0aMdYaIDv8RBj8dwDMF0ACpYfPZvFtKkO3RN/2sn6ApWDeD8cN9lq bOCTZHDH6QMMxgK3FrmtG9OyjeOQUe2k39KjAjwP3KKFxW88QP51Q0lHXyd45zzG jcQOZFlOdF+y9QNTRr1FBbCUm5mGpZseWs2/wU1fO7mOuuvzxmmYZ1d4kfwk8dXQ Zm242e0weXgiLuj0Q4rbkxsoYhJ1XAvFSxXV/SItvpsR7hGslKrdrRKSS1AvsrVU DGoSzwIDAQABo4ICrzCCAqswHwYDVR0jBBgwFoAUWaRmBlKge5WSPKOUByeWdFv5 PdAwHQYDVR0OBBYEFNMAPyPH6TYMka68RiDI+ON5cWLNME8GA1UdEQRIMEaCIGxv bmNvbnN1bC5nYXJnYW5hLm15aW5zdGFuY2UuY29tgiIqLmxvbmNvbnN1bC5nYXJn YW5hLm15aW5zdGFuY2UuY29tMA4GA1UdDwEB/wQEAwIFoDAdBgNVHSUEFjAUBggr BgEFBQcDAQYIKwYBBQUHAwIwOwYDVR0fBDQwMjAwoC6gLIYqaHR0cDovL2NybC5z Y2ExYi5hbWF6b250cnVzdC5jb20vc2NhMWIuY3JsMCAGA1UdIAQZMBcwCwYJYIZI AYb9bAECMAgGBmeBDAECATB1BggrBgEFBQcBAQRpMGcwLQYIKwYBBQUHMAGGIWh0 dHA6Ly9vY3NwLnNjYTFiLmFtYXpvbnRydXN0LmNvbTA2BggrBgEFBQcwAoYqaHR0 cDovL2NydC5zY2ExYi5hbWF6b250cnVzdC5jb20vc2NhMWIuY3J0MAwGA1UdEwEB /wQCMAAwggEDBgorBgEEAdZ5AgQCBIH0BIHxAO8AdQD2XJQv0XcwIhRUGAgwlFaO 400TGTO/3wwvIAvMTvFk4wAAAXUtvpNMAAAEAwBGMEQCIBQqjFHMQDxoeaxhwJlD dmELOU0v1+2jPvKbxgnS9Sr2AiArQ+SOeM3bTpnY7BBX9ue2+z16KZaHuan+PB/L FmqhBgB2AFzcQ5L+5qtFRLFemtRW5hA3+9X6R9yhc5SyXub2xw7KAAABdS2+k5sA AAQDAEcwRQIhAOUW8k67YCzwqxx/pVYIzR5heOqYsqCW/6nRFkyECj6YAiA3007S pf7GzxULAaTAwQjpnvb/d/tu2O9VxqTxLoSTPjANBgkqhkiG9w0BAQsFAAOCAQEA nwKKUxQ+VDDKbh93XJ8mdhXYGHk8R9MH/HUprH9i2JSVovTYabo+kk8HC5Vo0Pwu NOEMjRe008xraTpAzfSjr2fupjltJB6lXehPe5sJaWPJ0mX3OBt4VyfrO6MYdmpy iGLhMXM357+CN75aMv1BD4pVA+a75dhvcUOfZCni4guQ+7wbbwONrKdwtg9FudWf XzvTdg1Q8VPfuQWUJb8tmITseg+8KDTyUn1u2SiNWHj17hBTSBTjkVt97id0BtZ/ UYrBWVldmJw0pJ6XYgQc6pBg6A86390sGkRzOfhYkT8AIbKNKSwtCRV0aBY2Nb4+ i81nP0KKeSvWcRf4/Gj+WA== -----END CERTIFICATE----- subject=CN = lonconsul.gargana.myinstance.com issuer=C = US, O = Amazon, OU = Server CA 1B, CN = Amazon --- -
Vault raft peer election: To check on the raft peer election status, run the following:
$ kubectl exec -ti -n vault-server vault-sg-01f5e0c0d6458ed88-0 -- /bin/sh
/ $ vault operator raft list-peers
Node                            Address                                                                  State       Voter
----                            -------                                                                  -----       -----
vault-sg-01f5e0c0d6458ed88-0    vault-sg-01f5e0c0d6458ed88-0.vault-sg-01f5e0c0d6458ed88-internal:8201    leader      true
vault-sg-01f5e0c0d6458ed88-1    vault-sg-01f5e0c0d6458ed88-1.vault-sg-01f5e0c0d6458ed88-internal:8201    follower    true
vault-sg-01f5e0c0d6458ed88-2    vault-sg-01f5e0c0d6458ed88-2.vault-sg-01f5e0c0d6458ed88-internal:8201    follower    true
These are the best best practices for using Vault on AWS. Please note that these best practices are enabled by default in this quickstart:
-
Enabled AWS KMS auto-unseal: This will make use of AWS KMS for storing and encrypting Vault's unseal keys. For more info, please visit Auto-unseal using AWS KMS
-
Enable Cluster HA: This will make sure that Vault is set up for fault tolerance. For more info, please visit Vault HA Cluster with Integrated Storage
-
Enable Raft storage for HA: This will set up the raft consensus protocol as Vault's storage backend. For more info, please visit Use Integrated Storage for HA Coordination
-
Enable Vault audit to AWS CloudWatch: This will enable audit logs for troubleshoooting. For more info, please visit Enabling audit devices
-
Enable SSL at the Vault UI endpoint: This will secure the Vault UI endpoint with a SSL certificate. For more info, please visit Vault UI
Q. I encountered a CREATE_FAILED error when I launched the Quick Start.
A. If AWS CloudFormation fails to create the stack, we recommend that you relaunch the template with Rollback on failure set to No. (This setting is under Advanced in the AWS CloudFormation console, Options page.) With this setting, the stack’s state is retained and the instance is left running, so you can troubleshoot the issue.
Important: When you set Rollback on failure to No, you continue to incur AWS charges for this stack. Please make sure to delete the stack when you finish troubleshooting.
For general EKS troubleshooting steps see the EKS Quick Start documentation.
For Vault specific troubleshooting see Vault troubleshooting documentation.
For additional information, see Troubleshooting AWS CloudFormation on the AWS website.
To post feedback, submit feature ideas, or report bugs, use the Issues section of the GitHub repository for this Quick Start. If you’d like to submit code, please review the Quick Start Contributor’s Guide.