-
A music streaming startup, Sparkify, has grown their user base and song database and want to move their processes and data onto the cloud. Their data resides in S3, in a directory of JSON logs on user activity on the app, as well as a directory with JSON metadata on the songs in their app.
-
As their data engineer, you are tasked with building an ETL pipeline that extracts their data from S3, stages them in Redshift, and transforms data into a set of dimensional tables for their analytics team to continue finding insights in what songs their users are listening to. You'll be able to test your database and ETL pipeline by running queries given to you by the analytics team from Sparkify and compare your results with their expected results.
- At first it was created two staging tables at Redshift, copying data from:
s3://udacity-dend/log_dataon s3 to a staging table on Redshift called staging_events with no kind of data transformations.s3://udacity-dend/song_dataon s3 to a staging table on Redshift called staging_songs with no kind of data transformations.
- Then, in order to best fit the needs of the startup, 5 new tables were build with Redshift with a Star Schema, as follows the image:
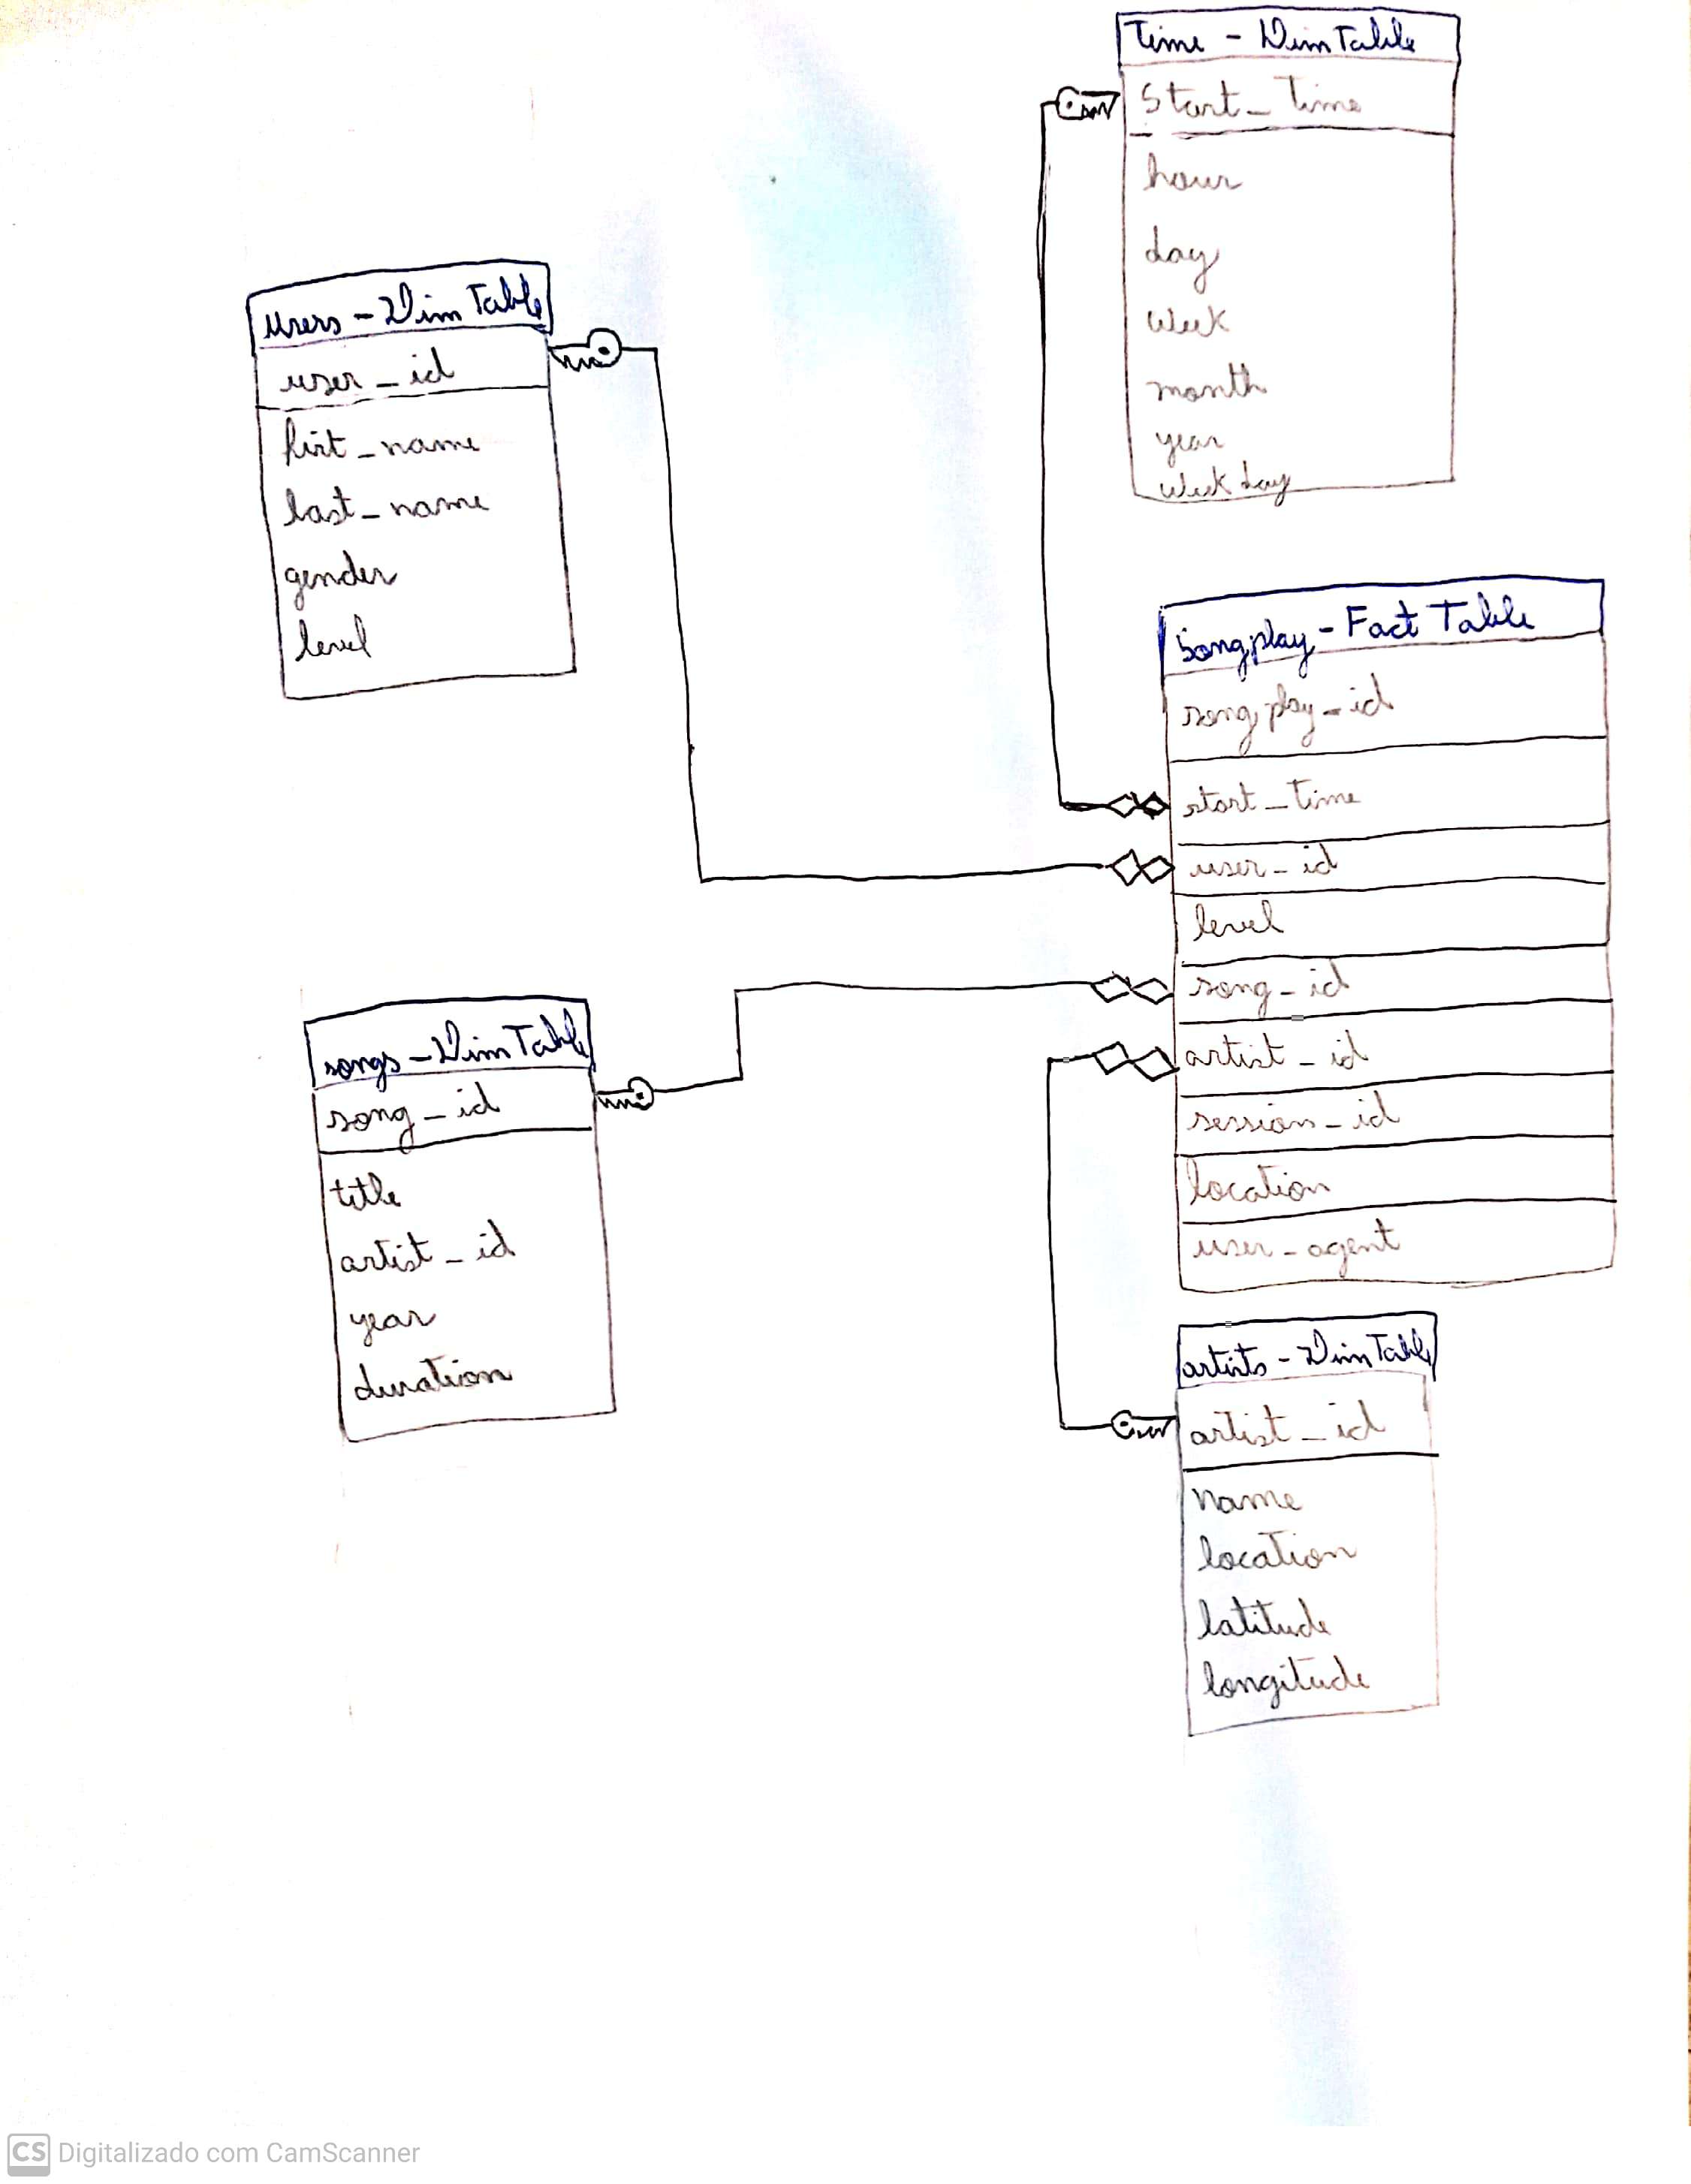
- The
songplayis the Fact Table of the Star Schema, which will be used to quickly retrieve information about users activity on the app, while the Dimension Tablesusers, time, songs and artistscan be used to retreive the detailed information of entities present in the songplay table.
- The

- To reproduce the solution present in this repository, some dependencies are necessary:
- You will need the credentials of a Administrator User on AWS.
- Secondly, you will need to have a Python 3.6+ installed on your machine, refer the official documentation in order to properly install it on your OS.
- Third (Tested on Ubuntu 18.04 and 20.04), run the Makefile from the project run by typing on the terminal
$ make. This command will run through the Makefile, in order to build a virtual environment with python and some dependencies to run this project. - Once you sucessfully ran the make command, a folder named
venvshould be installed on the root of the project. - Now open-up the dwh.cfg.example file and create another file called dwh.cfg with the same parameters declared on dwh.cfg.example, but with your own
KEYandSECRETfrom theAWSsession, your ownDB_PASSWORDandDWH_DB_PASSWORDon theCLUSTERandDWHsessions respectively, and lastly your ownARNof the IAM_Role for the Redshift Cluster you created. - To reproduce the whole ETL solution:
- First you will have to activate your created virtual environment by typing on your terminal
$ source venv/bin/activate. - Then, type on your terminal
$ python create_cluster.py, this will create a Redshift Cluster based on the credentials of your dwh.cfg file. This script will log on the screen the cluster status, and whe it shifts fromcreatingtoavailable, the script will close and your cluster will be ready. - Then, it's time to create all tables described on the Solution section. To do that, type on the terminal
$ python create_tables.py. This will create the following tables on your Redshift Cluster: staging_events, staging_songs, songplays, users, songs, artists and time. - After creating all tables, we are ready COPY data from AWS s3 buckets into the Staging Tables staging_events and staging_songs, and then INSERT data from our Staging Tables into our Fact and Dimension tables, songplays, users, songs, artists and time. To do that, type in your terminal
$ python etl.pyand wait some minutes. - After the
etl.pyscript finishes, all of our tables are prepared and filled with data! You can check the data making a connection to the Redshift Cluster with a DB Software like DBeaver. - Lastly, don't forget to delete the Redshift Cluster typing
$ python delete_cluster.py. This script will log the cluster status, when it switches fromdeletingtoRedshift Status: Error retrieving Redshift Cluster Status., the cluster will be deleted.
- First you will have to activate your created virtual environment by typing on your terminal