Ser2IP32 is an ESP32 application tha converts a ESP32 into a Serial to IP bridge. Its name Ser2IP32 is inspired by the awesome Ser2Net application from @cminyard. Ser2IP32 is written in Multithreaded C++ with native ESP-IDF SDK in order to get the maximum performance from the ESP32.
- 3x Serial to IP in a single ESP32
- Wifi mode selectable: SoftAP and Station
- SoftAP: Creates its own Wifi network with a DHCP server
- Station: Joins to given SSID network. Tries to autoreconnect endlessly
- TCP Server mode with max 1 client per Serial port
- Configurable parameters via console
- UART parameters and TCP listening port
- Wifi mode, ssid, passwd and channel (in AP mode)
- Led Matrix support for simple UI (using FastLed-idf from @bbulkow)
- Indication of Wifi Mode, Client connected and RX TX activity
- Only TCP server mode is implemented.
- One client per serial can be connected at the same time
- LED Matrix pin (WS2812) is not configurable at runtime, need to recompile
- No flow control can be used
Ser2IP32 has been developed and engineered to be used mainly in a ATOM Matrix ESP32 from @m5stack as it is super small, has enough pins available and integrates a nice LED Matrix.
A video of a real example controling an Alexmos Gimbal over Wifi/TCP/IP can be watched here (click for full version):
However, any ESP32 flavour can be used taking into account that you may need to change UART pins and may loose LED matrix function (LED Matrix pin still not configurable).
If you have a different version of ESP32 or want to adapt the project to your needs, just open VS Code and compile/flash from there.
If you own an Atom Matrix ESP32 and want to go directly to flashing the precompiled ser2ip32.bin, I use this command:
python.exe esptool.py -p COM3 -b 1500000 --after hard_reset write_flash --flash_mode dio --flash_freq 40m --flash_size detect 0x8000 bin/partition-table.bin 0x1000 bin/bootloader.bin 0x10000 bin/ser2ip32.bin
When ESP32 is powered up, Ser2IP32 will boot and wait 3 seconds for any key received by the standard console (Pins 1 & 3). If a key is received, the boot sequence is stoped and it enters configuration mode, if not, boot sequence continues to normal operation.
Configuration is done by using a virtual console with command history and autocompletion
Ser2IP32>
Supported commands:
- help --> will print available commands with their options
- uart_config --> configures one uart.
- Basic example
uart_config 1 1 115200 - Advanced example
uart_config 1 1 115200 --tcp_port=8080 --tx_pin=26 --rx_pin=32 --data_bits=7 --stop_bits=2 --parity=3
- Basic example
- wifi_config --> configures wifi mode and options
- AP
wifi_config 0 mySSID myPassword --channel=6 - Station
wifi_config 1 mySSID myPassword
- AP
- reboot --> reboot 😅
- factory --> reset saved settings to factory/default ones and reboot
A fresh Ser2IP32 has the following configuration:
- Wifi in SoftAP mode
| Mode | SSID | Pass | Channel |
|---|---|---|---|
| SoftAP | Ser2IP32 | 12345678 | 6 |
- UART
| Uart | Enabled | Bauds | TCP Port | TX Pin | RX Pin | TX Buffer | RX Buffer | Data bits | Parity | Stop bits |
|---|---|---|---|---|---|---|---|---|---|---|
| 0 | yes | 115200 | 2220 | 25 | 21 | 2048 | 2048 | 8 | none | 1 |
| 1 | yes | 115200 | 2220 | 32 | 26 | 2048 | 2048 | 8 | none | 1 |
| 2 | yes | 115200 | 2220 | 19 | 22 | 2048 | 2048 | 8 | none | 1 |
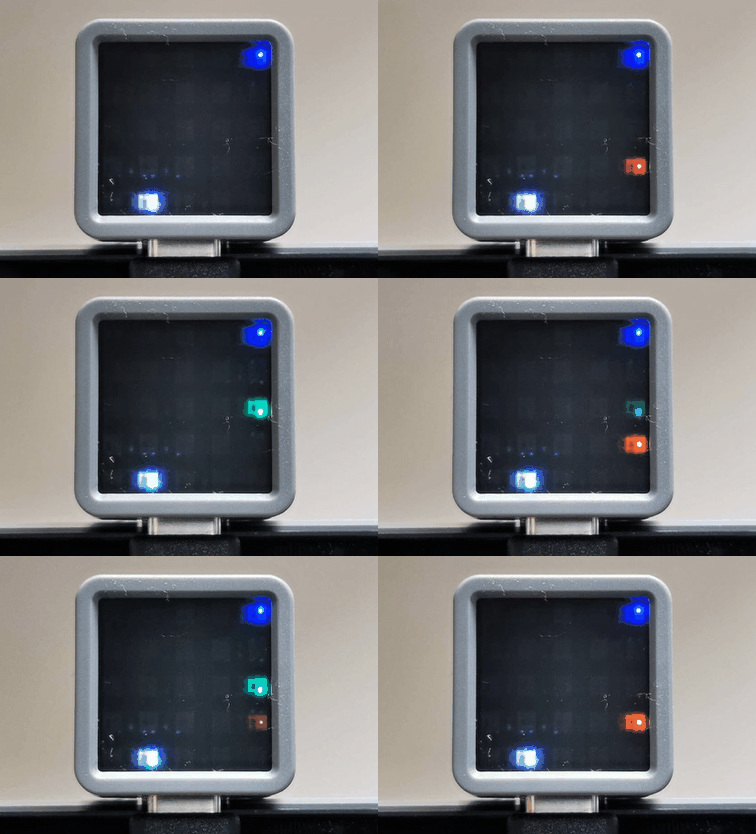
Ser2IP32 can work without any kind of interface. However, wouldn't it be cool to know what's going on while using it? 😉 For that purpose a simple LED Matrix like the one in the Atom Matrix is great.
Let's give an overview of this simple but useful "UI".
I would like to complete the project with some improvements:
- Add Ethernet support
- Add configurable LEDs positions
- Add Web page for configuration and status


