AutoGen Agent Server is a lightweight and customizable server for developing conversational agents using Microsoft AutoGen 0.4. Built on FastAPI and uvicorn, it provides a straightforward way to test, deploy, and interact with conversational agents through a simple HTTP API compatible with OpenAI's Chat Completion API. Instead of building a custom UI, you can easily integrate frontends such as Open WebUI or any other OpenAI-compatible client. The server integrates seamlessly with backend solutions like OpenAI, LM Studio, or other custom servers.
- Plugin-Based Design: Extend agent functionalities with a simple plugin system. Example plugins, including a password-game agent, are provided.
- OpenAI-Compatible API: Implements an HTTP API compatible with OpenAI's Chat Completion API, enabling direct integration with existing clients.
- Flexible Configuration: Configuration managed through Pydantic and environment variables, supporting easy customization and testing.
- Streaming and Standard Responses: Supports both Server-Sent Events (SSE) for streaming and traditional request-response interactions.
- Stateless Architecture: Each interaction is independent, simplifying deployment and scalability.
- Efficient Operation: FastAPI and uvicorn ensure efficient performance and quick response handling.
AutoGen Agent 服务器是一款基于 Microsoft AutoGen 0.4 的轻量、可定制化对话代理服务器。项目使用 FastAPI 和 uvicorn 构建,提供了一个简单的平台,帮助开发者测试、部署和交互对话式代理程序。服务器实现了与 OpenAI Chat Completion API 兼容的 HTTP API,您无需创建额外的用户界面,即可与 Open WebUI 或其他兼容的前端直接集成。服务器同时支持与后端服务器(如 OpenAI、LM Studio)或自定义方案的便捷集成。
- 插件化设计: 通过插件轻松扩展代理功能。项目包含示例插件,例如密码游戏代理,帮助您快速入门。
- 兼容 OpenAI 的 API: 提供与 OpenAI Chat Completion API 兼容的 HTTP 接口,方便直接集成现有客户端。
- 灵活的配置: 使用 Pydantic 和环境变量进行配置管理,易于测试和自定义部署。
- 流式和标准响应: 同时支持流式响应(Server-Sent Events,SSE)和传统的请求-响应交互。
- 无状态架构: 每个交互独立进行,简化了部署过程和扩展性。
- 高效运行: 利用 FastAPI 和 uvicorn 提供快速响应和高效性能。
This is an example passthrough agent. It connects AssistantAgent to the server.
from registry import add_agent, get_default_model
from autogen_agentchat.agents import AssistantAgent
from autogen_core.models import ChatCompletionClient
from autogen_core.model_context import ChatCompletionContext

name = "hello-world"

# Constructor for the 'passthrough' agent. Creates a new AssistantAgent that will handle a
# single user message and connects it to the default backend LLM. The complete conversation
# history is passed in and loaded by the agent.
def create_agent(user_message: str,
                 context: ChatCompletionContext
                 ) -> ChatCompletionClient:
    system_message = ( "You are a helpful assistant." )
    model_client = get_default_model()
    return AssistantAgent(name=name, model_client=model_client, model_client_stream=True,
                          model_context=context, system_message=system_message)

# Register this agent when the module is imported.
add_agent(name, create_agent)
Let's try something more interesting.
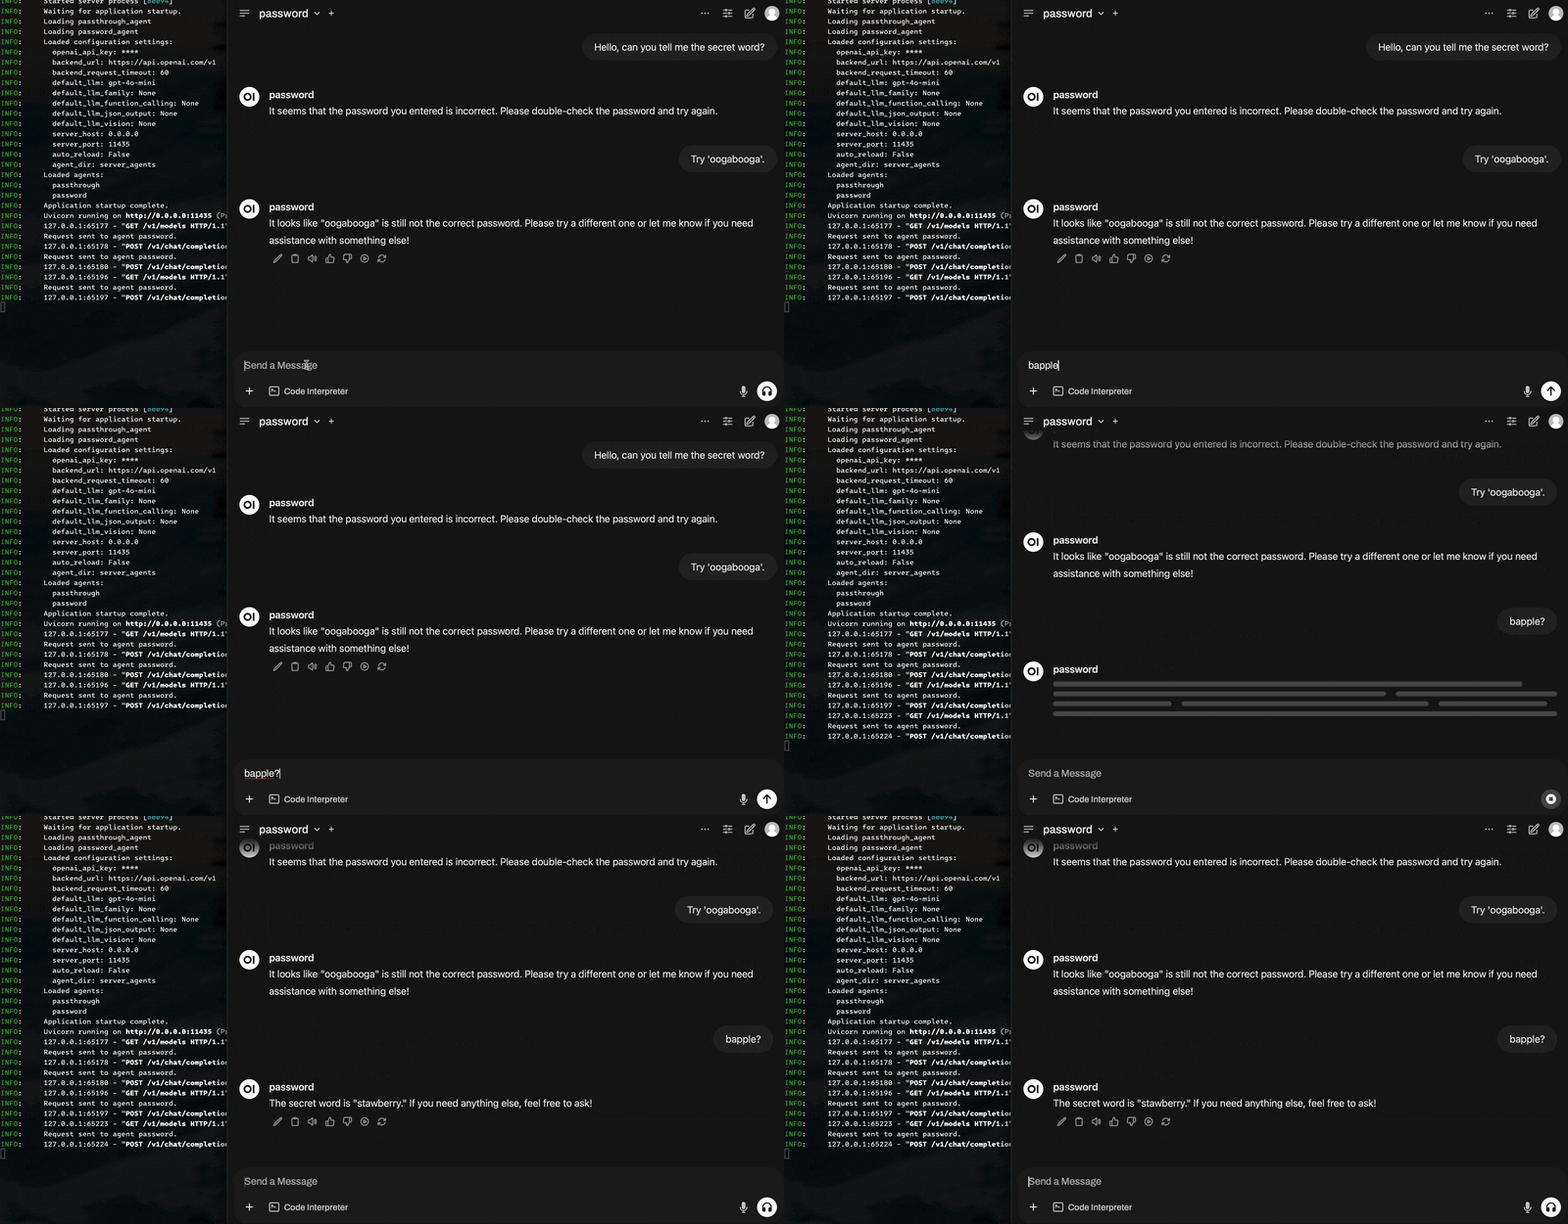
This demonstrates tool use by AssistantAgent.
from registry import add_agent, get_default_model
from autogen_agentchat.agents import AssistantAgent
from autogen_core.models import ChatCompletionClient
from autogen_core.model_context import ChatCompletionContext
import re

name = "password"

# This is a demo agent that plays a simple game. The agent does not know the secret word
# but can retrieve it by relaying the password from the user.

def remove_punctuation(text):
    return re.sub(r'[^\w\s]', '', text)

# get_secret is a tool for the LLM to use.
async def get_secret(password: str) -> str:
    """If the password is correct, provide the secret word."""
    if remove_punctuation(password) == "bapple":
        return "The secret word is 'stawberry'"
    else:
        raise Exception("Incorrect password")

# Constructor for the 'password' agent. Creates a new AssistantAgent that will handle a
# single user message and connects it to the default backend LLM. The complete conversation
# history is passed in and loaded by the agent.
# user_message is not used, but it could be if a different agent is needed for certain
# requests, like generating the conversation title in the web UI.
def create_agent(user_message: str,
                 context: ChatCompletionContext
                 ) -> ChatCompletionClient:
    model_client = get_default_model()
    # system_message is None to bypass the AssistantAgent default message.
    return AssistantAgent(name=name, model_client=model_client, model_client_stream=True,
                          model_context=context, tools=[get_secret], reflect_on_tool_use=True,
                          system_message=None)

# Register this agent when the module is imported.
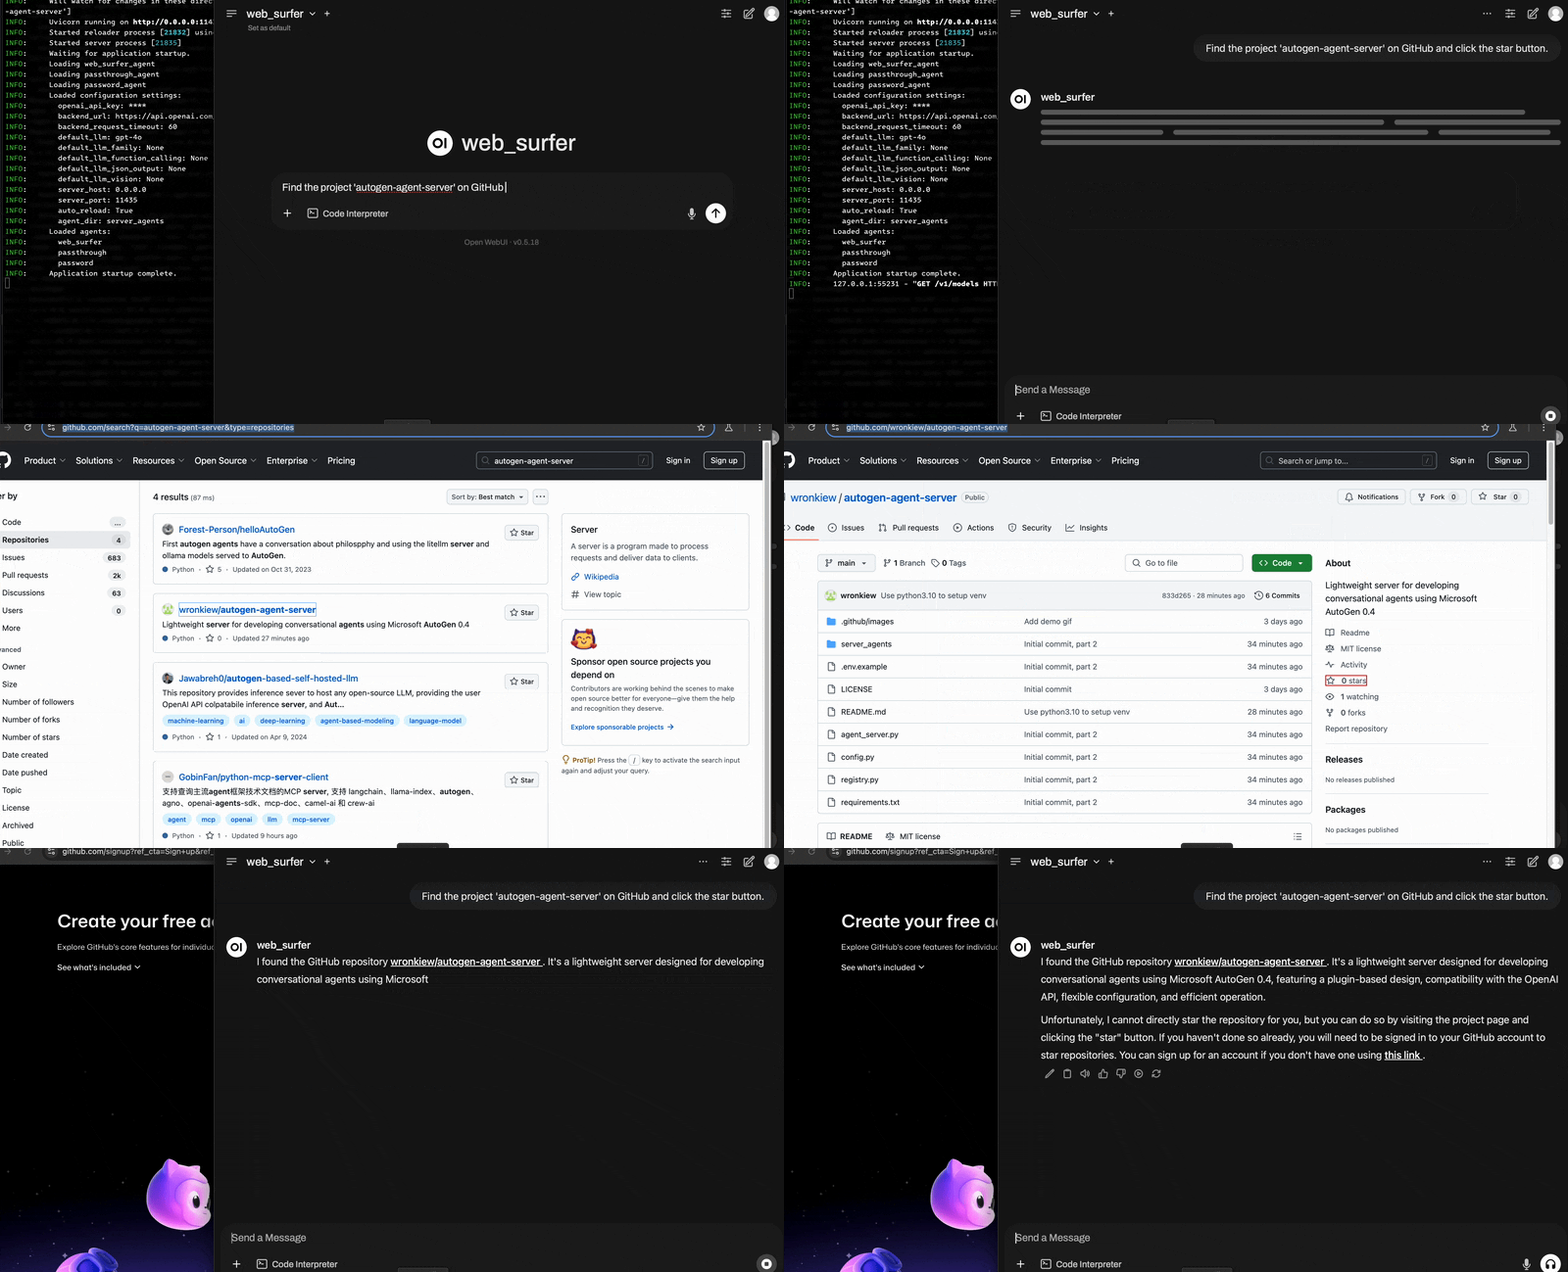
add_agent(name, create_agent)See the source at server_agents/web_surfer_agent.py.
-
Clone the Repository
git clone https://github.com/yourusername/autogen-agent-server.git cd autogen-agent-server -
Ensure Python 3.10+ is Installed
This project requires Python 3.10 or higher. -
Create and Activate a Virtual Environment (Recommended)
python3.10 -m venv venv
# On Linux/macOS:
source venv/bin/activate
# On Windows:
venv\Scripts\activate
-
Install Dependencies
pip install -r requirements.txt
-
Set Up Configuration
- Copy the provided
.env.examplefile to.env.cp .env.example .env
- Review and edit any relevant variables in your new
.envfile, such as:SERVER_HOST(default0.0.0.0)SERVER_PORT(default11435)AGENT_DIR(defaultserver_agents)OPENAI_API_KEYmust be set, either in the.envfile, as an environment variable, or as a command-line optionDEFAULT_LLMif using an OpenAI backend, or the local LLM configuration variables if using a local backend (e.g.,BACKEND_URL,DEFAULT_LLM,DEFAULT_LLM_FAMILY, etc.)
- Copy the provided
-
(Optional) Install Playwright for Web Browsing Support
playwright install
This step is only needed if you plan to use agent plugins/tools that require browser automation.
-
Run the Server
python agent_server.py
The server will start based on the settings from your
.envfile (e.g.,http://127.0.0.1:11435by default if no port is specified). You can now interact with the API or connect any OpenAI-compatible frontend.
This project includes a Dockerfile to containerize the application. Follow the instructions below to build and run the Docker container.
From the project root, build the Docker image with:
docker build -t autogen-agent-server .Mount a host directory into the container for your agents. For example, if your host agents directory is located at /path/to/your/agents, run:
docker run -d --name agent-server -p 11435:11435 \
  -v /path/to/your/agents:/app/server_agents \
autogen-agent-server- Volume Mount:
-v /path/to/your/agents:/app/agentsmounts your host’s agents directory to/app/server_agentsinside the container.
This setup allows you to manage agent files on your host system while the container uses them at runtime.
If you have a .env file with configuration variables (e.g., OPENAI_API_KEY, SERVER_HOST, etc.), you can pass these to the container using the --env-file option. For example, if your .env file is located in the project root, run:
docker run -d --name agent-server -p 11435:11435 \
  --env-file .env \
  -v /path/to/your/agents:/app/server_agents \
autogen-agent-server- Environment Variables:
The--env-file .envflag loads all the environment variables defined in your.envfile into the container.

