![]()


![]()
This project could be used to start developing application/library based on AEM.
To start developing long-term project based on AEM it is recommended to use Gradle AEM Multi instead.
Documentation for AEM plugin is available in project Gradle AEM Plugin.
-
Fork project using command:
git clone https://github.com/wttech/gradle-aem-single.git && cd gradle-aem-single && sh gradlew fork
and specify properties:
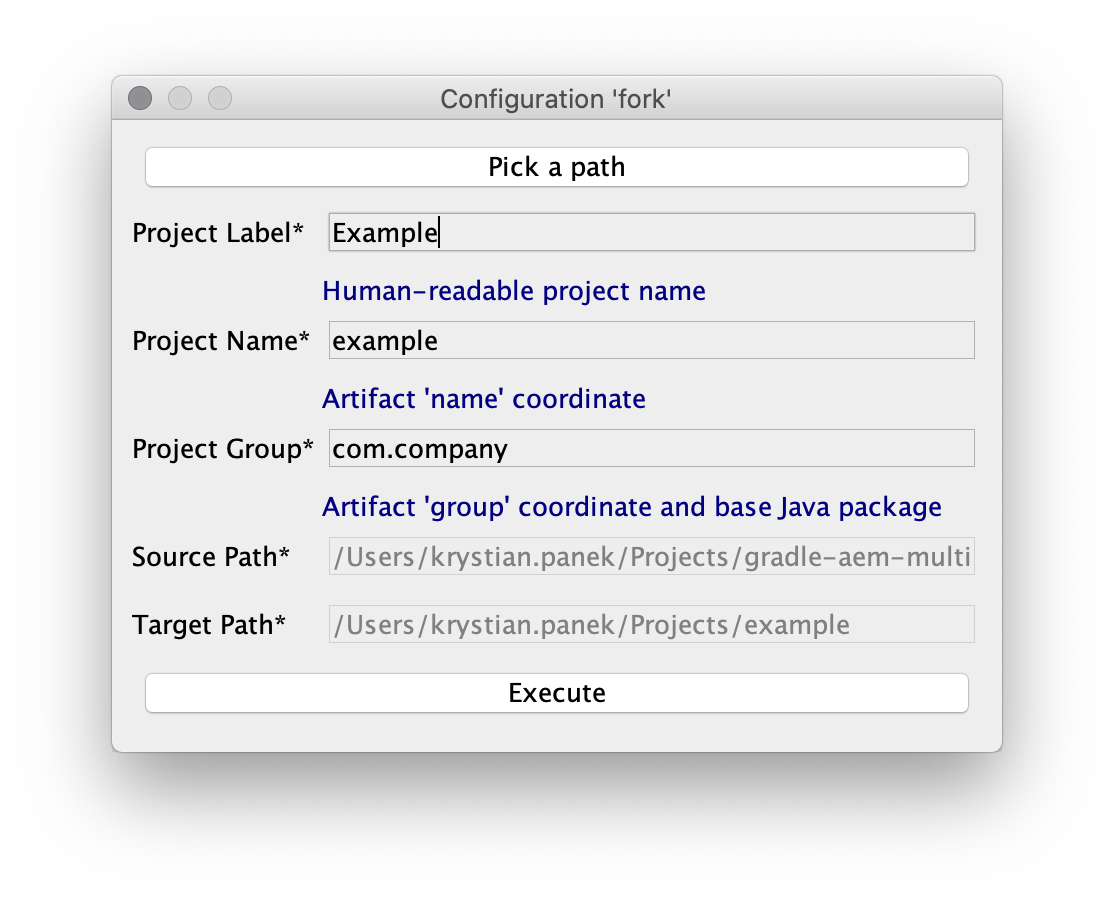
and wait until project is forked then enter configured target directory.
-
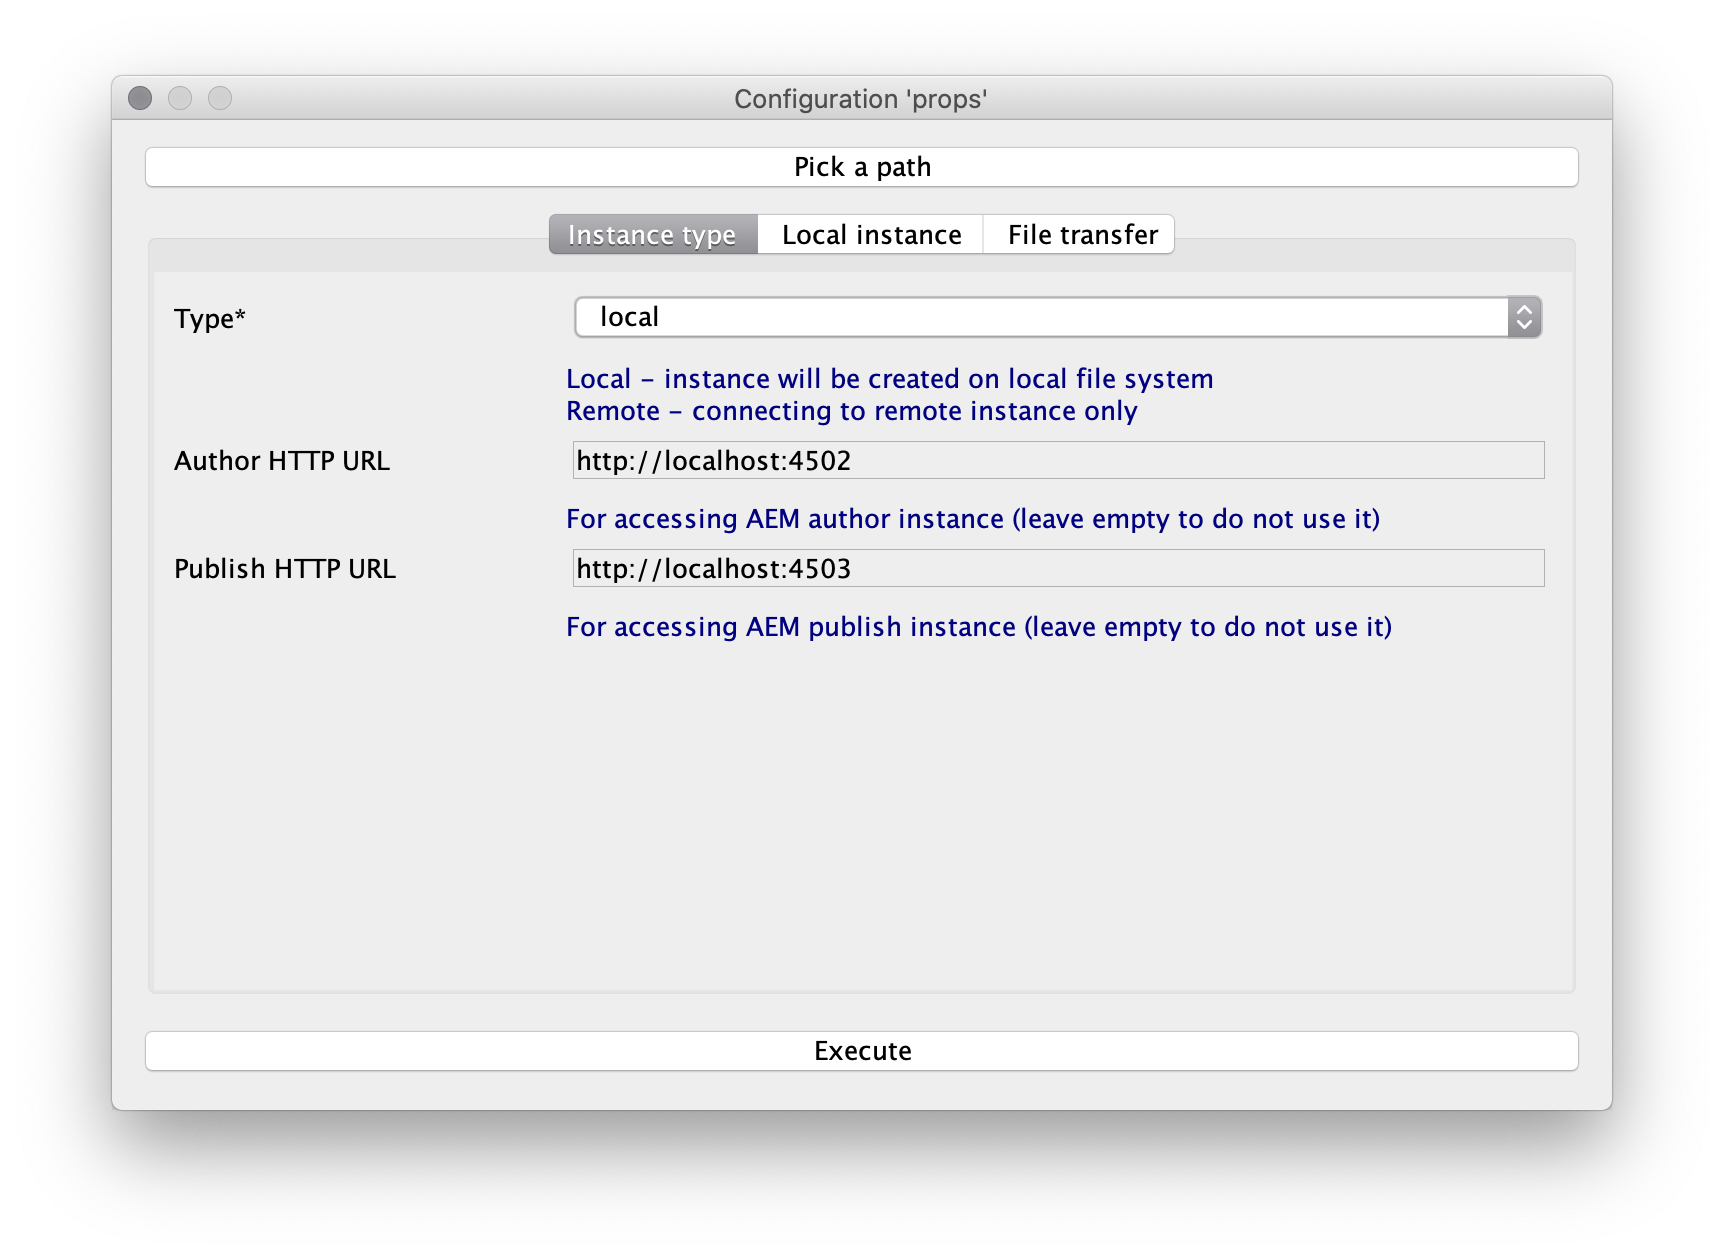
Setup user specific project configuration using command:
sh gradlew props
and specify properties:
-
Setup local AEM instances and dependencies then build application using command:
sh gradlew setup
and wait till complete AEM environment will be ready to use.
-
Develop continuously application using command:
sh gradlew


Tested on:
- Java 1.8
- Gradle 6.3
- Adobe AEM 6.5
- Use command
gradlewso that Gradle in version according to project will be downloaded automatically. - Deploy application:
sh gradlew<=>sh gradlew :packageDeploy
- Monitoring errors in logs:
sh gradlew :instanceTail, - Synchronizing JCR content from AEM to local file system:
sh gradlew :sync, - Copying JCR content between AEM instances:
sh gradlew :rcp -Prcp.source=http://user:pass@x.x.x.x:4502 -Prcp.target=local-author -Prcp.paths=[/content/example,/content/dam/example]
- According to recommendations, Gradle daemon should be:
- enabled on development environments,
- disabled on continuous integration environments.
- To see more descriptive errors or want to skip some tasks, see command line documentation.
Certain unit tests may depend on the results of running gradle tasks. One such example is the testing of OSGi Services using OSGi Mocks where in order to run a test, the SCR metadata must be available for a class. Running a test like this in IntelliJ results in errors because the IDE is not aware of the Bundle plugin.
This can be worked around by configuring IntelliJ to delegate test execution to Gradle. In order to set this up, go to Settings > Build, Execution, Deployment > Gradle > Runner and set your IDE to delegate IDE build/run actions to Gradle. Alternatively, you can use a dropdown menu to use a specific runner or to decide on a test-by-test basis.
- Execute build with options
-Dorg.gradle.debug=true --no-daemon, it will suspend, - Attach debugger on port 5005,
- Suspension will be released and build should stop at breakpoint.
For defining new tasks directly in build see:
The easiest way to implement custom plugins and use them in project is a technique related with buildSrc/ directory. For more details please read documentation.