Hello World~ This is the blog that I record things.
这是我的个人博客,一路写写停停~
下面是博客搭建教程,更详细教程请戳如何搭建jekyll主题的github.io博客
我的github
本地安装jekyll,使用jekyll serve或jekyll serve --watch命令监听4000端口,打开http://127.0.0.1:4000/就可以预览修改内容,需要注意的是,_config.yml配置的修改需要重新执行命令。
_config.yml配置文件中添加自己的信息
# Site settings
title: Wml Blog    # blog title
SEOTitle: 吴美莲的博客 | Wml Blog   # seo title
description: "前端开发"  # seo description
url: "https://meilianwu.com/"     # your host, for absolute URL

# Build settings
paginate: 5     # paginate number
plugins: [jekyll-paginate]在_posts文件下添加新的博客文章,文章可以使用markdown编写,也可以使用textile格式编写,每篇文章头部都需要添加YAML头信息,它们会将文章内容转换成HTML页面。结构大致是
---
layout:     post
title:      "如何搭建jekyll主题的github.io博客"
subtitle:   ""
author:     "wml"
header-img: "img/blog-build-1.png"
header-mask:  0.5
catalog: true
tags:
    - blog
---侧边栏的配置在_config.yml中
# Sidebar settings
sidebar: true          # 是否使用侧边栏
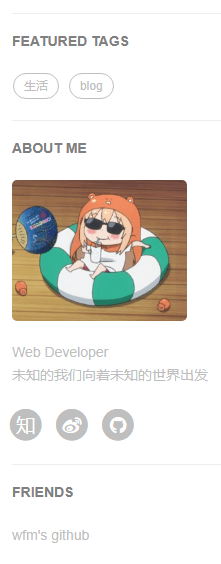
sidebar-about-description: "Web Developer <br/> 未知的我们向着未知的世界出发"   # 描述自己
sidebar-avatar: /img/avatar.png # 头像个人标签是否展示,在_config.yml中配置
# Featured Tags
featured-tags: true     # whether or not using Feature-Tags
featured-condition-size: 1 # A tag will be featured if the size of it is more than this condition value需要注意的是featured-condition-size: 如果一个标签的 SIZE,也就是使用该标签的文章数大于上面设定的条件值,这个标签就会在首页上被推荐。
内部有一个条件模板 {% if tag[1].size > {{site.featured-condition-size}} %} 是用来做筛选过滤的.
另外个人标签在每篇博客文章的头信息里添加;
tags:
- blog #添加了'blog'的标签这里可以添加好友友情链接,设置也是在_config.yml里添加好友
# Friends
friends: [{
  title: "wfm's github",
  href: "https://github.com/wfm19970"
}]社交账号添加
# SNS settings
RSS: false
weibo_username:     AnnualWu
zhihu_username:     wml
github_username: wumeilian在_includes/footer.html文件中有关于社交账号的展示,目前这里就列出了微博,知乎,推特,Facebook还有github的展示,如果想展示更多别的社交账号,只需要在文件下按以下格式添加即可,(eg.github的添加方式)
{% if site.github_username %}
  <li>
      <a target="_blank" href="https://github.com/{{ site.github_username }}">
          <span class="fa-stack fa-lg">
              <i class="fa fa-circle fa-stack-2x"></i>
              <i class="fa fa-github fa-stack-1x fa-inverse"></i>
          </span>
      </a>
  </li>
{% endif %}本文使用的是gitalk评论插件
将这段代码插入_layouts/_post.html中
<!-- Gitalk 评论 start  -->
<!-- Link Gitalk 的支持文件  -->
<link rel="stylesheet" href="https://unpkg.com/gitalk/dist/gitalk.css">
<script src="https://unpkg.com/gitalk@latest/dist/gitalk.min.js"></script>
<div id="gitalk-container"></div>
<script type="text/javascript">
    var gitalk = new Gitalk({
    // gitalk的主要参数
    clientID: `Github Application clientID`,
    clientSecret: `Github Application clientSecret`,
    repo: `存储你评论 issue 的 Github 仓库名`,
    owner: 'Github 用户名',
    admin: ['Github 用户名'],
    id: '页面的唯一标识,gitalk会根据这个标识自动创建的issue的标签',
    });
    gitalk.render('gitalk-container');
</script>
<!-- Gitalk end -->创建一个github application;将创建好产生的Client ID 和 Client Secret 填入你的我们 Gitalk 参数中,推送到远程仓库以后刷新每篇文章会产生一个issue,首次加载可能比较慢。这里感谢qiubaiying的教程。


