Intelligent HoneyPot on SDN:
Our design is having 3 hosts, openflow switch,RYU controller and Redis server

One of the hosts have the HoneyPots, capture the traffic, feature extraction and upload it to Redis server.
The controller have the ML model and UI to show the actions have been taken.
Hosts can be physical hosts if you are using openflow switch, in our case we are using mininet so it's a virtual hosts.
It exists on the Host
- SSH:
Secure shell protocol is a protocol to transfer data between two hosts in encrypted mode to protect the data from attackers.
The Code of the SSH HP is written in python, the requried modules is:
- paramiko using
pip install paramiko - logging using
pip install logging
Before running SSH honeypot, a key must be generated using the following command:
ssh-keygen -t rsa -f server.keyand then rename the output file usingmv server.key.pub server.pub
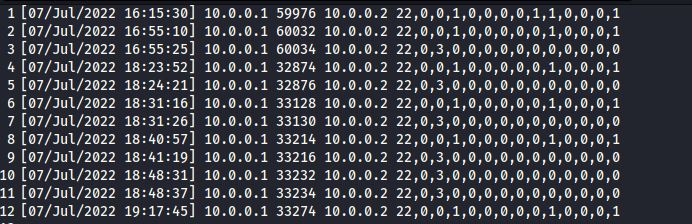
After running the SSH honeypot features.log file will be created and file called ssh_honeypot.log, this file contain the logs about each connection to the honeypot.
Exapmle of the features.log file:
The file called ssh_honeypot.log has the every command The attacker write in the shell.
To Run the SSH HoneyPot you should usepython3 SSH.pyand you should have the folder named fake_files.


The Code of the FTP HoneyPot is written in python.
- pickle using
pip install pickle-mixin - twisted using
pip install Twisted - pyshark using
pip install pyshark


these are a subset of the NSL-KDD dataset Features.
- **python3** `python3 ftppot.py`
- Help:
Help command is used to show the available commands that are supported on the FTP server.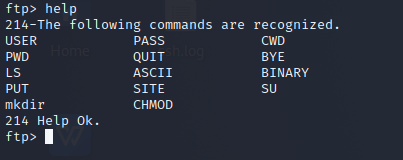
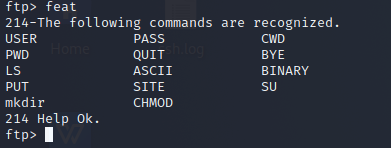
- FEAT:
An alternative command to HELP to show the available features.
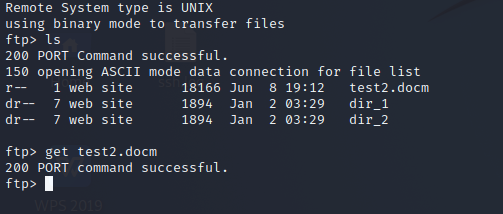
- LS:
A Command used to list the content of the current working directory excluding the hidden ones.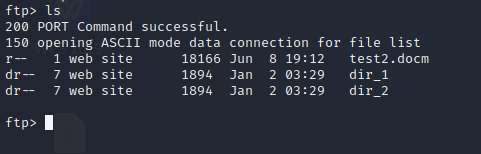
- LS -la:
A Command used to list the content of the current working directory including all hidden ones.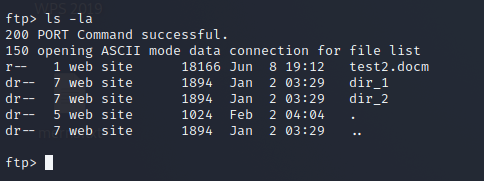
- MKDIR:
A command used to make a new directory.

- CWD:
A command used to change the current working directory .i.e to navigate to another one.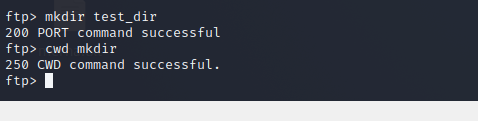
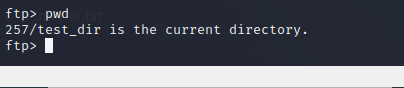
- PWD:
A command used to print the current working directory.
- PUT:
A command used to upload files to the server.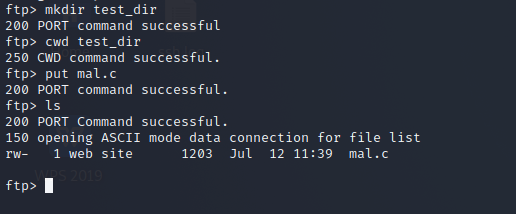
Note: we simulated the case of uploading hidden files too.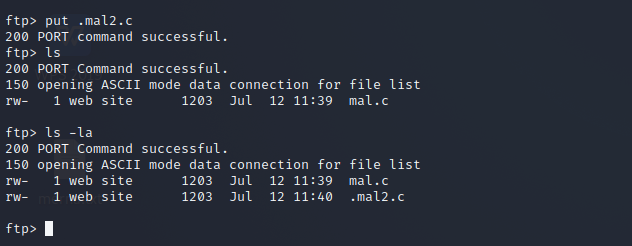
- CHMOD:
A command used to change the permissions of a file. This command needs root privileges.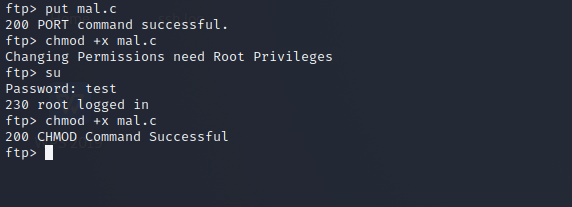
- SU or ROOT:
A command used to change to root privileges.
- ASCII:
A command used to switch to ASCII mode to transfer files.
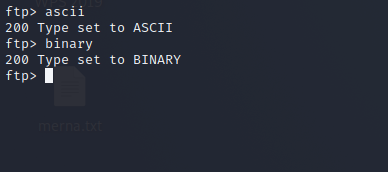
- BINARY:
A command used to switch to BINARY mode to transfer files. - GET:
A command used to Download files from the ftp server.
- QUIT:
A command used to end the session and disconnect from the FTP server.

- BYE:
An alternative command to the Quit command.


It exists on the Host
You must install zeek using the following command:
sudo apt-get -y install zeek
To run zeek then you must give it a pcap file so we used tcpdump tool to capture the traffic using:tcpdump -i <interface-name> -s 0 -w <filename>, in this case the file name is ntraffic.pcap.
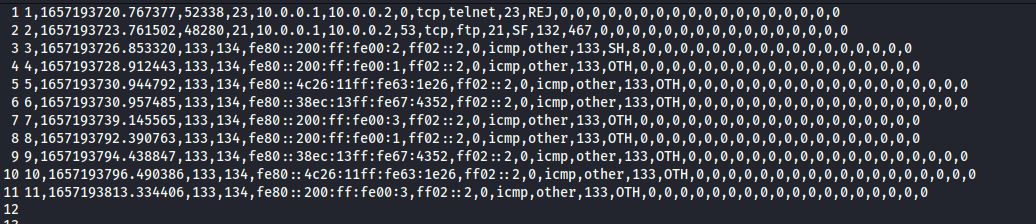
After capturing the traffic, we will use zeek script called extract.zeekthat extract some of the required features and store it in a file called conn.list using the following command:zeek -r ntraffic.pcap extract.zeek -C > conn.list
After getting conn.list file, we must sort it with the id of the connection using:sort -n conn.list > conn_sort.list
Exapmle of the conn_sort.list file:

It exists on the Host
The training Dataset for the model is KDD dataset which has 41 features.
Some of this features from the log files and some of them is from the traffic of the connections,
so we used zeek tool to extract some of the features and then link the features extracted from zeek and the log files using the pyhton program called editor.py.
- You must have the file called tablethree_editor.py when running it.
To Run the script we will use the following command: python3 editor.py
Files called con_feature.txt and ips.txt will be created that have the ssh,ftp, and the smtp connections only and the IPs.
It exists on the Host and the controller
To install redis server we will use the following commands:
curl -fsSL https://packages.redis.io/gpg | sudo gpg --dearmor -o /usr/share/keyrings/redis-archive-keyring.gpgecho "deb [signed-by=/usr/share/keyrings/redis-archive-keyring.gpg] https://packages.redis.io/deb $(lsb_release -cs) main" | sudo tee /etc/apt/sources.list.d/redis.listsudo apt-get updatesudo apt-get install redis
To install redis module for python we will use the following command:pip install redis
To run redis server on your host:redis-server --protected-mode no
There is a python script to upload the files con_feature.txt and ips.txt for the ML model.
We will use the python program called store.py to do that.
To run the file that store data on the database we will use the following command:
python3 store.py <ip-of-the-server-run-redis-server>
On the side of the ML model we will use readfrom_db.py to save the data on the machine.
Two files called con_feature.txt and ips.txt will be created after running the script using:python3 readfrom_db
It exists on the Host
To install mininet on your machine, you can use the following command:
sudo apt-get -y install mininet
To use mininet, you can type:service openvswitch-switch startto start the openflow switch.sudo mn --controller=remote,ip=127.0.0.1 --switch=ovsk,protcols=OpenFlow13 --topo=minimalto start the mininet with minimal topology with 2 hosts and remote controller.
Inside the mininet, you can typexterm h1to get a terminal for host1.
We used a custom topology written in python, to run the topology:sudo python3 topo.py
You will get 3 hosts with mac addresses and IPs, and NAT so we can connect to the internet.
To install RYU controller:
git clone https://github.com/faucetsdn/ryu.gitto clone the repo have the ryu controller.cd ryusudo pip install -r tools/pip-requiresto install the requried modulessudo python3 setup.py install
Now you have the ryu controller with all the Applications of it. After download the simple_switch_13.py you will change directory to where the file exist and run the Applications using:ryu-manager --verbose simple_switch_13
It exists on the contoller
To run the ML model, you must have the following modules:
- numpy, you can install it using
pip install numpy - pandas, you can install it using
pip install pandas - sklearn, you can install it using
pip install sklearn - keras, you can install it using
pip install keras
You must have kdd_train.csv, and kdd_test.csv in the same folder where you will run the model.
You can run the model using: python3 Model.py
After that you can predict using the classifier.py but you must have the following modules:- tensorflow, you can install using
pip install tensorflow
Now you can run the classifier using: python3 classifier.py
It exists on the contoller
You must have the following modules:
- pyqt6, you can install it using
pip install pyqt6.
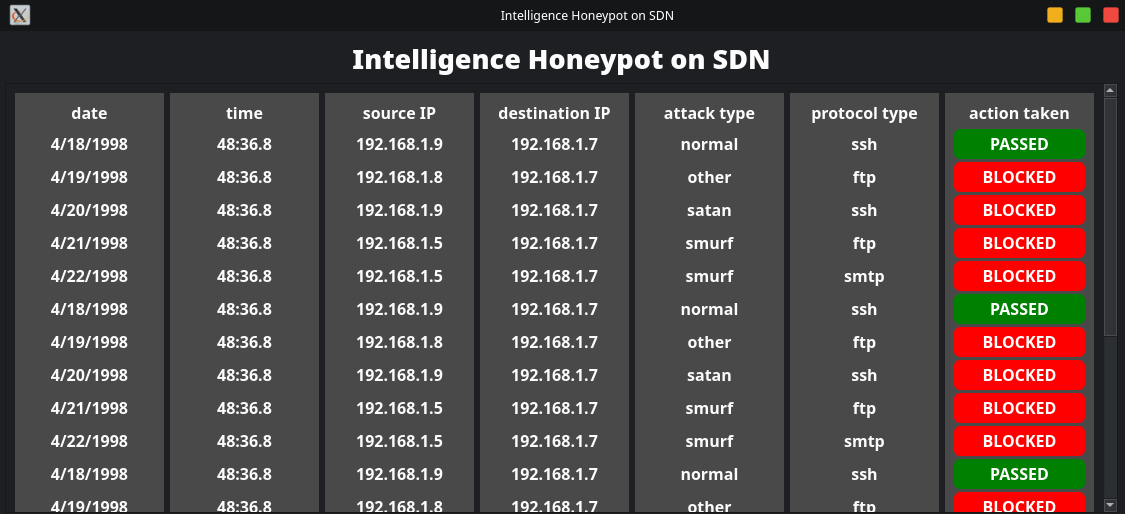
Now you can run the UI using: python3 main.py
There is optional info inside the file called "global_var.py" you will find different variable with explicit names.
Exapmle of the UI: