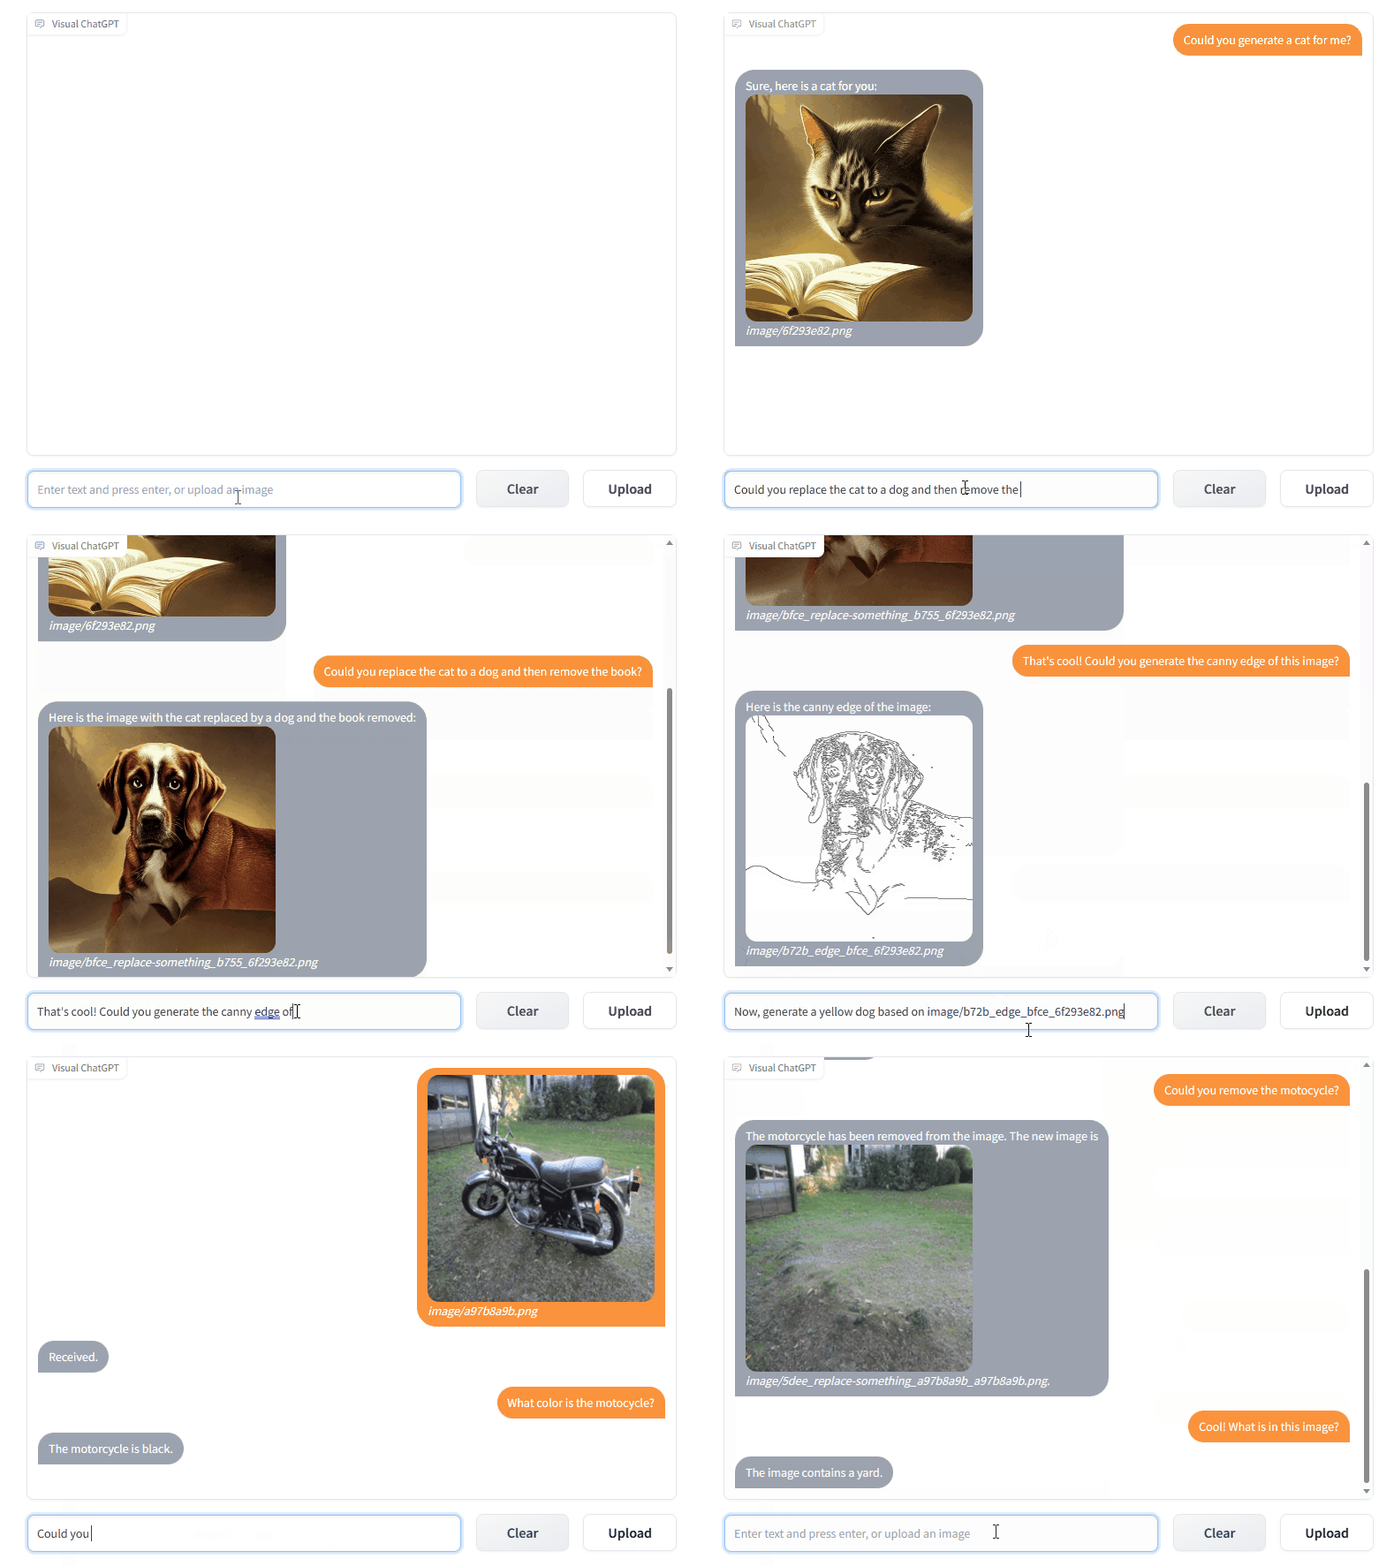
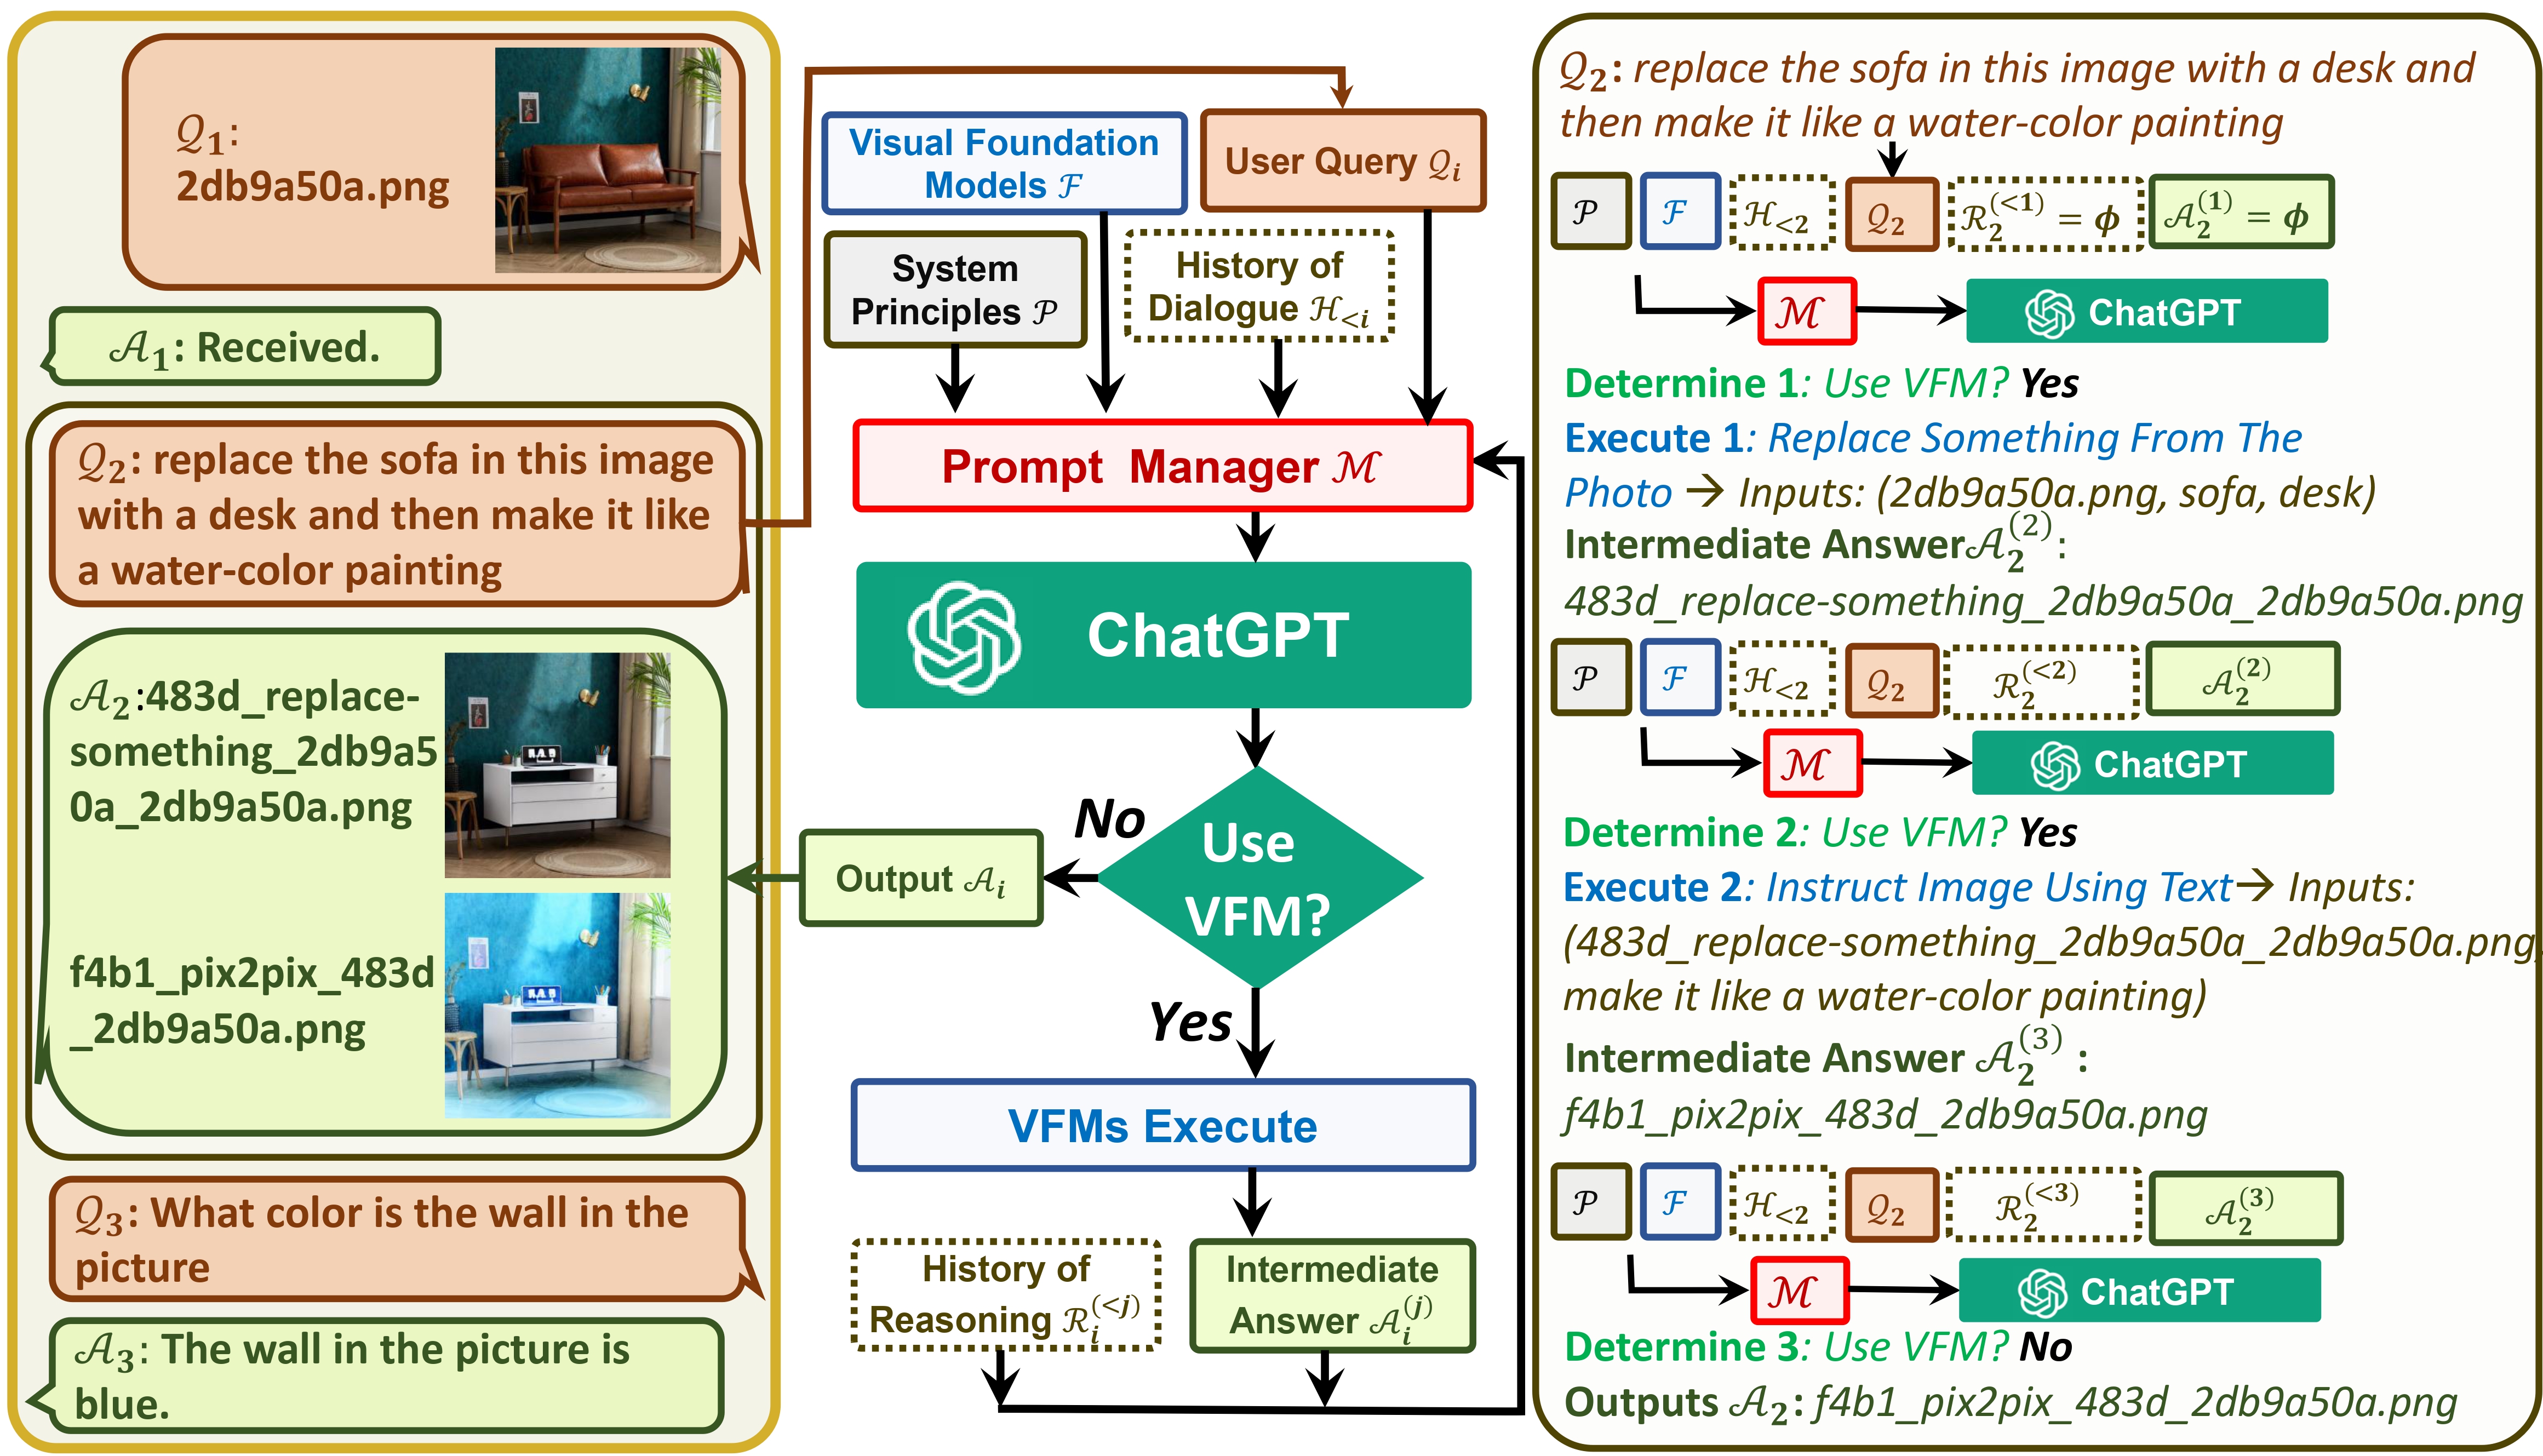
visual-chatgpt支持中文的版本
官方论文: Visual ChatGPT: Talking, Drawing and Editing with Visual Foundation Models
官方仓库:visual-chatgpt
个人技术解读与实现:
- Visual ChatGPT(一): 除了语言问答,还能看图问答、AI画图、AI改图的超实用系统
- Visual ChatGPT(二): 系统搭建完全指南
- Visual ChatGPT(2.5): 需要65GB才能跑!?no way,我们还是先来支持低显存模式吧!
- Visual ChatGPT(三): 中文支持来了!
# 1、下载代码
git clone https://github.com/wxj630/visual-chatgpt-zh

# 2、进入项目目录
cd visual-chatgpt-zh

# 3、创建python环境并激活环境
conda create -n visgpt python=3.8
conda activate visgpt

# 4、安装环境依赖
pip install -r requirement.txt

# 5、确认api key
export OPENAI_API_KEY={Your_Private_Openai_Key}
# windows系统用set命令而不是export
set OPENAI_API_KEY={Your_Private_Openai_Key}

# 6、下载hf模型到指定目录(注意要修改sh文件里的{your_hf_models_path}为模型存放目录)
bash download_hf_models.sh

# 7、启动系统,这个例子我们加载了ImageCaptioning和Text2Image两个模型,
# 想要用哪个功能就可增加一些模型加载
python visual_chatgpt_zh.py
--load ImageCaptioning_cuda:0,Text2Image_cuda:0 \
--pretrained_model_dir {your_hf_models_path} \
根据官方建议,不同显卡可以指定不同“--load”参数,显存不够的就可以时间换空间,把不重要的模型加载到cpu上,虽然推理慢但是好歹能跑不是?(手动狗头):
# Advice for CPU Users
python visual_chatgpt.py --load ImageCaptioning_cpu,Text2Image_cpu

# Advice for 1 Tesla T4 15GB  (Google Colab)
python visual_chatgpt.py --load "ImageCaptioning_cuda:0,Text2Image_cuda:0"

# Advice for 4 Tesla V100 32GB
python visual_chatgpt.py --load "ImageCaptioning_cuda:0,ImageEditing_cuda:0,
    Text2Image_cuda:1,Image2Canny_cpu,CannyText2Image_cuda:1,
    Image2Depth_cpu,DepthText2Image_cuda:1,VisualQuestionAnswering_cuda:2,
    InstructPix2Pix_cuda:2,Image2Scribble_cpu,ScribbleText2Image_cuda:2,
    Image2Seg_cpu,SegText2Image_cuda:2,Image2Pose_cpu,PoseText2Image_cuda:2,
    Image2Hed_cpu,HedText2Image_cuda:3,Image2Normal_cpu,
    NormalText2Image_cuda:3,Image2Line_cpu,LineText2Image_cuda:3"
We appreciate the open source of the following projects:

