Sega Master System ROM resource editor
SMS Editor is an application designed primarily to hack/patch graphic resources within a Sega Master System ROM image. It offers some basic tools to import new graphics, and edit them. There is also a data entry section, where byte data can be entered.
What you will need:
- A ROM that you will be creating a hack of (Golden Axe)
- SMS Editor
- The project_file_example.zip file, referenced in the first release of SMS Editor
https://github.com/xfixium/SMSEditor/releases
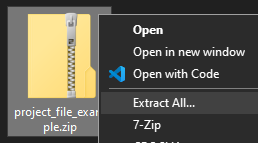
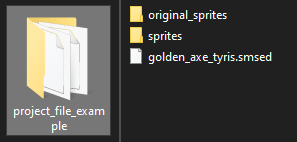
Note: We will be using the Stage 1 graphics in the sprite folder, within the project_file_example.zip file.After downloading the file, in Windows, you can right click the .zip file, and then choose "Extract All..." to get to the resources within. The file contains image resources, a full .smsed project file of Golden Axe, for reference, and image resources.
Note: I will be using Emulicious for this example, I suggest getting the latest version
Suggested tools:
-
A decent graphics editor, like Gimp: https://www.gimp.org/
-
An emulator, like Emulicious or Meka: https://emulicious.net/ https://www.smspower.org/meka/
-
A ROM checker, to make sure your ROM is legit, before hacking it: https://www.smspower.org/maxim/Software/SMSChecker
-
A hex editor, to look at the data at the byte level: http://frhed.sourceforge.net/en/
-
A visual graphics data tool: http://jmimu.free.fr/mastertileconverter/
-
A ROM patch application, Flips: https://www.smspower.org/Hacks/HowToUseBPSAndIPSPatchFiles
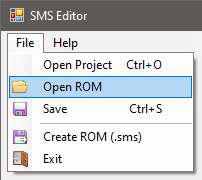
SMS Editor can generate its own project files, but to start a new project, you will need to load the Sega Master System ROM you want to hack first. First, start SMS Editor (Download it from https://github.com/xfixium/SMSEditor/releases), once open, click "File" at the top left, then click "Open ROM". The "Open ROM" file dialog box will display. From there, select your ROM (.sms) file. This will load the ROM into memory, and SMS Editor's UI will display.
SMS Editor is primarily a graphics editing tool for Sega Master System ROMs. But, before you can change anything in an existing ROM, we need to first define graphical building blocks common in all Sega Master System games. The three building blocks are; palettes, tilesets, and tilemaps. In this example we're going to define some graphics within SMS Editor, and then later edit them, and finally compile the changes into a hacked version of the ROM. Let's get started.
Palettes are a collection of colors that the Master System uses when drawing graphics to the screen. The Master System has two palettes that it can use, the background palette, and the sprite palette. Each palette has 16 colors out of 64 total colors the Master System can use. The topic of palettes is quite detailed, and it won't be covered fully here. For more information about palettes, visit Maxim's thorough explanation of them here:
https://www.smspower.org/maxim/HowToProgram/Palette
So, our first step we're going to find a palette in a ROM to use for other graphic assets. After we've loaded our ROM into SMS Editor, as explained in the Start section, we're going to switch to Emulicious and load the same ROM into it. The game I'm using in this example is Golden Axe.
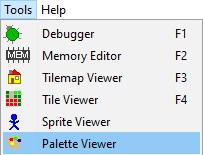
Emulicious is a powerful tool and emulator, with a ton of features that we will make use of for simplicity's sake. Once Golden Axe has been started, proceed to the stage 1 screen. From there, we're going to click from the menu bar at the top, "Tools>>Palette Viewer".
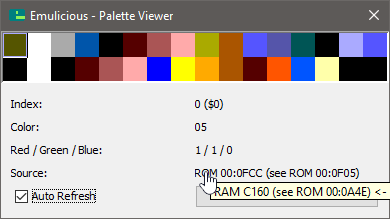
The palette viewer window will appear. Emulicious displays the background palette on the top, and the sprite palette on the bottom. If we click the first color of the background palette, there will be a ROM address next to the section labeled, "Source:", click it, and you will open the memory editor.
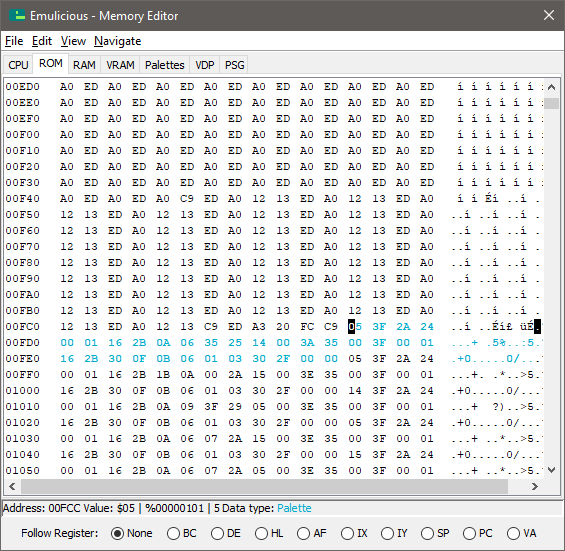
The cursor will automatically be set in the ROM where that palette color is located.
To copy that position, right click the "Address:" section on the lower left corner of the window, then click "Copy Address". This will copy the address in hexadecimal format to the clipboard. If Emulicious doesn't have that option, your version may be out of date.
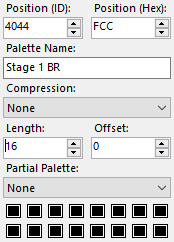
Once we have the address, we're going to head back over to SMS Editor. Click the "Palettes" tab, and paste the address in the "Position (Hex)" field. Next, we're going to enter "Stage 1 BG" in the "Name" field. Then, we're going to set the "Length" field to 16, for 16 colors. Each color is a byte in the ROM, length is always in number of bytes.
Lastly, click the "Validate Palette" button, this will fetch the data from the loaded ROM, and bring it back if it is valid. If everything goes well, the palette will be updated with the colors that show up in Emulicious for the background palette. Once you've made sure the colors match (You can hover over each one to see their value on the palettes tab), click the "Save Palette" button to import the palette into your project. Nice, we now have our first palette from the game.
Next, click the "Tilesets" tab, and we're off to grab our next asset.
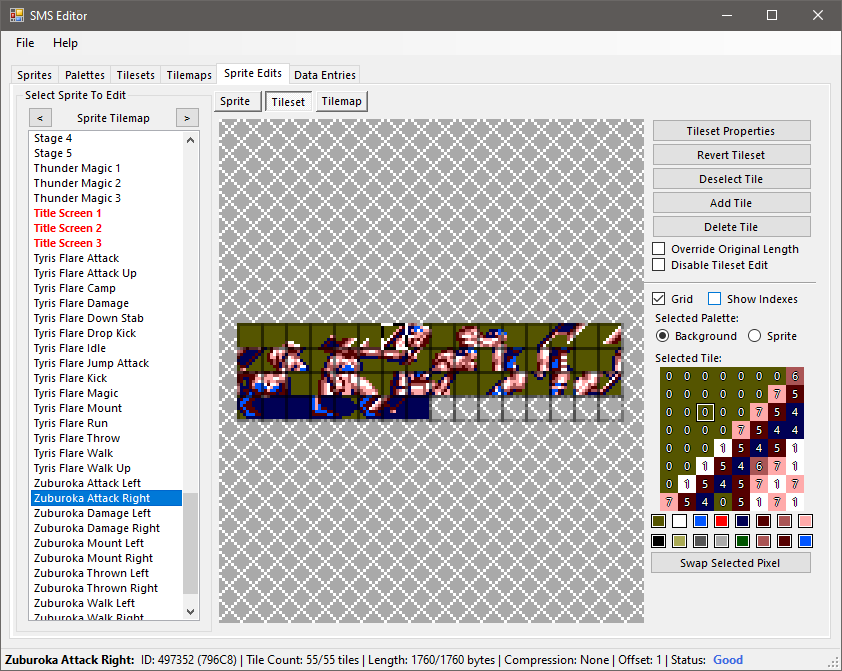
Tilesets, or tiles, are the raw pixel color information. A pixel is a number from 0 to 15, that directly represents the color index of the palette we just defined earlier. So a pixel that has a 1 for a value, would be the color white, based on our previous palette we got. Indexes always start at 0, so 1 is the second color in the background palette. For more information on tiles, visit Maxim's thorough explanation of them here:
https://www.smspower.org/maxim/HowToProgram/Tiles
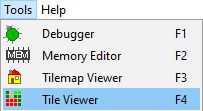
To get Golden Axe's stage 1 tiles, we follow the same types of steps. Getting the starting address from Emulicious, and entering that address into SMS Editor. So, we go back to Emulicious, click "Tools>>Tile Viewer", which launches another window.
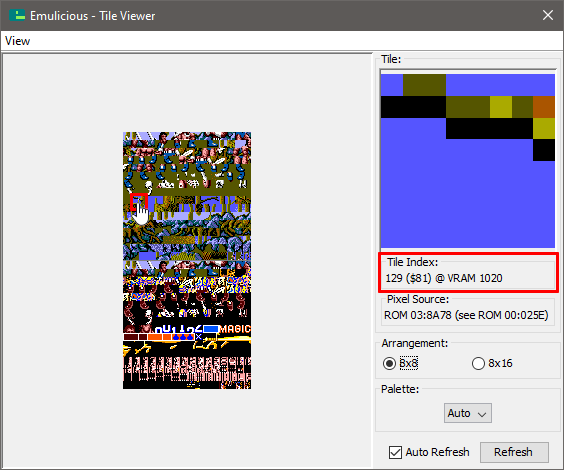
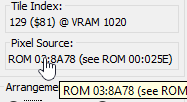
This window shows all the graphics that have been loaded from the ROM data, into video memory. If you hover the mouse over the graphics, portion, you can see information updating on the right side of the interface. We're interested in where the background tiles start. Which looks like tile index 128, so click that tile. If we again click the ROM location under "Pixel Source", we'll be taken to the location in the ROM where the tileset data starts, or is it? The data doesn't have enough zeros to be the right place. So let's try the next tile at tile index 129.
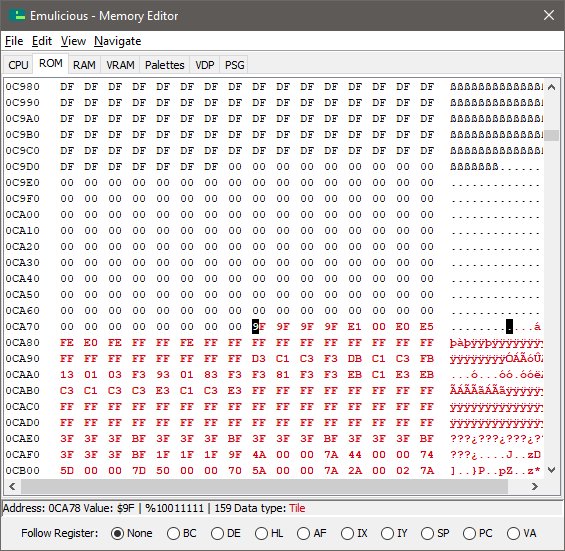
Click the ROM location, and it looks like valid data.
Emulicious also highlights data in a certain color, to give a better indication on what the data might be. Most of the time it's spot on.
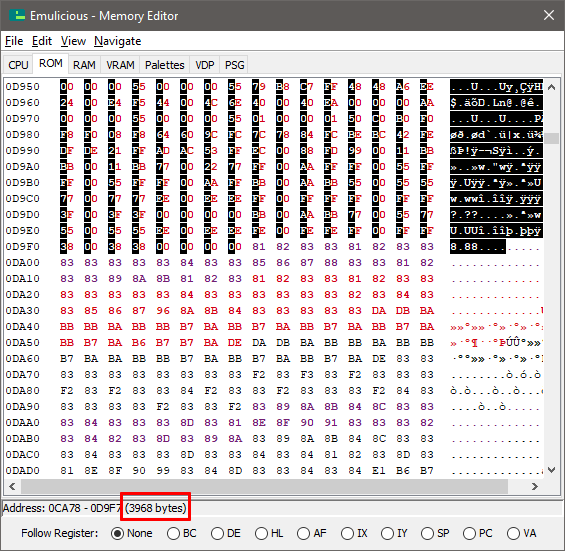
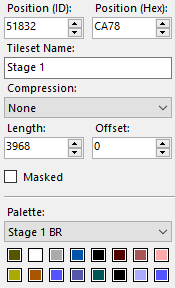
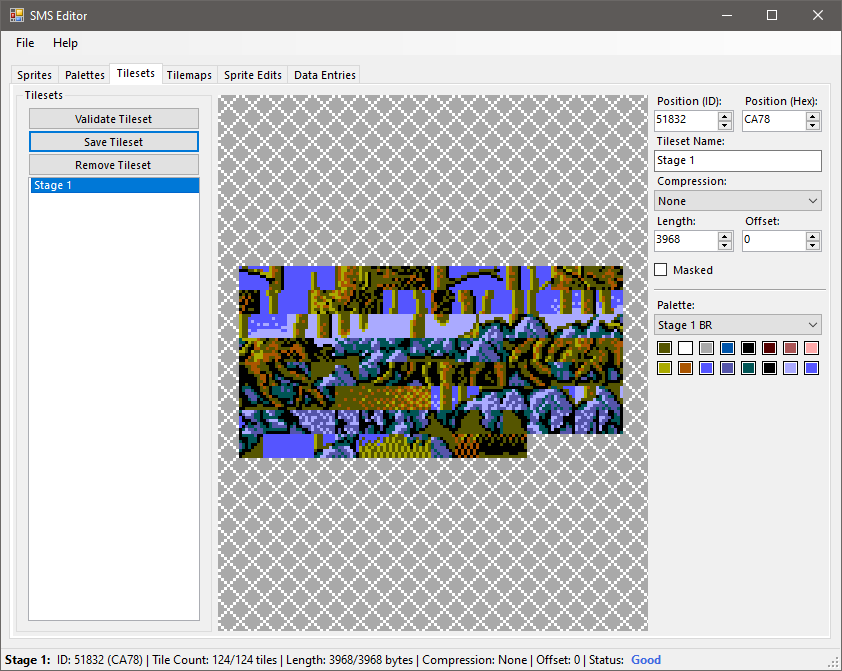
We right click and copy the address like last time, and paste it into SMS Editor under the "Position (Hex)" field again (Address CA78). We name the tileset "Stage 1" again, now all we need is the length, which again, is in bytes. In Emulicious, if we click the starting address, and drag downwards, it'll show the number of bytes being selected. We're going to do that until we are at the end of the tileset data. Again, Emulicious making this very easy, by color coding the byte values. Once at the end, take note of the number of bytes selected, and that's what we'll enter for the length of the tileset.
Just a note, one tile is 32 bytes, so make sure your length is divisible by 32 evenly, to be sure you're getting the exact amount of tile data, no more, no less. Of course SMS Editor will display more or less bytes, if you happen to get the wrong amount. The length should be 3968 bytes (3968 / 32 is 124 tiles total). Any more than that will look like a jumbled mess. We want to make sure we're not going further than the tile data. As we might accidentally overwrite something important.
Click "Validate Tileset", to get the data from the ROM and display it on the screen. Does it look right? Is it over or under the tile count unevenly? These are the questions to ask yourself when you're searching for data. But if you mess up, you can always come back and adjust. After validating the tileset, it should say the number of tiles (124) on bottom status bar, next to "Tile Count". Click "Save Tileset", and we're done.
Congrats, we just defined our first tileset. Now we need that final graphical piece, the tilemap. So click the "Tilemaps" tab next.
Tilemaps, much like a tileset pixel, uses a number to reference another graphical object. In a tileset, each pixel is a number pointing to a palette color. Well, with tilemaps, each tile is a number referencing a tile in a tileset. Each of these numbers tells the Master System's graphics processor, what tile to draw from the tileset. So a tilemap is a 2D grid of tiles, with a width and height. There are also special flags that can be set for each tile index. Like if it should be drawn flipped, or if it's drawn in front of a object in the game. More information from Maxim, here:
https://www.smspower.org/maxim/HowToProgram/Tilemap
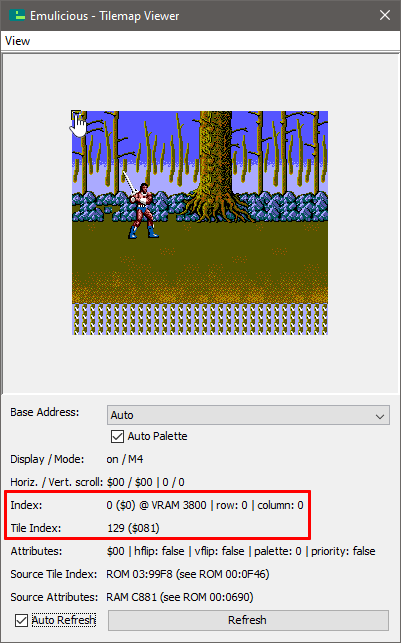
Finally, we're going to get the tilemap data. Once again, using Emulicious. This time from the stage 1 screen, we're going to click on "Tools>>Tilemap Viewer", another window will display itself.
You'll see the current screen tiles drawn in it. Click the up most left corner tile.
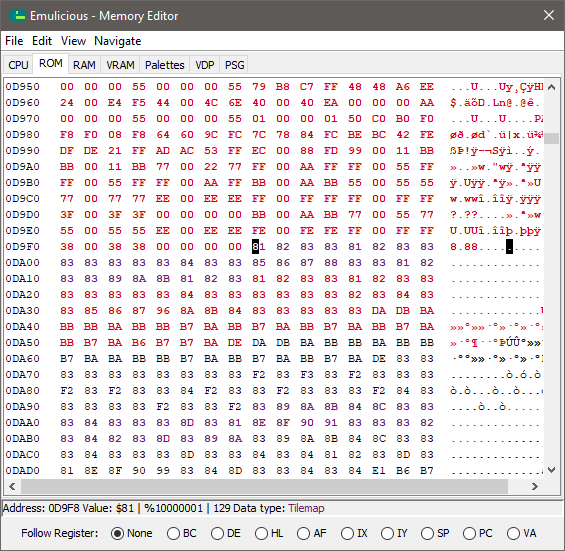
Next to "Source Tile Index", click on the ROM location. Emulicious should get us close to the right location.
If we look at the values, they're pretty high. starting at 129 (81 in hex) for the first tile index. That's more than the stage 1 tileset has in tile count total (Remember the tileset had 124 tiles) Not to mention, a standard tilemap tile usually has another byte (2 bytes per tile), that holds the tile flags, and the rest of the tile index value. What gives?
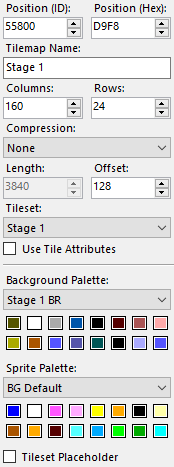
To explain this, and this isn't the case for every game, but Golden Axe does not use tile flags (Attributes) for most tilemaps, it only holds the tile index in its ROM, and that's it. Meaning it only uses 1 byte per tile, instead of 2. It can't use tile flipping, priority flag, etc.. etc.. (Look at Maxim's tilemap page for more info.) That also means that the maximum tile index is only 255. So, because of this, we need to make some adjustments when defining the tilemap. In SMS Editor, we have an "Offset" field that can simulate that the tilemap starts at Tile index 0. It does not write the offset value on ROM export. This is for visual and editing purposes only. Since technically, the tileset starts in graphics memory on the 128th tile, in the "Offset"field, enter 128, to subtract the stored tile index back by 128, meaning the first tile starts at 0.
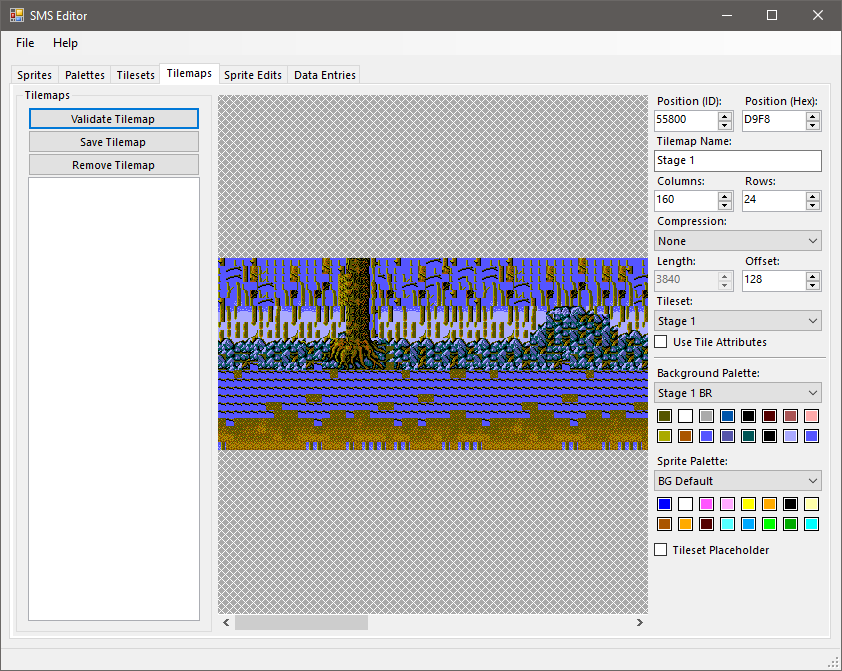
In the "Position (Hex)" field, we're going to enter D9F8. In the "Name" field, enter Stage 1. We now need the width and height of the tilemap, in tiles. Sometimes this information is close to the tilemap data itself, but for this one, I think I found the data through other means. I don't recall how. I did find the right numbers however, so for the "Columns" field, enter 160, and for the "Rows" field, enter 24. That means our tilemap is 160 tiles wide, and 24 tiles high. The actual size in pixels is 1280 x 192. Since a tile is 8 x 8 pixels big, we just take the tilemap dimensions, and times them by 8 to get the actual size. For the "Tileset" field, select our Stage 1 tileset, that we defined earlier.
Lastly, for the "Background Palette", choose Stage 1 BG. Click "Validate Tilemap" and the stage should appear. Except wait a minute, it seems jumbled.
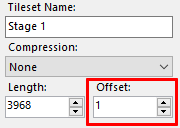
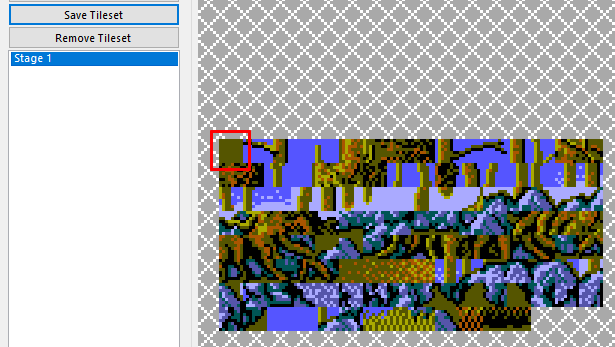
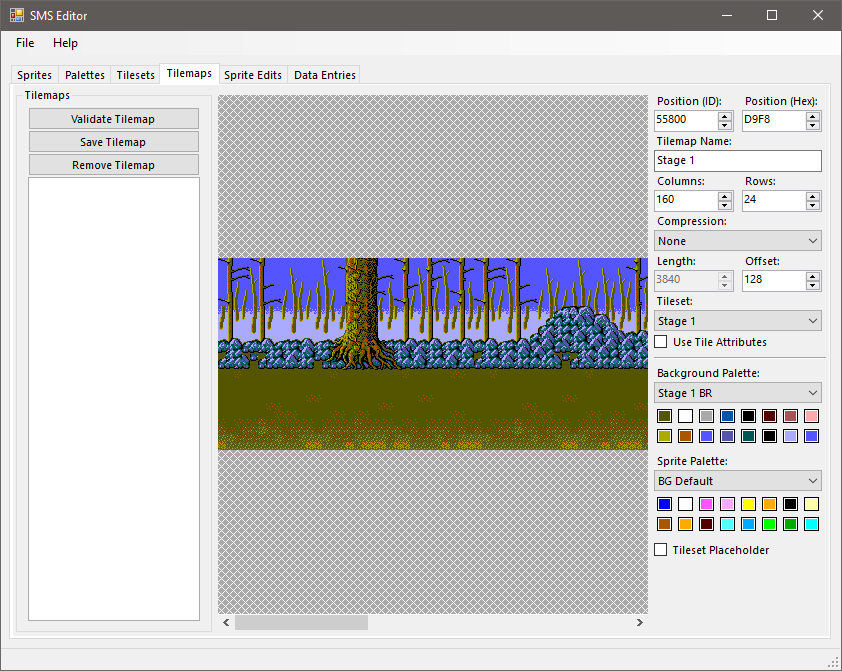
This is because the first blank tile is elsewhere in the ROM. Not next to the Stage 1 tileset data. Golden Axe places the empty tile in graphics memory, when the game is running, before the rest of the tileset data. So, to make up for this, and simulate a proceeding blank tile, just go back to the Stage 1 tileset, and in the "Offset" field, enter a 1, then save it. This will pad the tileset with an empty tile, it will not write it back to the ROM on export. This is just so it looks right when viewing and editing it.
Lastly, go back to the tilemap, it should update, and look like it does in the game.
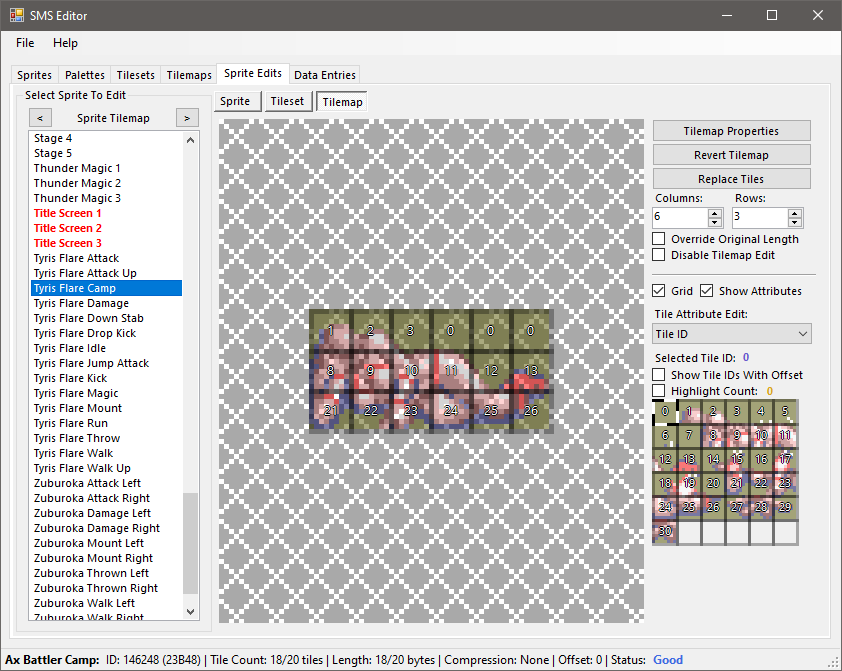
Now that we have a palette, a tileset, and a tilemap, we have enough information to create a Sprite. The Sprite object can hold a background and sprite palette, and a collection of tilemaps. This can be put together in any way you see fit. The idea is to put together assets that are related to one another for optimized editing. While the Stage 1 graphics aren't the best example of this, there are other assets that benefit from putting them together in a Sprite. For instance, the walking animation of Ax Battler (Tarik) uses only one tileset, for many tilemaps. Editing those assets in a single place is more manageable. The graphics can be exported, worked on in an external editor like Gimp, and reimported. There is also no need to worry about keeping the image in 8 bit indexed mode, as the importer will match the colors of the target palette(s), or they can be assigned manually. So click on the Sprites tab, so we can define a sprite object.
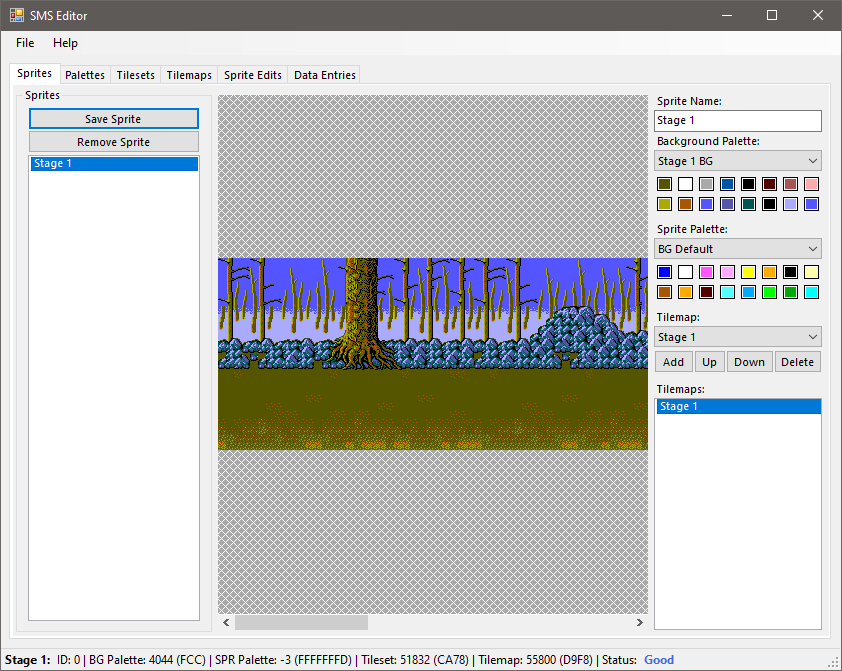
On the sprite page, in the "Name" field, enter Stage 1. For the background palette, choose Stage 1 BG under the "Background Palette" drop down, and finally from the "Tilemap" drop down, select Stage 1 then click the "Add" button, to add it to the sprite's list of tilemaps.
Click "Save Sprite". We now have an asset that can be edited.
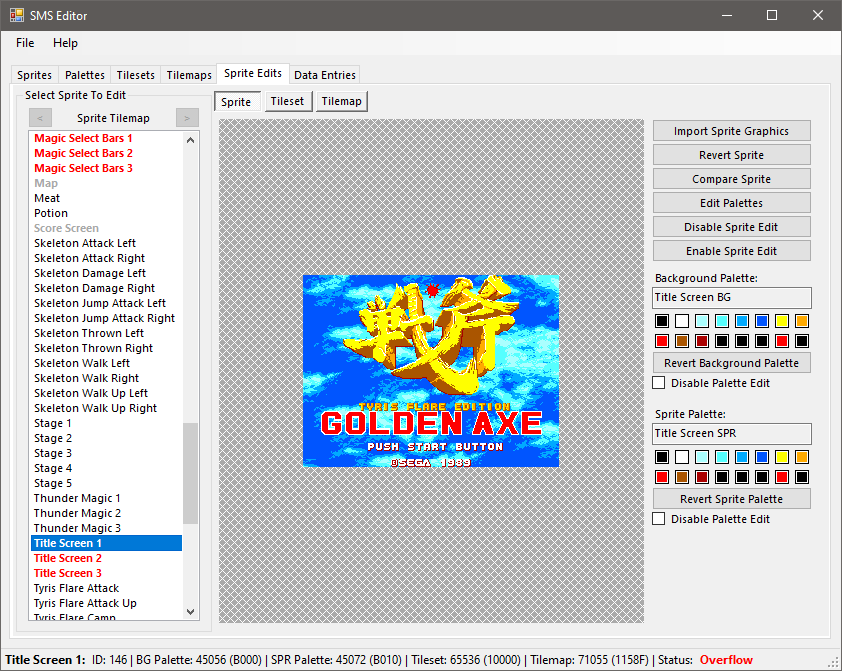
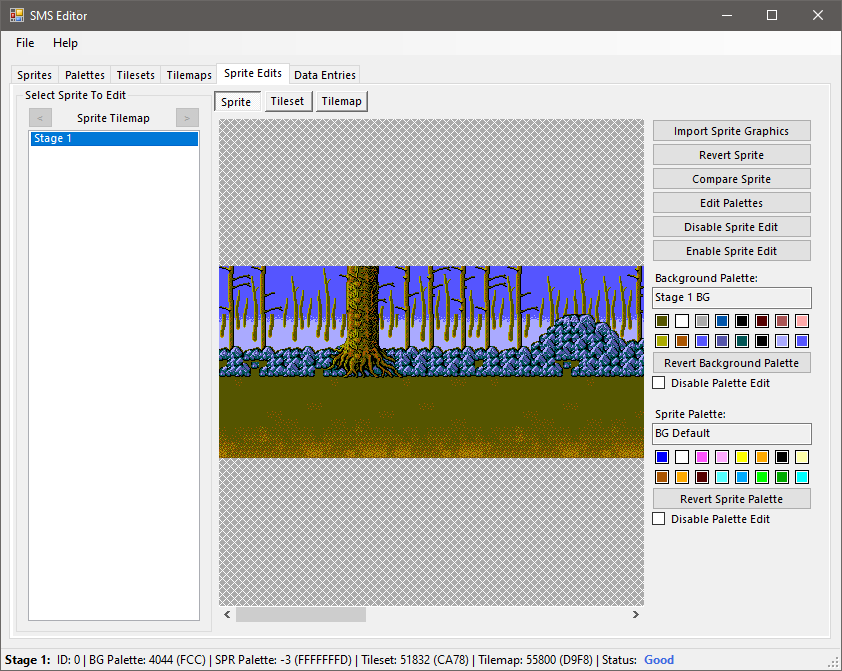
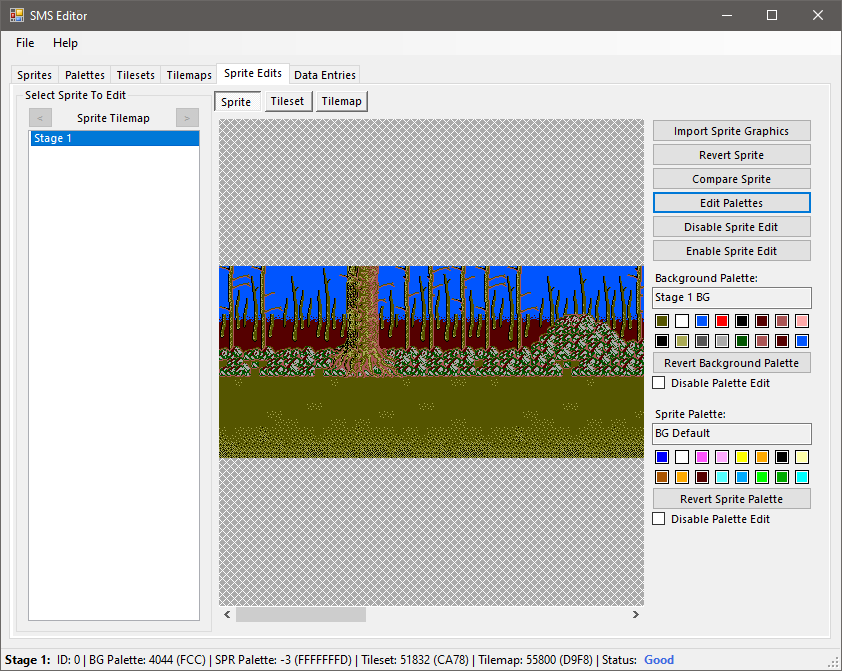
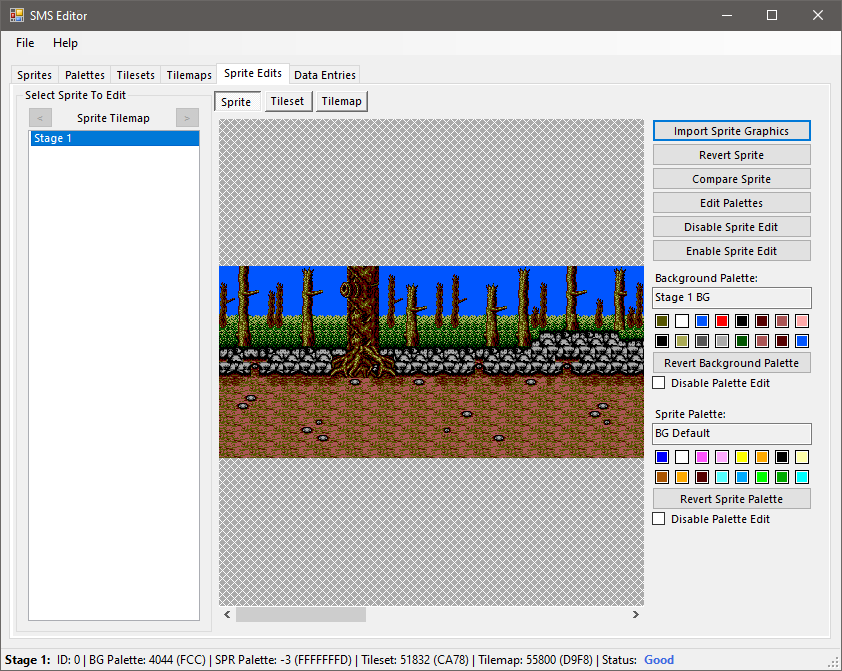
Once we have created a sprite through the "Sprites" tab, it will be available on the "Sprite Edits" tab. Stage 1 should already be selected. There are a myriad of options, but the one we're focusing on is the "Import Sprite Graphics" button. What we want to accomplish is replacing the entire Stage 1 graphics, with something new. Before we do that however, we need to update the palette for our replacement graphics.
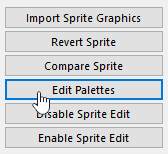
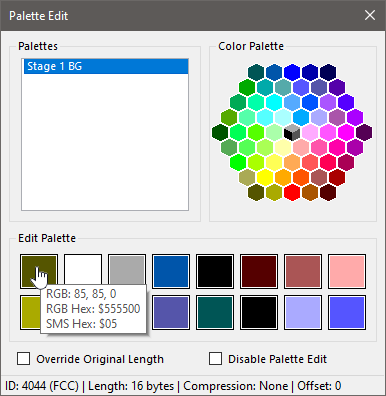
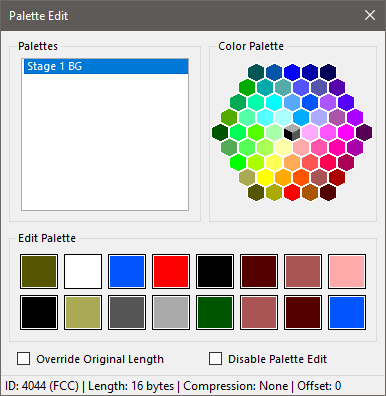
Click "Edit Palettes", a window will appear with a list of all the palettes.
Select Stage 1 BG from the list.
We're going to change the palette to following colors: $05, $3F, $34, $03, $10, $01, $16, $2B, $00, $1A, $15, $2A, $04, $16, $01, $34. To do this, click on a color in the "Edit Palette" section, it should start blinking with a red outline. That means it's ready to be set. Now click on a color from the "Color Palette" section. It will replace the selected color. Once this has been done for all colors, close the window. It's worth noting, if you click outside the color palette colors, it will set the selected color to white.
Once we close the Edit Palettes window, Stage 1 will look a little weird. This is because of the palette change. We're now going to update the graphics to match our palette changes.
Click the "Import Sprite Graphics" button.
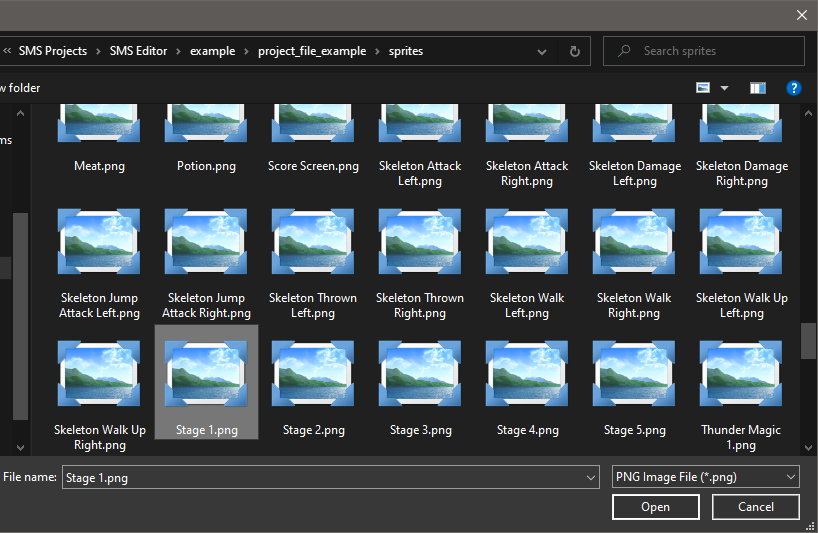
A window will display asking for the image that contains the new graphics (.png), select the Stage 1.png graphics (From the .zip file I linked to earlier), and the importer window will display.
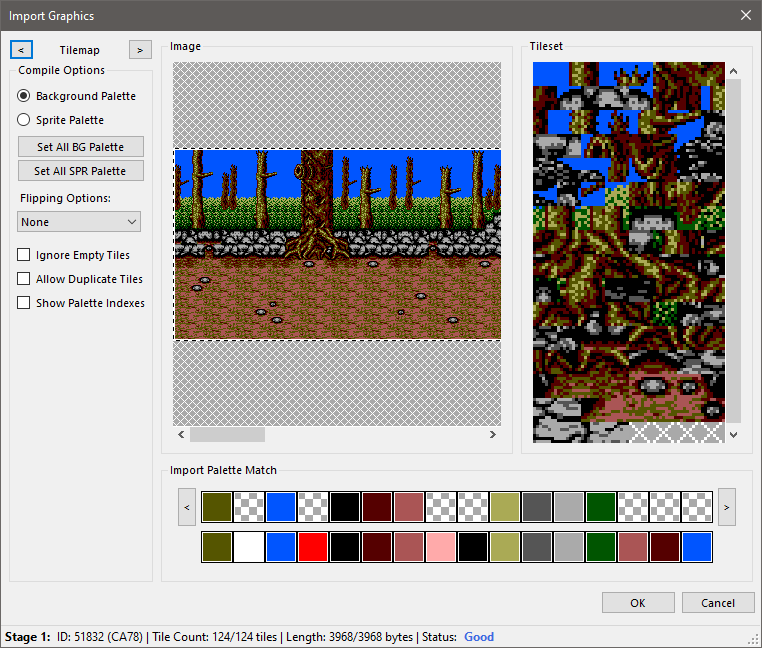
Graphics Importer will give various compile options. The importer will automatically match the colors from the image, with the palettes assigned to the sprite. You can assign certain tiles to use the background or sprite tiles, if there's support for tile flags (Attributes). Since the tilemap doesn't support tile flags, we can just leave it pointing to the background palette. What we're concerned with primarily, is that the tiles being imported are less than or equal to the originals size. If not, the data will be truncated on write, unless the "Override Length" option is used. The "Override Length" option should only be used if you're sure you're not writing over something else, when the ROM is exported. SMS Editor truncates to the original size of the defined data, by default. If there is any issues with the import size, a warning will display on the bottom status bar. This is particularly helpful with assets that get compressed. If the import data is smaller than the original, SMS Editor pads the data with zeros to the original's data length.
There's one last issue to resolve before importing the new graphics. The colors $34, $01, and $16 need to be up on the second half of the background palette. This can be easily done by clicking the color (It will blink with a red border), and then clicking the right arrow button, to move it to the right.
I do this, because of the way Golden Axe blends tiles.
Once done, click okay, and the new graphics have been imported.
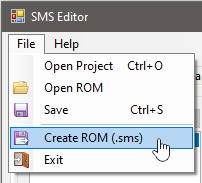
Finally, we can take our new Stage 1, and export it to a newly hacked version of the original game. Click "File>>Create ROM (.sms)" and a dialog will display, where you can name and save the ROM where you like.
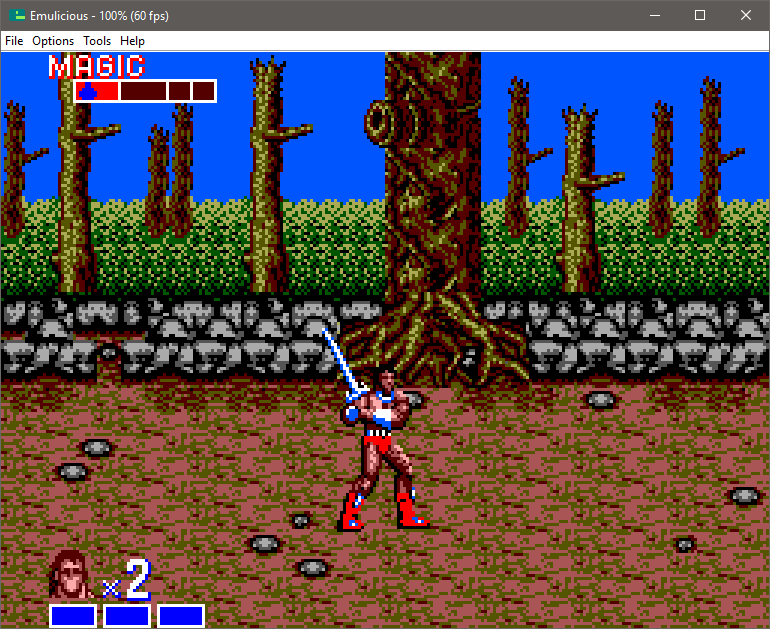
Last thing to do is fire up your favorite SMS emulator, and give it a test. Notice how that palette change affected not only the stage graphics, but also the player and enemies.
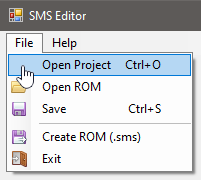
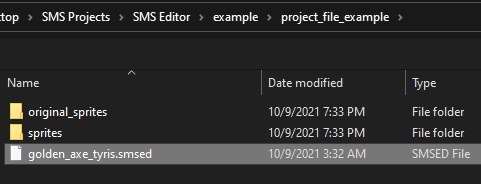
You did it! If you like the results, you can create a patch from it, using Flips, as listed previously. If you'd like to see the whole project, you can go back into the project_file_example folder we unzipped previously, by starting up SMS Editor, then clicking File>>Open Project.
Then select the golden_aex_tyris.smsed file to open it.
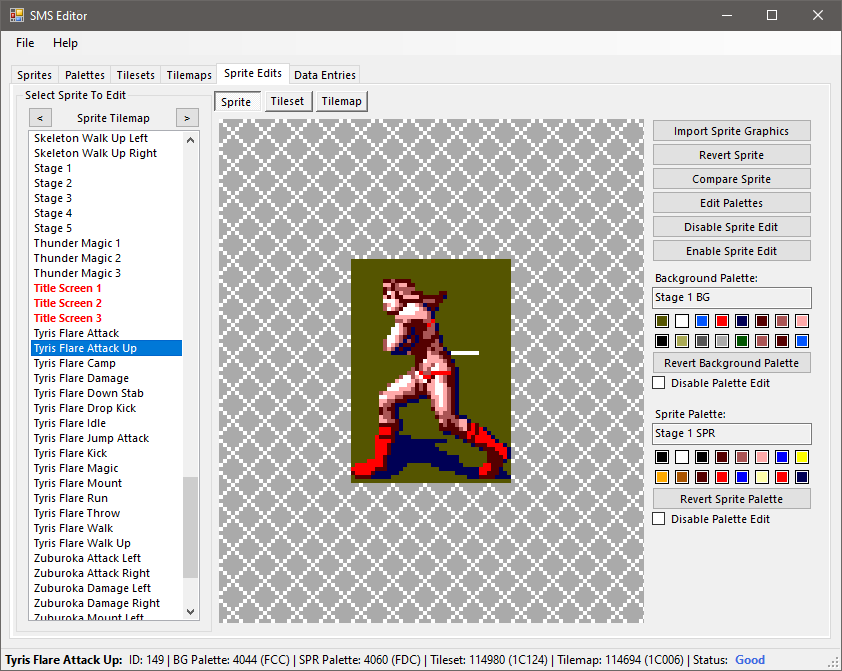
The project will start the UI. Check out all the resources that have been defined and changed. You may use this project as a reference for your own hacking projects, or maybe your own version of Golden Axe. Have fun!
