This project jumps start the use of ESP32 and programming environment. An ESP32 development board is used to read the DHT22 humidity and temperature sensor using a third party sensor library---esp-idf-lib, which has been installed at /home/iot/esp/esp-idf-lib in our Ubuntu VM.
The hard part is to install the CP210x USB to UART Bridge VCP Drivers and make it work.
- If not, install VirtualBox and VirtualBox Extension Pack as Administrator on Windows 10 and Mac OS X.
- Download the UbuntuIoT-35GB.ova for the Ubuntu VM
- To import .ova file into VirtualBox, just click the downloaded .ova file and follow the on-screen instructions.
- After the import, you shall see the Ubuntu IoT VM in the Oracle VM VirtualBox Manager.
- USB Device Filters are already configured for the Ubuntu VM so that we can access the IoT kit via USB inside of Ubuntu VM.
- Ubuntu VM credentials
- Username: IoT
- Password: toi
- sudo password: toi
- If a student feels the Ubuntu IoT VM is slow, please watch How to improve Linux performance in a VirtualBox VM.
The diagram below shows how the DHT22 temperature and humidity sensor is connected to the ESP32 while there are other components shown in the diagram.
The picture below gives a closer look at the connections of different parts of the IoT kit.
The picture below shows the pin layout of the ESP32 development board we use.
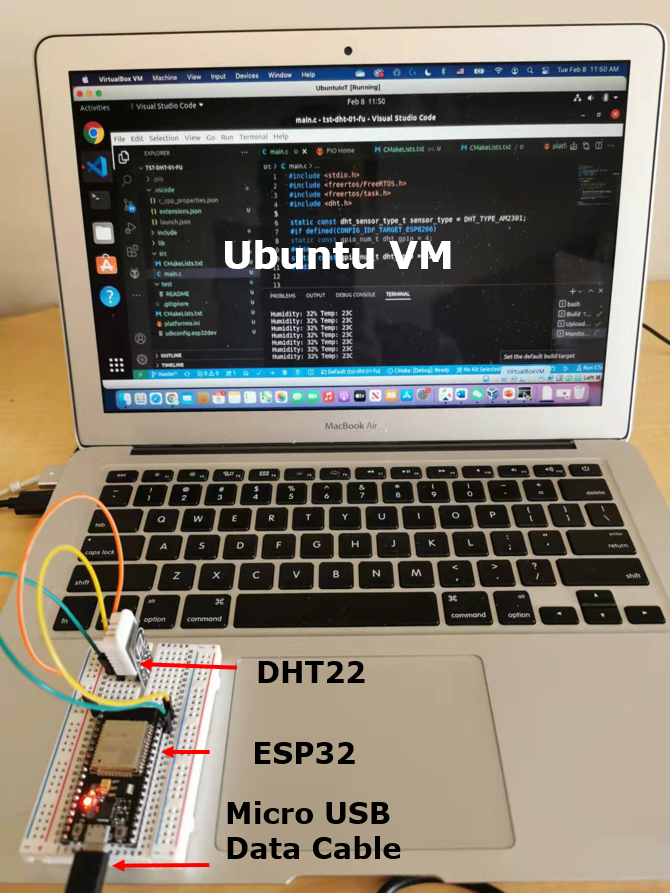
The picture below shows how the IoT kit is connected to a MacBook.
-
Note: Don’t start the Ubuntu VM yet.
-
Connect the ESP32 board to your computer via a micro USB cable.
-
Install the USB to UART bridge driver on the host computer, which will run the guest Ubuntu VM.
- Windows host: Install the CP210x USB to UART Bridge VCP Drivers (CP210x Universal Windows Driver) for Windows. After installation, under Ports within the Windows Device Manger, you shall see Silicon Labs CP210x USB to UART Bridge (COMx), where x may be different at different computers.
- macOS host: It appears macOS has the appropriate driver installed already. When the IoT kit is plugged in a USB port of a Mac computer, within Terminal, run ls /dev/*. /dev/cu.usbserial-0001 or similar shall be seen. When unplugged, the device disappears.
- If there is no /dev/cu.usbserial-0001, please download and install CP210x USB to UART Bridge VCP Drivers (CP210x VCP Mac OSX Driver).
- Unzip the downloaded zip file. In the created macOS_VCP_Driver folder, run SiLabsUSBDriverDisk.dmg and then Install CP210x VCP Driver.app. After successful installation, within Terminal, run ls /dev/*. /dev/cu.SLAB_USBtoUART shall show up.
- Linux Host: It appears Linux like Ubuntu has tha appropriate driver installed already. However, the following steps are needed for our Ubuntu VM to use the IoT kit
- Become a user with the sudo priviledge. e.g., su cyberadmin
- sudo adduser student1 vboxusers # student1 is the user that runs our Ubuntu IoT VM
- Reboot the Linux host
-
After log into the Ubuntu VM, within Terminal, run /ls/dev to see ttyUSB0
- When the mcro-usb cable of the IoT kit is unplugged from your host computer, ttyUSB0 disappears.
Note: It appears that the CP210x USB to UART Bridge VCP Driver has quite some issues. Here are troubleshooting tips
- Make sure the correct micro usb cable is used. The micro usb is like the one used for phones for both data communication and power supply.
- Try different USB ports on the computer and see which one works.
- Sometimes, unplug and plug again the micro usb cable will address the issue.
Note: By default, this project is already located in /home/iot/esp/esp-idf-lib/examples/tst-dht-lab of the Ubuntu VM.
If you do not have the project, start the Ubuntu VM and clone this GitHub project within a folder.
git clone https://github.com/xinwenfu/tst-dht-lab.git
- Start Visual Studio Code. Open File -> Open Folder.
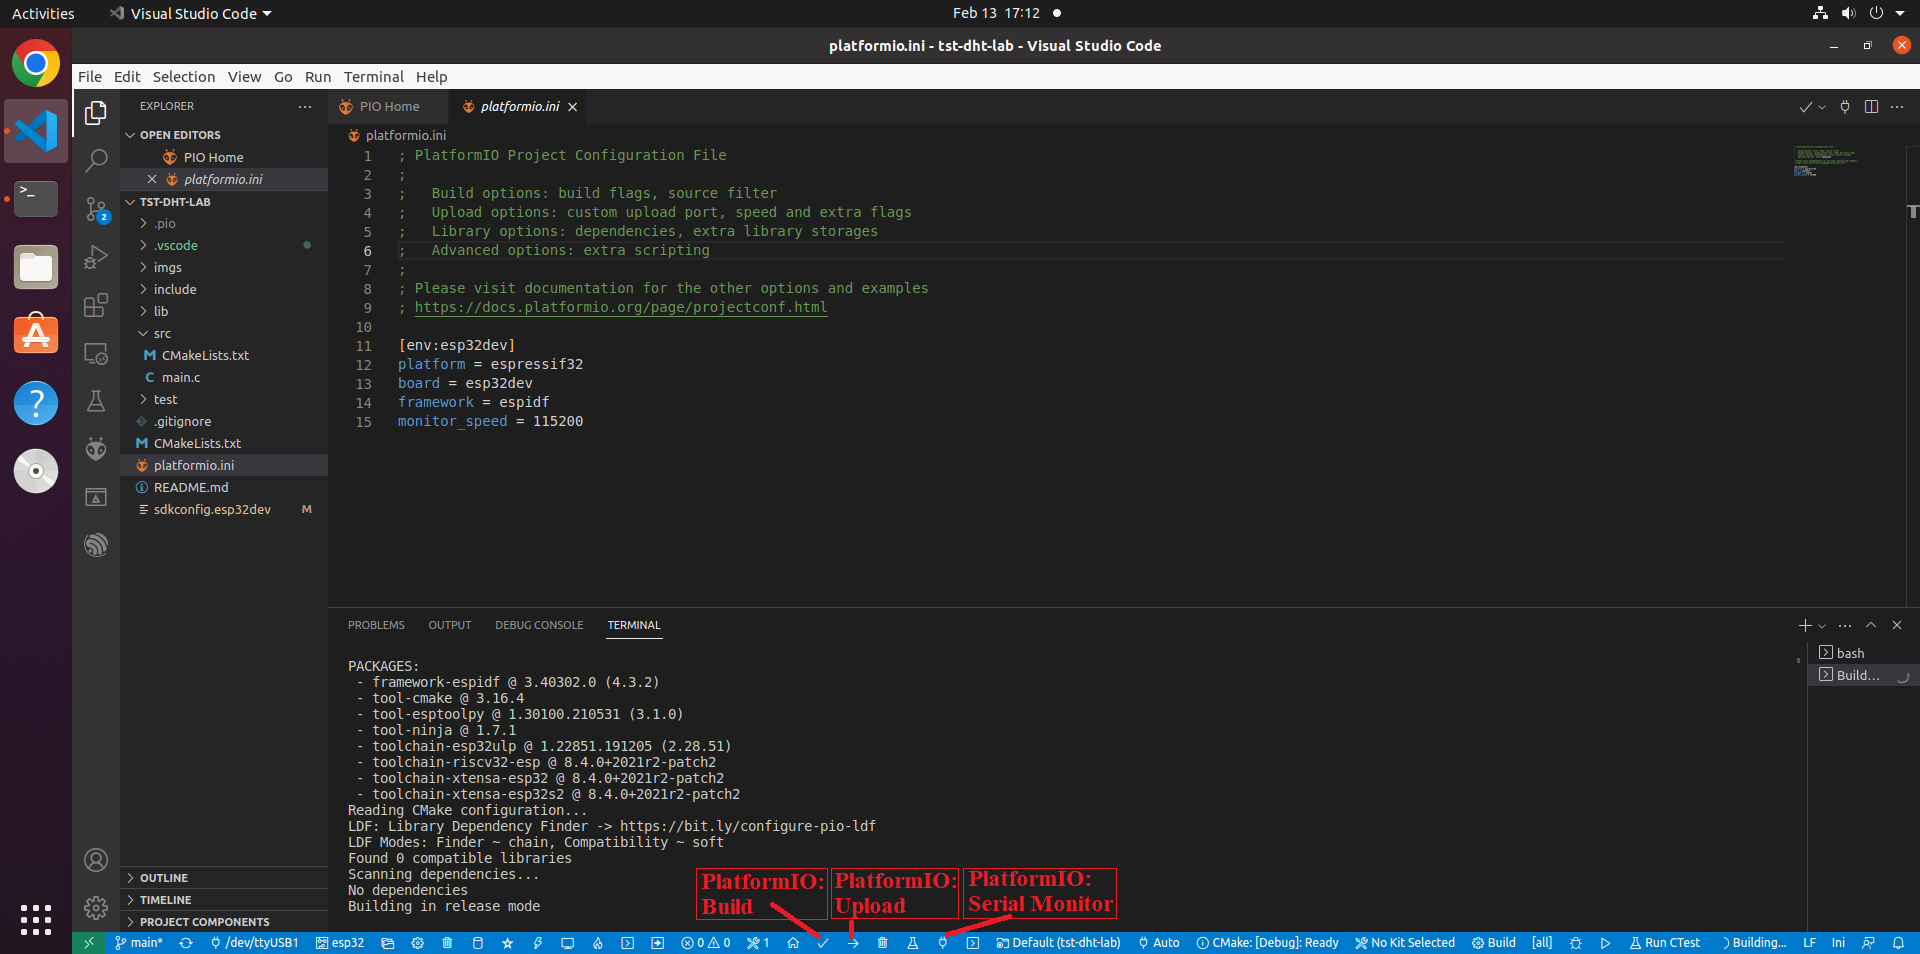
- Click the PlatformIO: Build icon on the status bar at the bottom of the VS Code interface to build the project.
- Refer to the picture below
- If the icon does not work, use the alternative apporach at the end of this post
- Click the PlatformIO: Upload to upload the firmware onto the ESP32 board.
- Note: During the uploading process, you may need to hold down the boot button until the uploading starts
- Refer to the picture below
- If the icon does not work, use the alternative apporach at the end of this post
- Click the PlatformIO: Serial Monitor icon to open the Serial Monitor to see the output from the ESP32 board.
- Refer to the picture below
- If the icon does not work, use the alternative apporach at the end of this post
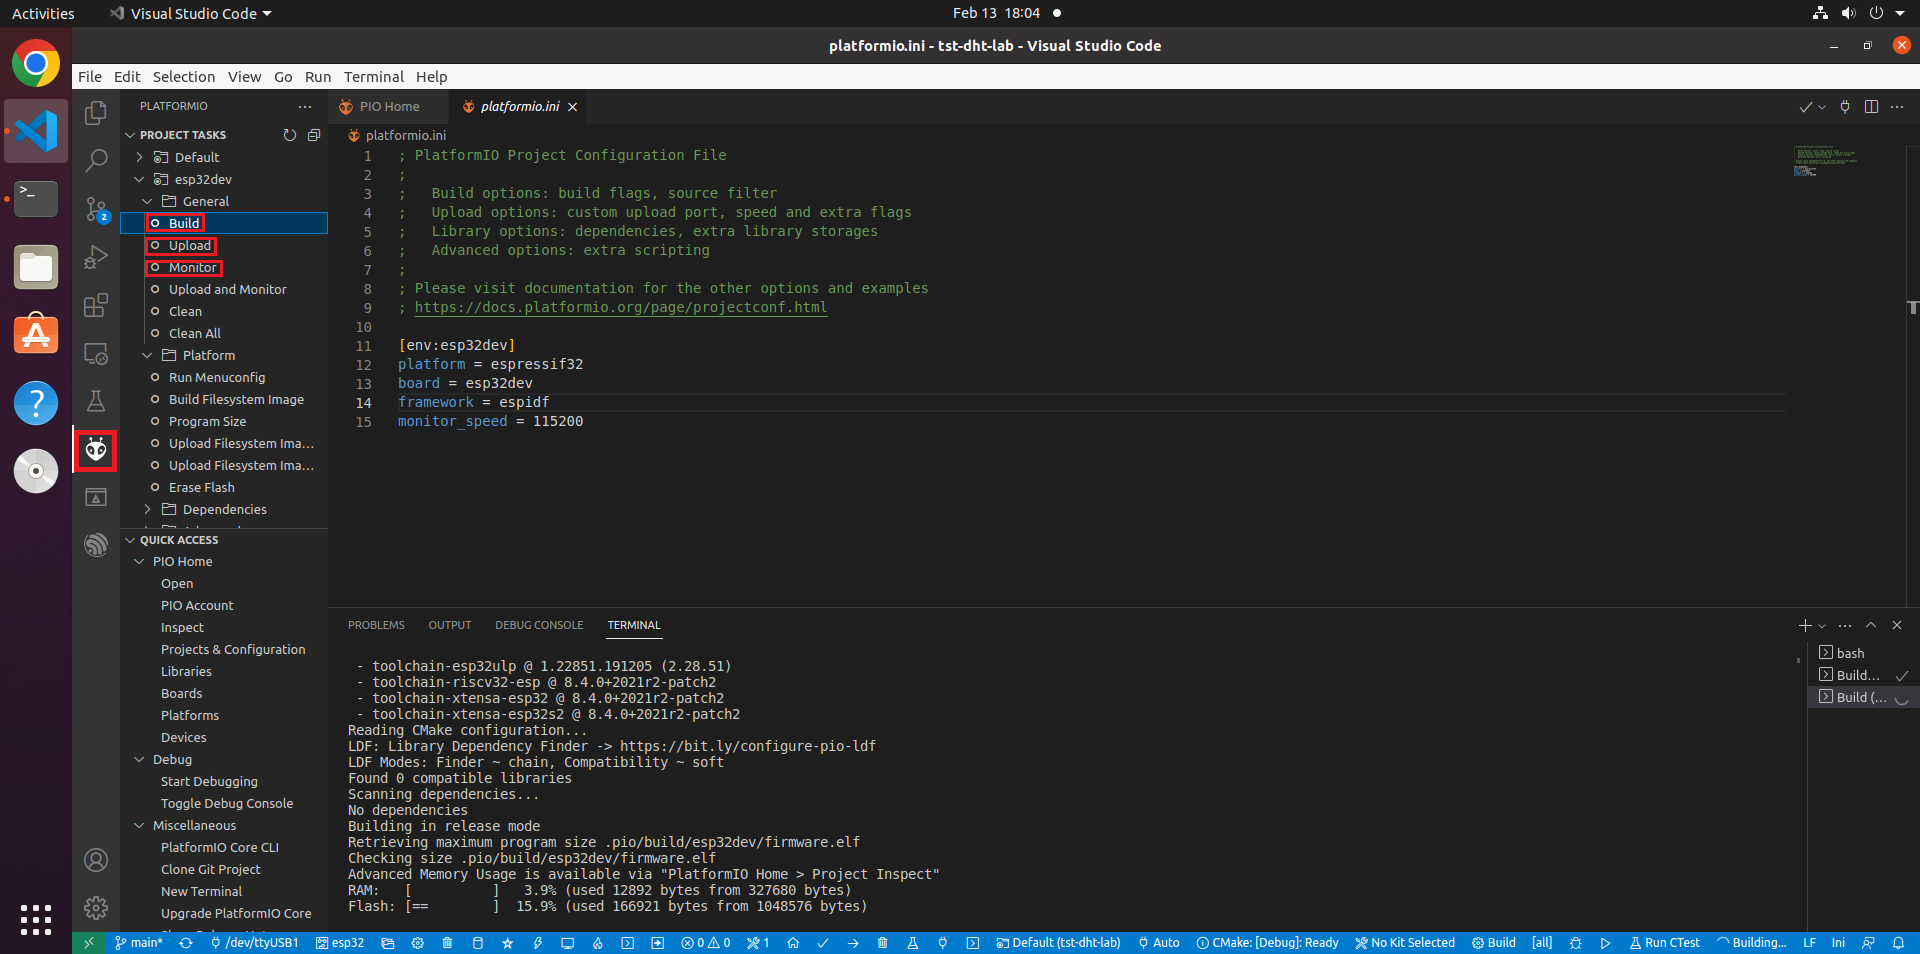
Alternatively, Build, Upload and Monitor can be done by clicking on the PlatformIO icon and use Build, Upload and Monitor within PROJECT TASKS as shown below


