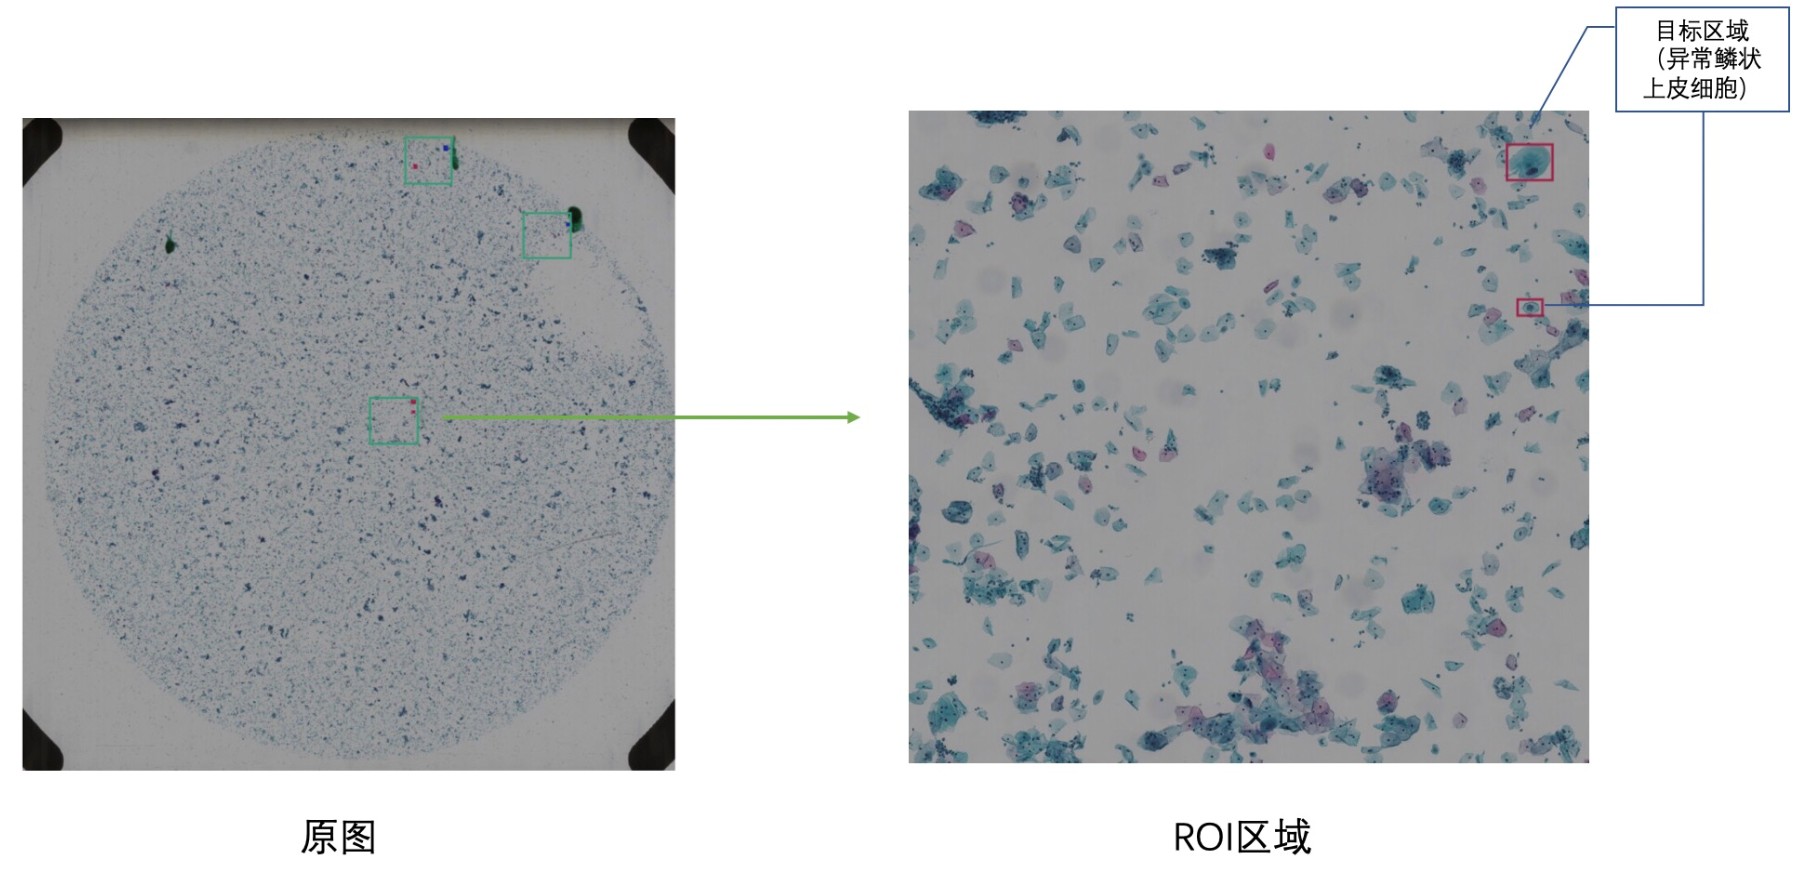
This code is for the competition of 'Digitized Human Body' Visual Challenge - Intelligent Diagnosis of Cervical Cancer Risk. The purpose of the competition is to provide large-scale thin-layer cell data of cervical cancer labeled by professional doctors. The competitors can propose and comprehensively use methods such as object detection and deep learning to locate abnormal squamous epithelial cells (i.e., ASC) of cervical cancer cytology and classify cervical cancer cells through images, which improve the speed and accuracy of model detection, and assist doctors in real diagnosis.
The object detection steps are shown as below:
(1) kfbreader:
Since the kfb data need to be loaded by specified SDK (i.e., kfbreader), we have to setup kfbreader provided by the match orgnaisers. The specific tutorial can be visited by the link.
Remember to add kfbreader to the below paths:
export PYTHONPATH=/home/admin/jupyter/kfbreader-linux:$PYTHONPATH
export LD_LIBRARY=/opt/conda/lib:/home/admin/jupyter/kfbreader-linux:$LD_LIBRARY_PATH
(2) detectron2:
More information, please visit detectron2 install tutorial
Before downloading fvcore cocoapi, make sure you have python >= 3.6 and pytorch 1.3.
Setup detecron2 by running the following commands. (Note: <ROOT> is the root path of detectron2 file path)
# setup fvcore
cd <ROOT>/fvcore-master
python setup.py --user

# setup cocoapi
cd <ROOT>/cocoapi-master/Pythonapi
python setup.py --user

# setup detectron2
cd <ROOT>/detectron2
python setup.py build develop --user
(1) put train/test dataset into <ROOT>/Data/Train and <ROOT>/Data/test respectively.
cd <ROOT>
mkdir /Data/Train
mkdir /Data/test
(2) Generate training dataset for model.
cd <ROOT>/Data
python roi_based_data_generation.py

# or
python pos_based_data_generation.py
(3) Generate extra rotated images with large bboxes and their labels.
python big_rotate_object.py
(4) Transfer prepared datasets from <ROOT>/Data to <ROOT>/detectron2/VOC2007.
<ROOT>/detectron2/VOC2007 file structure follows the structure of Pascal VOC2007 data file:
VOC2007/
  Annotations/
  	patch0.json
	pathc1.json
	...
  ImageSets/
	Main/
	  train.txt
	  val.txt
    	  trainval.txt
  JPEGImages/
	patch0.jpg
	patch1.jpg
	...
In order to gain the above structure format, run the following commands:
cd <ROOT>/detectron2
mkdir /VOC2007/ImageSets
mkdir /VOC2007/ImageSets/Main
mkdir /VOC2007/Annotations
mkdir /VOc2007/JPEGImages

# split dataset for get train/val/trainval.txt
cd VOC2007
python split_dataset_produce_txt.py
Transfer dataset:
# Note: since the files are a lot, we cannot use 'cp' directly.

cd <ROOT>
# transfer train dataset
find Data/Train/train/ -name "*.jpg" | xargs -i cp {} detectron2/datasets/VOC2007/JPEGImages/
find Data/Train/label/ -name "*.json" | xargs -i cp {} detectron2/datasets/VOC2007/Annotations/

# transfer extra large rotated dataset
find Data/big_rotate_object/rotate_image/ -name "*large.jpg" | xargs -i cp {} detectron2/datasets/VOC2007/JPEGImages/
find Data/Tbig_rotate_object/rotate_label/ -name "*large.json" | xargs -i cp {} detectron2/datasets/VOC2007/Annotations/

# transfer test dataset
mkdir detectron2/datasets/VOC2007/test
find Data/test/ -name "*.kfb" | xargs -i cp {} detectron2/datasets/VOC2007/test
find Data/test/ -name "*.json" | xargs -i cp {} detectron2/datasets/VOC2007/test
You can visit Model_Zoo to download ImageNet pretrained model weight file (e.g., X-101-32x8d.pkl), and then put pkl file under <ROOT>/detectron2/configs/ImageNetPretrained/MSRA/. In this competition, we use X101-FPN model.
Modify hyperparameter setting file /detectron2/config/PascalVOC-Detection/<faster_rcnn_xxx.yaml> and then run:
cd <ROOT>/detectron2
python tools/train_net.py --num-gpus 2 --config-file configs/PascalVOC-Detection/faster_rcnn_X_101_FPN.yaml
SOLVER.IMS_PER_BATCH and SOLVER.BASE_LR need to be changed if there is any change of the number of GPU. More information, please read the content of Experiment Record 2 in Dec. 7, 2019.
cd <ROOT>/detectron2
python tools/prediction_multiprocess.py --stride_proportion 0.25
Note: there are many arguments that is tunable:
(1)--output_config: config.yaml - hyperparameter setting file, default: ./output/config.yaml.
(2)--model_weights_pth: target the specified checkpoint pth file, default: final_model.pth.
(3)--final_nms_switch: whether to do class-wise NMS, default: True.
(4)--img_size: image length/height, default: 1000。
(5)--stride_proportion: the sliding step / img_size, default: 0.25. If the sliding window size is 1000*1000, the stride step will be 500 (1000/2=500).
(6)--save_path: the saving path of predicted result, default: ./output/submit_result/.
(7)--test_kfb_path: the path of test dataset, default:, ./datasets/VOC2007/test/.
There are other setting inside the file so please read code carefully. Also, the code prediction with Soft NMS and the prediction based on the iamge with the uniform hue value are available. Here, we do not introduce furthure, you can take a look inside them.
If you want to ensemble different predicted results from different experimental setting, you can modify the file model_ensemble.py as your need and run it.
cd <ROOT>/detectron2
python tools/model_ensemble.py
cd <ROOT>/detectron2/output
zip -r submit_result.zip submit_result/*