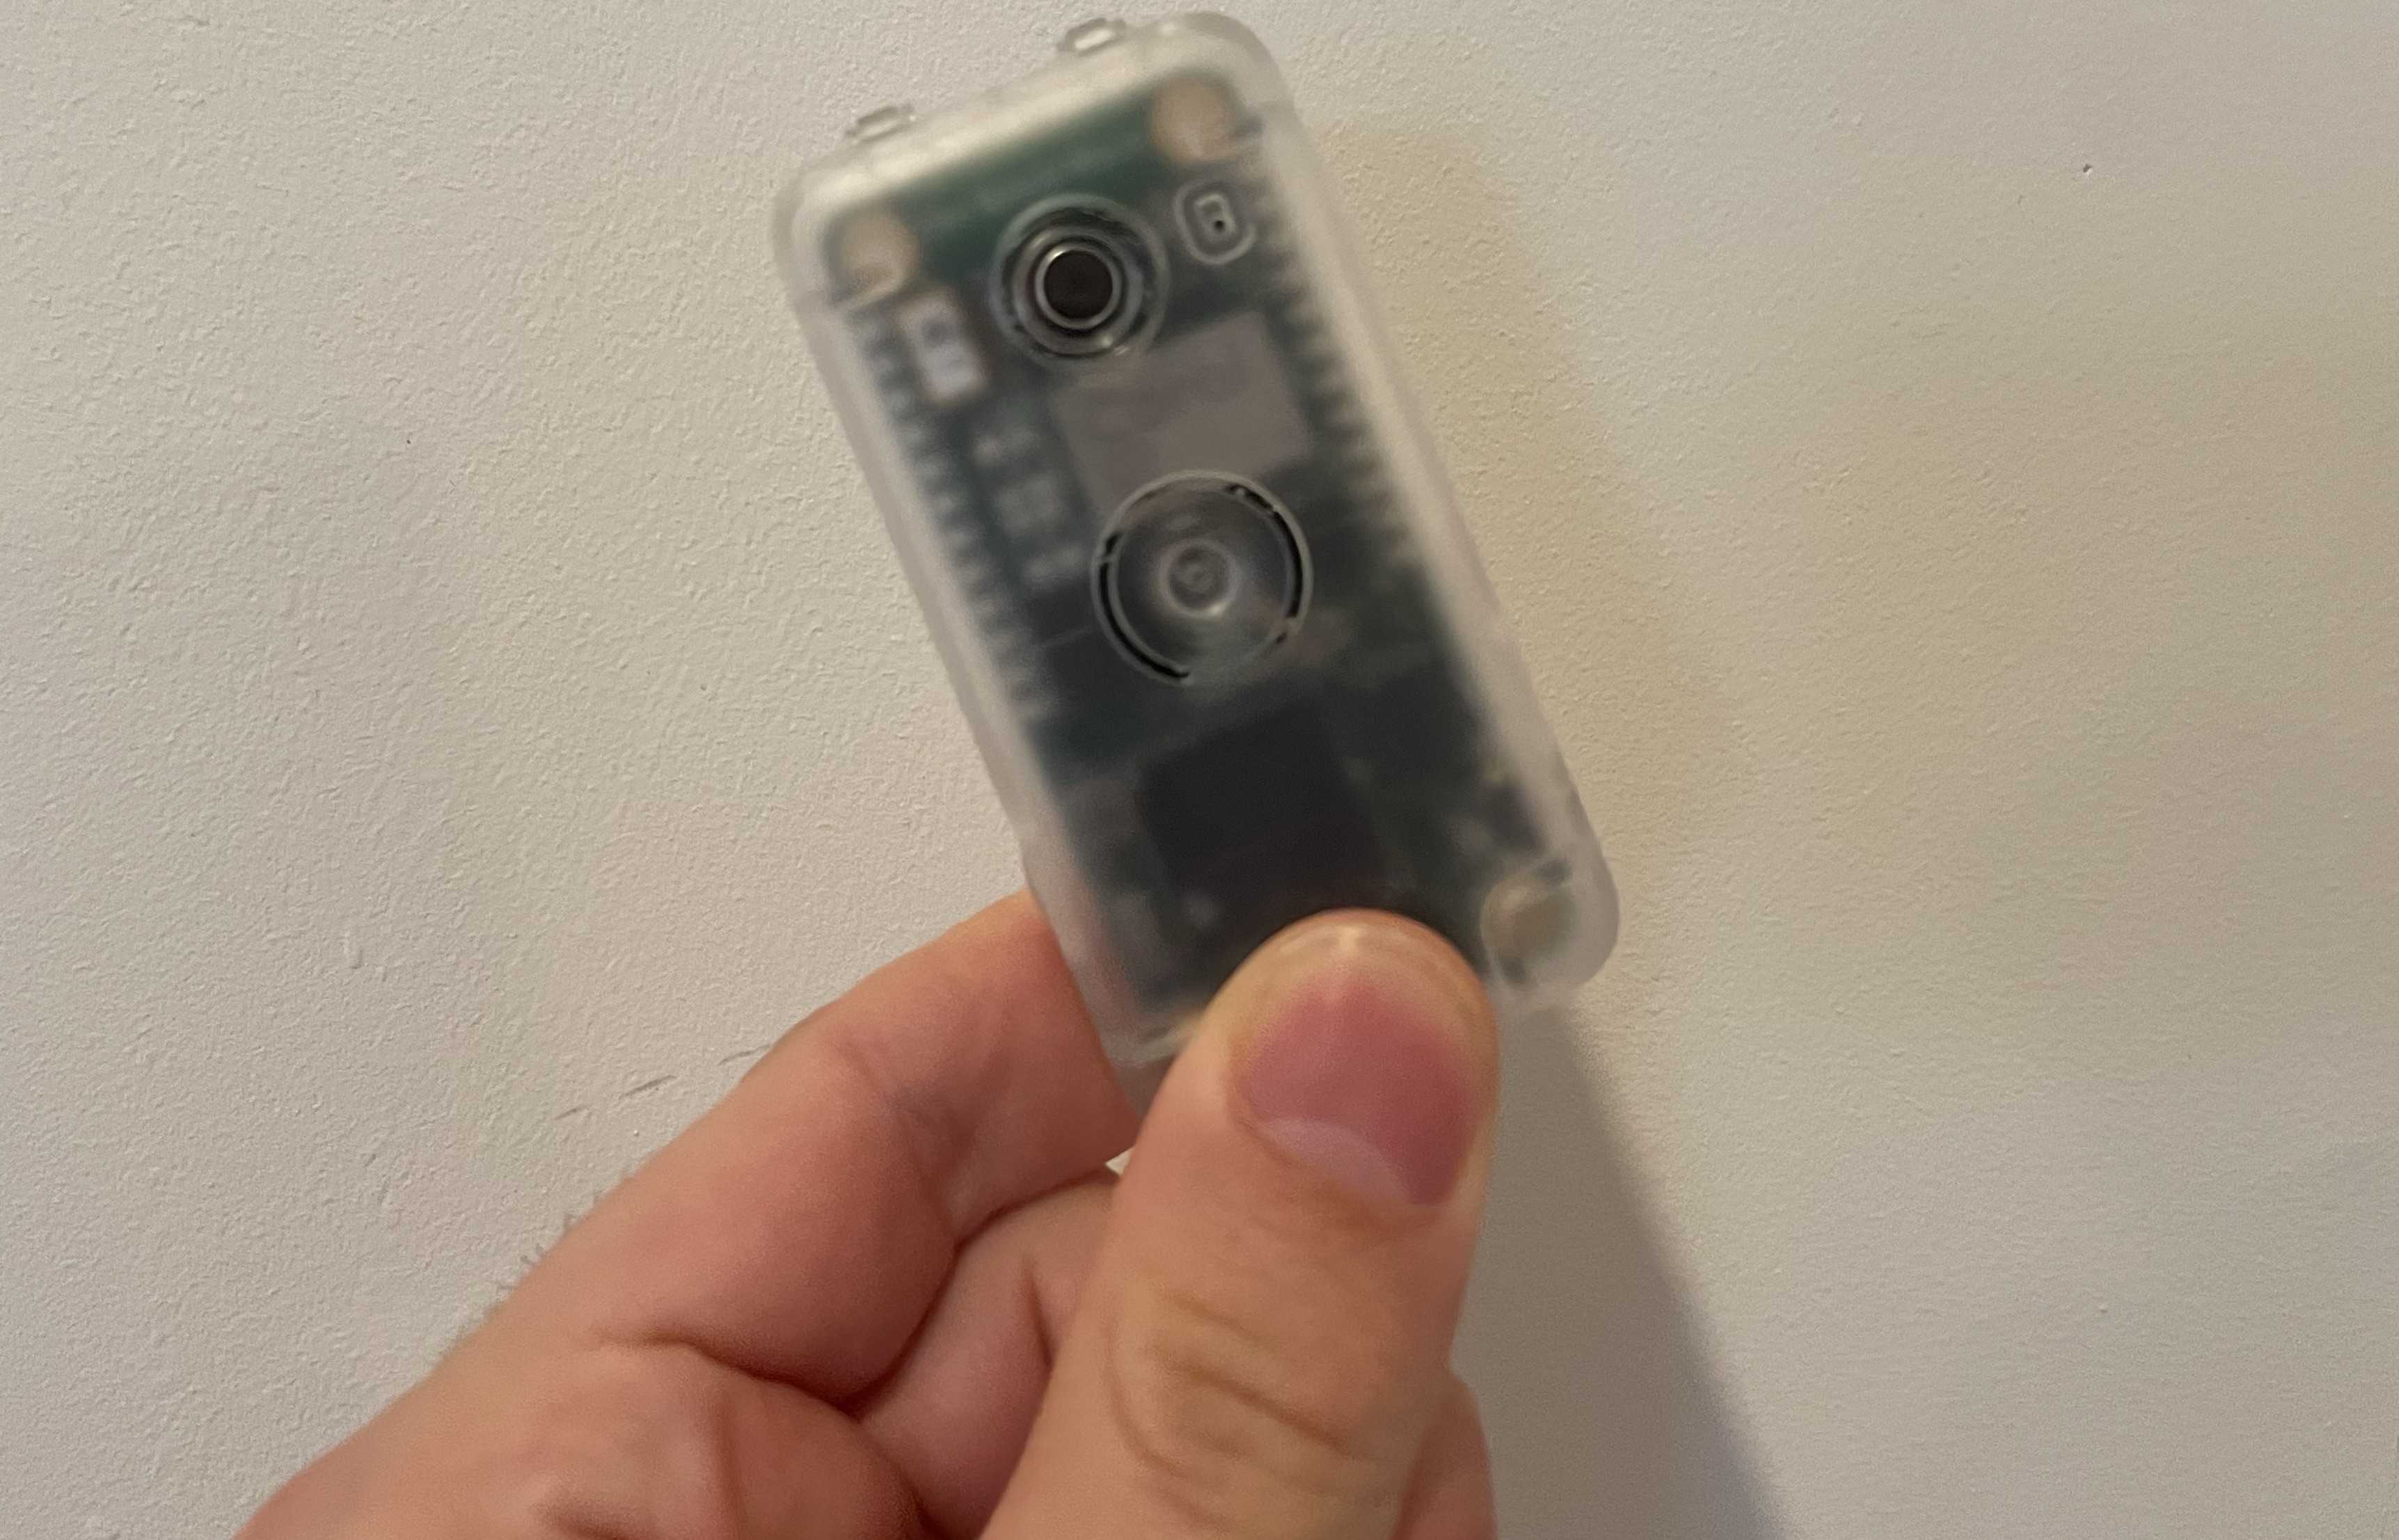
In the upcoming world of AI devices like Tab, Pin, Rewind, that are with us all the time, literally listening to everything we say, and know much about us as our closest friends - it is crucial to be able to own this setup, to own our data, to have this completely open source, managed by the user itself.
This is Adeus, the Open Source AI Wearble device - and in this repo, you will be guided on how to set up your own! From buying the hardware (~$100, and will be cheaper once we finish the Raspberry PI Zero version) to setting up the backend, the software, and start using your wearable!
p.s. any contribution would be amazing, whether you know how to code, and want to jump straight in to the codebase, a hardware person who can help out, or just looking to support this project financially (can literally be $10) - please reach out to me on X/Twitter @adamcohenhillel
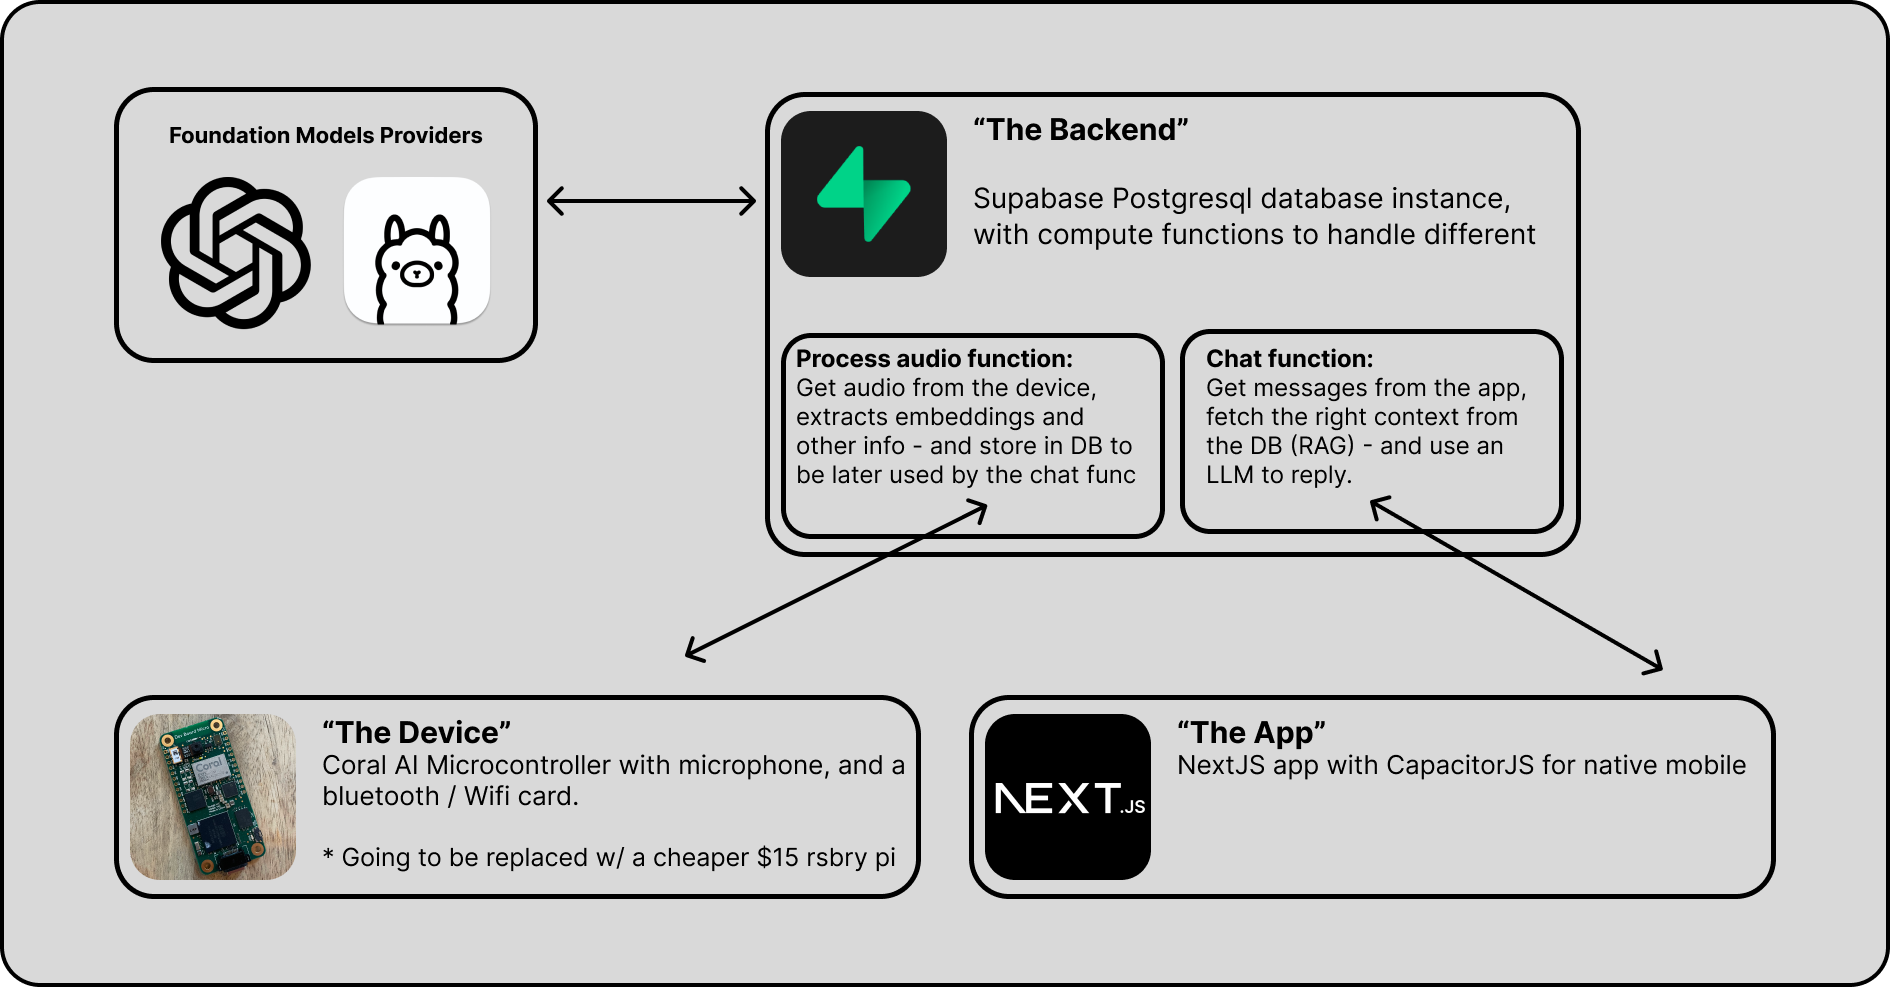
Adeus consists of 3 parts:
-
A mobile / web app: an interface that lets the user to interact with their assistant and data via chat.
-
Hardware device (Currently Coral AI, but soon a Rasberry-Pi Zero W worth $15): this will be the wearable that will record everything, and send it to the backend to be processed
-
Supabase : Our backend, and datavase, where we will process and store data, and interact with LLMs. Supabase is an open source Firebase alternative, a "backend-as-a-service" - which allows you to setup a Postgres database, Authentication, Edge Functions, Vector embeddings, and more - for free (at first) and at extreme ease!
- [!!] But more importantly - it is open source, and you can choose to deploy and manage your own Supabase instance - which us crucial for our mission: A truly open-source, personal AI.
This will look something like:
Note: I'm working on an easy setup.sh file that will do everything here more or less automatically, but it is still in the making
A'ight, let's get this working for you!
- Dev Board Micro ($80)
- Wireless/Bluetooth Add-on ($20)
- A case (Optional, 10$)
- Either an OpenAI key, or a Ollama server running somewhere you can reach via internet
Note: We are working on a version of this working with Raspberry PI Zero W, which will cost ~$20, stay tuned
First - cloning the repo:
git clone https://github.com/adamcohenhillel/ADeusWe will use Supabase as our database (with vector search, pgvector), authentication, and cloud functions for processing information.
-
Go to supabase.co, create your account if you don't have one already
-
Click "New Project", give it a name, and make sure to note the database password you are given

-
Once the project is created, you should get the
anon publicAPI Key, and theProject URL, copy them both, as we will need them in a bit.
-
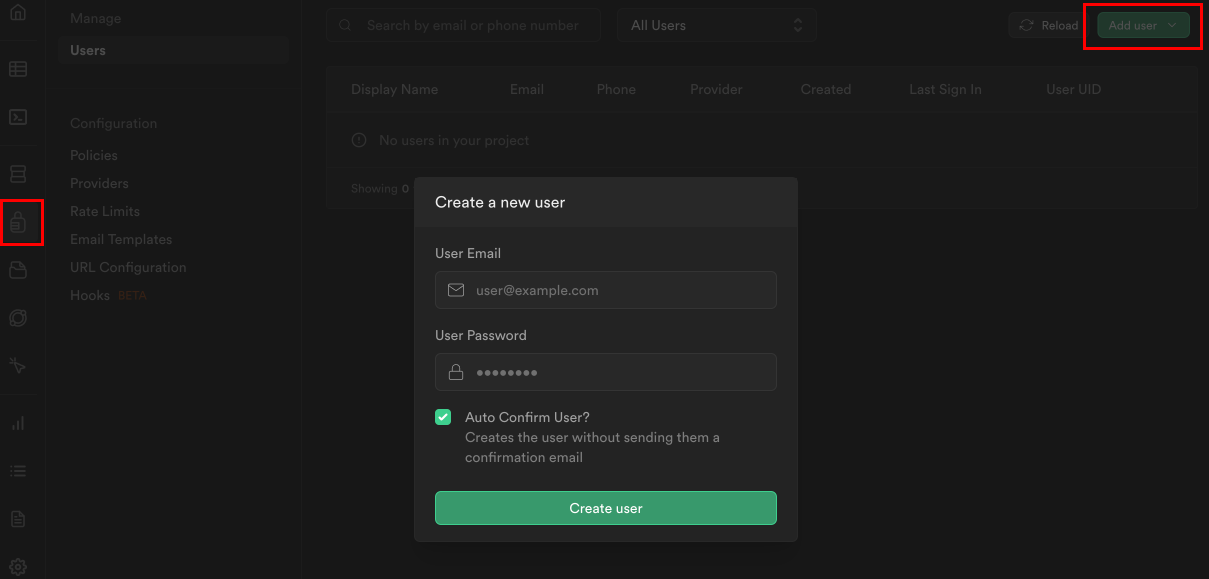
Now, go to the authentication tab on the right navbar (
 ), note that it can take a few moments for Supabase to finish setup the project
 -
There, you will see the "user management" UI. Click "Add User" -> "Add new user", fill an email and password, and make sure to check the "auto-confirm" option.
-
From there, go to the SQL Editor tab (
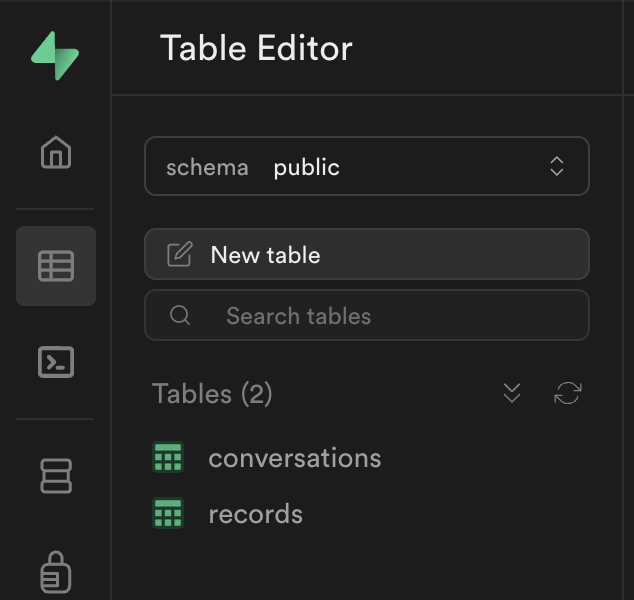
 ) and paste the schema.sql from this repo, and execute. This will enable all the relevant extensions (pgvector) and create the two tables:
-
By now, you should have 4 things:
email&passwordfor your supabase user, and theSupabase URLandAPI Anon Key. -
If so, go to your terminal, and cd to the supabase folder:
cd ./supabase -
Install Supabase and set up the CLI. You should follow thier guide here, but in short:
- run
brew install supabase/tap/supabaseto install the CLI (or check other options) - Install Docker Desktop on your computer (we won't use it, we just need docker dameon to run in the background for deploying supabase functions)
- run
-
Now when we have the CLI, we need to login with oour Supabase account, running
supabase login- this should pop up a browser window, which should prompt you through the auth -
And link our Supabase CLI to a specific project, our newly created one, by running
supabase link --project-ref <your-project-id>(you can check what the project id is from the Supabase web UI, or by runningsupabase projects list, and it will be under "reference id") - you can skip (enter) the database password, it's not needed. -
Now let's deploy our functions! (see guide for more details)
supabase functions deploy --no-verify-jwt(see issue re:security) -
Lasly - if you're planning to first use OpenAI as your Foundation model provider, then you'd need to also run the following command, to make sure the functions have everything they need to run properly:
supabase secrets set OPENAI_API_KEY=<your-openai-api-key>(Ollama setup guide is coming out soon)
If everything worked, we should now be able to start chatting with our personal AI via the app - so let's set that up!
Now that you have a Supabase instance that is up and running, you can technically start chatting with your assistant, it just won't have any personal data it.
To try it out, you can either use the deployed version of the web app here: adeusai.com - which will ask you to connect to your own Supabase instance (it is only a frontend client).
Or you can deploy the app yourself somewhere - the easiest is Vercel, or locally:
from the root folder:
cd ./appnpm install and run:
npm i
npm run dev
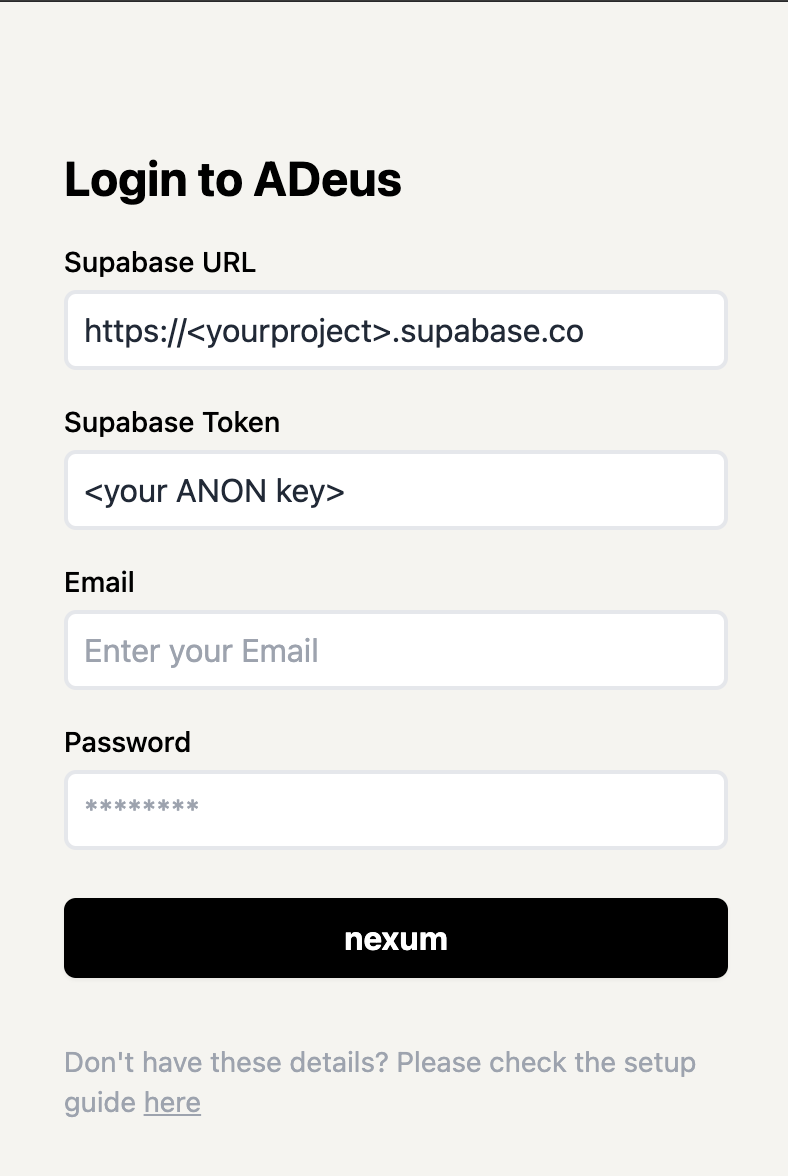
Once you have an app instance up and running, head to its address your-app-address.com/, and you should see the screen:
Enter the four required details, which you should've obtained in the Supabase setup: Supabase URL, Supabase Anon API Key, email and password.
And you should be able to start chatting!
Now - let's configure our hardware device, so we could start provide crucial context to our personal AI!
First, to learn more about the device, it is good to check out the official docs. Our project is using out-of-tree setup with a Wireless Add-on.
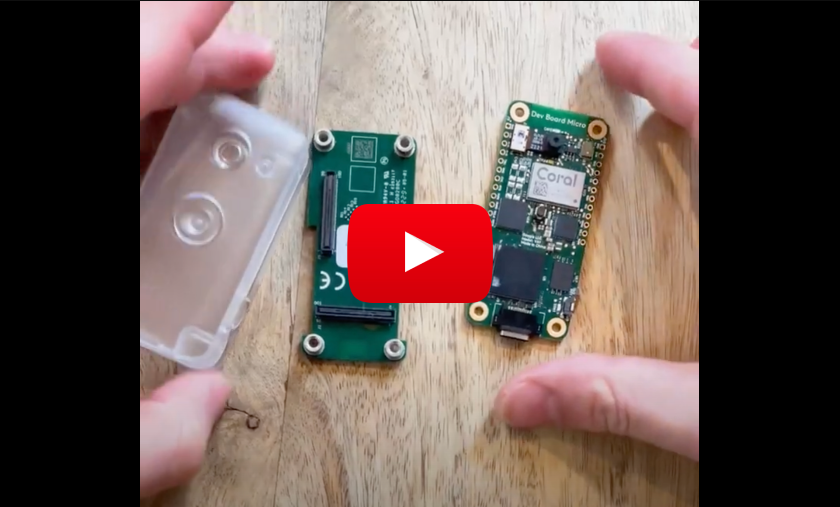
Here is quick video showing how to "connect" the hardware pieces together, and install the software:
In the root folder of this repository, run the following commands, (which will download the Coral AI Micro Dev dependencies to your computer - note that it might take a few minutes):
git submodule add https://github.com/google-coral/coralmicro devices/coralai/coralmicrogit submodule update --init --recursiveThen, when it is finished, CD to the devices/coralai folder:
cd devices/coralaiAnd run the setup script, which will make sure your computer can compile the code and pass it on to the device:
Note that if you're using Apple Silicon Mac, you might need to change the
coralmicro/scripts/requirements.txtfile, making the version of the packagehidapi==0.14.0(see issue)
bash coralmicro/setup.shexport SUPABASE_URL"<YOUR_SUPABASE_URL"Note: Security RLS best practices is still WOP! (see ticket #3)
Once the setup has finished running, you can connect your device via a USB-C, and run the following to create a build:
cmake -B out -S .make -C out -j4And then, flash it to your device with WIFI_NAME and WIFI_PASSWORD: (Bluetooth pairing is coming soon, see [ticket][adamcohenhillel#8])
python3 coralmicro/scripts/flashtool.py --build_dir out --elf_path out/coralmicro-app --wifi_ssid "<WIFI_NAME>" --wifi_psk "<WIFI_PASSWORD>"To debug the device, you can connect to it serial-y via the USB-C.
First, find the serial id On Linux:
ls /dev/ttyACM*On Mac:
ls /dev/cu.usbmodem*Then run the checkOutput.py script:
python3 checkOutput.py --device "/dev/cu.usbmodem101"(replace the /dev/cu.usbmodem* with whatever you got in the ls command)
Note: It might fail for the first few CURL requests, until it resolves the DNS
SOON! (cost $15, but need to solder a microphone)
How-to-Guide will be written here soon, but it should be fairly simple with Ollama serve and ngrok http 11434
brew install ngrok/ngrok/ngrok
As people will soon notice, my C++ skills are limited, as well as my React and hardware skills :P - any help would be amazing! Contributions are more than welcomed. This should be maintained by us, for us.
Build it for yourself, and build it for others. This can become the Linux of the OS, the Android of the mobile. It is raw, but we need to start from somewhere!
-
Whisper tends to generate YouTube-like text when the audio is unclear, so you can get noise data in the database like "Thank you for watching", and "See you in the next video," even though it has nothing to do with the audio (ticket #7)
-
Currently it is using Wi-Fi, which makes it not-so mobile. An alternative approach would either be: (ticket #8)
- Bluetooth, pairing with the mobile device
- Sdd a 4G card that will allow it to be completly independent
-
Sometimes when loading from scratch, it takes some time (2-3 curl requests) until it resolves the DNS of the Supabase instance (ticket #8)
- The RAG (Retrieval-Augmented Generation) can be extremely improved:
- Improve security - currently I didn't spent too much time making the Supabase RLS really work (for writing data) (ticket #3)
- Run on a Rasberry Pi Pico / Zero, as it is much much cheaper, and should do the work too (ticket #4)
- Currently the setup is without battery, need to find the easiest way to add this as part of the setup (ticket #5)
- Improve user setup?
- An easy setup script / deploy my own Ollama server to replace OpenAI ticket #6
- Add How-to for Ollama setup (ticket #9)
A lot of companies and organizations are now after building the "Personal AI" - the one that will be a companion for individuals. This will be a paradigm shift of the way we all experince the digital (and physical) realms. Interacting with our AI that knows a lot about us, and help us navigate the world.
The problem with all these initiatives, is that they don't really provide you with your own personal AI. It’s not private, you don’t own it. As long as you don’t have a way to opt out, and take your so-called personal AI elsewhere, it’s not yours, you merely renting it from somewhere.
Personal AI should be like a personal computer, connected to the internet.
The pioneers of the personal computers, the internet, they all knew it - and that what made it great, a period of possibilities. But since, as we all know, things had drifted. You don’t own things, merely renting them. You can’t take it elsewhere - and therefore the free-market forces of capitalism can’t be easily integrated into the digital realm.
Check out the Intro video:
