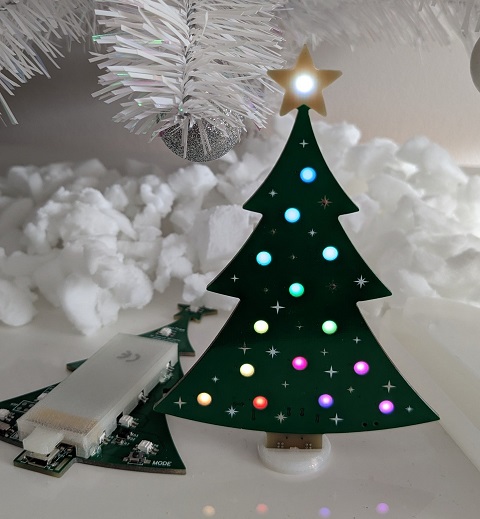
- Christmas-Tree style PCB
- 15 NeoPixel RGB LEDs (SK6812) shining through the PCB
- Powered by rechargeable LiPo Battery
- Charged via MicroUSB (2h full charge)
- Custom programming via MicroUSB
- Based on ATTiny85 microcontroller
- Mode/Animation selection via Button
A short press on the MODE button cycles the available modes. When you hold down the MODE button, the current animations slows down or changes its style each time the star flashes.
Install VSCode and open the downloaded/cloned project folder in VScode.
VSCode should ask you to install the PlatformIO extension - do so.
You may need to close VSCode and open the folder once again in VSCode for PlatformIO to recognize the project.
Open src/main.c and look for "Build", "Upload", "Home" buttons on the bottom bar of VSCode.
Download Zadig from here or github releases.
Zadig is used to install the required USB driver. See the documentation for more details and screenshots.
Assign the libusb-win32 driver (not winusb).
To do so, the NeoTree needs to be pre-flashed with the USB bootloader (see usb-bootloader subfolder), turned off, connected via MicroUSB cable and then turned on. It should appear in Zadig. Select "Options - List All Devices" if it doesn't. Select libusb-win32 and click install.
Open the project folder in VSCode and open src/main.c. Make sure to select env:usb in the bottom bar of VSCode as PlatformIO environment.
Connect the NeoTree via USB but keep it turned off.
Then hit upload ("->" Button) and follow the console output.
When it says Please plug in the device (will time out in 60 seconds) ... turn on the NeoTree. It should immediately upload the new code.
