微信跳一跳技术讨论QQ群
- 148698890
Windows一键开始请移步release
用户常见问题请先查询FAQ
用JAVA自动控制手机玩跳一跳
- JAVA,最低版本为7.0,官网下载
- 安卓手机,目前已适配分辨率
- 1600x2560
- 1440x2560
- 1080x1920
- 720x1280
有JAVA开发工具的同学可以直接运行java代码,便于代码调试,下面主要介绍运行已经打包好的jar包的方法
-
手机打开USB调试,并连接电脑
- 打开USB调试方法,进入
设置,找到开发者选项,打开并勾选USB调试; - 如果没有
开发者选项,进入关于手机,连续点击版本号7次,即可开启开发者选项。
- 打开USB调试方法,进入
-
通过下面的命令,运行Android.jar
java -jar Android.jar -
根据手机分辨率选择跳跃系数,目前已适配机型:
- 1600x2560机型推荐0.92
- 1440x2560机型推荐1.039
- 1080x1920机型推荐1.392
- 720x1280机型推荐2.078
其他分辨率请自己微调。
-
通过adb命令控制手机截图,并取回到本地
adb shell screencap -p /sdcard/screen.png adb pull /sdcard/screen.png . -
图片分析
-
通过adb命令,给手机模拟按压事件
adb shell input swipe x y x y time其中
x和y是屏幕坐标,time是触摸时间,单位ms。
.
├── Samples             # 一些示例图片
├── Android             # 使用Android手机的相关代码和jar包
│   ├── src             # JAVA源代码目录
│   └── build           # Android.jar包所在目录
└── README.md
这里将针对一些关键算法的代码进行解释
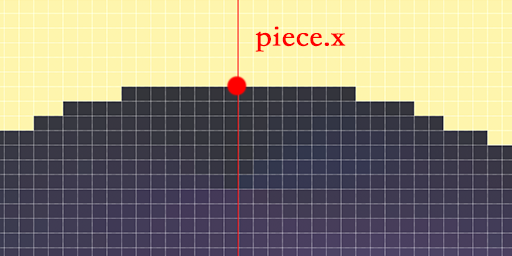
把截图放大,可以看到棋子顶部像素连成一条横线,那么我们通过颜色匹配,找到这一条线的始末位置,取中间位置,就得到了棋子的x坐标。
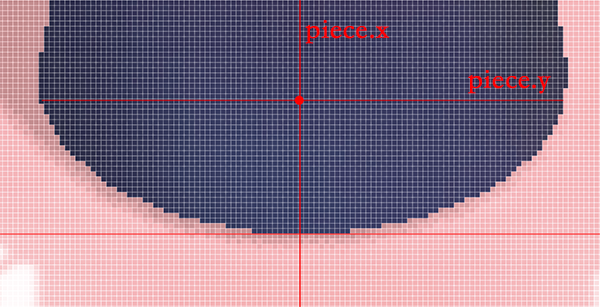
棋子的底部也是一条横线,用颜色匹配,我们检测到相似颜色的最大y坐标,就是棋子底部了,不过考虑到棋子底部是个圆盘,我们把棋子的y坐标再往上提一些。
这样我们就得到了棋子的xy坐标,下面是相关代码:
/* 计算棋子位置 */
Pixel piece = new Pixel();
for (int i = TOP_BORDER; i < screenHeight - BOTTOM_BORDER; i++) {
    int startX = 0;
    int endX = 0;
    for (int j = LEFT_BORDER; j < screenWidth - RIGHT_BORDER; j++) {
        int red = Color.red(pixels[i][j].color);
        int green = Color.green(pixels[i][j].color);
        int blue = Color.blue(pixels[i][j].color);
        if (50 < red && red < 55
                && 50 < green && green < 55
                && 55 < blue && blue < 65) {//棋子顶部颜色
            //如果侦测到棋子相似颜色,记录下开始点
            if (startX == 0) {
                startX = j;
                endX = 0;
            }
        } else if (endX == 0) {
            //记录下结束点
            endX = j;

            if (endX - startX < PIECE_TOP_PIXELS) {
                //规避井盖的BUG,像素点不够长,则重新计算
                startX = 0;
                endX = 0;
            }
        }
        if (50 < red && red < 60
                && 55 < green && green < 65
                && 95 < blue && blue < 105) {//棋子底部的颜色
            //最后探测到的颜色就是棋子的底部像素
            piece.y = i;
        }
    }
    if (startX != 0 && piece.x == 0) {
        piece.x = (startX + endX) / 2;
    }
}
//棋子纵坐标从底部边缘调整到底部中心
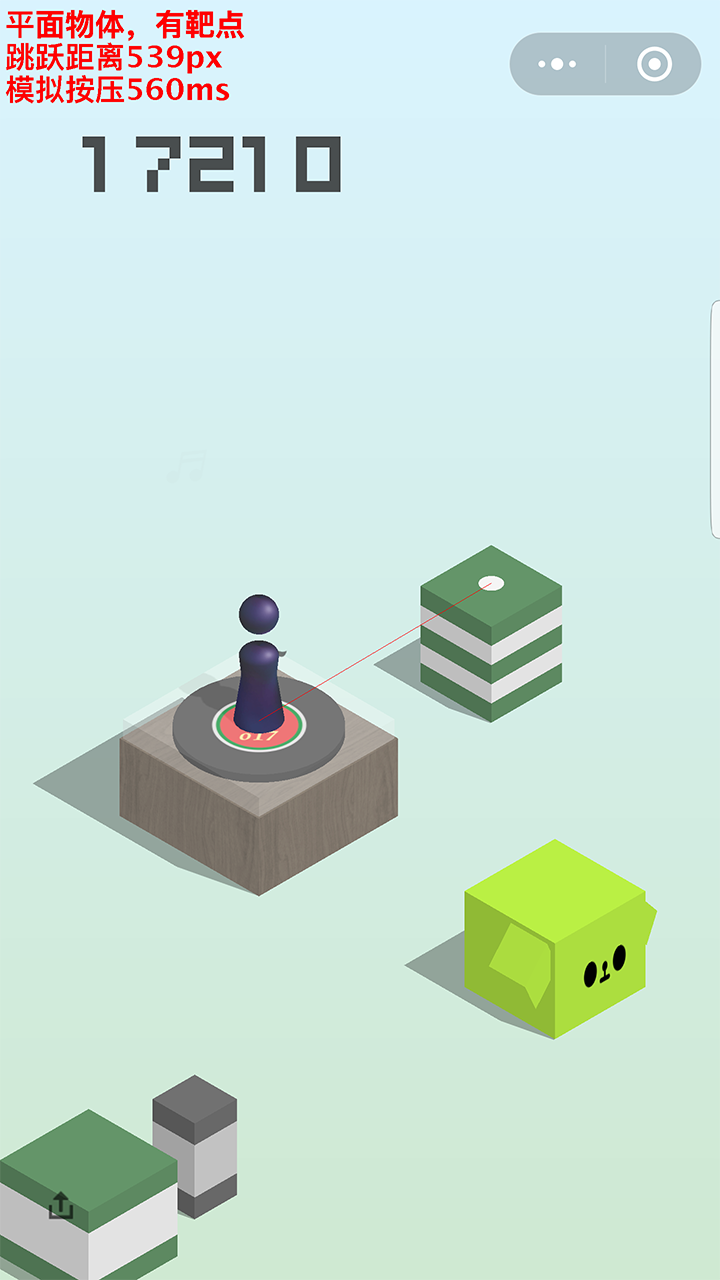
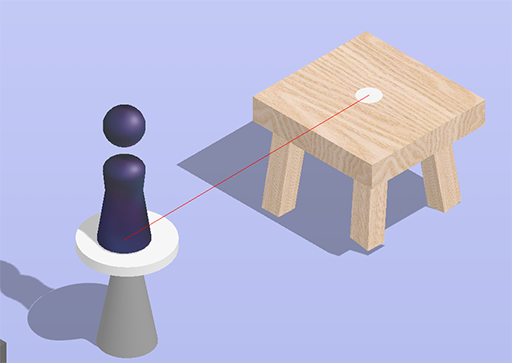
piece.y -= PIECE_BOTTOM_CENTER_SHIFT;所谓靶点,就是目标物体中心的那个小圆点,颜色值为0xf5f5f5。
那么我们只需要寻找颜色值为0xf5f5f5的色块就可以了,为了规避其他物体相近颜色干扰,我们可以限制色块的大小,正确大小的色块才是靶点。
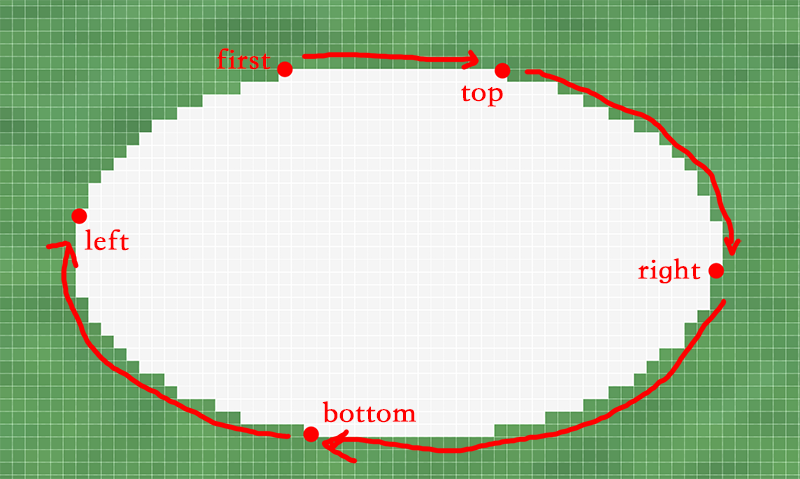
但是如何计算色块的大小呢,色块最顶端到最底端y坐标的差值我们作为色块的高度,同理,最左侧到最右侧x坐标的差值作为宽度,我们只需要查找这四个顶点的坐标就可以了。
本来打算用凸包的Graham扫描算法,后来发现色块已经是凸包了,且边缘像素是连续的,那么我们按照一定顺序,遍历边缘像素,就可以在O(n^-2)的时间复杂度里,得到色块的顶点坐标了。
我们从第一个像素点开始,寻找的顺序如图所示:
    /**
     * 寻找色块顶点像素
     */
    public static final Pixel[] findVertexs(Pixel[][] pixels, Pixel firstPixcel) {
        Pixel[] vertexs = new Pixel[4];
        Pixel topPixel = firstPixcel;
        Pixel leftPixel = firstPixcel;
        Pixel rightPixel = firstPixcel;
        Pixel bottomPixel = firstPixcel;
        Pixel currentPixcel = firstPixcel;
        //先把坐标置于左上角
        while (checkBorder(pixels, currentPixcel)//判断是否超出图像边缘
                && Color.compareColor(pixels[currentPixcel.y - 1][currentPixcel.x], firstPixcel)) {//判断是否是相同颜色
            currentPixcel = pixels[currentPixcel.y - 1][currentPixcel.x];
        }
        while (checkBorder(pixels, currentPixcel)
                && Color.compareColor(pixels[currentPixcel.y][currentPixcel.x - 1], firstPixcel)) {
            currentPixcel = pixels[currentPixcel.y][currentPixcel.x - 1];
        }
        //寻找上顶点像素
        while (checkBorder(pixels, currentPixcel)) {
            if (Color.compareColor(pixels[currentPixcel.y - 1][currentPixcel.x], firstPixcel)) {
                currentPixcel = pixels[currentPixcel.y - 1][currentPixcel.x];
            } else if (Color.compareColor(pixels[currentPixcel.y][currentPixcel.x + 1], firstPixcel)) {
                currentPixcel = pixels[currentPixcel.y][currentPixcel.x + 1];
            } else {
                topPixel = findCenterPixcelHorizontal(pixels, currentPixcel);
                break;
            }
        }
        //寻找右顶点像素
        while (checkBorder(pixels, currentPixcel)) {
            if (Color.compareColor(pixels[currentPixcel.y][currentPixcel.x + 1], firstPixcel)) {
                currentPixcel = pixels[currentPixcel.y][currentPixcel.x + 1];
            } else if (Color.compareColor(pixels[currentPixcel.y + 1][currentPixcel.x], firstPixcel)) {
                currentPixcel = pixels[currentPixcel.y + 1][currentPixcel.x];
            } else {
                rightPixel = findCenterPixcelVertial(pixels, currentPixcel);
                break;
            }
        }
        //寻找下顶点像素
        while (checkBorder(pixels, currentPixcel)) {
            if (Color.compareColor(pixels[currentPixcel.y + 1][currentPixcel.x], firstPixcel)) {
                currentPixcel = pixels[currentPixcel.y + 1][currentPixcel.x];
            } else if (Color.compareColor(pixels[currentPixcel.y][currentPixcel.x - 1], firstPixcel)) {
                currentPixcel = pixels[currentPixcel.y][currentPixcel.x - 1];
            } else {
                bottomPixel = findCenterPixcelHorizontal(pixels, currentPixcel);
                break;
            }
        }
        //寻找左顶点像素
        while (checkBorder(pixels, currentPixcel)) {
            if (Color.compareColor(pixels[currentPixcel.y][currentPixcel.x - 1], firstPixcel)) {
                currentPixcel = pixels[currentPixcel.y][currentPixcel.x - 1];
            } else if (Color.compareColor(pixels[currentPixcel.y - 1][currentPixcel.x], firstPixcel)) {
                currentPixcel = pixels[currentPixcel.y - 1][currentPixcel.x];
            } else {
                leftPixel = findCenterPixcelVertial(pixels, currentPixcel);
                break;
            }
        }
        vertexs[0] = leftPixel;
        vertexs[1] = topPixel;
        vertexs[2] = rightPixel;
        vertexs[3] = bottomPixel;
        return vertexs;
    }
得到了四个坐标点,我们就可以计算色块的中点了,也就是目标落点。
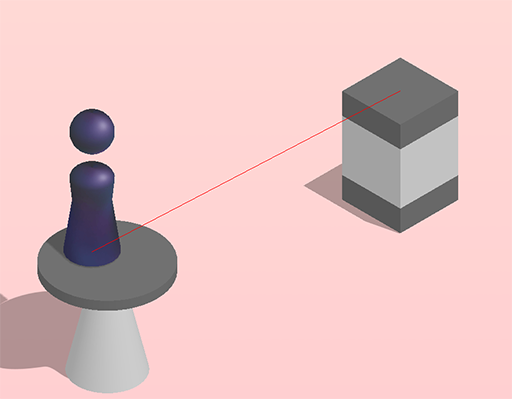
对于没有靶点,但是落点是规则平面的,也可以用类似算法。
对于没有靶点,又不是规则平面的,我们怎么计算落点呢,这时候就要用到斜率了。
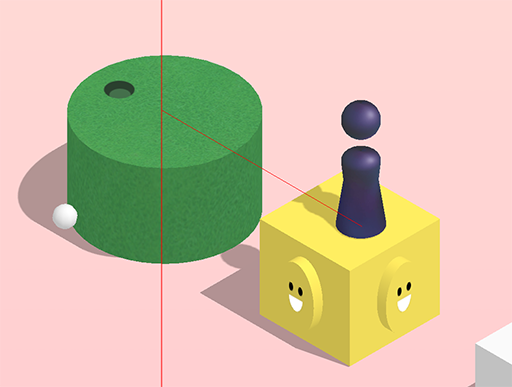
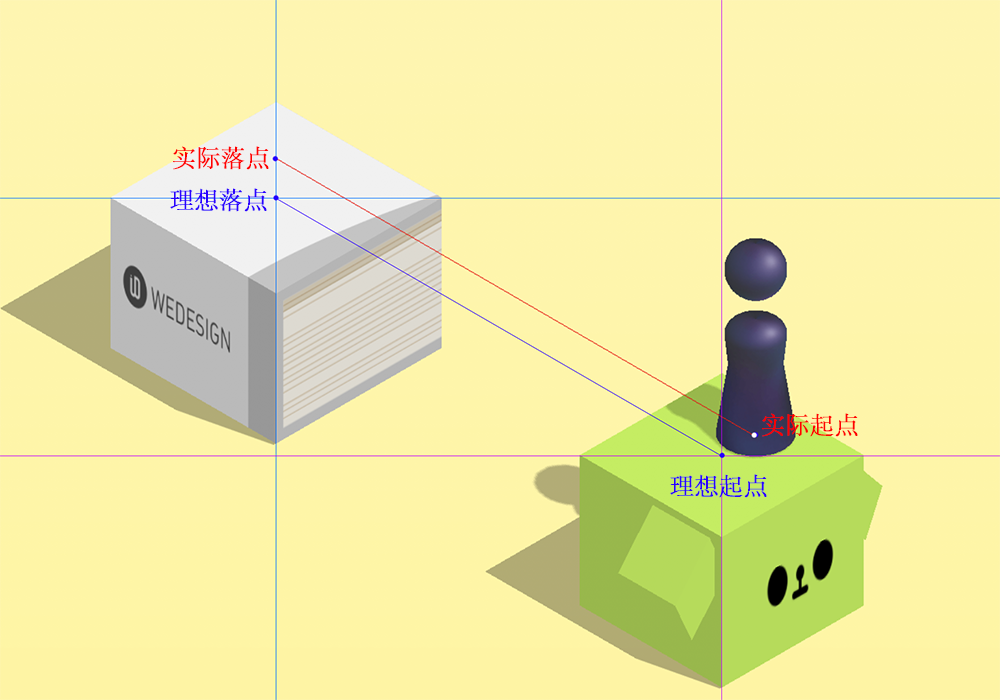
可以看得出来,每次左上角或右上角出现的物体,针对当前物体的方向都是一样的,也就是两个物体中心的连线,斜率是固定的。
基本所有的目标物体,最顶点像素中点的x坐标,都是在物体中间,我们至少先得到了目标物体x坐标了,记为des.x ,接下来要求des.y 。
如上图所示,计算过程如下:
    斜线的公式为 y=kx+b
    那么,在棋子坐标上有 piece.y=k*piece.x+b
    在目标落点坐标上有 des.y=k*des.x+b
    代入得到 des.y=k*(des.x-piece.x)+piece.y
然而这种算法还是有偏差的。
可以看到,同样的斜率,如果棋子的位置有偏差,计算出来最终落点还是会有偏差的。
代码解析就先讲这么多,希望有大神可以提出更好的解决方案。
- 连续的落到物体中心位置,是有分数加成的,最多跳一次可以得几十分
- 井盖、商店、唱片、魔方,多停留一会,有音乐响起后也是有分数加成的
那么看一下程序员的朋友圈有多残酷吧
