OpenVINO - Open Model Zoo toolkit
This is a wrapper library for Open Model Zoo (OMZ) for Intel distribution of OpenVINO toolkit. User can use OMZ models without having deep knowledge of OpenVINO or deep-learning. This library hides all the mess behind the scene.
User can utilize OpenVINO performance and OMZ algorithms (models) by simple funciton calls.
これはIntel distribution of OpenVINO toolkit用のモデルライブラリ、Open Model Zoo (OMZ)を簡単に利用できるようにするためのラッパーライブラリです。ユーザーはディープラーニングやOpenVINOの知識が無くてもディープラーニングを使った処理を実行可能になります。
ユーザーは普通に関数を呼び出すだけでOpenVINOのパフォーマンスとOMZのアルゴリズムを利用可能です。
- This library uses synchrounous infernence API. OpenVINO can achieve much higher throughput if you use asynchronous inference API natively.
- OpenVINO setting is configurable through setConfig() API. User could achieve much higher performance if the user set the appropriate configuration for the system. This libray doesn't provide interface for it but still the user can use setConfig() API to setup OpenVINO for higher throughput.
- このライブラリではOpenVINOの同期推論APIしか使用していません。OpenVINOは非同期推論APIを活用することでもっと高いスループットを発揮することが可能です(多くの場合)。
- このライブラリではサポートしていませんが、setConfig() APIで使用している機材に合わせたセッティングをすることでもっと高い性能を出すことが可能な場合があります。このライブラリを使用していてもsetConfig() APIを使用することは可能です。
This toolkit (library) provides following functions or capabilities:
- Automatic OMZ model downloading - 自動モデルダウンロード
The library will download required OMZ IR models automatically if it's not existing on the computer. - Preprocess and postprocess - 推論プリ/ポストプロセス
The library does required preprocess and postprocess for inferencing. User just need to provide an OpenCV image and get the parsed inference result.
Intel OpenVINO toolkit 2021.3.
Supported models are defined in model_def.yml.
Check those files for details.
The default model for a task is defined in default_models.yml.
- image_classification
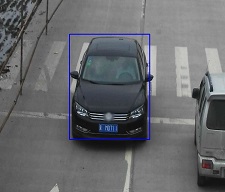
- object_detection
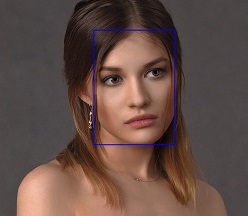
- face_detection
- age_gender
- head_pose
- emotion
- face_landmarks
- text_detect
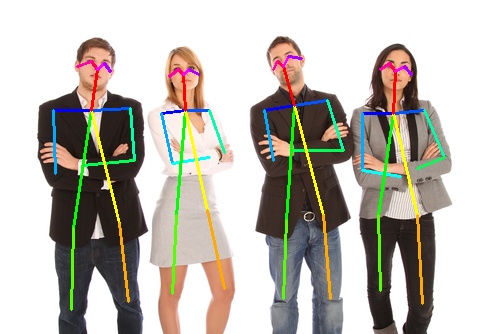
- human_pose (require to build the pose_extractor C++ module to enable this feature)
- Deploy required files to your directory
open_model_zoo_toolkit.pydefault_models.ymlmodel_def.ymllabels_coco.txtlabels_imagenet.txtlabels_voc.txt
** If you want to use human_pose_estimation **CmakeLists.txtbuild-poseextractor.batorbuild-poseextractor.sh
Please follow the instruction inhow to build pose_extractorsection below to build thepose_extractorC++ module.
import cv2
import open_model_zoo_toolkit as omztk

omz = omztk.openvino_omz()
model = omz.imageClassifier()
#model.setDevice('MYRIAD')  # You can change inference device. Default='CPU'

img = cv2.imread('resources/car.png')
res = model.run(img)
print(res)
# Example: res = [[479, 'car wheel', 0.5016654], [817, 'sports car, sport car', 0.31316656], [436, 'beach wagon, station wagon, wagon, estate car, beach waggon, station waggon, waggon', 0.06171181]]
# res spec : [ [ classId, classLabel, probability ], ...]import cv2
import open_model_zoo_toolkit as omztk
omz = omztk.openvino_omz()
model = omz.objectDetector() # Default model will be used
#model = omz.objectDetector('ssd_mobilenet_v2_coco') # Also, you can select a OMZ model from 'model_def.yml' and use it
img = cv2.imread('resources/car_1.bmp')
res = model.run(img)
print(res)
# Example: res = [[1, 'person', 0.9291767, (42, 2), (759, 714)]]
# res spec : [ [ classId, classLabel, probability, upper-right, bottom-left], ...]
for obj in res:
cv2.rectangle(img, obj[3], obj[4], color=(255,0,0), thickness=2)
cv2.imshow('result', img)
cv2.waitKey(3 * 1000) # 3 secondsimport cv2
import numpy as np
import open_model_zoo_toolkit as omztk
omz = omztk.openvino_omz()
model = omz.textDetector()
img = cv2.imread('resources/textdet.jpg')
rects, imgs = model.run(img)
print(rects)
# res spec : rects = [ ((x0,y0), (x1,y1), angle), ... ] # == list of cv2.RotatedRect()
# imgs = cropped OpenCV images of detected texts
for rect in rects:
box = cv2.boxPoints(rect).astype(np.int32) # Obtain rotated rectangle
cv2.polylines(img, [box], True, (0,255,0), 4) # Draw bounding box
cv2.imshow('text', img)
key = cv2.waitKey(3 * 1000) # 3 secNote: Human pose estimation requires a Python module to decode the inference result (pose extraction). The module comes with OpenVINO human_pose_estimation_demo_3d Python demo program and you need to build the pose extraction module by your self (pose_extractor.pyd). Run build_demo script with "-DENABLE_PYTHON=YES" option to build the module.
import cv2
import open_model_zoo_toolkit as omztk

omz = omztk.openvino_omz()
model = omz.humanPoseEstimator()

img = cv2.imread('resources/people.jpg')
res = model.run(img)
print(res)
# res spec : res = [ person0, person1, ... ]
#            person = [ point * 18, + score ]    # 3*18+1 = 55 elements
#            point  = scaled_x, scaled_y, conf

omztk.renderPeople(img, res)
cv2.imshow('result', img)
cv2.waitKey(3 * 1000) # 3 secimport cv2
import open_model_zoo_toolkit as omztk
omz = omztk.openvino_omz()
facedet = omz.faceDetector()
agegen = omz.ageGenderEstimator()
hp = omz.headPoseEstimator()
emo = omz.emotionEstimator()
lm = omz.faceLandmarksEstimator()
img = cv2.imread('resources/girl.jpg')
detected_faces = facedet.run(img)
for face in detected_faces:
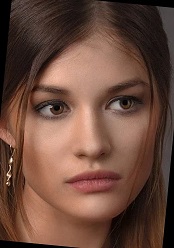
face_img = omztk.ocv_crop(img, face[3], face[4], scale=1.3) # Crop detected face (x1.3 wider)
landmarks = lm.run(face_img) # Estimate facial landmark points
# Example: landmarks = [(112, 218), (245, 192), (185, 281), (138, 369), (254, 343)]
face_lmk_img = face_img.copy() # Copy cropped face image to draw markers on it
for lmk in landmarks:
cv2.drawMarker(face_lmk_img, lmk, (255,0,0), markerType=cv2.MARKER_TILTED_CROSS, thickness=4) # Draw markers on landmarks
cv2.imshow('cropped face with landmarks', face_lmk_img)
cv2.waitKey(2 * 1000) # 2 sec # Display cropped face image with landmarks
yaw, pitch, roll = hp.run(face_img) # Estimate head pose (=head rotation)
# Example: yaw, pitch, roll = -2.6668947, 22.881355, -5.5514703
face_rot_img = omztk.ocv_rotate(face_img, roll) # Correct roll to be upright the face
age, gender, prob = agegen.run(face_rot_img) # Estimate age and gender
print(age,gender,prob)
# Example: age, gender, prob = 23, female, 0.8204694
emotion = emo.run(face_rot_img) # Estimate emotion
# Example: emotion = 'smile'
print(age, gender, emotion, landmarks)
cv2.imshow('cropped and rotated face', face_rot_img)
cv2.waitKey(2 * 1000) # 2 sec
cv2.rectangle(img, face[3], face[4], (255,0,0), 2)
cv2.imshow('result', img)
cv2.waitKey(3 * 1000) # 3 sec- Prerequisites
- Microsoft Visual Studio (w/C++ build package)
- Open Microsoft Visual Studio command prompt (
Developer Command Prompt for VSxxxx) - Run
build-poseextractor.bat - You'll have
pose_extractor.pydin the current directory.
- Open a terminal
- Run
build-poseextractor.sh
You might need to give permission to run ->chmod +x build-poseextractor.sh - You'll have
pose_extractor.soin the current directory.


