watsonx-chatbot-lab.github.io
A template to embed the watsonx assistant chatbot using GitHub pages
The web chat of the watsonx assistant provides an easy-to-use chatbot interface that you can
add to your website without writing any code. Here is how you can add the web chat of your
watsonx assistant into a static web page and host it using GitHub Pages.
-
Frist thing first, use the
Forkbutton on the upper right corner of this repository to fork this repository into your namespace. On theCreate a new forkpage, you can just click theCreate forkbutton. -
After you fork the repository, you will be redirected to the forked version under your namespace. Click the
Settingson the very right of the menu on top of the repository name. -
On the
Settingspage, click on thePagesin the navigation menu on the left-hand side. -
In the
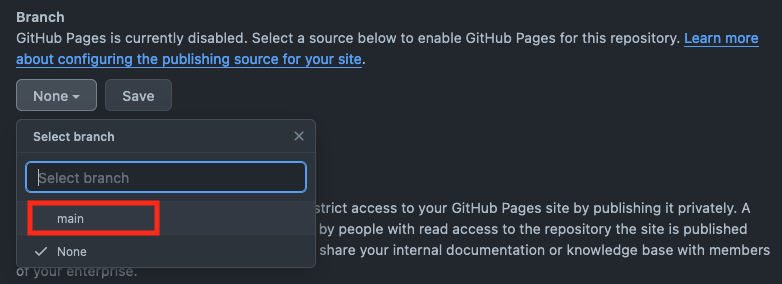
Branchsection, select themainbranch from the drop-down list and click theSavebutton. -
Open your watsonx assistant editor and get the code snippet by following this instructions
-
Go back to the repository you forked and show the file list view by clicking the
Codein the menu bar. -
Click on the gear icon in the
Aboutsection -
In the
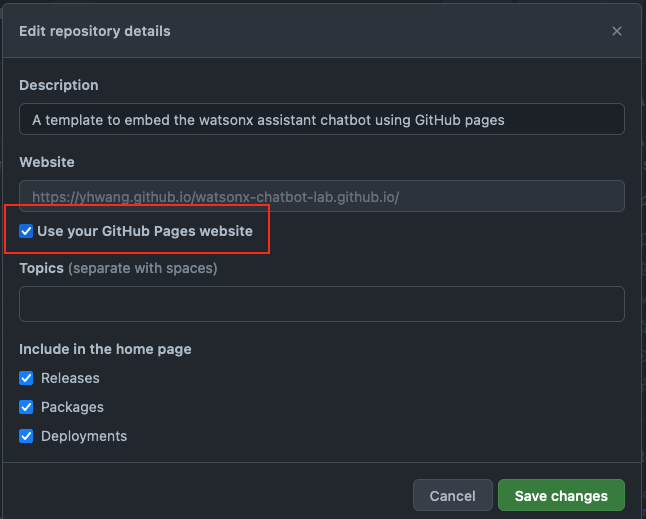
Websitesection, check theUse your GitHub Pages websitecheckbox and clickSave Changesbutton to save the change.Now you GitHub Pages URL will show up in the
Aboutsection. -
Click the
index.htmlfile, and you will see the HTML content of the sample file. -
Directly edit the file by clicking the
Pencilicon on the upper-right corner of the HTML content.
-
You should see a comment saying:
<!-- Replace the code below with the web chat code snippet from your watsonx assistant -->Replace the code below that comment with your web chat code snippet and click theCommit changes...button on the upper-right corner. In the pop-up widget, edit the commit message you see fit and click theCommit changesbutton to save the change. -
Click the
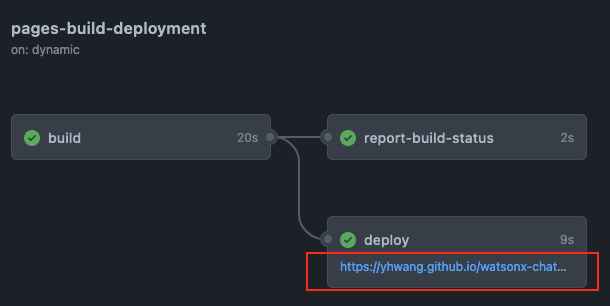
Actionson the top menu bar, you should see a workflow namedpage build and deploymentis running or finished. Click it to show the workflow details. -
Click on the URL link on the
deploynode. It will redirect you to the index.html page with the embedded web chat!


