Ubuntu16.04 安裝依賴套件:
sudo apt-get install python3-setuptools python3-dev python3-h5py python3-matplotlib python3-psutil
Python3 安裝依賴套件(建議用virtualenv):
pip3 install -r requirements.txt
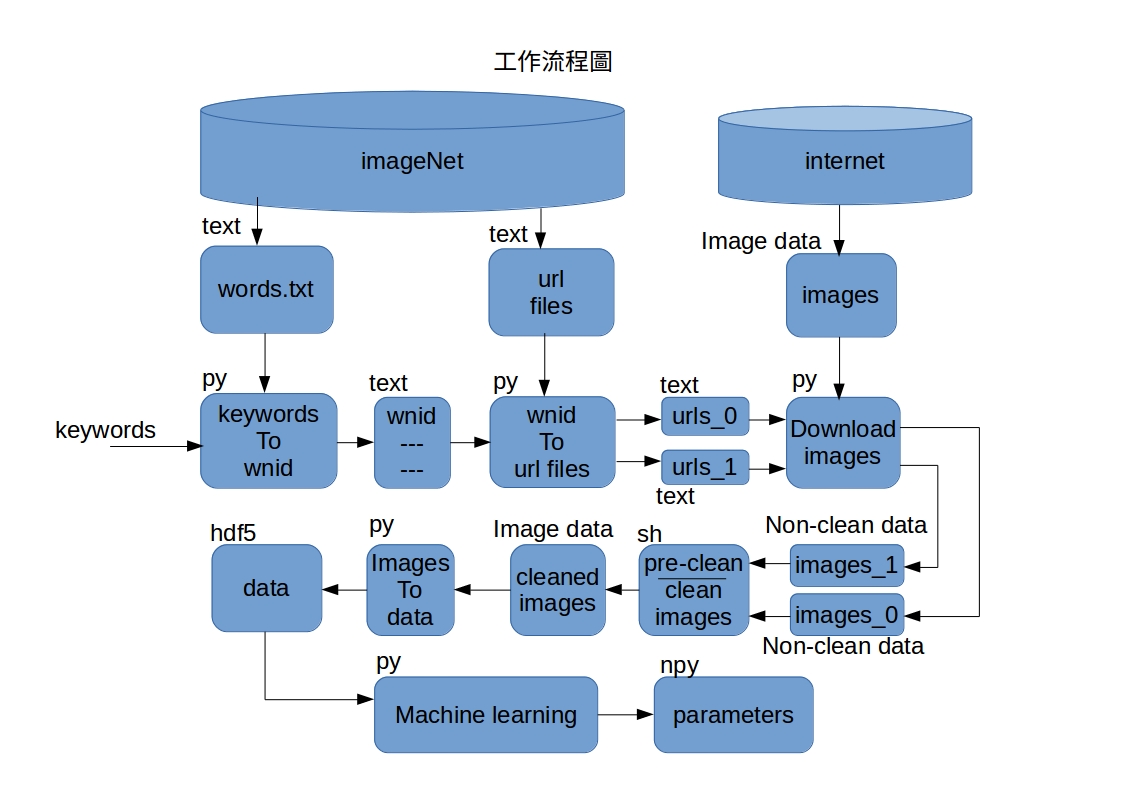
- keyword2wnid.py # 產生專案目錄以及wnid 列表檔
- wnid2url.py # 利用wnid 列表檔,產生url 列表檔
- multithreads_download_from_url_files.py # 利用url 列表檔,下載圖片資料
- update_url.py # 清理掉已經下載好的url 列表 (可選)
- ./pre-clean_images.sh # 圖片清理
- ./clean_images.sh # 圖片清理
- images2hdf5.py # 講圖片檔轉成一個資料檔
- dnn_2_layers_Training.py # 一層的深度學習
- dnn_test.ipynb # 訓練權重測試
Note:
- 分辨 miss image是利用 command line的 identify指令, 對人工辨識的 miss image算出一組 signature hash code, 凡是圖片有相同的 signature hash,則視為 miss images。
- 請自行下載url檔,以及words.txt檔,並解壓縮, 將文件檔各自放置在urls 和words資料夾裡。
- imageNet 的分類,有一個重點,她只保證有什麼, 但不保證沒什麼。(舉例:像是在human裡,保證有human, 但不保證沒有human以外的東西,像是車子、書、狗...等等。)
- 深度學習的輸出檔名是寫死的,小心覆蓋。
- OS: ubuntu16.04
- CPU: Intel® Core™ i5-3470 CPU @ 3.20GHz × 4
- RAM: 15.6 GiB
MIT License
