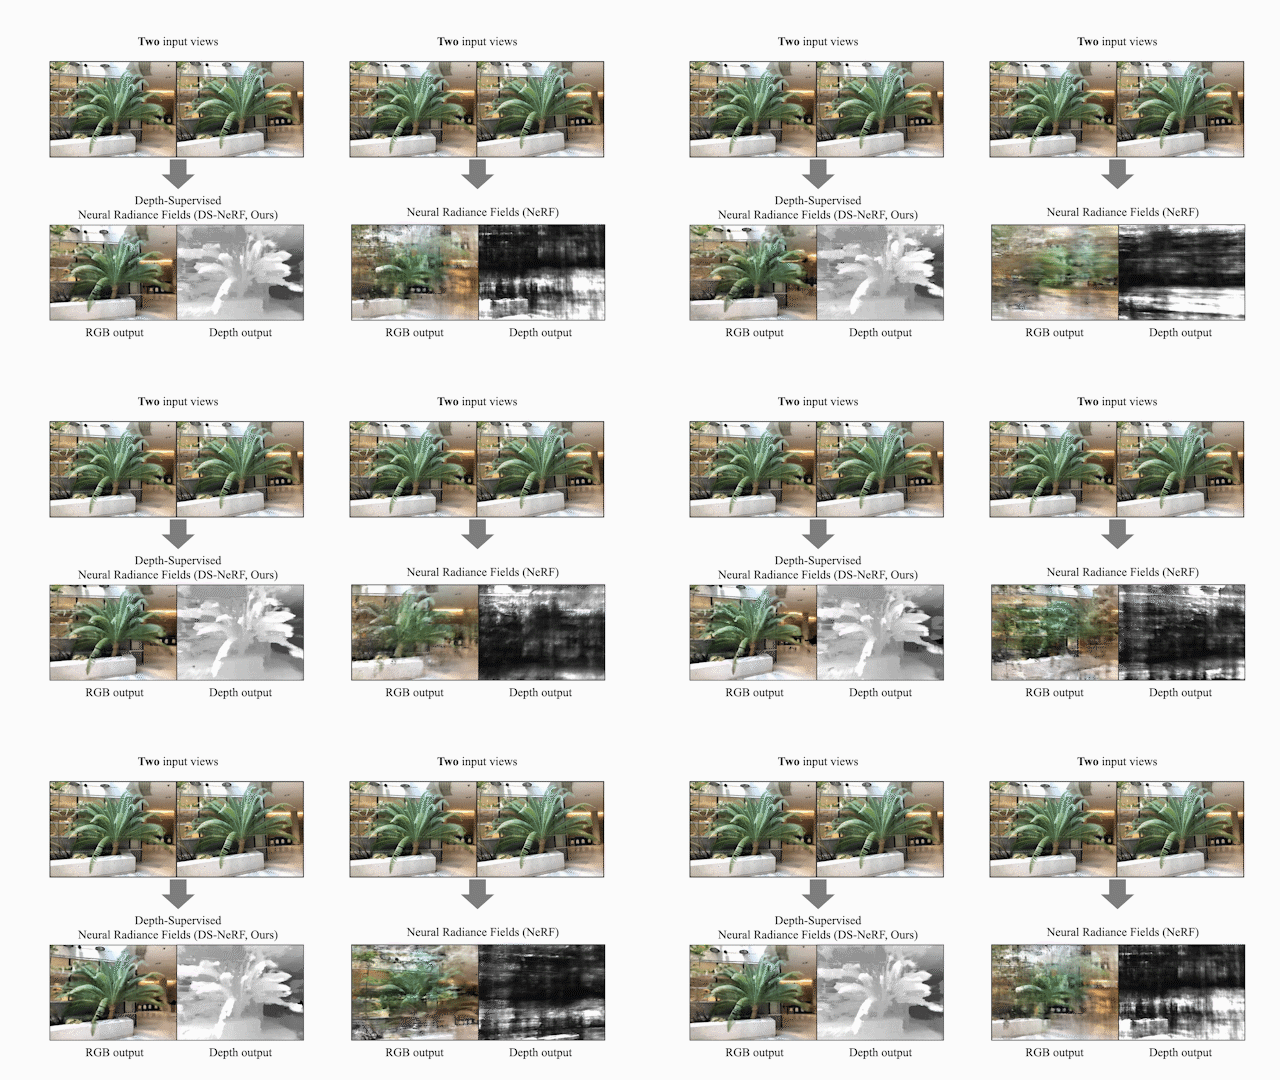
Pytorch implementation of our method for learning neural radiance fields that takes advantage of depth supervised by 3D point clouds. It can be used to train NeRF models given only very few input views.
Depth-supervised NeRF: Fewer Views and Faster Training for Free
arXiv 2107.02791, 2021
Kangle Deng1, Andrew Liu2, Jun-Yan Zhu1, Deva Ramanan1,3,
1CMU, 2Google, 3Argo AI
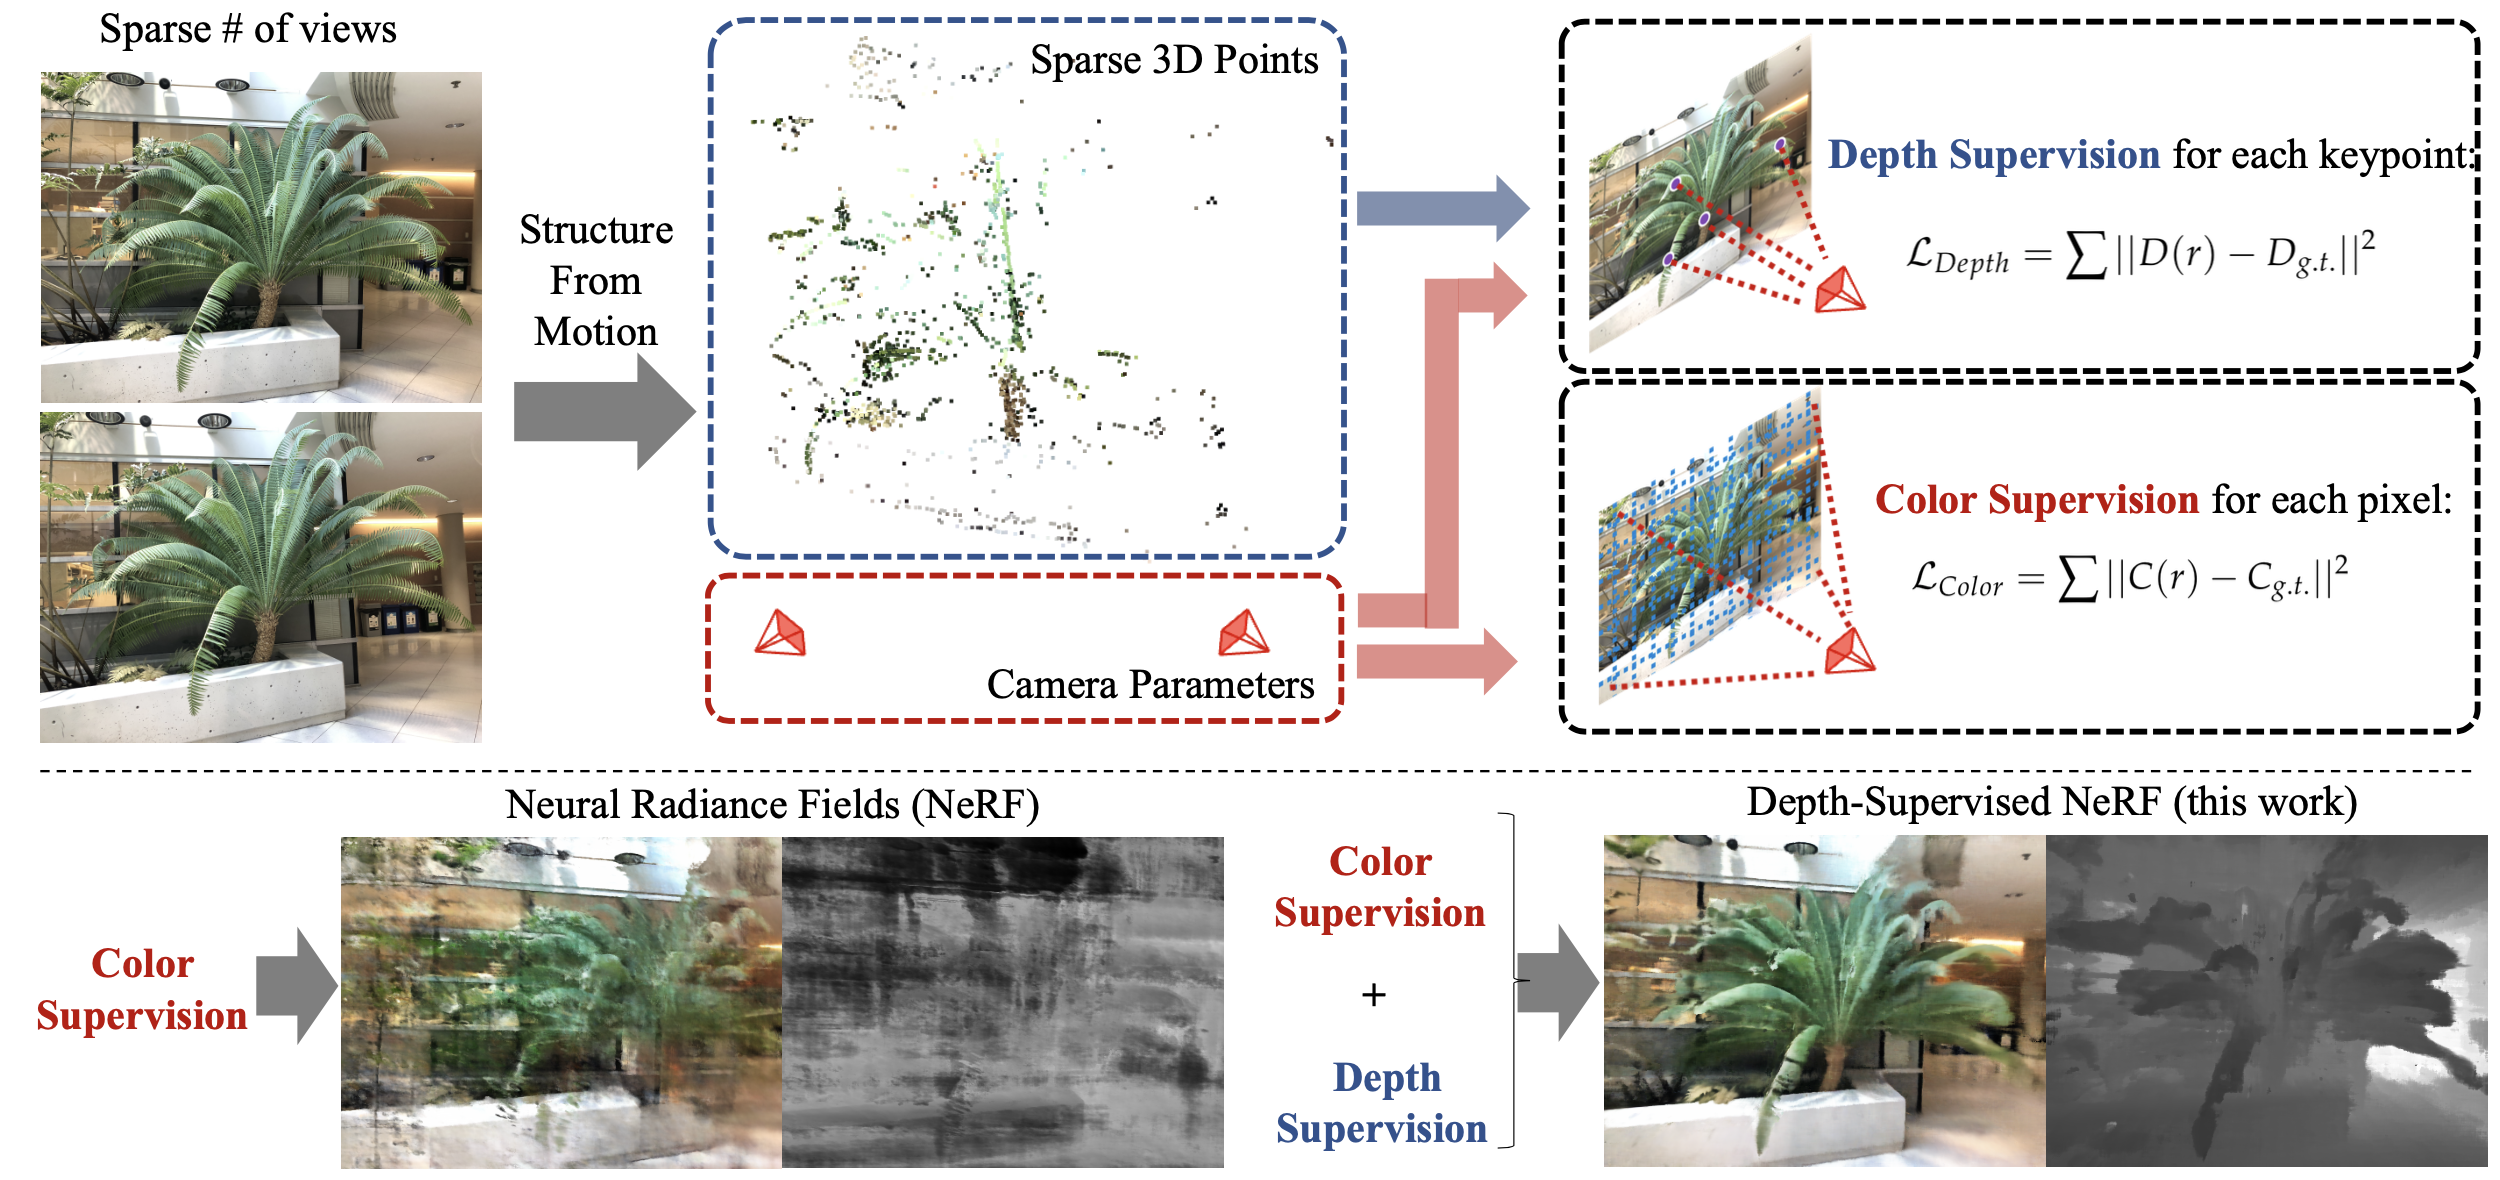
We propose DS-NeRF (Depth-supervised Neural Radiance Fields), a model for learning neural radiance fields that takes advantage of depth supervised by 3D point clouds. Current NeRF methods require many images with known camera parameters -- typically produced by running structure-from-motion (SFM) to estimate poses and a sparse 3D point cloud. Most, if not all, NeRF pipelines make use of the former but ignore the latter. Our key insight is that such sparse 3D input can be used as an additional free signal during training.
NeRF trained with 2 views:
DS-NeRF trained with 2 views:
NeRF trained with 5 views:
DS-NeRF trained with 5 views:
Install requirements:
pip install -r requirements.txt
You will also need COLMAP installed to compute poses if you want to run on your data.
Download data for the example scene: fern_2v
bash download_example_data.sh
To play with other scenes presented in the paper, download the data here.
You can download the pre-trained models here. Place the downloaded directory in ./logs in order to test it later. See the following directory structure for an example:
├── logs
│   ├── fern_2v    # downloaded logs
│   ├── flower_2v  # downloaded logs
This step is necessary only when you want to run on your data.
First, place your scene directory somewhere. See the following directory structure for an example:
├── data
│   ├── fern_2v
│   ├── ├── images
│   ├── ├── ├── image001.png
│   ├── ├── ├── image002.png
To generate the poses and sparse point cloud:
python imgs2poses.py <your_scenedir>
Once you have the experiment directory (downloaded or trained on your own) in ./logs,
- to render a video:
python run_nerf.py --config configs/fern_dsnerf.txt --render_only
The video would be stored in the experiment directory.
To train a DS-NeRF on the example fern dataset:
python run_nerf.py --config configs/fern_dsnerf.txt
It will create an experiment directory in ./logs, and store the checkpoints and rendering examples there.
You can create your own experiment configuration to try other datasets.
We provide a tutorial on how to use depth-supervised loss in your own project here.
If you find this repository useful for your research, please cite the following work.
@article{kangle2021dsnerf,
  title={Depth-supervised NeRF: Fewer Views and Faster Training for Free},
  author={Deng, Kangle and Liu, Andrew and Zhu, Jun-Yan and Ramanan, Deva},
  journal={arXiv preprint arXiv:2107.02791},
  year={2021}
}
This code borrows heavily from nerf-pytorch. We thank Takuya Narihira, Akio Hayakawa, Sheng-Yu Wang, and for helpful discussion. We are grateful for the support from Sony Corporation, Singapore DSTA, and the CMU Argo AI Center for Autonomous Vehicle Research.


