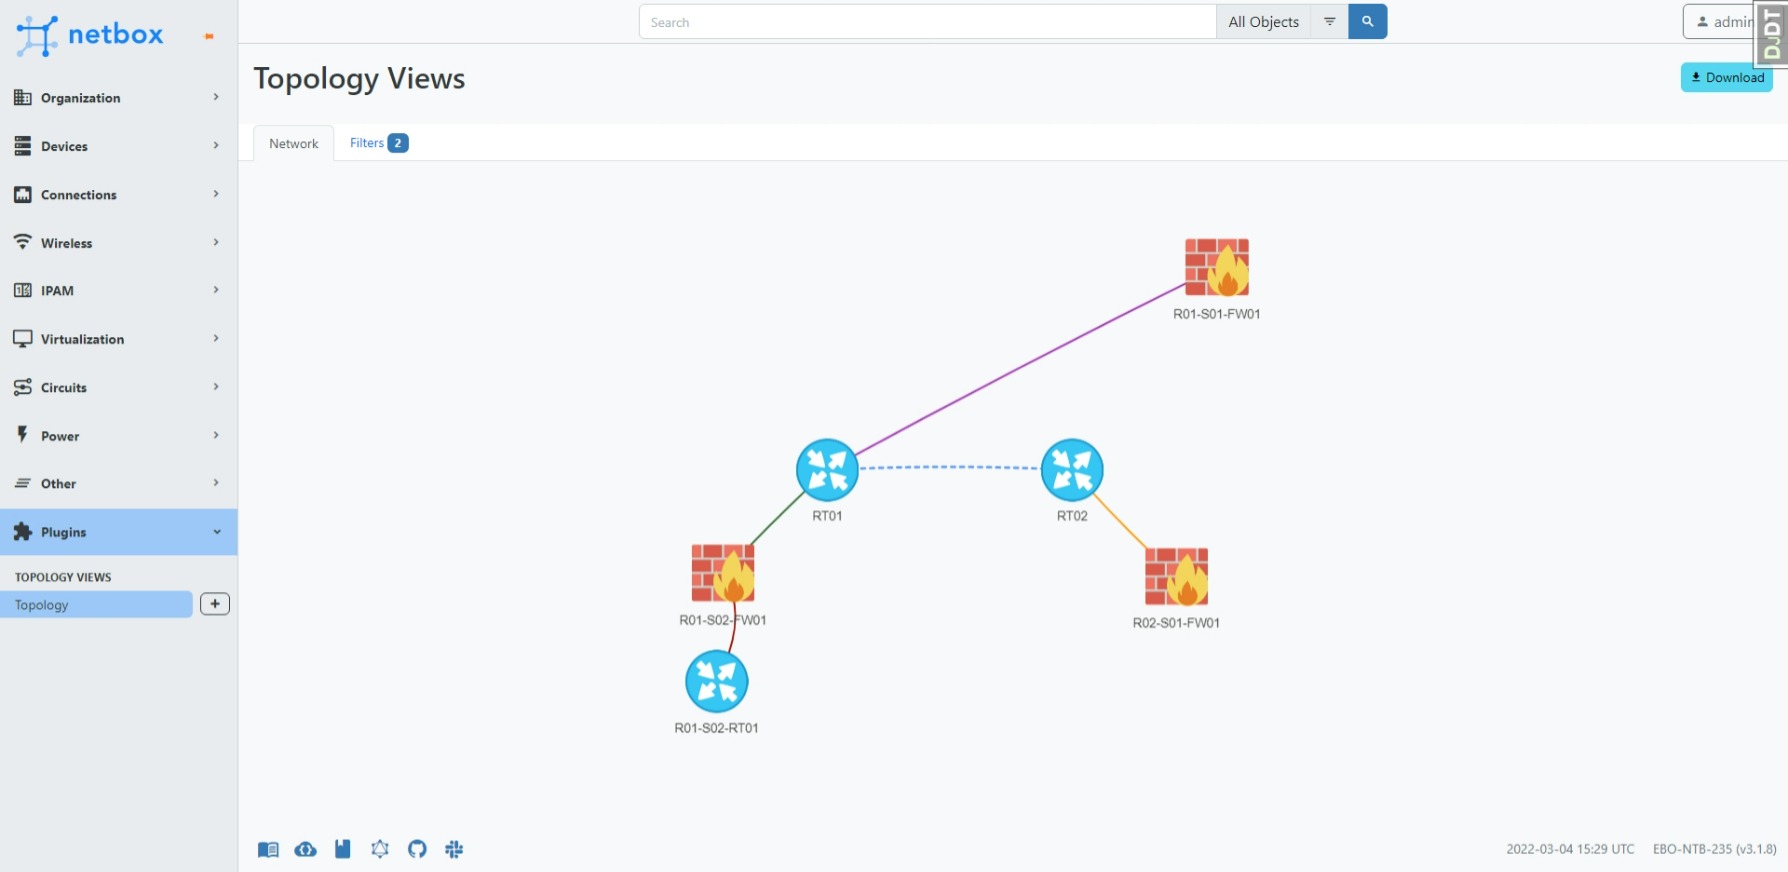
Create topology views/maps from your devices in netbox. The connections are based on the cables you created in netbox. Support to filter on name, site, tag and device role.
The plugin is available as a Python package and can be installed with pip.
Run pip install netbox-topology-views in your virtual env.
To ensure NetBox Topology Views plugin is automatically re-installed during future upgrades, create a file named local_requirements.txt (if not already existing) in the NetBox root directory (alongside requirements.txt) and list the netbox-topology-views package:
# echo netbox-topology-views >> local_requirements.txt
Once installed, the plugin needs to be enabled in your configuration.py
# In your configuration.py
PLUGINS = ["netbox_topology_views"]
First run source /opt/netbox/venv/bin/activate to enter the Python virtual environment.
Then run
cd /opt/netbox/netbox
pip3 install netbox-topology-views
python3 manage.py collectstatic --no-input| netbox version | netbox-topology-views version |
|---|---|
| >= 3.3.0 | >= v3.0.0 |
| >= 3.2.0 | >= v1.1.0 |
| >= 3.1.8 | >= v1.0.0 |
| >= 2.11.1 | >= v0.5.3 |
| >= 2.10.0 | >= v0.5.0 |
| < 2.10.0 | =< v0.4.10 |
There is also support for custom fields.
If you create a custom field "coordinates" for "dcim > device" and "Circuits > circuit" with type "text" and name "coordinates" you will see the same layout every time.
The coordinates can then be provided as: "X;Y".
Please read the "Configure" chapter to set the allow_coordinates_saving option to True.
You might also set the always_save_coordinates option to True.
If you want to override the default values configure the PLUGINS_CONFIG in your netbox configuration.py.
Example:
PLUGINS_CONFIG = {
    'netbox_topology_views': {
        'device_img': ['router','switch', 'firewall'],
        'preselected_device_roles': ['Router', 'Firewall']
    }
}
| Setting | Default value | Description |
|---|---|---|
| device_img | ['access-switch', 'core-switch', 'firewall', 'router', 'distribution-switch', 'backup', 'storage,wan-network', 'wireless-ap', 'server', 'internal-switch', 'isp-cpe-material', 'non-racked-devices', 'power-units'] | The slug of the device roles that you have a image for. |
| preselected_device_roles | ['Firewall', 'Router', 'Distribution Switch', 'Core Switch', 'Internal Switch', 'Access Switch', 'Server', 'Storage', 'Backup', 'Wireless AP'] | The full name of the device roles you want to pre select in the global view. Note that this is case sensitive |
| allow_coordinates_saving | False | (bool) Set to true if you use the custom coordinates fields and want to save the coordinates |
| always_save_coordinates | False | (bool) Set if you want to enable the option to save coordinates by default |
| ignore_cable_type | [] | The cable types that you want to ignore in the views |
| preselected_tags | '[]' | The name of tags you want to preload |
| draw_default_layout | False | (bool) Set to True if you want to load draw the topology on the initial load (when you go to the topology plugin page) |
You upload you own custom images to the netbox static dir (static/netbox_topology_views/img/).
These images need to be named after de device role slug and have the .png format/extension.
If you add your own image you also need to add the slug to the device_img setting.
Go to the plugins tab in the navbar and click topology or go to $NETBOX_URL/plugins/netbox_topology_views/ to view your topologies
Run pip install netbox-topology-views --upgrade in your venv.
Run python3 manage.py collectstatic --no-input
Clear you browser cache.
To view /plugins/topology-views/ you need the following permissions:
- dcim | device | can view device
- dcim | site | can view site
- extras | tag | can view tag
- dcim | device role | can view device role
Power icons created by Freepik - Flaticon.
Power icons created by Flat Icons - Flaticon
Provider icons created by Good Ware - Flaticon


