💗Thank you
After a few days of testing, the UAV aerial image geometric correction, also known as aerial film orthophoto processing.
The main steps are as follows:
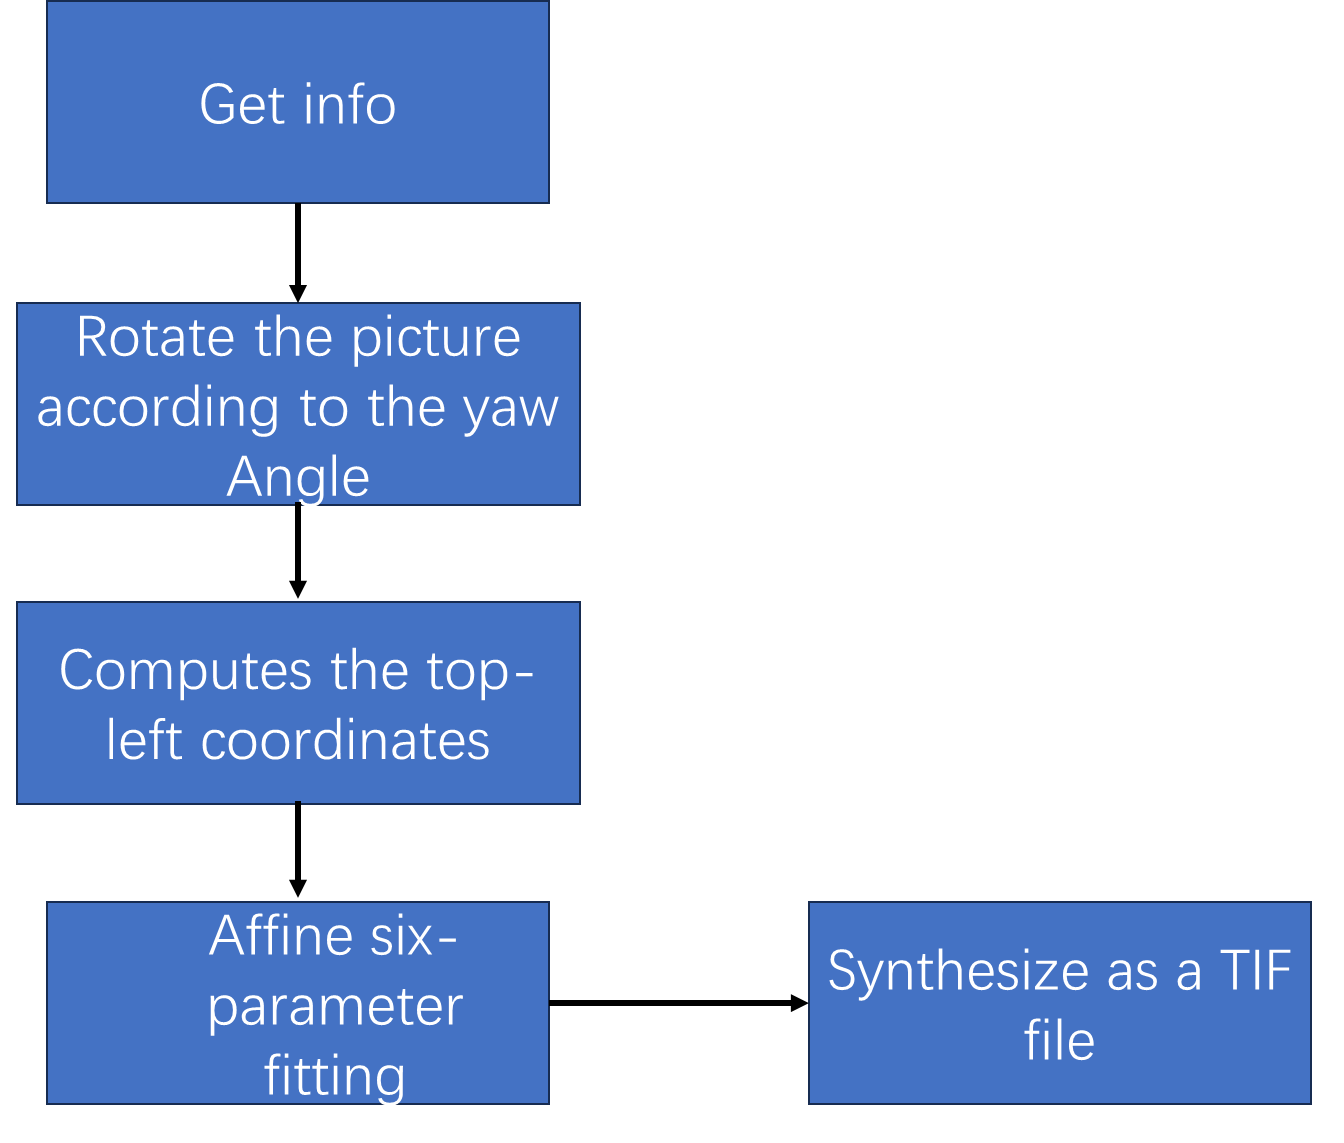
Now analyze each step and talk about why you did it.
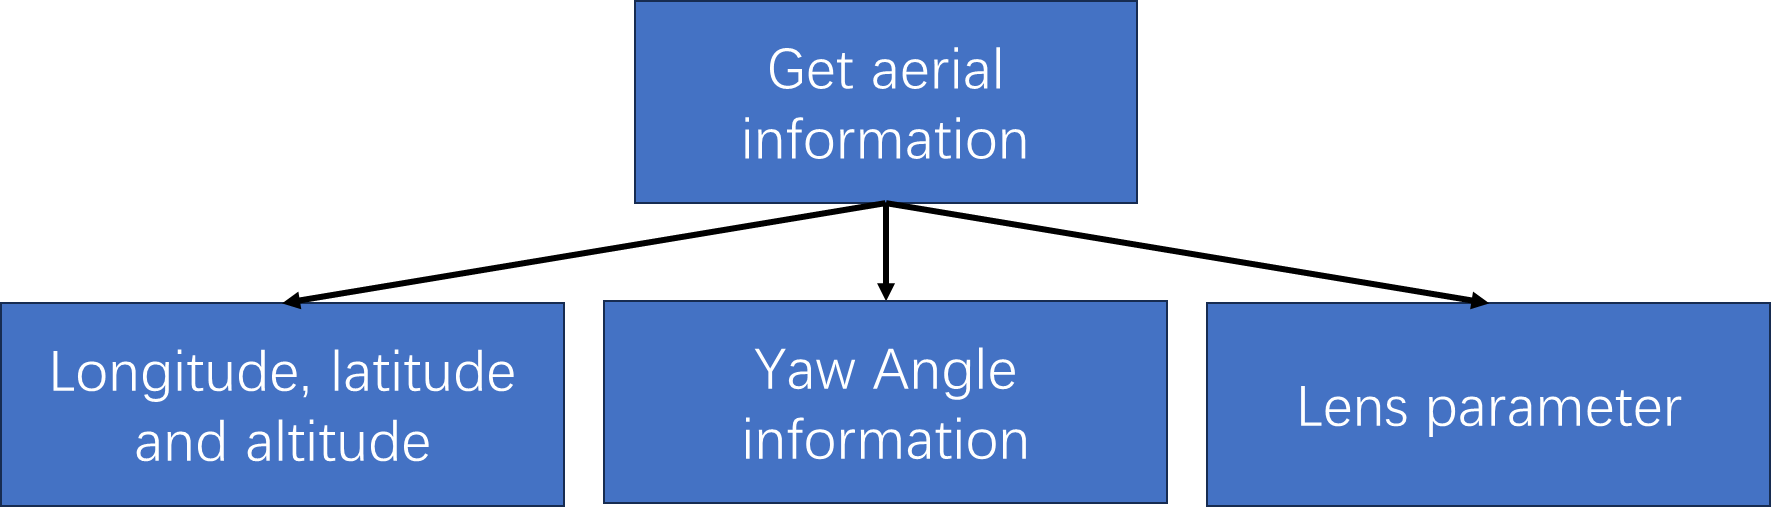
Aerial film information is obtained in order to calculate the resolution of the image, the relevant operations can be seen here.
This step is necessary. Explain in detail how to implement this step.
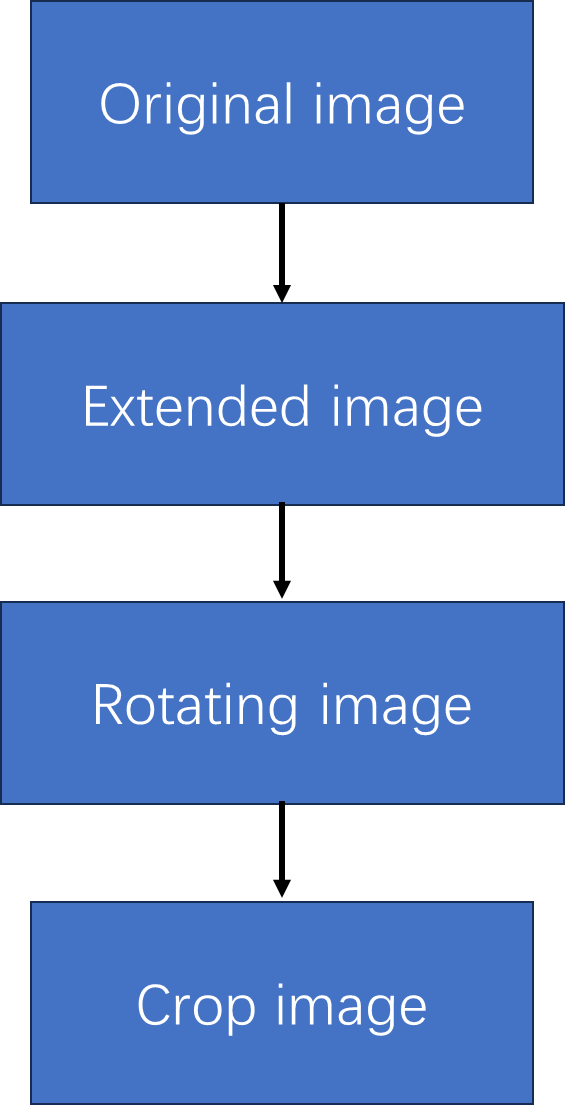
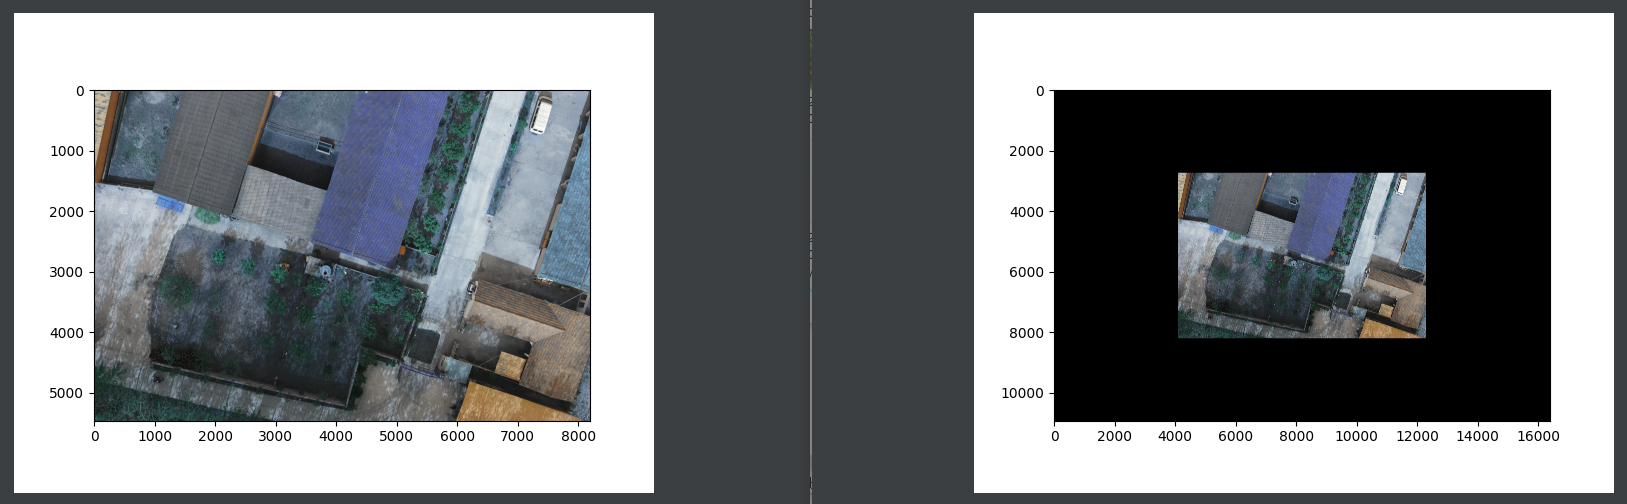
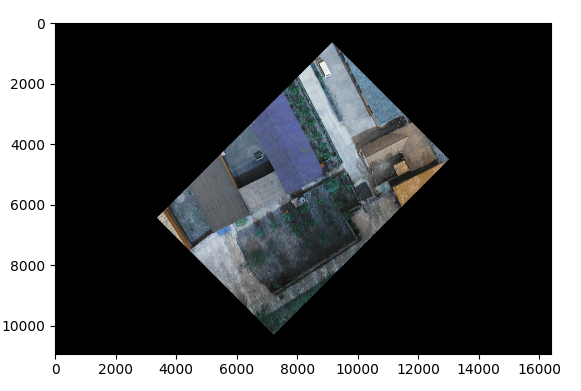
Expanding the image means filling the edges of the image with a value of 0. The purpose of this step is to rotate the image so that it is still within the specified size range.
The expanded image effect is as follows:
The next step is to rotate the image, assuming that the yaw Angle is -45°, then the image is rotated 45° counterclockwise.
This involves another problem, the definition of yaw Angle. The diagram is as follows:

In simple terms, the track line is on the right side of the course, the yaw Angle is positive, the track line is on the left side of the course, the yaw Angle is negative. See the soul drawing below.
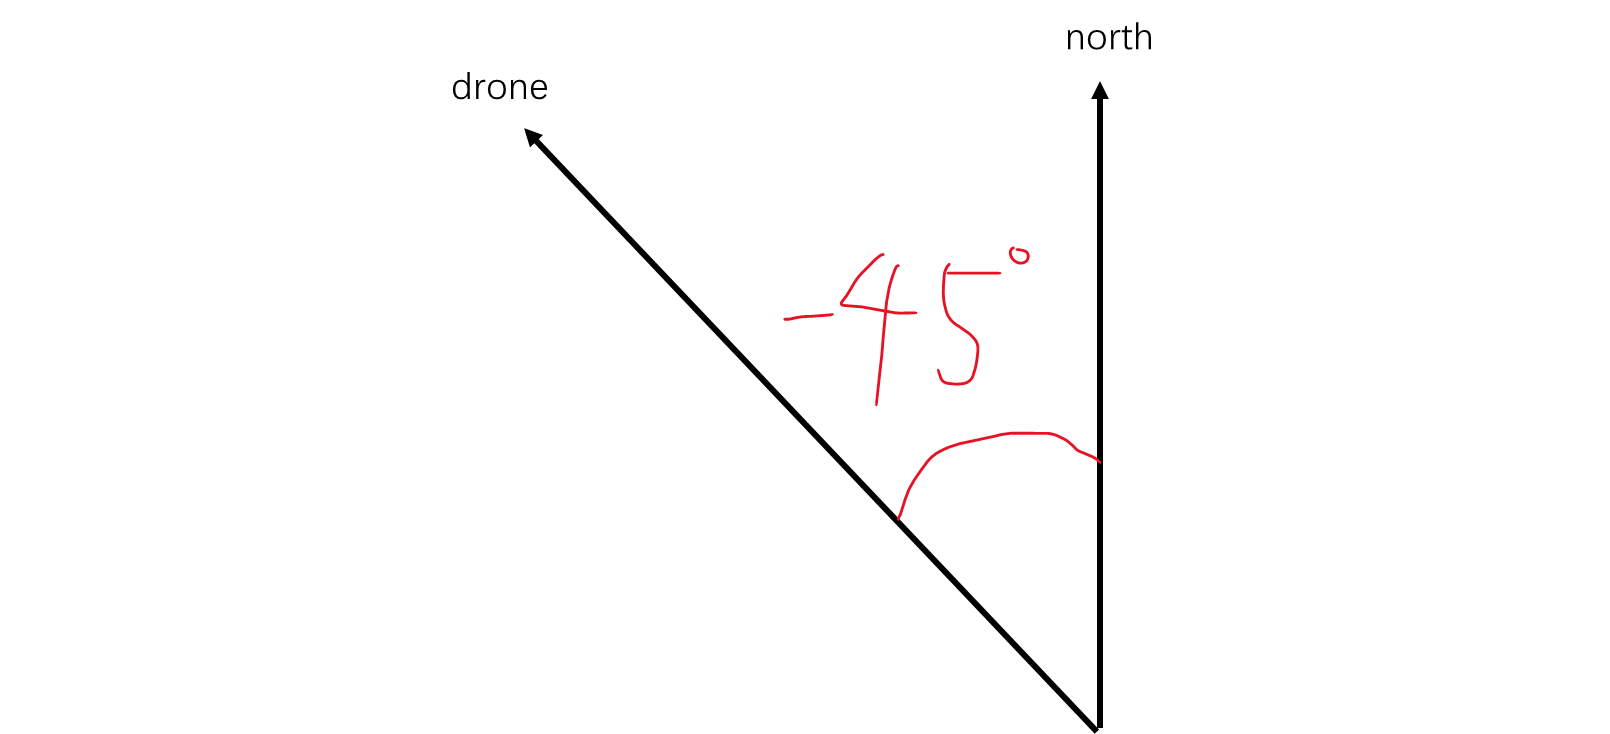
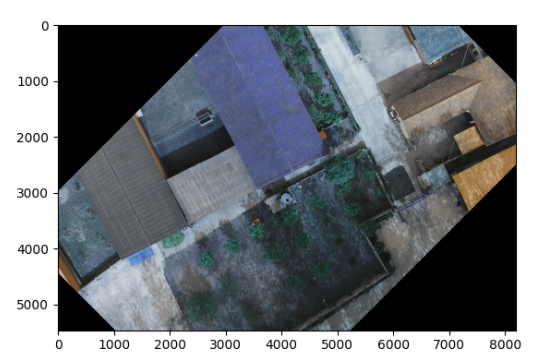
Here we assume that the yaw Angle is -45 degrees, the center of rotation is the center of the image, and the image after rotation is as follows:
Why expand the image first and then rotate it? Because the opencv function is called here, if the original image is rotated directly, some information will be lost.
Rotate the original image directly, and the effect is as follows:
As shown in the figure above, some of the information is omitted, so you first expand the edge of the image with a value of 0 to double the size of the image, and then rotate the expanded image.
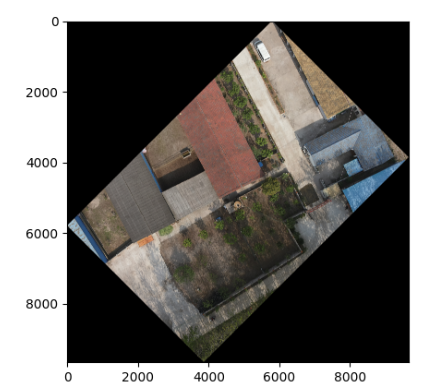
The purpose of this step is to reduce the size of the image while preserving only the useful information in order to reduce the invalid pixels of the rotated image.
The rotated image after cropping has the following effect:
The result you get now, it doesn't contain the latitude and longitude information. In the first step, we obtained the longitude, latitude, height, and lens parameters of the center of the image. So we can calculate the spatial resolution of the photos taken by the drone at this time.
Spatial resolution = (pixel size x height)/focal length
The above units should be converted to meters.
Pixel size depends on the hardware parameters of your drone. Right now our drone lens has an pixel size of 4.4 microns.
Height and focal length are automatically obtained from the image file.
At this time, the spatial resolution is meters, and we need to carry out unit conversion and convert meters into degrees.
Assuming that the radius of the Earth is 6371004 meters, there is the following conversion formula:
x_res = x_res_meter / (2 * math.pi * 6371004) * 360
The longitude and latitude conversion formula in the upper left corner is as follows:
Upper left longitude = center point longitude - Width of the cropped rotating image x 0.5 x longitude resolution
Upper left latitude = center latitude + Width of the cropped rotating image x 0.5 x latitude resolution
Through the above steps, we have obtained
-
Latitude and longitude in the upper left corner
-
Spatial resolution
So we can get the affine six parameters of the image. Its format is as follows:
[Upper left longitude, longitude resolution,0, upper left latitude,0, latitude resolution]
Since we are in the Northern Hemisphere, the longitude and latitude resolution conversion formula in the above formula is as follows:
Longitude resolution = spatial resolution
Latitude resolution = -1 x spatial resolution
The GDAL library is used here to easily combine the cropped rotation image with affine six parameters to generate TIF format images.
Drag the result to google earth, as shown below:
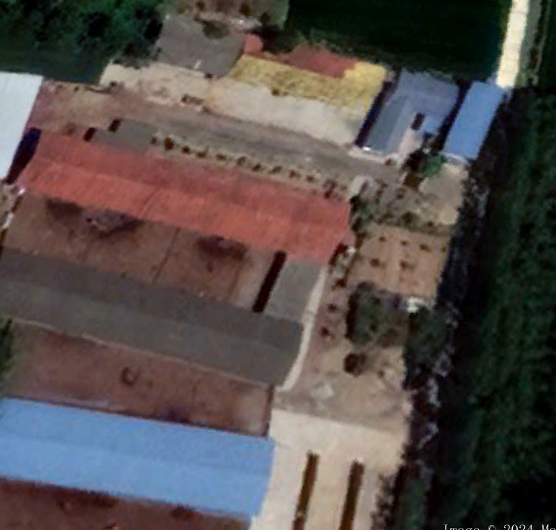
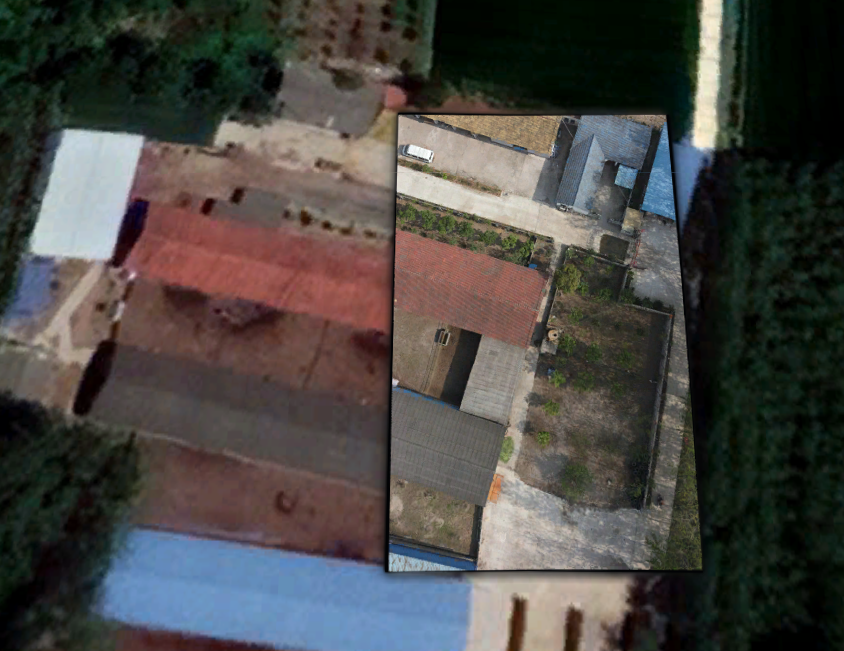
The above can be considered as the rough geometry correction of aerial film. There is a certain deviation, about 2 meters.
This is because when we calculate the spatial resolution, we assume the radius of the Earth. In fact, the local Earth radius is not the universal Earth radius we assume. According to the local latitude and longitude, the UTM coordinates can be converted to WGS84 coordinates.
If the correction is to be refined, then it is necessary to carry out the feature point matching, the registration of aerial film and base map, and the direct configuration of aerial film and aerial film.