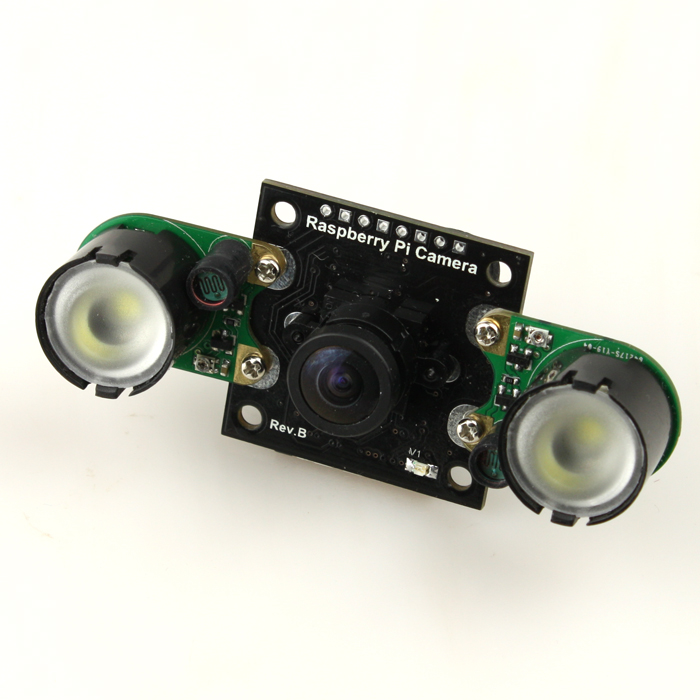
NOIR camera is a rapspberry pi camera module where there is no ir filter, abbinated with 2 ir light let you see image also in low and no light condition with good contrast in grayscale, so could provide face recognition also in low light condition with direct ir light that make the subject illuminated omogenusly .
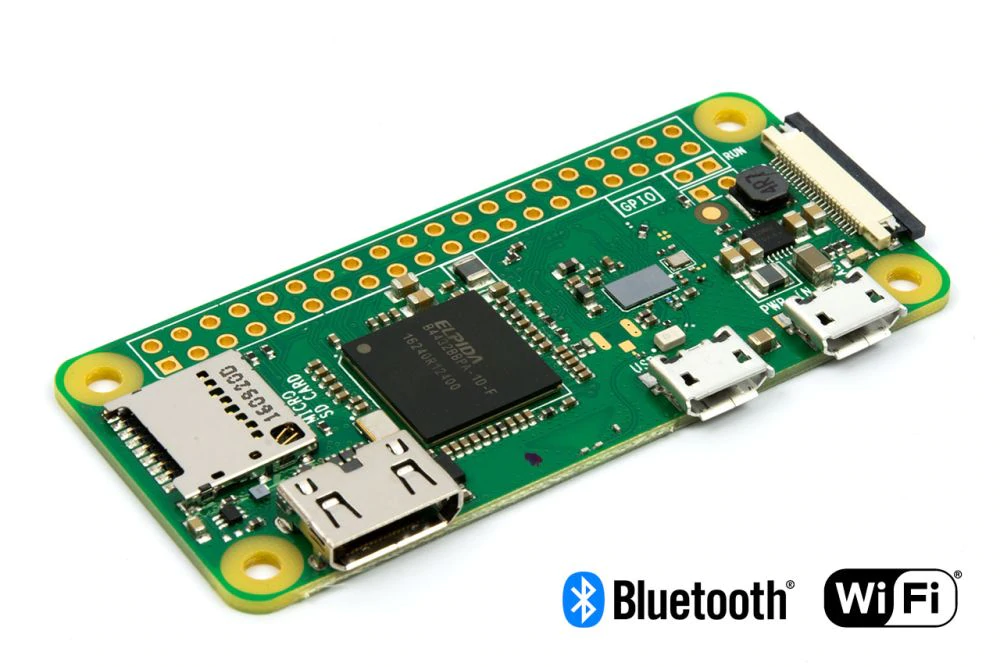
The model of Raspberry pi is the zero w ( is the one with lower computational power, lower power consume and wireless connectivity ), reasonably implementable also in a multimodal biometric system .
-
RaspberryPi ZeroW or 4/3/2
-
RaspberryPi NOIR camera + ir lights and photoresistor .
-
Any Kind of server with Docker(could also be another RaspberryPi or a remote server) (for the not standalone version)
-
The Dockerfile in this repo, modded version of the one founded here Dockerileinstall automaticaly all the dipendences(face_recognition,openCv,numpy,dlib_),copy this repo and execute the server
-
Any other camera device as a phone cam or a web cam for enrollment (if you don't want to enroll on the camera directly ).For enroll just put the photo in the folder Known_Person the server on startup will encode all the known faces
-
Lan connection between server and raspberry
-
(Standalone version) Install the dipendency on the raspberryPi (there is a readme in the sub folder)
-
Ssh connection enable on RaspberryPi
-
python 3 on raspberry pi with camera module import avaible
-
Lan connection between raspberry and the server, you could connect it also over wan by forwarding the port but is not advisable for security reasons
-
Face recognition in no light with optimal result also with non coperative users
-
Fotoresistor auto turn on ir light in low and no light condiction
-
Use of more sequential image (5) and distance mesure for evaluate lan intrusion(if the sequential probe images presence all the exact same distance there is with high probably an intrusion in the network )
-
Presence of anti spoofing tecnique,done by design, screen and printed face image reflect badly ir light and make spofing very difficult.
-
Fast operation with no buffering
-
A standalone version using only the pi zero w (There is a guide for the dimpendency in the sub-folder)
-
Auto-save intruder image when there is no known_face match
-
Biometric system as a service in a future multimodal version (array of data from various pi are evaluated to bring a more precise response )
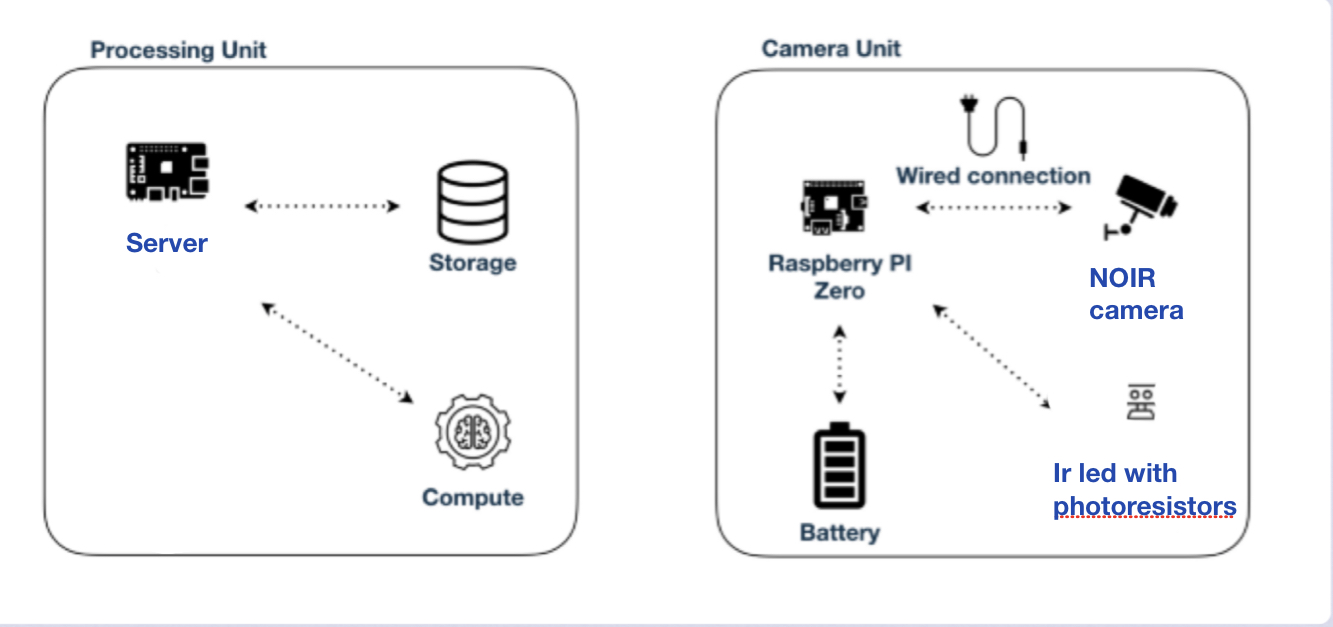
The raspberry pi zero w is connected to the camera and save 10 frames per second.
The ir light intensity is setted by the photoresistor.
(anti spoofing)The use of direct ir light and NOIR camera make the use of screen and printed images as a spoofing technique unuseful, infact screen and paper reacts in a different way to infrared than faces and make the images almost all white.
The server(could be another raspberry or a proper server running the docker image ):
- Load on sturtup all the known faces and encode it in a 128-dimensions matrix(use numpy)and OpenFace pretrained CNN
- Downlad the 10 frames from the PiZeroW
- Search in each image for one or more face (Face Localization)
- Each founded face is encoded
- The Server start the comparison between all the face knowed and the founded Faces
- For each match(if the distance is less than the trashold) the server save the distance and put it in an array.
- The name of the face with the lower distance in the match array is printed as result,if there is no face that match the systems print unkonown faces
- for every unknown face the original image frame is saved in the intruder folder
- (AntiHacking tecnique) is almost impossibile that more than 8 photo on 10 with the same subject have exactly the same distance from the knowed ones, so if this happen, probably there is an intrusion in the lan.
help of gradients.
Why not a deep lerning based ones why not use wavelets, why the Hog from dlib?
Because dilib hog algorithm is generaly faster and works on grayscale images withlow resorces used, so it's perfect to be used with ir light and to work with real time video, i have done some testing also with a cnn model, but my system can't elaborate more than 5 of the 10 frames sended every second. even with paralaization of the process; so i conclude that using a cnn model is not realiable for this project and for a future multimodal (face recognition system) version .
anyway hog is not as good as dlib CNN for recognition of odd faces so if you have
enough system performance you should go with it.
To find faces in an image, we’ll start by making our image black and white because we don’t need color data to find faces:
Then we’ll look at every single pixel in our image one at a time. For every single pixel, we want to look at the pixels that directly surrounding it:
Our goal is to figure out how dark the current pixel is compared to the pixels directly surrounding it. Then we want to draw an arrow showing in which direction the image is getting darker:
If you repeat that process for every single pixel in the image, you end up with every pixel being replaced by an arrow. These arrows are called gradients and they show the flow from light to dark across the entire image:
This might seem like a random thing to do, but there’s a really good reason for replacing the pixels with gradients. If we analyze pixels directly, really dark images and really light images of the same person will have totally different pixel values. But by only considering the direction that brightness changes, both really dark images and really bright images will end up with the same exact representation. That makes the problem a lot easier to solve!
But saving the gradient for every single pixel gives us way too much detail. We end up missing the forest for the trees. It would be better if we could just see the basic flow of lightness/darkness at a higher level so we could see the basic pattern of the image.
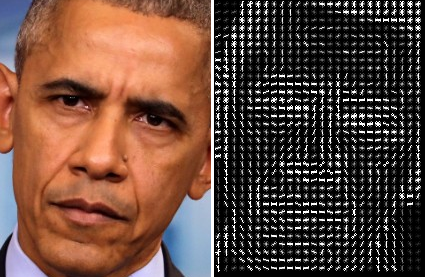
To do this, we’ll break up the image into small squares of 16x16 pixels each. In each square, we’ll count up how many gradients point in each major direction (how many point up, point up-right, point right, etc…). Then we’ll replace that square in the image with the arrow directions that were the strongest.
The end result is we turn the original image into a very simple representation that captures the basic structure of a face in a simple way:
To find faces in this HOG image, all we have to do is find the part of our image that looks the most similar to a known HOG pattern that was extracted from a bunch of other training faces:
Using this technique, we can now easily find faces in any image:
Whew, we isolated the faces in our image. But now we have to deal with the problem that faces turned different directions look totally different to a computer:
To account for this, we will try to warp each picture so that the eyes and lips are always in the sample place in the image. This will make it a lot easier for us to compare faces in the next steps.
To do this, we are going to use an algorithm called face landmark estimation. There are lots of ways to do this, but we are going to use the approach invented in 2014 by Vahid Kazemi and Josephine Sullivan.
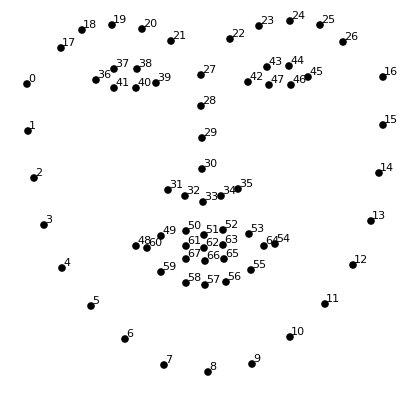
The basic idea is we will come up with 68 specific points (called landmarks) that exist on every face — the top of the chin, the outside edge of each eye, the inner edge of each eyebrow, etc. Then we will train a machine learning algorithm to be able to find these 68 specific points on any face:
given a image, return the 128-dimension face encoding for each face in the image.
this is generated by a Deep Convolutional Neural Network pretrained on face(Downloaded from OpenFace)
We use a simple linear SVM classifier as we have see in lessons
The standalone version make your raspberry a little and compact face recognition system, anyway the model zeroW is not situable for begin used in this way, infact can capture and analize only one frame every 10 second with a gallery of 5 person,
anyway with the model 4 or 3b performance jumps at 4(model 3b+ ) or 10(model 4 4gb) frames analized per second so the system could be reliably used (ex for unlocking door or any type of closed set operation)
Each face is rappresnted as a point in an imaginary 128-dimensional space. To check if two faces match, we checks if the distance between those two points is less than 0.6 (the default threshold). Using a lower threshold than 0.6 makes the face comparison more strict.
To have a percente match betweeen two face we need to convert a face distance in a perrcent match score, to do this use :
import math

def face_distance_to_conf(face_distance, face_match_threshold=0.6):
    if face_distance > face_match_threshold:
        range = (1.0 - face_match_threshold)
        linear_val = (1.0 - face_distance) / (range * 2.0)
        return linear_val
    else:
        range = face_match_threshold
        linear_val = 1.0 - (face_distance / (range * 2.0))
        return linear_val + ((1.0 - linear_val) * math.pow((linear_val - 0.5) * 2, 0.2))
For a face match threshold of 0.6 the results :
For a face match threshold of 0.4 the results:
i used this guide to get a graphic of FAR FRR and to find EER and check if 0.6 was the really the best treshold GUIDE
anyway, due to the pandemic and the fact that i can't use screen to test image directly on the camera, all test are doned copying dataset images from the raspberry to the server and check if the image get a match with the actual real image pre encoded
With Labeled Faces in the Wild dataset i get a 96% of accuracy using cnn implementation of dilb, very close to the one you can find in dlib and face_rec _documentations of 99.38% dlib [face_rec](face-recognition · PyPI) , i think anyway that the difference is more caused to network problem in transfer all the data than other things.
The HoG algorithm in dlib that is real used in this project anyway get worst result but is incredibly fast (0.011 seconds / image), the accuracy rate is (FRR = 27.27%, FAR=0%).JITE
test on 50 images:(time for each execution)
| Dlib | ||
|---|---|---|
| Test n | CNN | Hog |
| 1 | 1.828 | 0.469 |
| 2 | 1.766 | 0.578 |
| 3 | 1.781 | 0.859 |
| 4 | 1.781 | 0.484 |
| 5 | 1.797 | 0.453 |
| 6 | 1.938 | 0.438 |
| 7 | 1.781 | 0.500 |
| 8 | 2.047 | 0.516 |
| 9 | 1.828 | 0.516 |
| 10 | 1.766 | 0.453 |
| avreage(second) | 1.831 | 0.527 |
| avreage per image | 0.037 | 0.011 |
FRR with FAR setted at 0:
| CNN | Hog | |
|---|---|---|
| Total detections | 119 | 112 |
| false rejection | 35 | 42 |
| false acceptance | 0 | 0 |
| FRR(%) | 22.73 | 27.27 |
| FAR(%) | 0.00 | 0.00 |
FAR,FRR and EER graphic in the end show that 0,6 is a good value for the threshold:
(added 0.27/1 to the graphic for show that when FRR is a that value FAR is actualy 0.000~ )
