🔆 see live
- After sign in or registration, send an URL of a picture with faces, this app can recognize and mark them.
- The user's entries/ counts will be updated everytime with sending a photo, and then shows on screen.
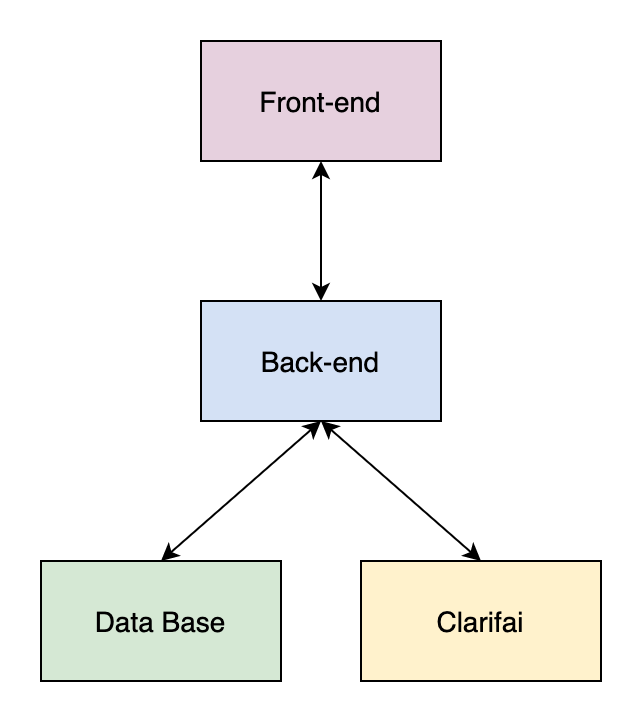
- Frond-end website exchanges data with back-end server, also, back-end server connects with database and Clarifai API.
- back-end server goes here
✨ Connecting Clarifai's face recognition API, sending back data and showing on front-end website.
✨ Frond-end website using React.js.
-Similar to Javascript syntax.
-The whole app combines small components which are independent and reusable.
✨ Back-end server using node.js, express.js.
-Based on Javascript and powerful, can build a server quickly.
✨ Connecting front-end and back-end with RestfulAPI.
-Higher readability, easy to debug. Every endpoint is seperated and can be combined into multiple logics with flexibility.
✨ Saving user data in PostgreSQL.
✨ Connecting database with server using knex.
-Clear documentation. Powerful.
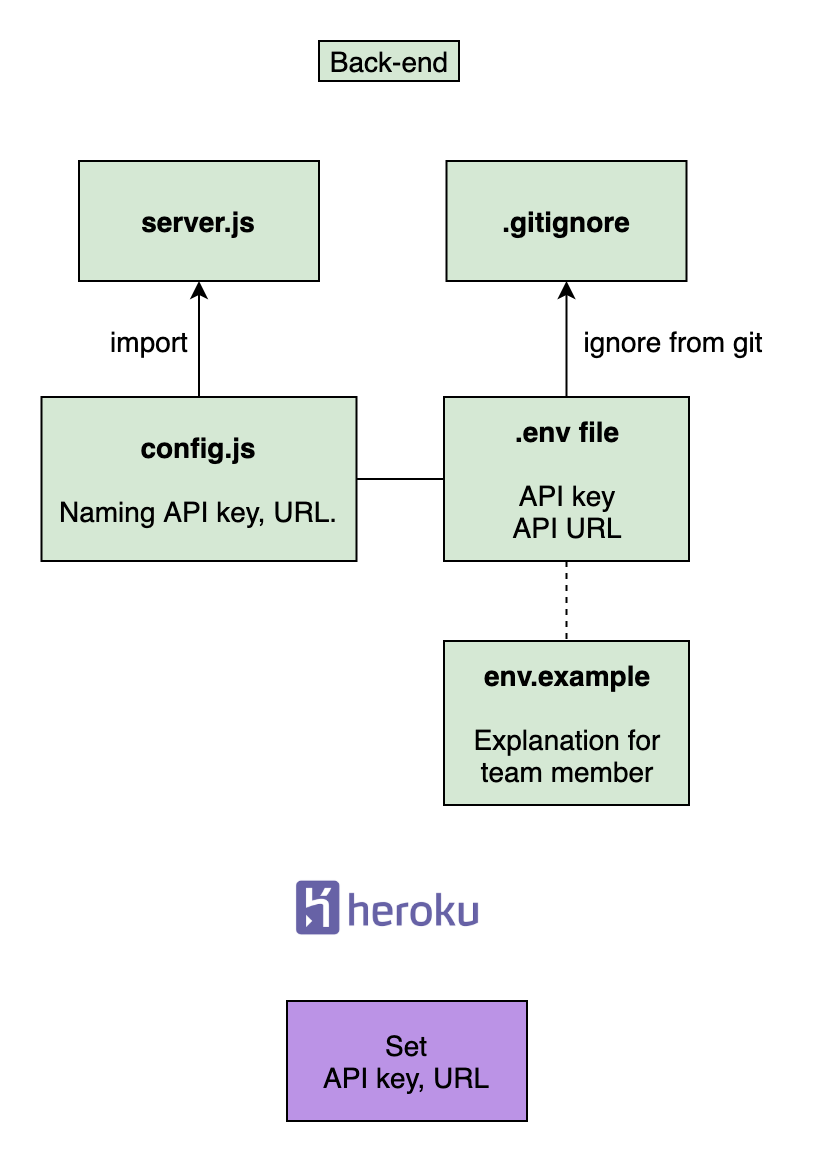
🔐 Seperating Clarifai API key from back-end server code and by storing it as environment variable. Also, registering it in gitignore to prevent being tracking.
🔐 Clarifai API key setting on Heroku after deployment.
🔐 Hash user's password with Bcrypt.
🔐 Storing password and name to seperate tables, reduce change of data leakage.
🔐 Using dotenv in development.
-Easy to seperate confidential data from code.
✨ Good user experience on both mobile and desktop.
✨ Different layouts on mobile and desktop using Tachyons.
✨ Dynamic background using react-particles-js.
✨ Hover effect using react-tilt.
✨ Front-end deployment to Netlify.
-Suitable for front-end website without waiting for awaken.
✨ Back-end deployment to Heroku.
-Easy to maintain and operate. Works well for a low-traffic website.
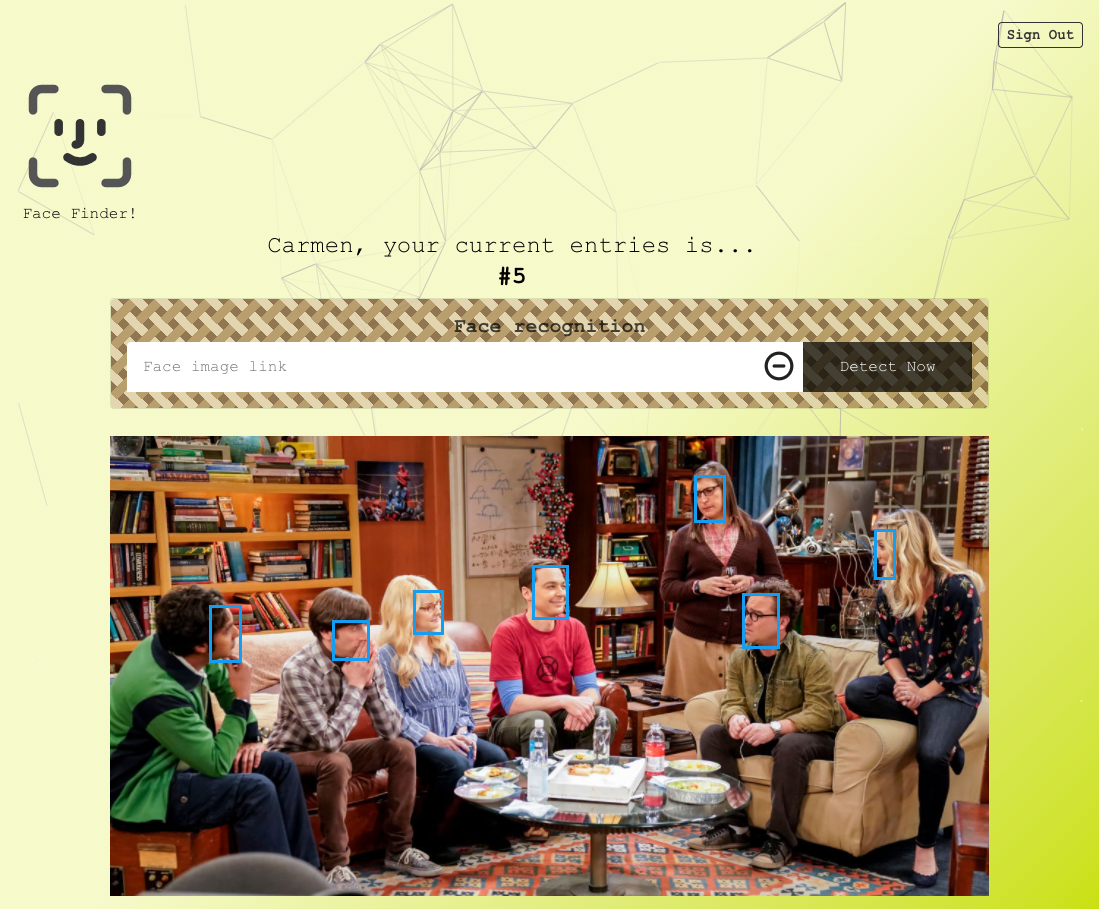
- A detection screenshot on desktop showing user's name, entries/ counts, and the faces are marked.
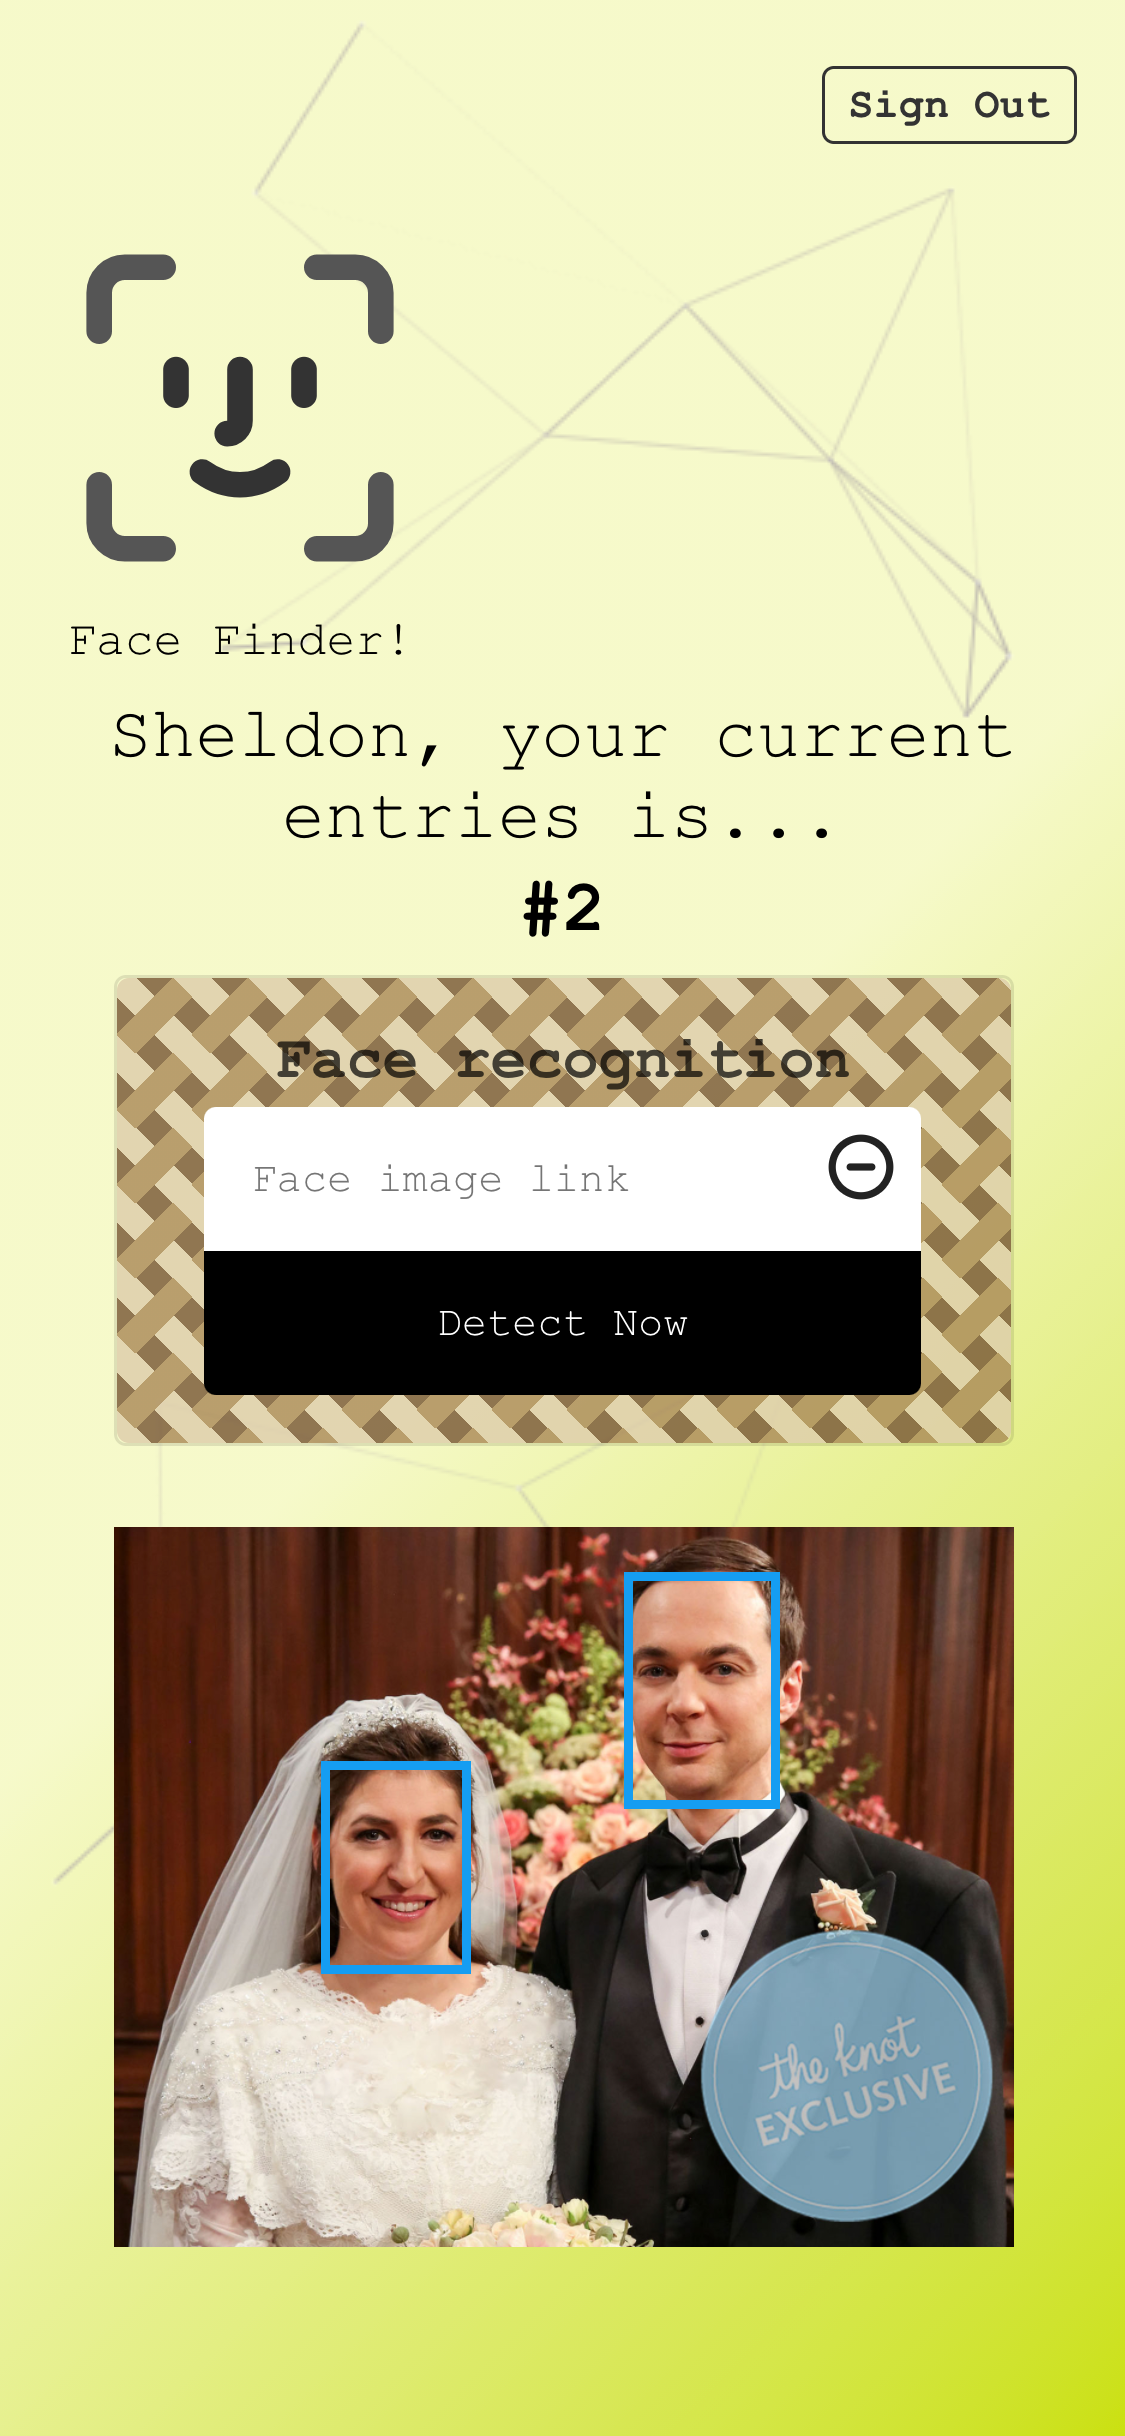
- A detection screenshot on mobile. The picture size is adapted to screen size.
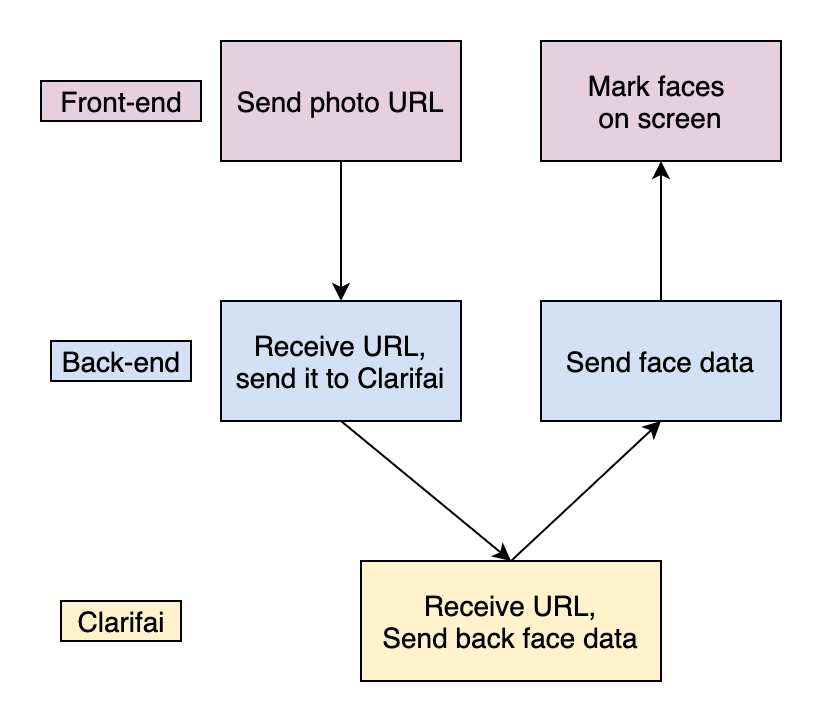
- The URL is sent from front-end to back-end, then to Clarifai face detection API.
- The detection result is sending back from Clarafai and showing on screen.
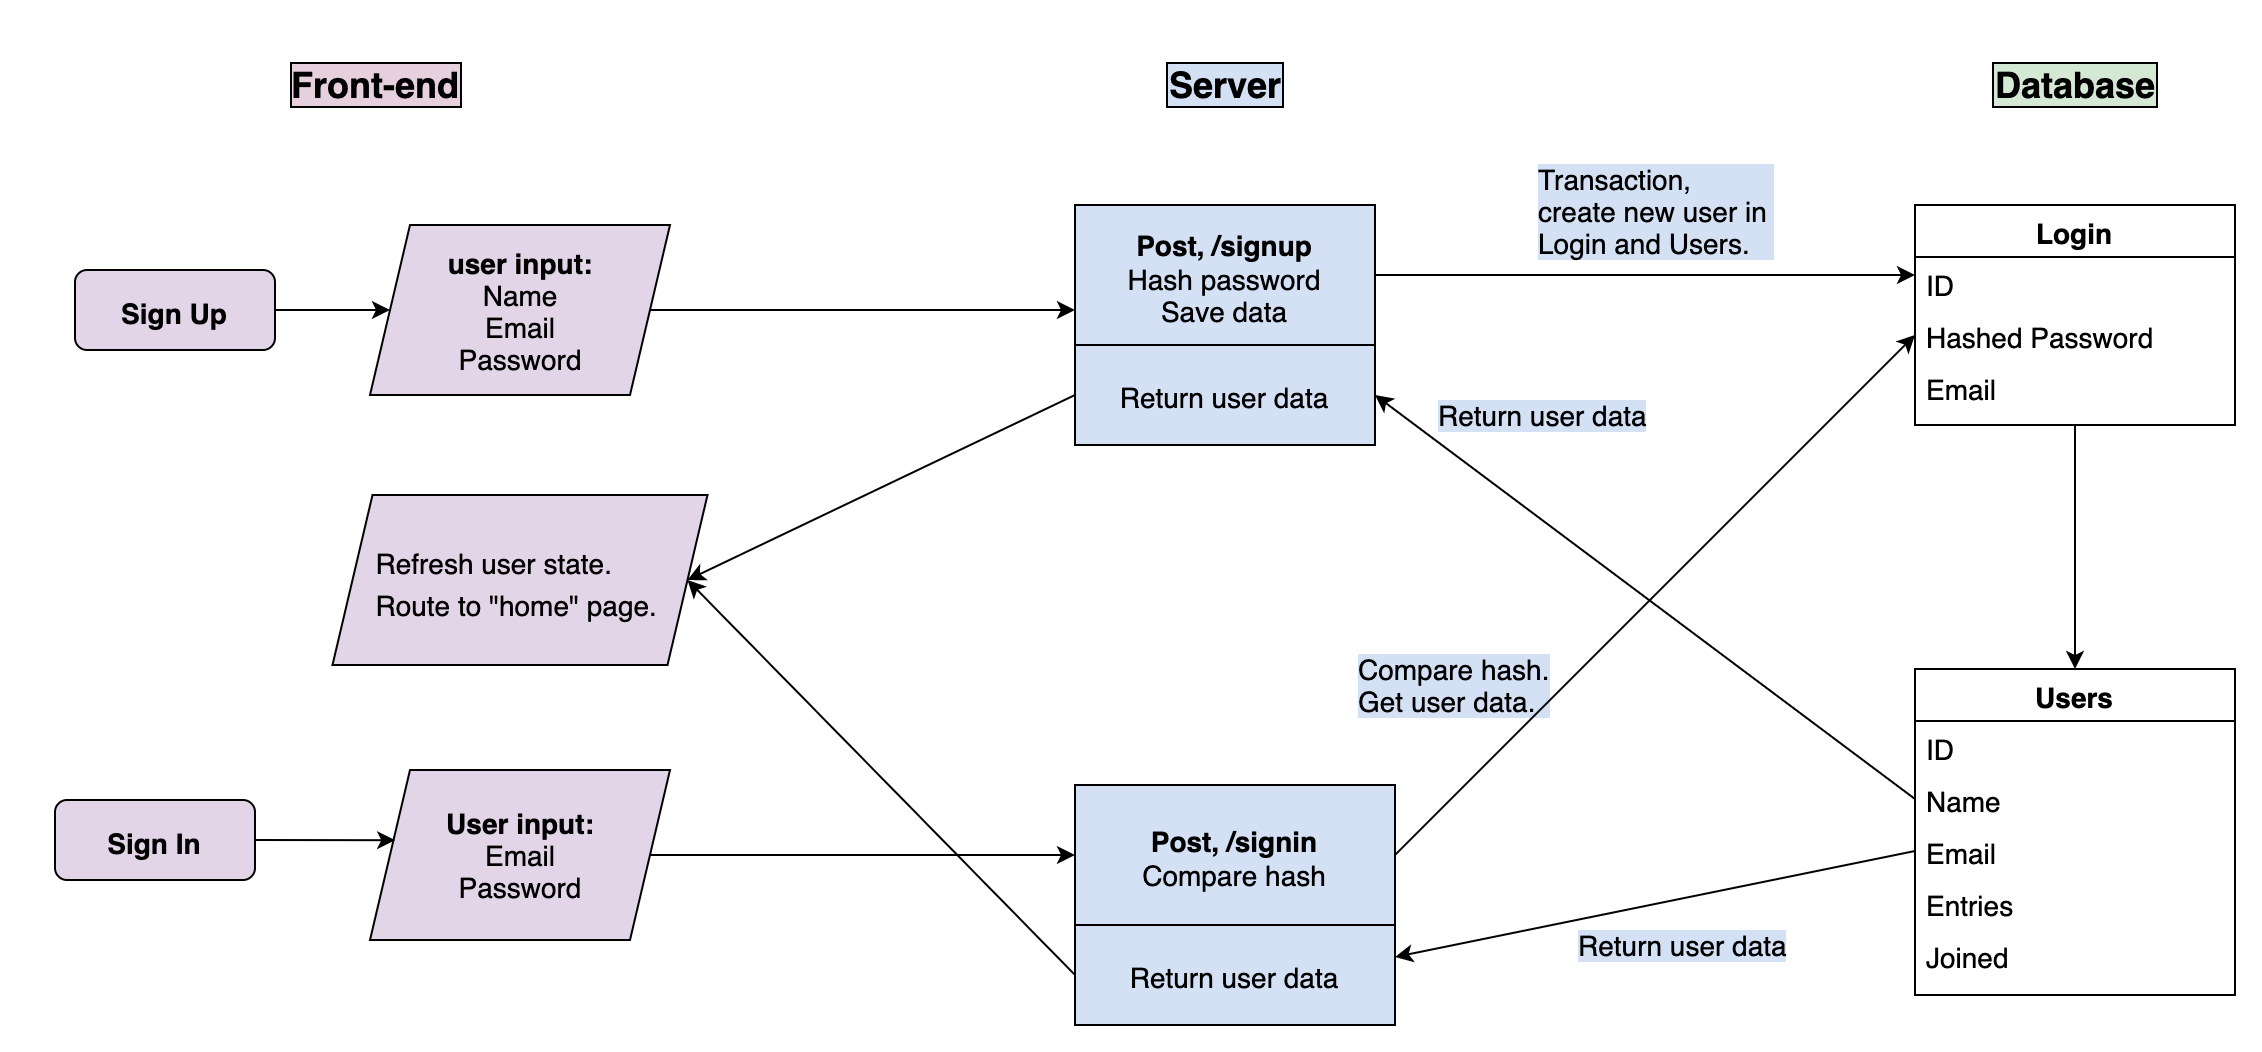
- Connections between front-end, back-end and database in register step and sign in step.
- Creating new user in both Login and Users tables with transaction in registration step.
- Stroing hashed password in Login table.
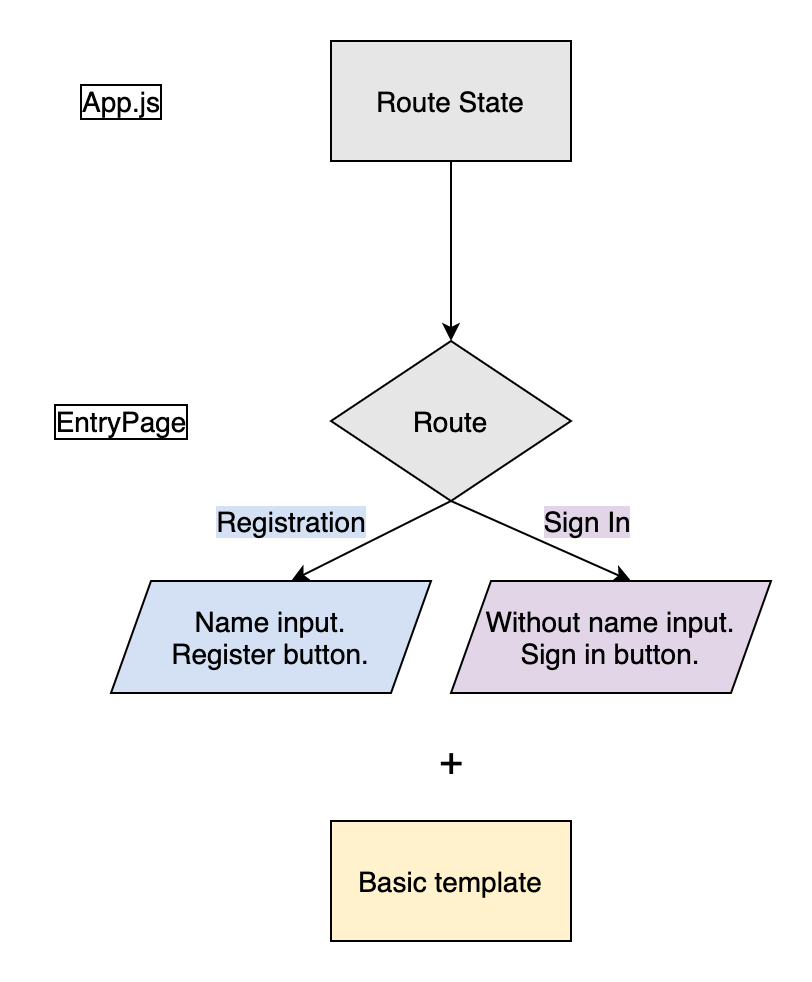
- Since the two pages are quite similar, merge two components to one, don't repear yourself.
- Rendering different contents based on
Routestate fromApp.js: The registration page has a name blanket which does not exist in sign in page. Also the two buttons are named differently. - The component is built by function component using
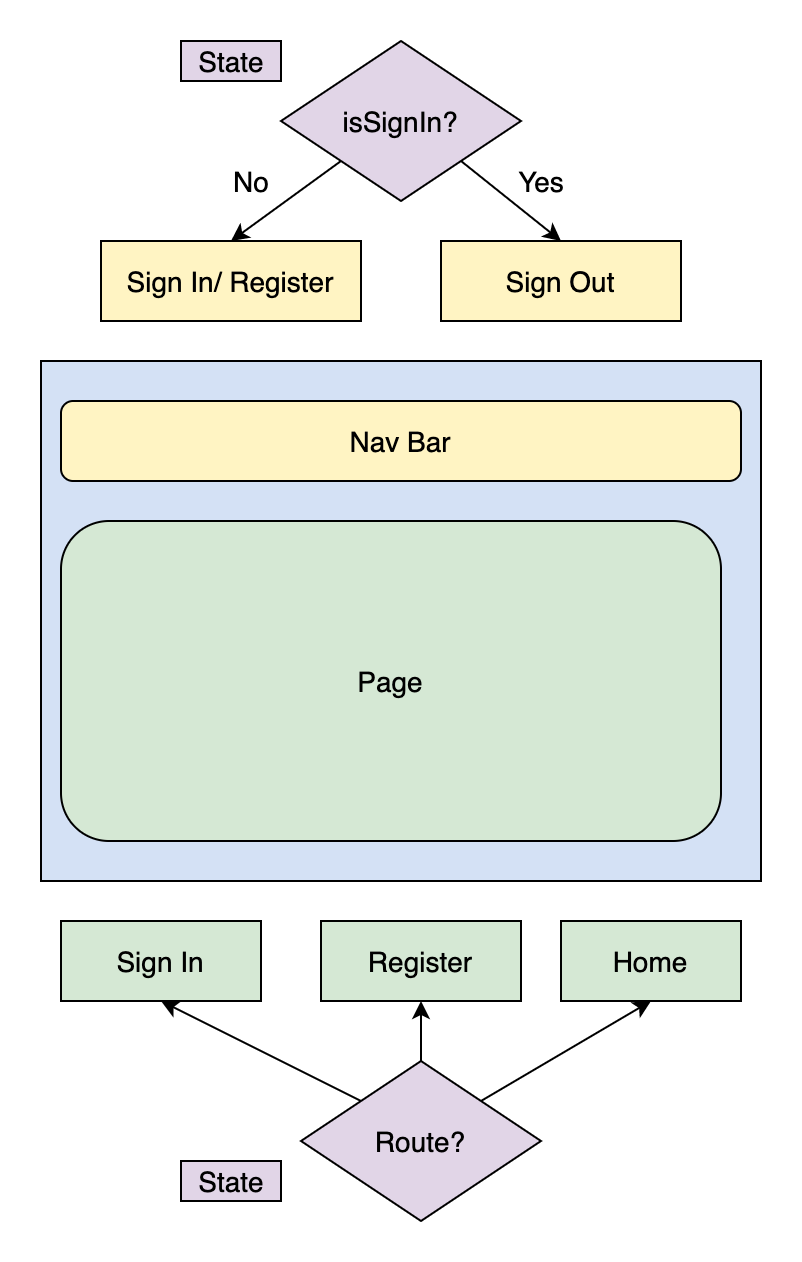
useStateanduseEffect, clearer syntax.
- Rendering nav bar according to
isSignInstate. - Rendering page according to
route.
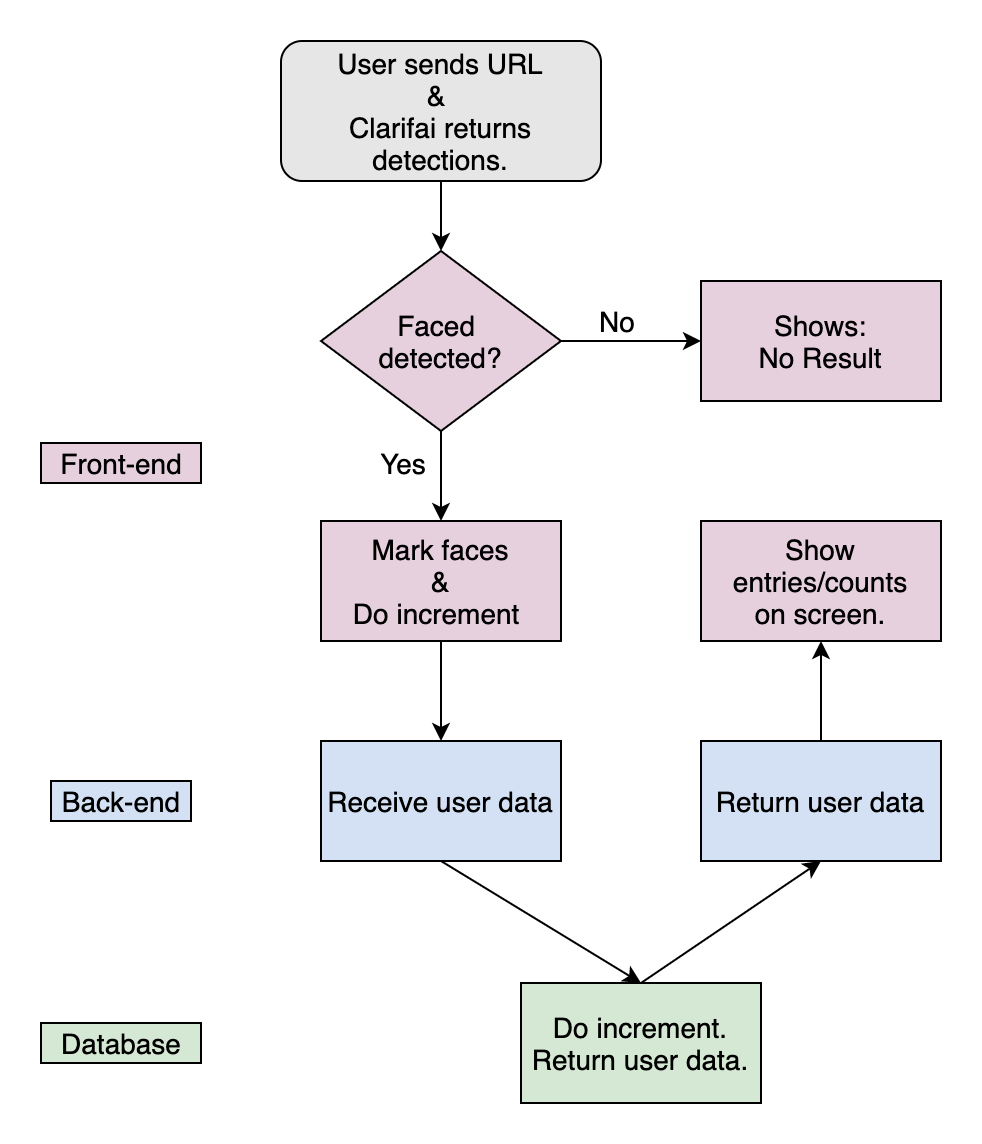
- After Clarifai returning the detection, if there are faces, increment function is triggered and go to database to add 1 times to this user.
- After that, it will return to the front-end and display the updated entries of user on the screen.
environment variables in Back-end
- Storing API key in
.envand add it togitignoreto keep this file from being tracked. - Naming environment variables in
config.jsand exporting it. - Adding another
env.exampleas reference for the team. - In production stage, set API key on Heroku.
- Classifying endpoints, and dividing them to separate files with
dependency injectionsyntax, making it clearer.
