First project for Scripted Studio at Google!
Check out the example here: https://scripted-studio-chat.appspot.com/
-
Fork this repo
 and create a new <c9.io>
workspace for your fork.
and create a new <c9.io>
workspace for your fork. -
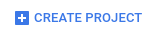
Go to https://console.cloud.google.com sign in and click on CREATE PROJECT
-
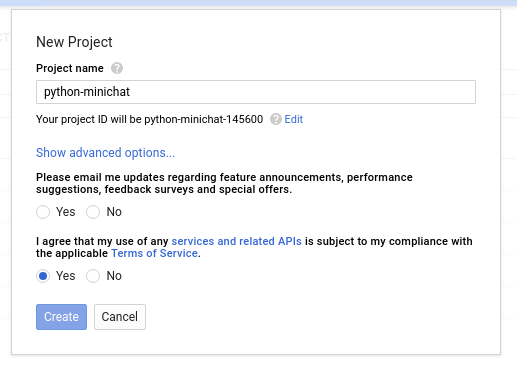
Choose a project name for your project.
-
In your cloud9 workspace open a terminal and run the following command:
curl https://dl.google.com/dl/cloudsdk/release/install_google_cloud_sdk.bash | bashAnswer yes to the prompted questions.
-
Authenticate with the google cloud api by running:
~/google-cloud-sdk/bin/gcloud initFollow the procedure of opening the link and copying the code back to the terminal.
Select the project name you created before when prompted.
-
Deploy your project by running
~/google-cloud-sdk/bin/gcloud app deploy -
Once your project is deployed open it up in a browser by going to your-project-name.appspot.com
-
Change the url at the top of this README to your-project-name.appspot.com
-
Now that your instance of the chat room is deployed customize it to your design. Try modifying the CSS or changing the Python code to have new behavior. Read through the code walk-through below to learn how the app works and get ideas for what you can add or change.


There are two files with code for this project and one config file. Let's walk through them to see what they are doing to make the application work.
The main python file, main.py, consists of four handlers for different
actions. Each handler is bound to a url at the end of the file when the
application is defined:
app = webapp2.WSGIApplication([
  ('/', HandleMain),
  ('/send', HandleSend),
  ('/_ah/channel/connected/', HandleConnect),
  ('/_ah/channel/disconnected/', HandleDisconnect),
], debug=True)
HandleMain is the first entry point to the application. This handler is called
when the web page is loaded and it returns the index.html file to the browser.
The first thing it does is save the user loading the page to the database and open a channel for that user.
class HandleMain(webapp2.RequestHandler):
  """ Renders index.html an initializes the chat room channel. """
  @login_required
  def get(self):
    user = users.get_current_user()
    chat_user = ChatUser.get_or_insert(user.user_id(),
                                       nickname = user.nickname())

    token = channel.create_channel(chat_user.key.string_id())
    template = jinja_environment.get_template('index.html')
    self.response.out.write(template.render({ 'token': token }))
HandleSend is called when the javascript application on the frontend send a
new chat message to the backend. Once it receives the message it then sends out
that message to each connected user.
class HandleSend(webapp2.RequestHandler):
  """ When a user sends a message to be echoed to all other users. """
  def post(self):
    user_id = users.get_current_user().user_id()
    chat_user = ChatUser.get_by_id(user_id)

    data = self.request.get('data')
    for recipient in ChatUser.query():
      channel.send_message(recipient.key.string_id(),
                           '%s: %s' % (chat_user.nickname, cgi.escape(data)))
HandleConnect is called when the channel for a new user is ready to be used.
Similar to HandleSend it also broadcasts out to every user that a new user has
joined the chat room.
class HandleConnect(webapp2.RequestHandler):
  """ Send a welcome message and notifies all other users. """
  def post(self):
    user_id = self.request.get('from')
    chat_user = ChatUser.get_by_id(user_id)

    existing_users = ChatUser.query(ChatUser.key != chat_user.key)
    channel.send_message(chat_user.key.string_id(),
                         'Welcome, %s! Other chatters: %d' %
                         (chat_user.nickname, existing_users.count()))
    for existing_user in existing_users:
      channel.send_message(existing_user.key.string_id(),
                           '%s joined' % chat_user.nickname)
HandleDisconnect is called when a user closes the web page. It deletes the
user from the database so the application doesn't try to send messages to the
user anymore. And it also broadcasts the exit out.
class HandleDisconnect(webapp2.RequestHandler):
  """ Deletes the user model and notifies all other users. """
  def post(self):
    user_id = self.request.get('from')
    chat_user = ChatUser.get_by_id(user_id)
    chat_user.key.delete()

    for user in ChatUser.query():
      channel.send_message(user.key.string_id(), '%s left' % chat_user.nickname)
Finally the users are stored in the database in the format described by the
ChatUser class. And this class is used to save, delete, and query users.
class ChatUser(ndb.Model):
  """ Stored user model. Should be keyed by the User ID. """
nickname = ndb.StringProperty()The index.html file has both the html and javascript in it. First the html
consists of a div to contain the chat messages and an input tag where user
sends chat messages.
<div id="chat">
  <div id="messages"></div>
  <input disabled placeholder="Connecting..." id="newmessage"></input>
</div>
Next the html imports jQuery and the api for App Engine channels.
<script src='//ajax.googleapis.com/ajax/libs/jquery/3.1.1/jquery.min.js'>
</script>
<script src='/_ah/channel/jsapi'></script>
In the application javascript we start off by saving the jQuery objects for the two html elements from above.
<script>
  var messages = $('#messages');
  var newmessage = $('#newmessage');
Then we use the library imported from /_ah/channel/jsapi to open a channel to
the backend. Note here the value {{ token }} is replaced when the index.html
is served with the unique token string created in main.py.
  // Wire up the channel event handlers.
  var channel = new goog.appengine.Channel('{{ token }}');
  var handler = {
    'onopen': function() {
      // Let the chatting begin.
      newmessage.attr('placeholder', 'Send a message');
      newmessage.attr('disabled', false);
      newmessage.focus();
    },
    'onmessage': function(m) {
      // Blindly append the message to the end of the element.
      messages.append('<p class="message">' + m.data + '</p>');
    },
    'onerror': function() {}, // No-op.
    'onclose': function() {}, // No-op.
  };
channel.open(handler);
Finally, we listen for the user pressing enter on the chat input and send the chat message. We also bind to the user clicking outside of the chat input and return focus to it in order to make sure it's always easy to send a new chat message.
// Enter-button handler, i.e. send a message.
newmessage.on('keypress', function(e) {
  if (e.key === 'Enter' && newmessage.val() !== '') {
    $.post('/send', {data: newmessage.val()});
    newmessage.val('');
  };
});

// Force all focus to the input box.
newmessage.on('blur', function(e) {
  newmessage.focus();
});The app.yaml file is a config file that App Engine uses to run the application
when it's deployed. The first three lines of the file set up the project to run
a python backend.
runtime: python27
api_version: 1
threadsafe: true
The next section of the file connects the urls to the main.py file.
inbound_services sets up the internal /_ah/channel/ urls for receiving the
connect and disconnect notifications.
inbound_services:
- channel_presence

handlers:
- url: /.*
  script: main.app
````

Finally, App Engine needs to know about the third party libaries our python
application uses.

```yaml
libraries:
- name: webapp2
  version: "2.5.2"
- name: jinja2
  version: "2.6"