
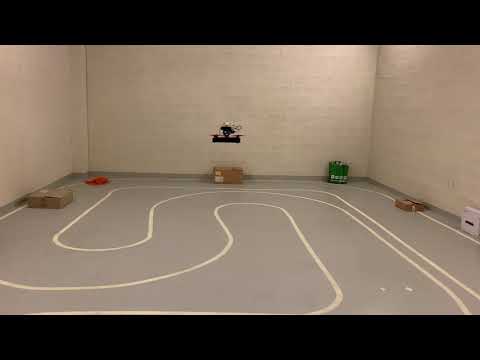
The objective of this project is to build an autonomous drone able to follow a path, detect and pass thru gates and complete course.
Corresponding challenge : https://www.roboracingleague.com/
Meetup : https://www.meetup.com/fr-FR/DIY-Robocars-France/
Youtube channel : https://www.youtube.com/channel/UC7dakUQw-4Dd-6M4JbVFB6w
Slack team : https://join.slack.com/t/diyrobocars-france/shared_invite/enQtODU2MDcwNDA0MTI5LTgyYzMzYjlkY2E1YThmMjg4MTk4MjlkMGY3NmExZjA1ZmM2NGQ3ODk3ODNhNmIxNTU5OWM1ZjVjZGY0YmEzODk
This github repo is divided into 2 parts :
- Drone build : how to mount the drone, see below
- Brain setup : the software part including the Jetson Nano setup. See in brain directory
Frame : Realacc Martian IV 7 Inch 300mm Wheelbase 4mm Arm Carbon Fiber FPV Racing Frame Kit

Frsky XM+ (SBUS) EU LBT receiver : https://www.studiosport.fr/recepteur-frsky-xm-sbus-a13865.html
4 x Motors XNova FS Line 2207 - 1700 KV : https://www.studiosport.fr/moteurs-xnova-fs-line-2207-par-4-a17208.html
4 x three-bladed propelers DALprop TJ6045 Red : https://www.studiosport.fr/helices-tripales-dalprop-tj6045-a10781.html
4 x ESC AIKON AK 32 35A 6S BLHeli32 : https://www.studiosport.fr/esc-aikon-ak-32-35a-6s-blheli32-a13754.html
UBEC : Matek Systems UBEC DUO 4A/5~12V et 4A/5V

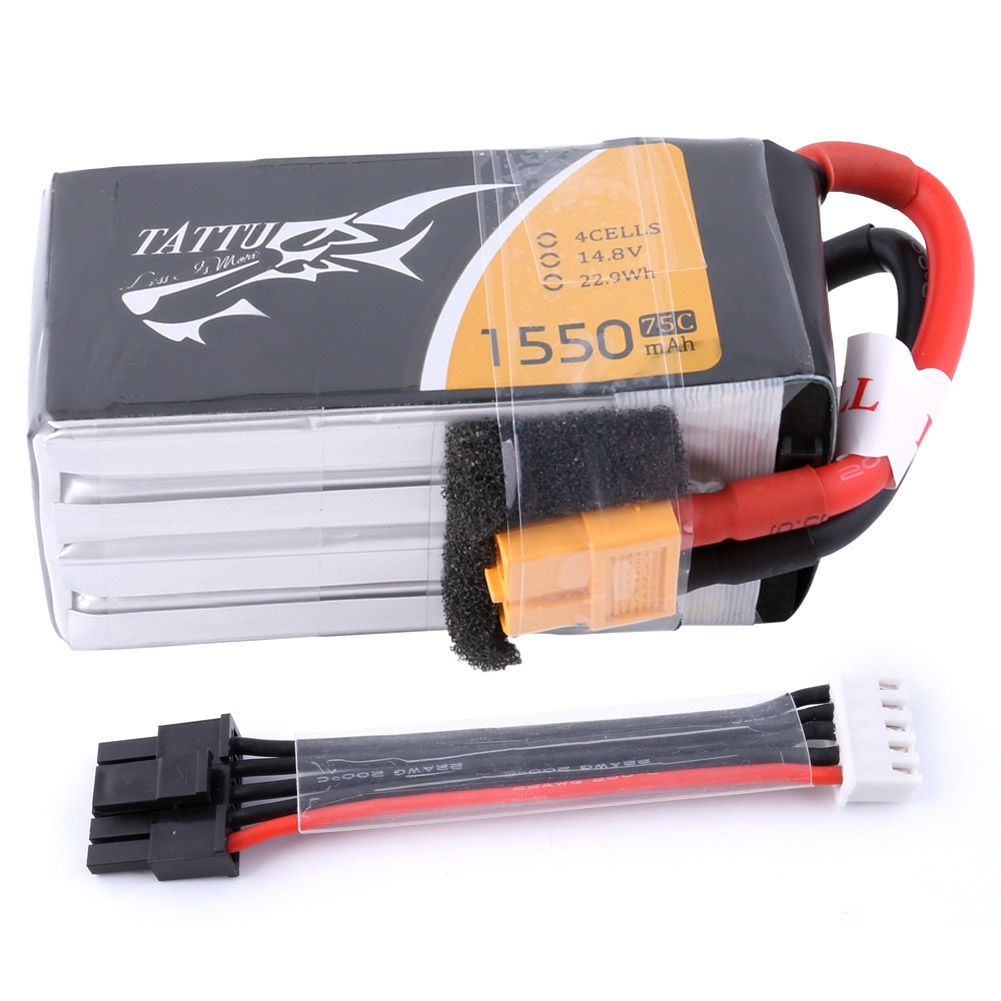
4S LIPO :
Pixhawk 4 mini

Radio Controler - Taranis X9D plus

But other cheaper alternatives are ok. Adapt your RC receiver according to your radio
Intel realsense T265 & D435

and their cables at the right size :
- https://www.amazon.fr/gp/product/B074V3GD2S/ref=ppx_yo_dt_b_asin_title_o03_s00?ie=UTF8&psc=1
- https://www.amazon.fr/gp/product/B078XS7BLH/ref=ppx_yo_dt_b_asin_title_o03_s01?ie=UTF8&psc=1
NVIDIA Jetson nano

with 2 x molex antena for wifi : https://www.mouser.fr/ProductDetail/molex/204281-1100/?qs=W0yvOO0ixfHAJETEkFF0dw==&countrycode=DE¤cycode=EUR
3D prints :
- core :
- STL : ref
- fixings :
- d435 : https://www.amazon.fr/gp/product/B07CKZNZRB/ref=ppx_yo_dt_b_asin_title_o04_s00?ie=UTF8&psc=1
- https://www.amazon.fr/gp/product/B07G1B2BJW/ref=ppx_yo_dt_b_asin_title_o04_s00?ie=UTF8&psc=1
- https://www.amazon.fr/gp/product/B07RKTMKGR/ref=ppx_yo_dt_b_asin_title_o05_s00?ie=UTF8&psc=1
- Support silentbloc M3 2x4 : https://www.dronelec.com/c/p/4480-support-silent-bloc-pour-carte-de-vol-m3-5x5mm-x4/null/
- prop guard x4 :
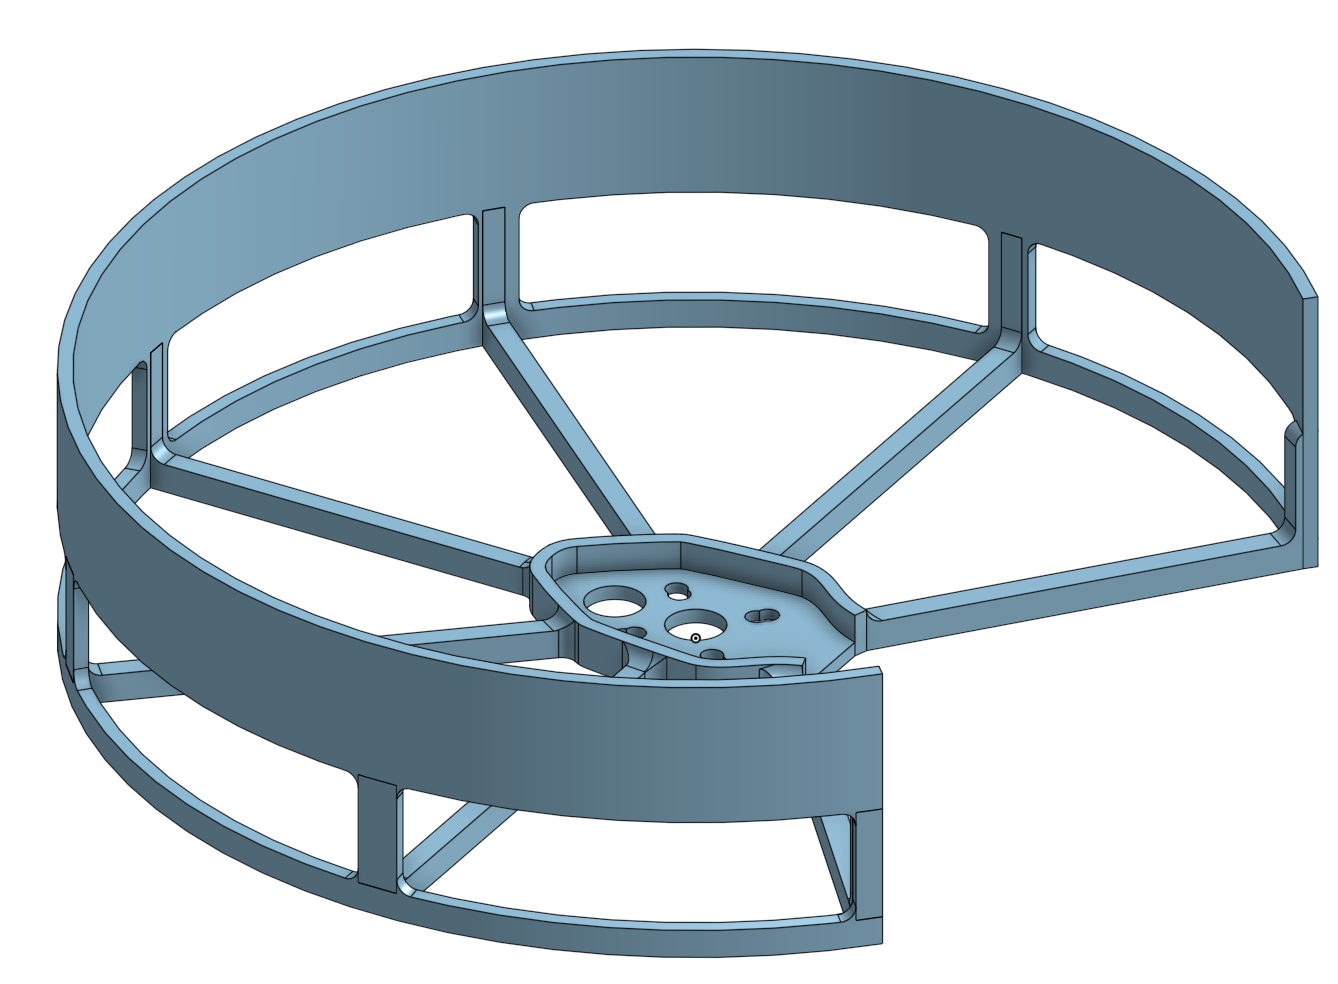
- STL : ref
Mount motors and ESC on each arm and solder the wires. Beware to invert wiring of motor 1 and 2 (they spin counterclockwise).

Mount powerboard delivered with Pixhawk 4 mini. Solder the wires
Connect powerboard to Pixhawk with connectors provided with Pixhawk
Connect Frsky XM+ to Pixhawk (use connector provided with Pixhawk and solder to Frsky XM+)
Connect your computer to Pixhawk (via micro usb)
Download, install then open QGround Control on your computer
You should have now QGC connected to your Pixhawk
PX4 Firmware version used and tested : 1.10.0
Airframe : select 3DR DIY QUad
Sensor setup : follow instructions
Radio setup : after having connected your RC (see below), check channel 1 to 12 are active and that Roll, Pitch, Yaw and Throttle are correct
Flight mode : 
Power : 
Safety : 
Parameters :
- EKF2 :
- EKF2_AID_MASK : 24
- EKF2_EVP_NOISE : 0.10 m
- EKF2_HGT_MODE : vision
- GPS : disabled
- MAVLINK :
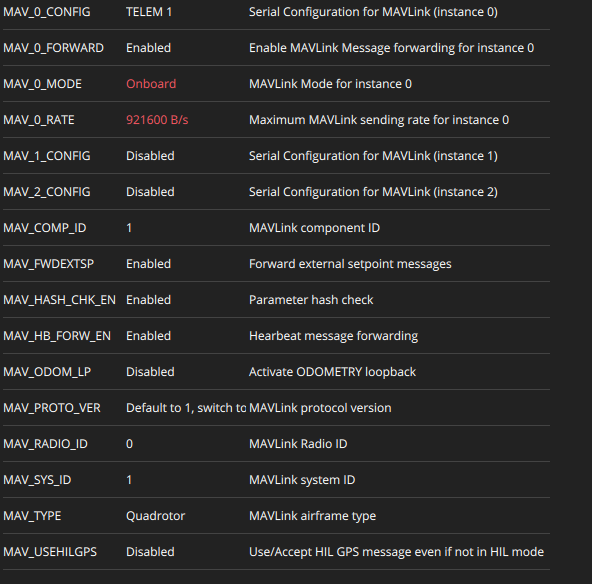
- SERIAL : SER_TEL1_BAUD : 921600 8N1
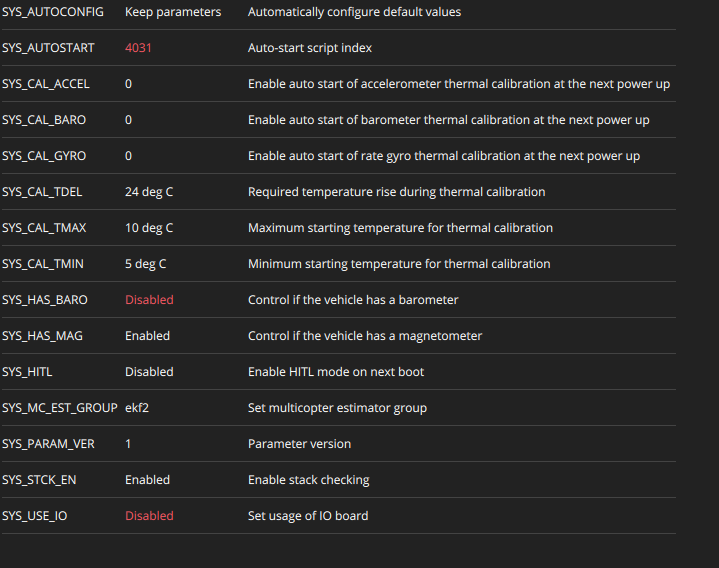
- SYSTEM :
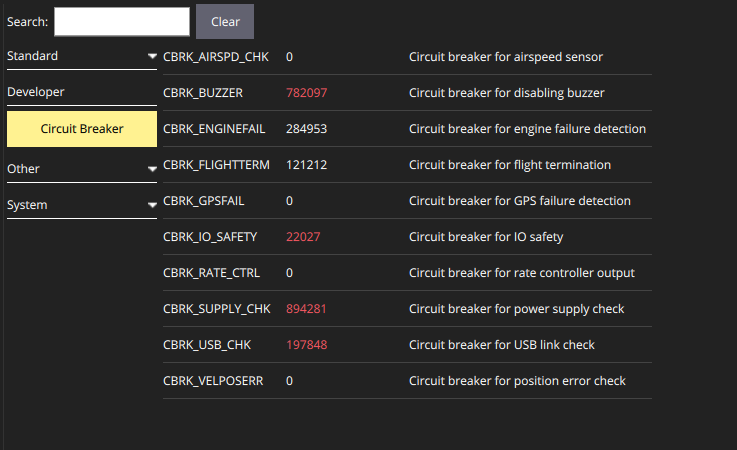
- Developer :


Start and set your taranis so that it connects to your Frsky XM+. Tutorial : https://www.youtube.com/watch?v=ZOBwwNpjNrY
Set your 12 first channel (first 4 for attitude control). See at end of Readme.md in brain directory for some details
Without your propelers mounted, connect your 4S battery to your drone and turn on your Taranis.
Arm your drone (from taranis) and check that motors spin in the right way :
You can then test your drone with propelers but outdoor in safety environnement (with no obstacle 10m around and above) and in stabilized mode. Objective is to check that drone can takeoff (no more than 50cm !), yaw, pitch and roll.
Be ready anytime to disarm if something goes wrong !
If it's ok, you can move on to the next step : go to Assembly autonomous parts.

inject with your soldering iron the 4x  in the hole of 3Dprint Camera_support
Add Support silentbloc M3 2x4 and fix the Support_frame with Camera_support with M3 screws
If you want to mount D435 camera :
- use screw
 and put through 3D print 435_screw_support
- put it through the 3D Print camera_support
Be aware that you won't be able to mount this after having screwed the Support_frame on the quad


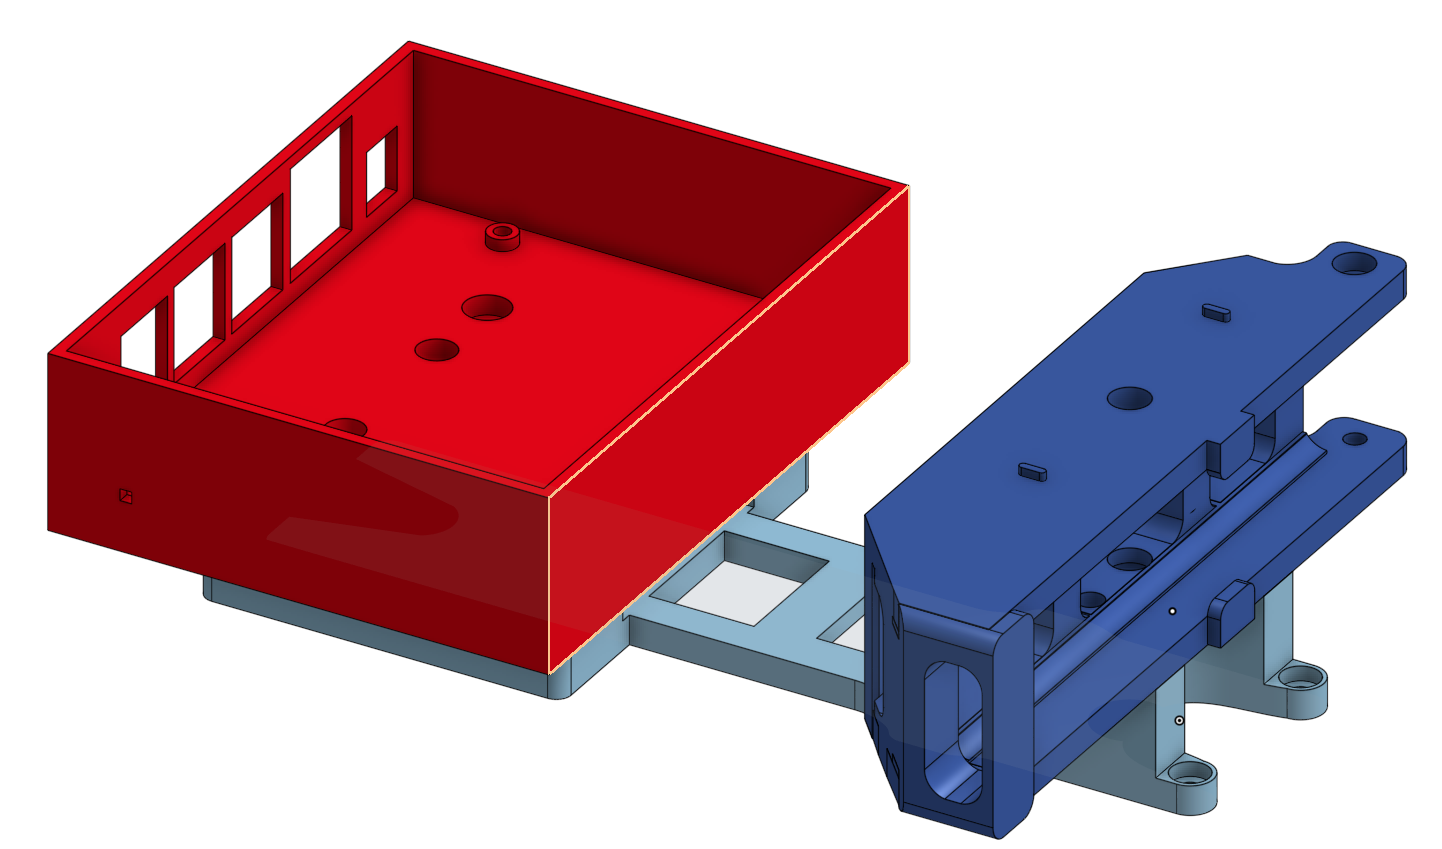
Then Mount the 3D print Support_frame and Camera_support on the quad frame.
Be careful to pass the UBEC and XT60 wires throuh the middle of the frame

Be careful also to put the battery strap on the Support_frame

Screw the Support_frame on your quad only after the UBEC is soldered (se below)
Solder your UBEC input voltage wires to Battery Pins of the Powerboard.
Be careful to pass the wires though the middle of the frame
Screw (3M) the Support_frame on your quad
inject with your soldering iron the 4x in the hole of 3Dprint Support_frame
Add Support silentbloc M3 2x4 and fix the Support_frame with Jetson_box with M3 screws
Connect TELEM1 port of Pixhawk to GND/RX/TX pins of the Jetson (pins 8, 10 and 12)
Insert your T265 realsense camera to the Camera_support and connect it to one of the Jetson USB port


