Project page | Paper | Video | LOD Viewer (SIBR) | Web Viewer| GarageWorld Dataset
This repository contains the official implementation associated with the paper "LetsGo: Large-Scale Garage Modeling and Rendering via LiDAR-Assisted Gaussian Primitives"
Large garages are ubiquitous yet intricate scenes in our daily lives. They pose challenges characterized by monotonous colors, repetitive patterns, reflective surfaces, and transparent vehicle glass. Conventional Structure from Motion (SfM) methods for camera pose estimation and 3D reconstruction fail in these environments due to poor correspondence construction. To address these challenges, this paper introduces LetsGo, a LiDAR-assisted Gaussian splatting framework for large-scale garage modeling and rendering. We develop a handheld scanner, Polar, equipped with IMU, LiDAR, and a fisheye camera, to facilitate accurate LiDAR and image data scanning. With this Polar device, we present a GarageWorld dataset consisting of eight expansive garage scenes with diverse geometric structures and will release the dataset to the community for further research. We demonstrate that the collected LiDAR point cloud by the Polar device enhances a suite of 3D Gaussian splatting algorithms for garage scene modeling and rendering. We also introduce a novel depth regularizer that effectively eliminates floating artifacts in rendered images. Furthermore, we propose a multi-resolution 3D Gaussian representation designed for Level-of-Detail rendering. We use tailored scaling factors for individual levels and a random-resolution-level training scheme to optimize the Gaussians across different levels. This 3D Gaussian representation enables efficient rendering of large-scale garage scenes on lightweight devices via a web-based renderer. Experimental results on our dataset, along with ScanNet++ and KITTI-360, demonstrate the superiority of our method in rendering quality and resource efficiency.
# clone repo
git clone https://github.com/zhaofuq/LOD-3DGS.git --recursive

# create a new python environment
conda env create --file environment.yml
conda activate lod-3dgs

# build PotreeConverter for Multi-Resolution Pointcloud, tested on windows
cd PotreeConverter
cmake . -B build
cmake --build build --config ReleaseWe provide a small scale garage sample dataset. To train a scene in our GarageWorld dataset, simply use
python train.py -s <path to GarageWorld scene with COLMAP format> \
    --use_lod \
    --sh_degree 2 \
    --depths depths \ # use for depth loss if contains depths folder.
    --densification_interval 10000 \
    --iterations 300000 \
    --scaling_lr 0.0015 \
    --position_lr_init 0.000016 \
    --opacity_reset_interval 300000 \
    --densify_until_iter 200000 \
    --data_device cpu \
    -r 1
Command Line Arguments for train.py
Path to the source directory containing a COLMAP or Synthetic NeRF data set.
Path where the trained model should be stored (output/<random> by default).
Alternative subdirectory for COLMAP images (images by default).
Alternative subdirectory for depth images (depths by default).
Add this flag to use a MipNeRF360-style training/test split for evaluation.
Specifies resolution of the loaded images before training. If provided 1, 2, 4 or 8, uses original, 1/2, 1/4 or 1/8 resolution, respectively. For all other values, rescales the width to the given number while maintaining image aspect. If not set and input image width exceeds 1.6K pixels, inputs are automatically rescaled to this target.
Specifies where to put the source image data, cuda by default, recommended to use cpu if training on large/high-resolution dataset, will reduce VRAM consumption, but slightly slow down training. Thanks to HrsPythonix.
Add this flag to use white background instead of black (default), e.g., for evaluation of NeRF Synthetic dataset.
Order of spherical harmonics to be used (no larger than 3). 3 by default.
Flag to make pipeline compute forward and backward of SHs with PyTorch instead of ours.
Flag to make pipeline compute forward and backward of the 3D covariance with PyTorch instead of ours.
Enables debug mode if you experience erros. If the rasterizer fails, a dump file is created that you may forward to us in an issue so we can take a look.
Debugging is slow. You may specify an iteration (starting from 0) after which the above debugging becomes active.
Number of total iterations to train for, 30_000 by default.
IP to start GUI server on, 127.0.0.1 by default.
Port to use for GUI server, 6009 by default.
Space-separated iterations at which the training script computes L1 and PSNR over test set, 7000 30000 by default.
Space-separated iterations at which the training script saves the Gaussian model, 7000 30000 <iterations> by default.
Space-separated iterations at which to store a checkpoint for continuing later, saved in the model directory.
Path to a saved checkpoint to continue training from.
Flag to omit any text written to standard out pipe.
Spherical harmonics features learning rate, 0.0025 by default.
Opacity learning rate, 0.05 by default.
Scaling learning rate, 0.005 by default.
Rotation learning rate, 0.001 by default.
Number of steps (from 0) where position learning rate goes from initial to final. 30_000 by default.
Initial 3D position learning rate, 0.00016 by default.
Final 3D position learning rate, 0.0000016 by default.
Position learning rate multiplier (cf. Plenoxels), 0.01 by default.
Iteration where densification starts, 500 by default.
Iteration where densification stops, 15_000 by default.
Limit that decides if points should be densified based on 2D position gradient, 0.0002 by default.
How frequently to densify, 100 (every 100 iterations) by default.
How frequently to reset opacity, 3_000 by default.
Influence of SSIM on total loss from 0 to 1, 0.2 by default.
Percentage of scene extent (0--1) a point must exceed to be forcibly densified, 0.01 by default.
To render a trained model, simply use
python render.py -m <path to model path> Command Line Arguments for render.py
Path to the trained model directory you want to create renderings for.
Flag to skip rendering the training set.
Flag to skip rendering the test set.
Flag to omit any text written to standard out pipe.
The below parameters will be read automatically from the model path, based on what was used for training. However, you may override them by providing them explicitly on the command line.
Path to the source directory containing a COLMAP or Synthetic NeRF data set.
Alternative subdirectory for COLMAP images (images by default).
Add this flag to use a MipNeRF360-style training/test split for evaluation.
Changes the resolution of the loaded images before training. If provided 1, 2, 4 or 8, uses original, 1/2, 1/4 or 1/8 resolution, respectively. For all other values, rescales the width to the given number while maintaining image aspect. 1 by default.
Add this flag to use white background instead of black (default), e.g., for evaluation of NeRF Synthetic dataset.
Flag to make pipeline render with computed SHs from PyTorch instead of ours.
Flag to make pipeline render with computed 3D covariance from PyTorch instead of ours.
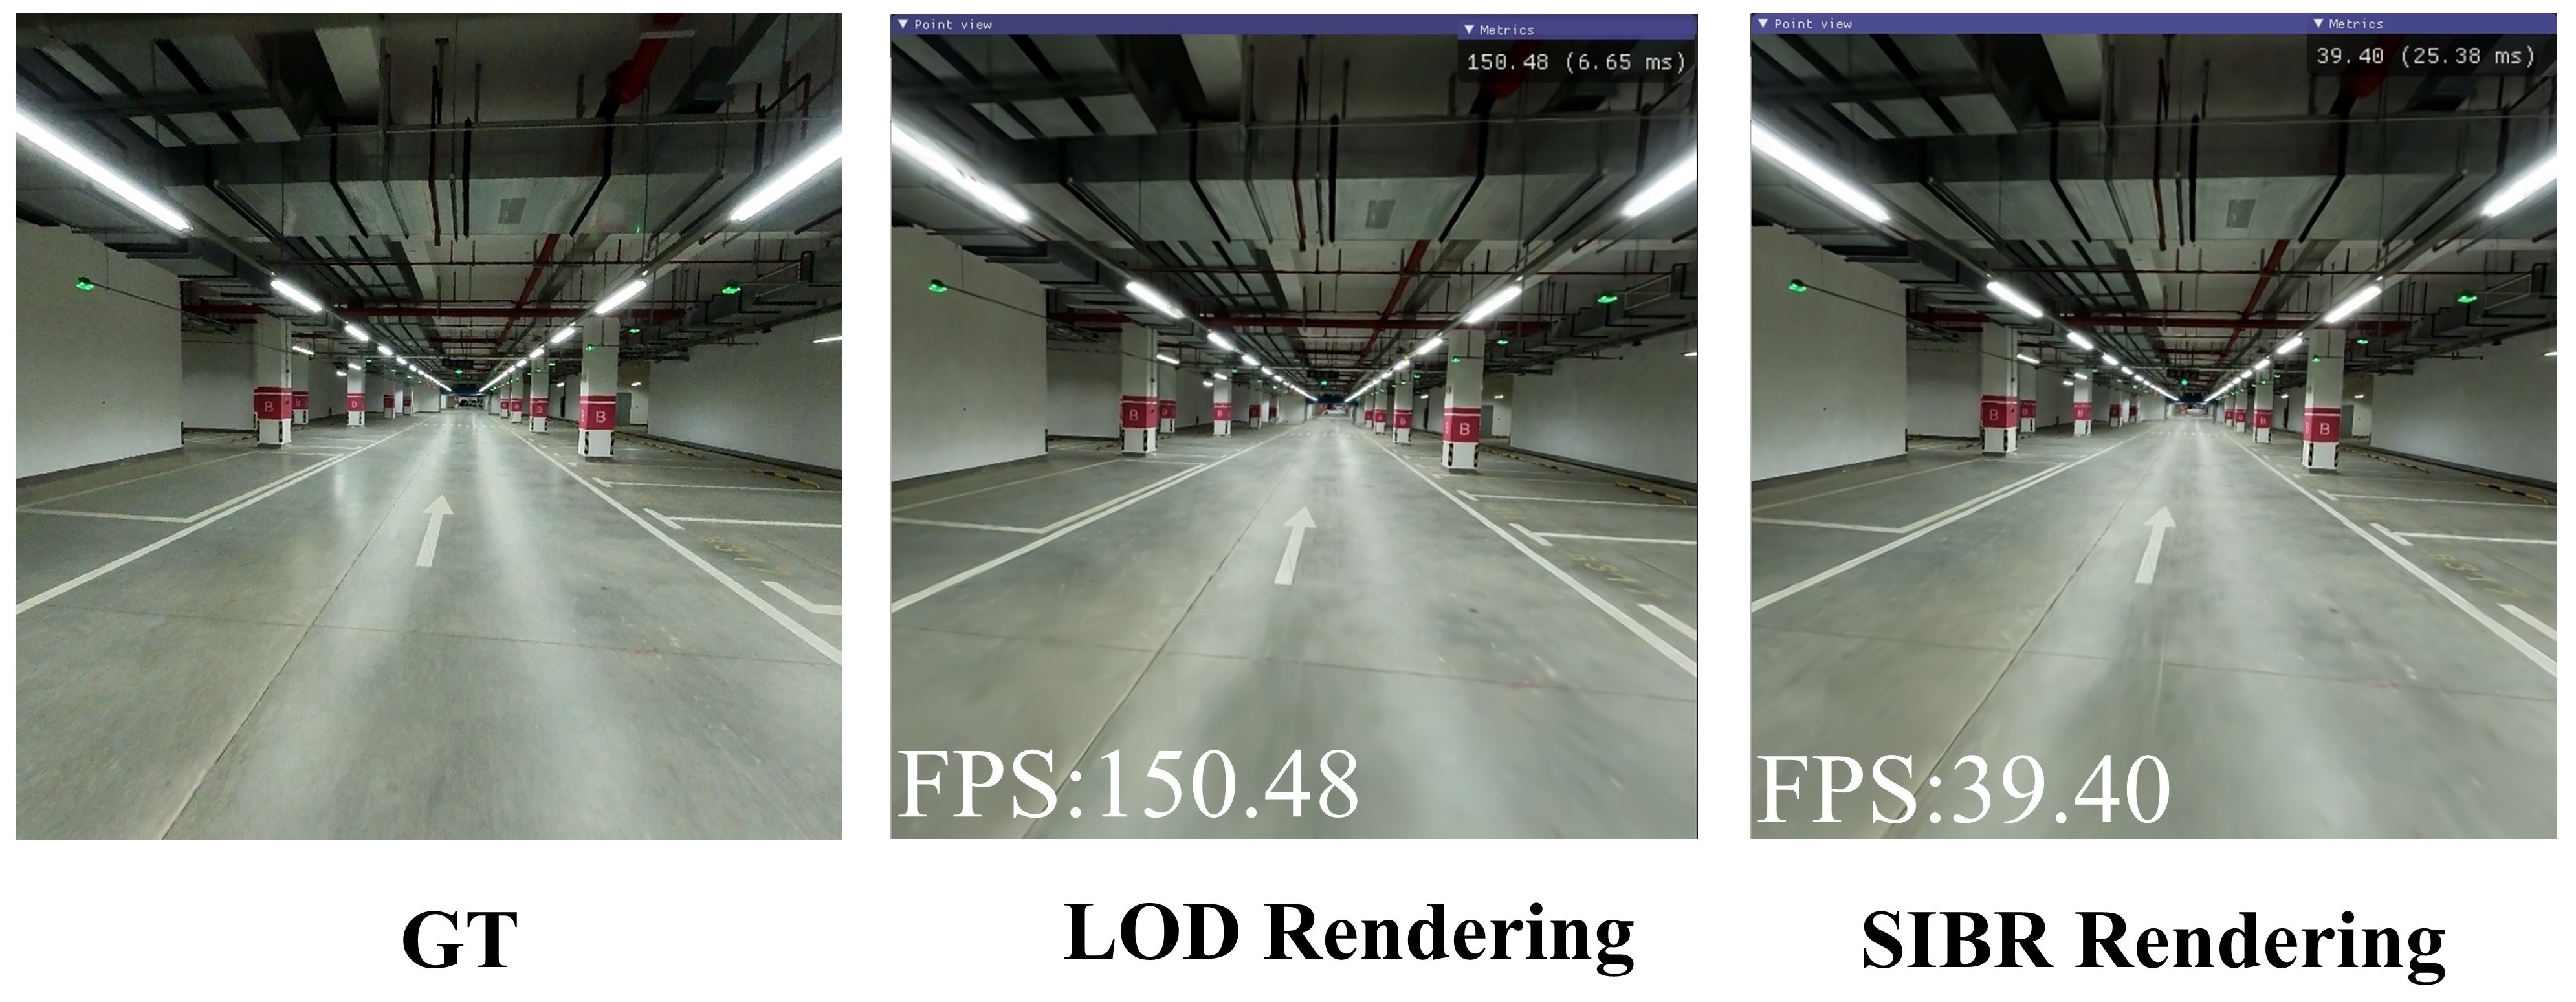
Our viewing solutions are based on the SIBR framework, developed by the GRAPHDECO group for several novel-view synthesis projects. We intergrate LOD rendering technique into SIBR framework to make faster rendering effects.
- CUDA-ready GPU with Compute Capability 7.0+
- 24 GB VRAM (to train to paper evaluation quality)
- Please see FAQ for smaller VRAM configurations
- Conda (recommended for easy setup)
- C++ Compiler for PyTorch extensions (we used Visual Studio 2019 for Windows)
- CUDA SDK 11 for PyTorch extensions, install after Visual Studio (we used 11.8, known issues with 11.6)
- C++ Compiler and CUDA SDK must be compatible
If you cloned with submodules (e.g., using --recursive), the source code for the viewers is found in SIBR_viewers. The network viewer runs within the SIBR framework for Image-based Rendering applications.
CMake should take care of your dependencies.
cd SIBR_viewers
cmake . -B build
cmake --build build --target install --config RelWithDebInfo
You may specify a different configuration, e.g. Debug if you need more control during development.
You will need to install a few dependencies before running the project setup.
# Dependencies
sudo apt install -y libglew-dev libassimp-dev libboost-all-dev libgtk-3-dev libopencv-dev libglfw3-dev libavdevice-dev libavcodec-dev libeigen3-dev libxxf86vm-dev libembree-dev
# Project setup
cd SIBR_viewers
cmake -Bbuild . -DCMAKE_BUILD_TYPE=Release # add -G Ninja to build faster
cmake --build build -j24 --target installBackwards compatibility with Focal Fossa is not fully tested, but building SIBR with CMake should still work after invoking
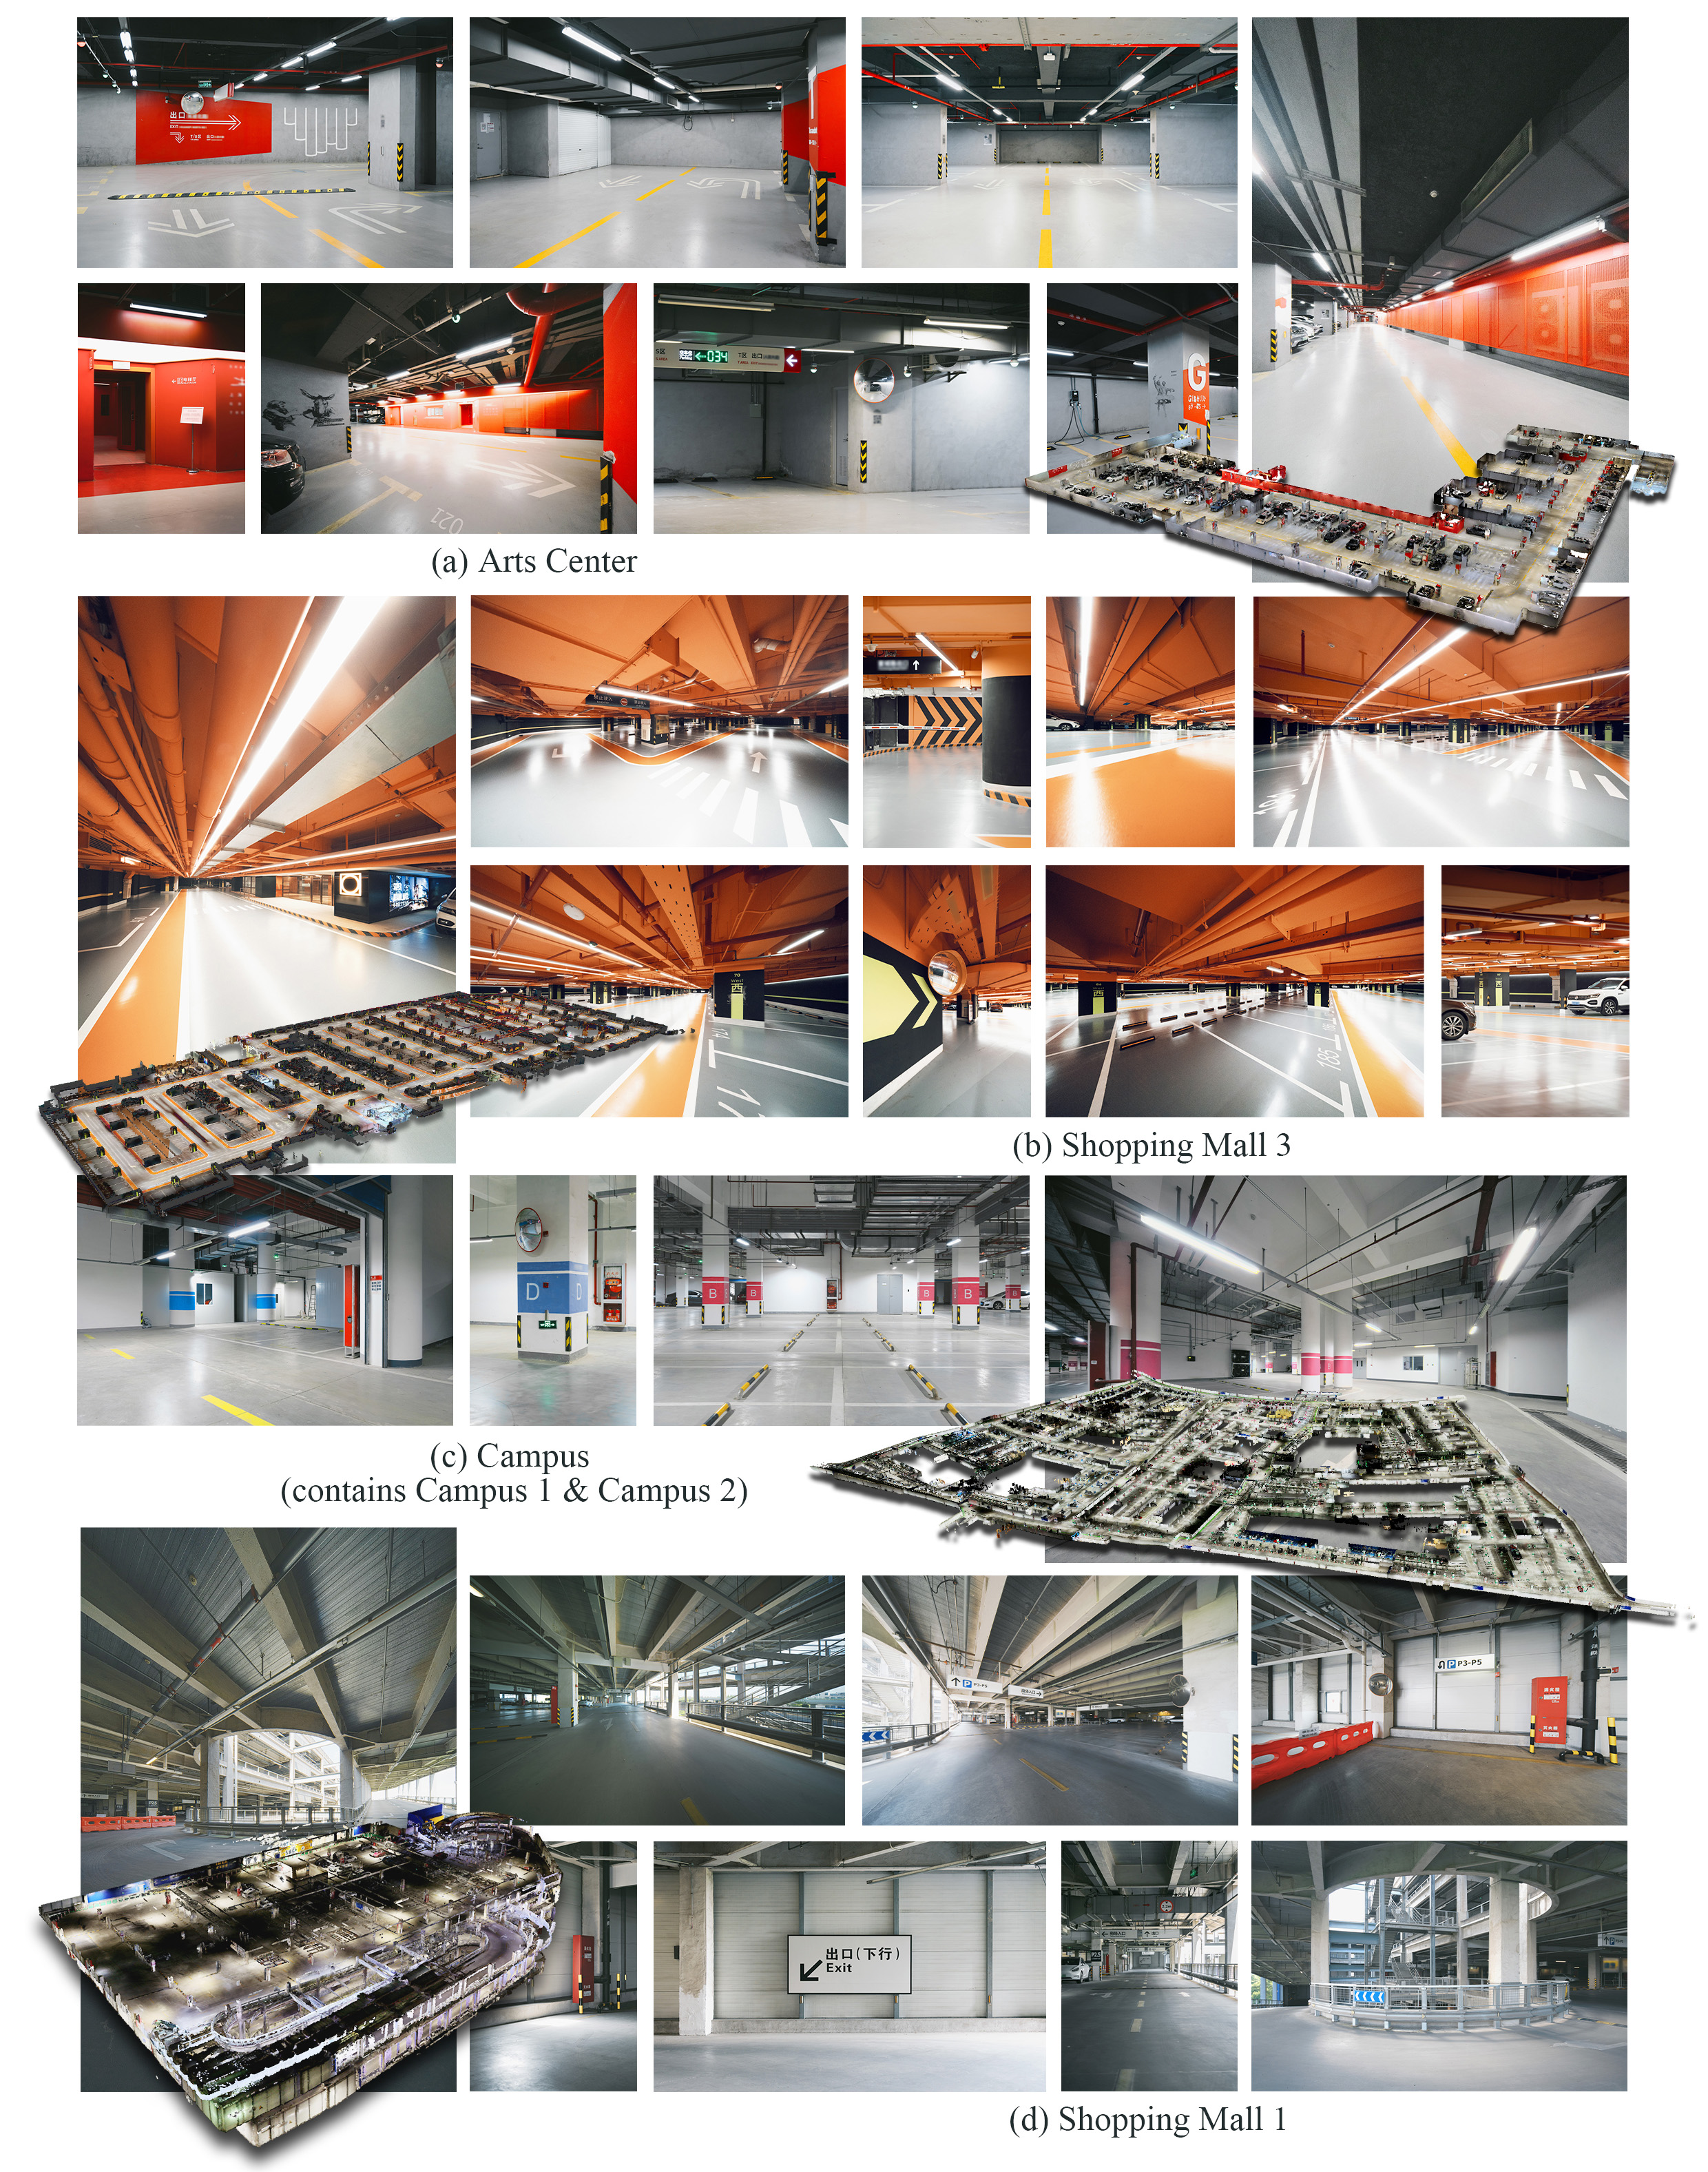
git checkout fossa_compatibilityUsing our polar divide, we build GarageWorld, the first large-scale garage dataset.


