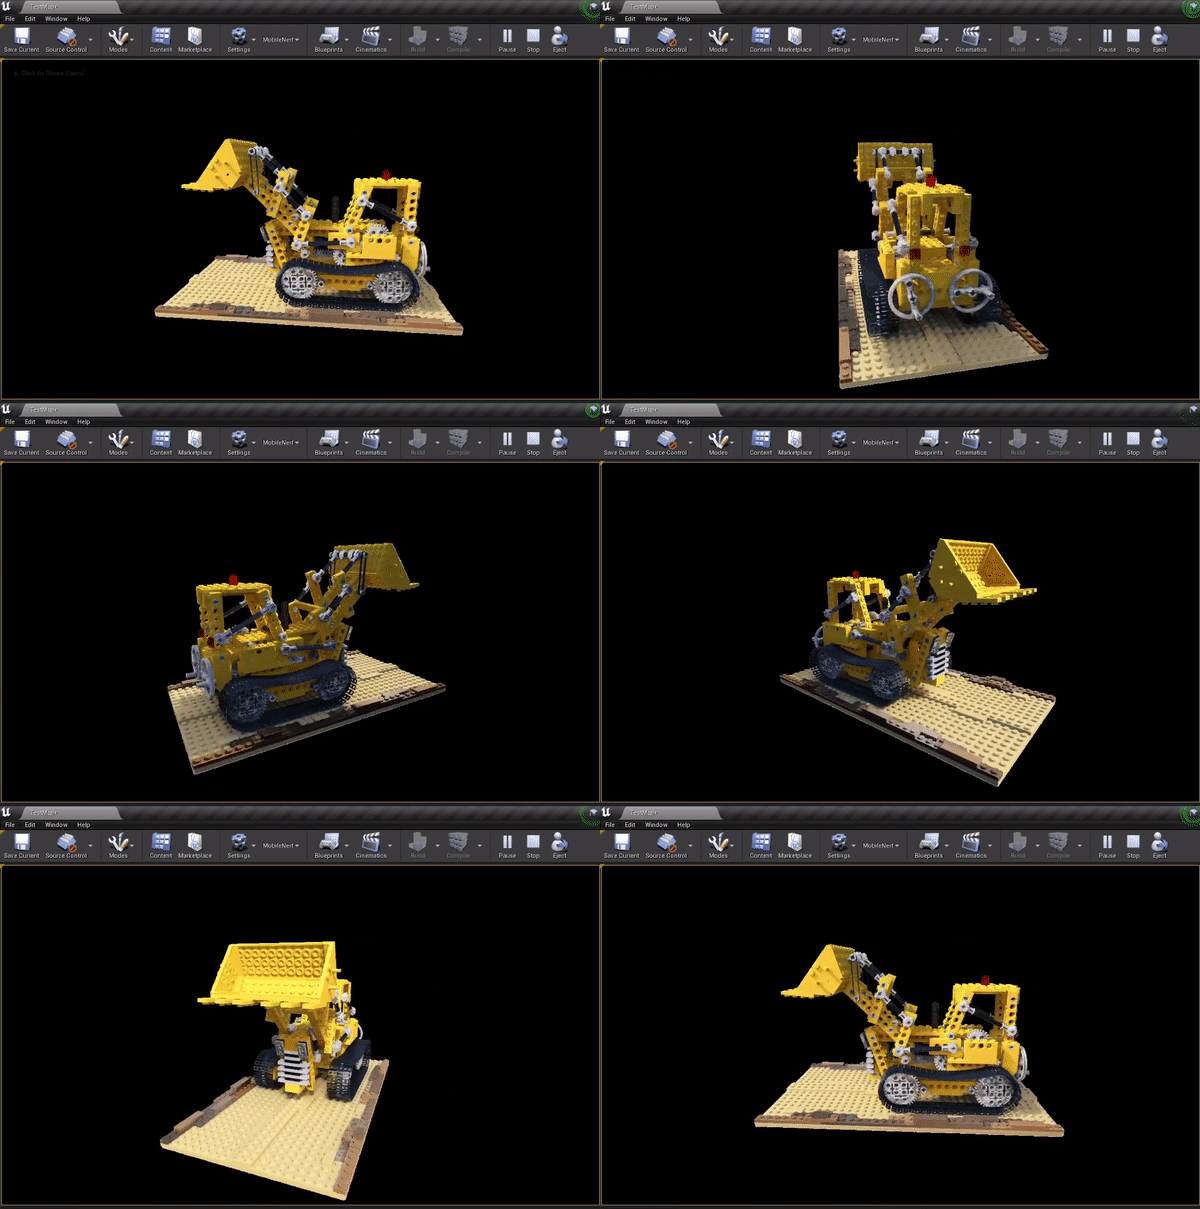
UnrealMobileNeRF is a plugin for Unreal Engine that allows for importing pre-trained MobileNeRF scenes and creating assets that you can use in-editor or in packaged projects.
MobileNeRF is an optimized NeRF representation that relies on textured polygons to make use of the standard rendering pipelines instead of raymarching algorithms. You can read more about MobileNeRF in their official page: MobileNeRF: Exploiting the Polygon Rasterization Pipeline for Efficient Neural Field Rendering on Mobile Architectures
Please note, that this is an unofficial port of the Web Brower Live Demo that comes with the paper. I am not affiliated with the original authors or their institution.
-
Start by cloning the repository under your project's Plugins folder. You should end up with something like YourProjectName/Plugins/UnrealMobileNeRF
-
Recompile your project, so the plugin will be built from source.
-
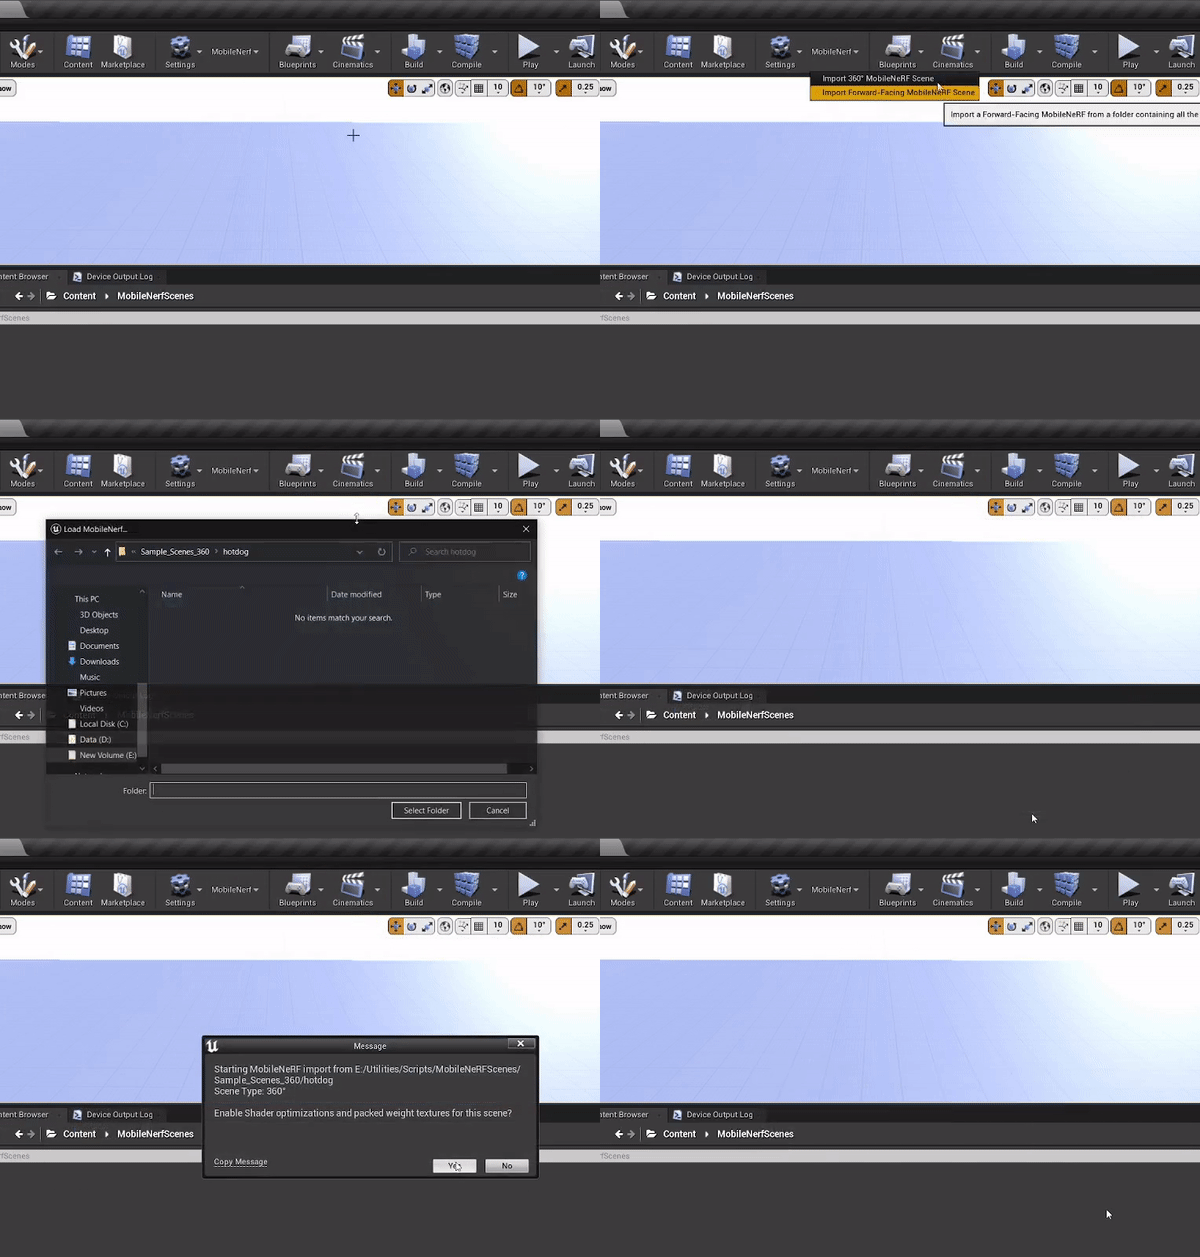
Open your project in the Editor, you should now see a new button next to the settings button in the level editor toolbar.
-
You can choose from the drop-down menu whether you want to import a 360° or Forward-Facing MobileNeRF scene. A directory dialog will open up and you can pick the folder where the pre-trained MobileNeRF exists. Make sure this folder contains all the required files (mpl.json, OBJs, and PNGs).
-
After choosing the folder, you can choose whether to enable optimizations (You can read about these in the details section) or to use the original paper implementation.
-
The plugin then starts creating/importing all the necessary assets. You should end up with a new folder under Content/MobileNeRFScenes/. Check the details section for the full list of the assets that you'll find under that folder. The most important asset is a StaticMesh with the name SceneNameCombined, which you can drag and drop into your level.
You can train your own MobileNeRF scenes following the official Github repository.
There are also some sample scenes provided in the official live demo. In the plugin folder, you can find a python script that you can use to download them. The script uses wget python library to download the files so you need to make sure that's installed beforehand.
pip install wget
You can then run the script by specifying the path where you want to download the files, and a sample scene name, or alternatively use the --all flag to download all the available sample scenes.
python "path/to/plugin/DownloadMobileNeRFSamples.py "Path/where/to/download/"--name SceneName"
The folder of the pre-trained MobileNeRF scene should contain the following files, that are required by the plugin:
- The JSON file, contains the weights for the MLP.
- All the OBJ files with the naming convention: shapeX.obj or ShapeX_Y.obj when the same shape is divided into different OBJs.
- Two PNG files per shape, with the naming convention: shapeX.pngfeat0.png and shapeX.pngfeat1.png
The plugin will create the following assets in your projects:
- Texture2D asset for each Imported PNG.
- Static Mesh for each imported OBJ file, these will use high-precision UVs.
- 3 Texture2D that contain the weights of the MLP.
- Base Material that uses the shared weight textures and has the biases hardcoded in its shader.
- Material Instance Constant for each shape. These inherit from the Base Material and use the appropriate feature textures.
- MobileNeRF Custom Asset contains information about the imported scene and references the necessary assets.
- One Combined Static Mesh; the result of merging all the shape meshes.
The material used for rendering the MobileNeRF scenes runs a small MLP network for every fragment on the screen. If you enable the optimizations when importing, the plugin will introduce the following optimizations to the network evaluation shader code:
- Create packed textures (RGBA) instead of single channel textures for the weights. This allows for fetching 4 weights at a time in the shader.
- Make use of vector Multiply-Add operations instead of the original scalar operations.
The colors of the mobileNeRF scenes are supposed to be displayed exactly as they are. That's why Unreal's Tonemapper can make the colors look a bit washed out. To completely disable the tonemapper, you can use a Post-Processing Volume and the ToneMapperReplacer Material provided in the plugin's content.
Note: This plugin was made and tested with Unreal Engine 4.27

