Auto-adaptive, AI-supported museum label with language identification
This code base has been developed by ZKM | Hertz-Lab as part of the project »The Intelligent Museum«.
Please raise issues, ask questions, throw in ideas or submit code, as this repository is intended to be an open platform to collaboratively improve language identification.
Copyright (c) 2021 ZKM | Karlsruhe.
Copyright (c) 2021 Paul Bethge.
Copyright (c) 2021 Dan Wilcox.
BSD Simplified License.
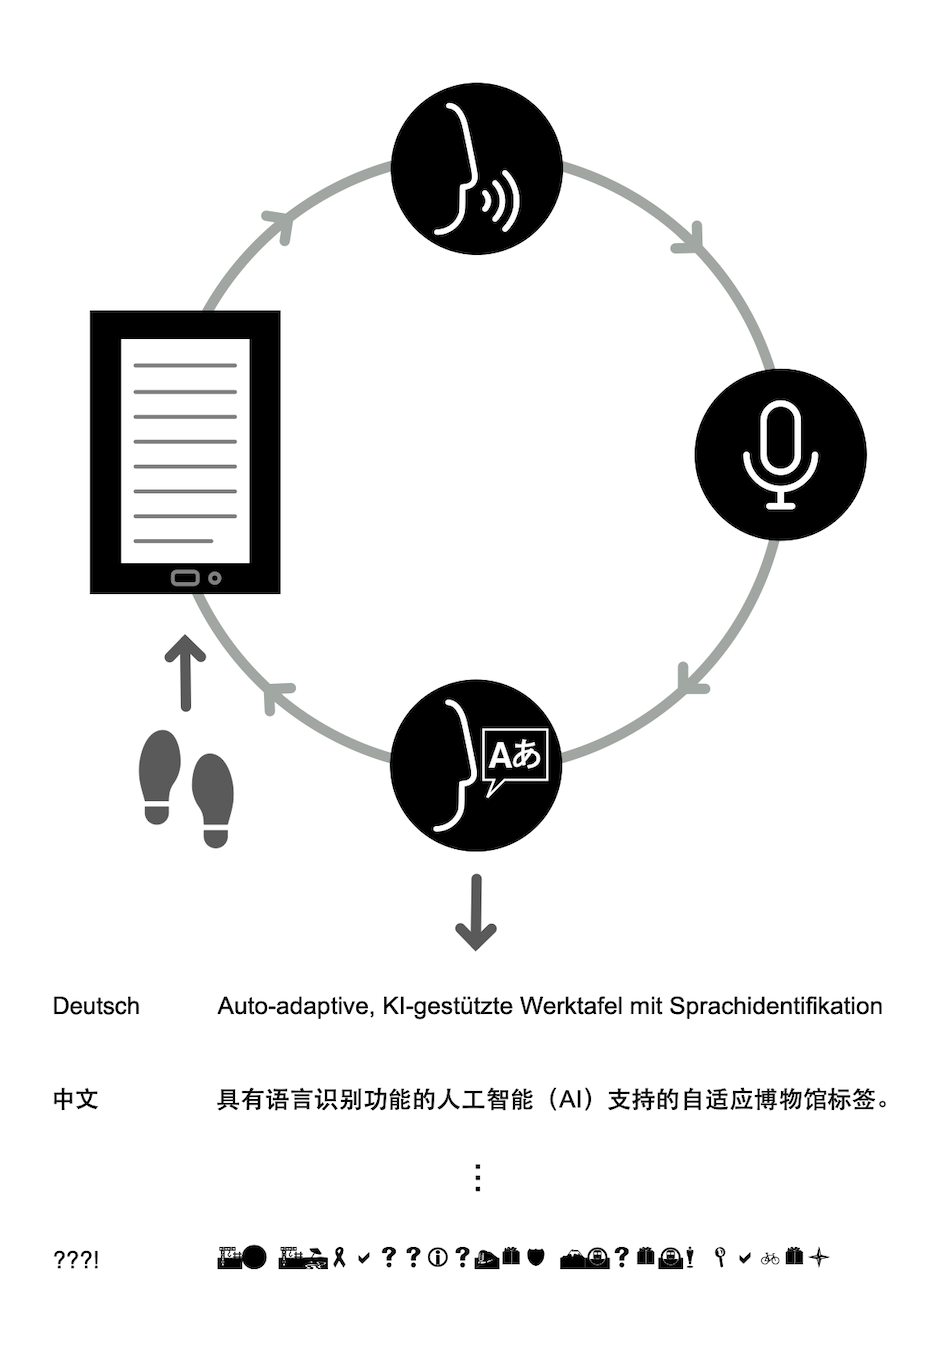
Basic interaction:
- Visitor walks up to installation & stands in front of text label
- Text label prompts visitor to speak in their native language
- Visitor speaks and text label listens
- Installation shows which language it heard and adjusts digital info displays
- Repeat steps 3 & 4 while visitor is present
- Return to wait state after visitor leaves and a timeout elapses
Components:
- Server
- controller: installation logic controller OSC server
- LanguageIdentifier: live audio language identifier
- baton: OSC to websocket relay server
- webserver.py: basic http file server
- Display
- web clients: digital info display, interaction prompt, etc
- tfluna: sensor read script which sends events over OSC
Communication overview:
LanguageIdentifier <-OSC-> controller <-OSC-> baton <-websocket-> web clients
tfluna --------------OSC-------^
proximity -----------OSC-------^
See also system diagram PDF
Hardware used for the fall 2021 protoype (reference implementation):
- Server:
- Apple Mac mini
- Yamaha AG03 audio interface
- AKG C 417 PP 130 lapel condensor microphone (run directly into RPi display case)
- HDMI display*
- Display:
- Raspbery PI 4 with 32 GB nano SD card
- Waveshare 10.1" 1024x600 HDMI display
- TF-Luna LIDAR distance sensor (connected to RPi GPIO pins)
- Micro HDMI to HDMI adapter (RPi -> screen)
- Flat HDMI cable extension cable with low-profile 90 degree plug (screen input)
- Flat USB A to Micro USB extension cable with low-profile 90 degree plug (screen power)
- Custom 3D printed case
Both systems are connected to a local network using ethernet cables. The display is wired through a hole in the wall directly behind it providing access for the RPi USB-C power, ethernet, and AKG microphone cables. The server Mac mini is concealed in the wall directly behind the display.
See also the installation technical diagram PDF
*: On macOS, an active display is required for the LanguageIdentifier openFrameworks application to run at 60 fps, otherwise it will be framerate throttled and interaction timing will slow.
Quick startup for testing on a single macOS system
Setup:
- Clone this repo and submodules
git clone https://git.zkm.de/Hertz-Lab/Research/intelligent-museum/museum-label.git
cd museum-label
git submodule update --init --recursive
- Build LanguageIdentifier, see
LanguageIdentifier/README.md - Install python dependencies:
cd ../museum-label
make
Run:
- Start server:
./server.sh
- On a second commandline, start display:
./display
If the TF-Luna sensor and USB serial port adapter are available, the display component will try to find the serial device path. If this simple detection doesn't work, you can provide the path as a display script argument:
./display.sh /dev/tty.usbserial-401
See tfluna/README.md for additional details.
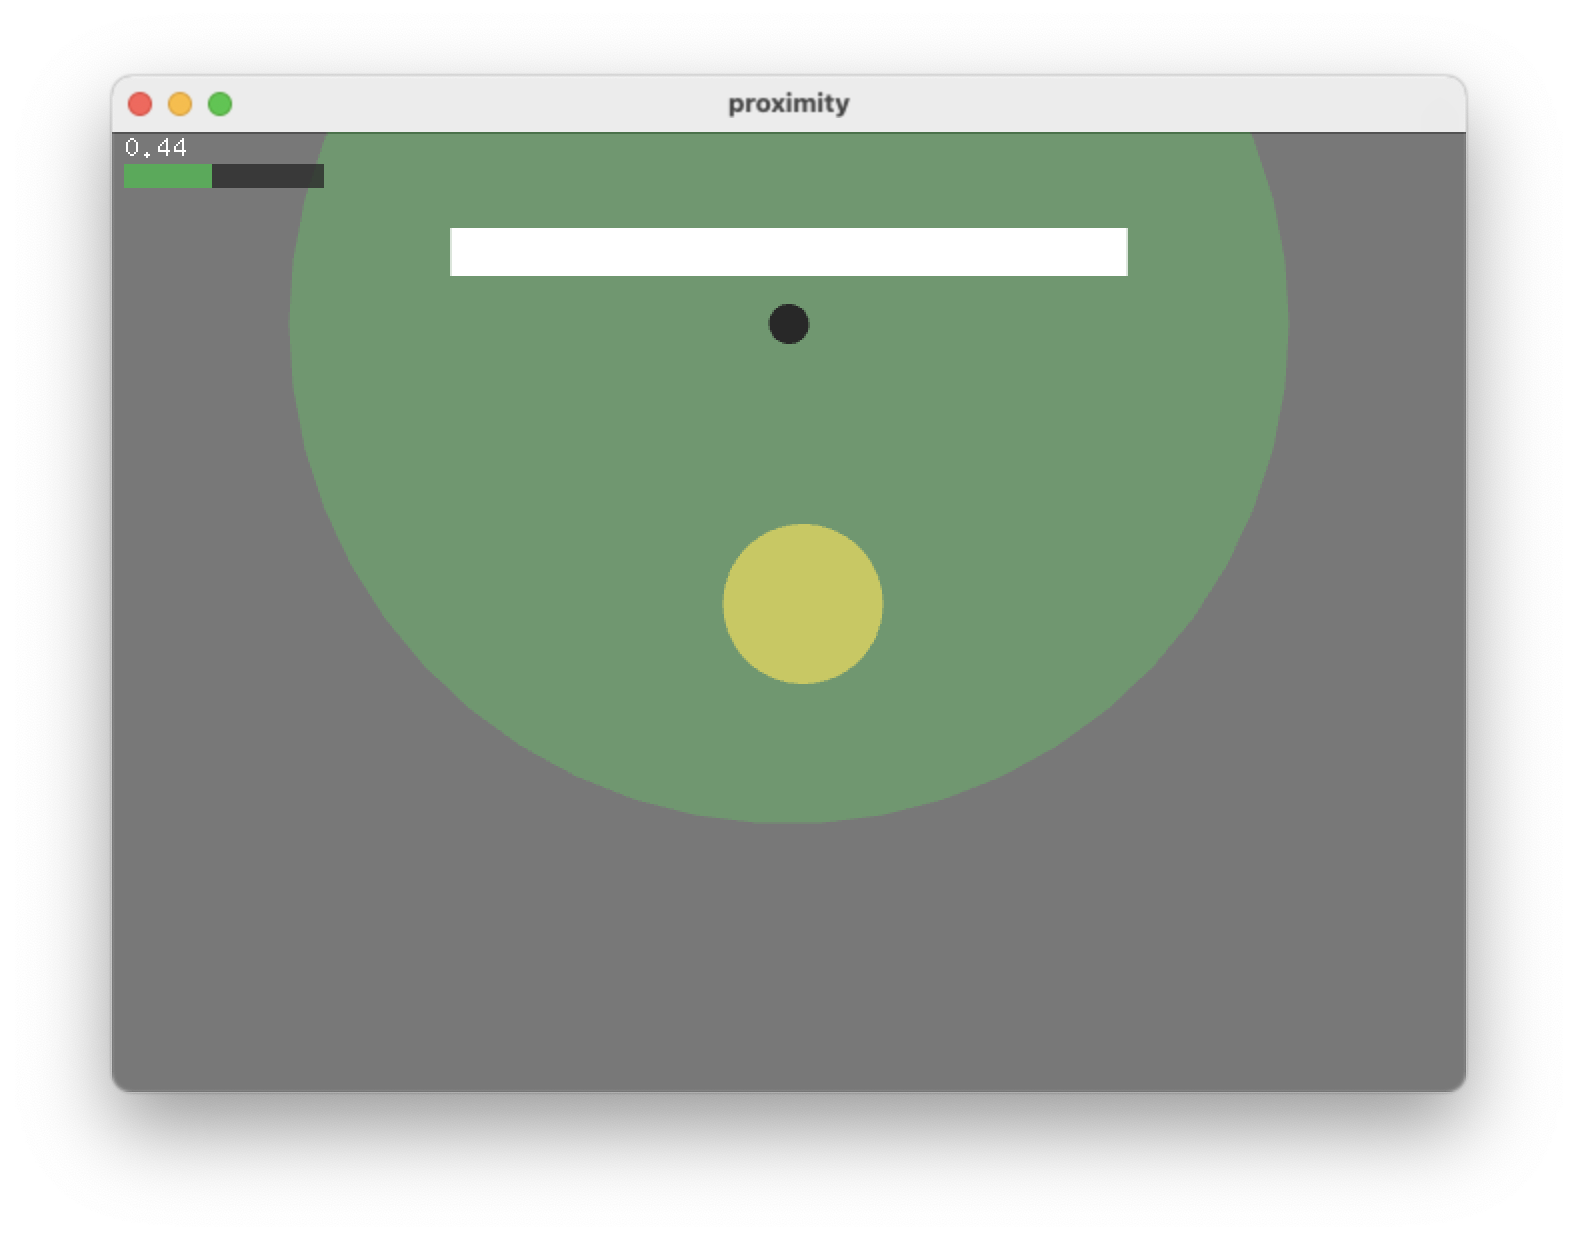
If the TF-Luna sensor is not available, the system can be given simulated sensor events.
There are two proximity sensor simulators which send proximity sensor values (normalized 0-1) to the controller server: a browser implementation using p5.js and a desktop implementation using loaf (Lua Osc And openFrameworks).
Once a simulator is started, drag the virtual visitor towards the artwork to initiate the detection process, as long as the server is running.
The proximity browser sketch is written in Javascript using p5.js. To run it, open the main index.html file in a web browser:
- Start a webbrowser and open
proximity/html./index.html - If the "websocket is not connected" error is shown, make sure the server is running and refresh the browser page.
The proximity loaf sketch is written in Lua using openFrameworks bindings. To run it, you will need to use the loaf interpreter:
- Download and install loaf
- Start loaf.app and drag
proximity/loaf/main.luaonto the loaf window
General dependency overview:
- Python 3 & various libraries
- openFrameworks
- ofxTensorFlow2
See the README.md file for each the individual components subdirectory for details.
The server component runs language identification from audio input, the logic controller, and web components.
- Python dependencies (easy)
- LanguageIdentifier (involved)
The default system is currently macOS but should work in Linux as well.
See SETUP_MAC.md for details on setting up macOS on a Mac mini to run Apache as the webserver for production environments.
Install the server Python dependencies, run:
make server
Next, build the LanguageIdentifier application. The system will need a compiler chain, openFrameworks, and ofxTensorFlow2 installed and additional steps may be needed based on the platform, such as generating the required project files.
See LanguageIdentifier/README.md for additional details.
Once ready, build via Makefile:
cd LanguageIdentifier
make ReleaseTF2
make RunRelease
This should result in a LanguageIdentifier binary or .app in the LanguageIdentifier/bin subdirectory which can be invoked through the LanguageIdentifier/langid wrapper script. See ./LanguageIdentifier/langid --help for help option info.
Start the server with default settings via:
./server.sh
To stop, quit the LanguageIdentifier application or the script and the script will then kill it's subservices before exiting.
To print available options, use the --help flag:
./server.sh --help
By default, the server script starts a local Python webserver on port 8080. The various clients can be reached in a browser on port 8080 using http://HOST:8080/museum-label/NAME. To open demo1, for example: http://192.168.1.100:8080/museum-label/demo1.
If the clients are being served via a webserver installed on the system, such as Apache httpd, run the server script without the Python webserver:
./server.sh --no-webserver
The webserver root should route /museum-label to the html directory.
Running Apache is suggested for production environments.
The display component runs the proximity sensor and acts as the front end for the museum label.
- Python dependencies (easy)
- TF-Luna hardware (medium)
The default system is a Raspberry Pi but the display can also be run on macOS with the TF-Luna sensor connected via a USB serial port adapter.
See SETUP_RPI.md for details on setting up a Raspberry Pi to run the display component.
Install the display Python dependencies, run:
make display
Start the display with default settings via:
./display.sh
To provide the sensor device path as the first argument:
./display.sh /dev/ttyAMA0
If the server component runs on a different system, provide the host address:
./display.sh --host 192.168.1.100
To stop, quit the script and it will then kill it's subservices before exiting.
To print available options, use the --help flag:
./display.sh --help
If the sensor is unavailable, the script will run a loop until it is exited.
Available html front-end clients are located in the html directory:
- demo0: very basic detected language display
- demo1: displays a greeting in the detected language
- demo2: displays example museum label text in the detected language
- prompt: interaction logic prompt, ie. "Please speak in your native language."
- textlabel: integrated prompt and museum label (current prototype)
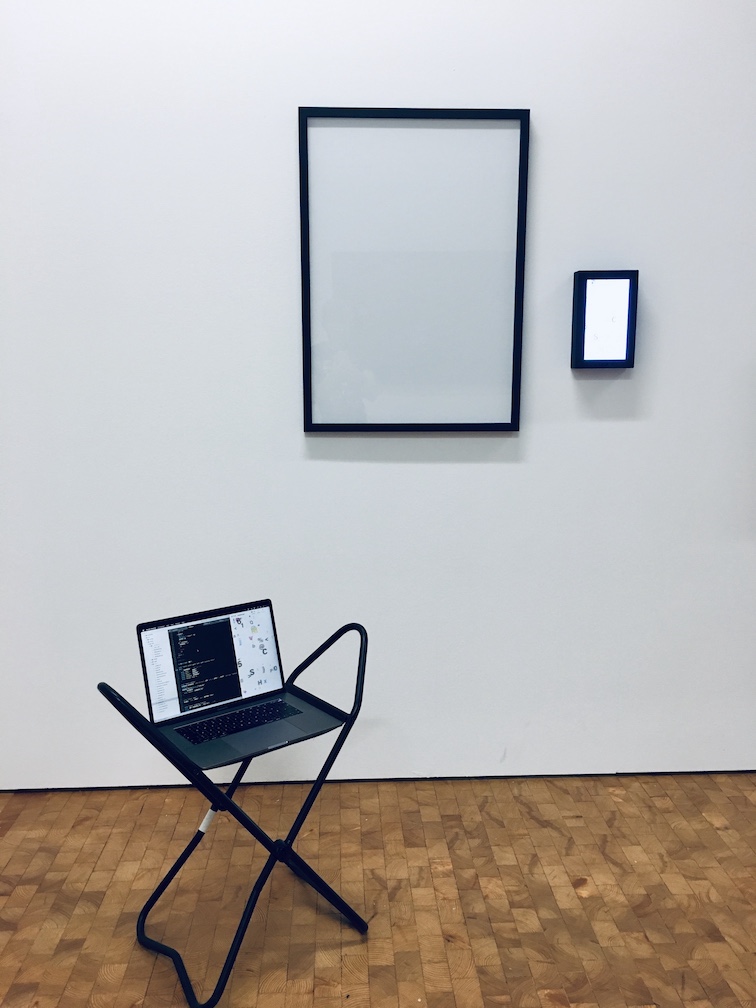
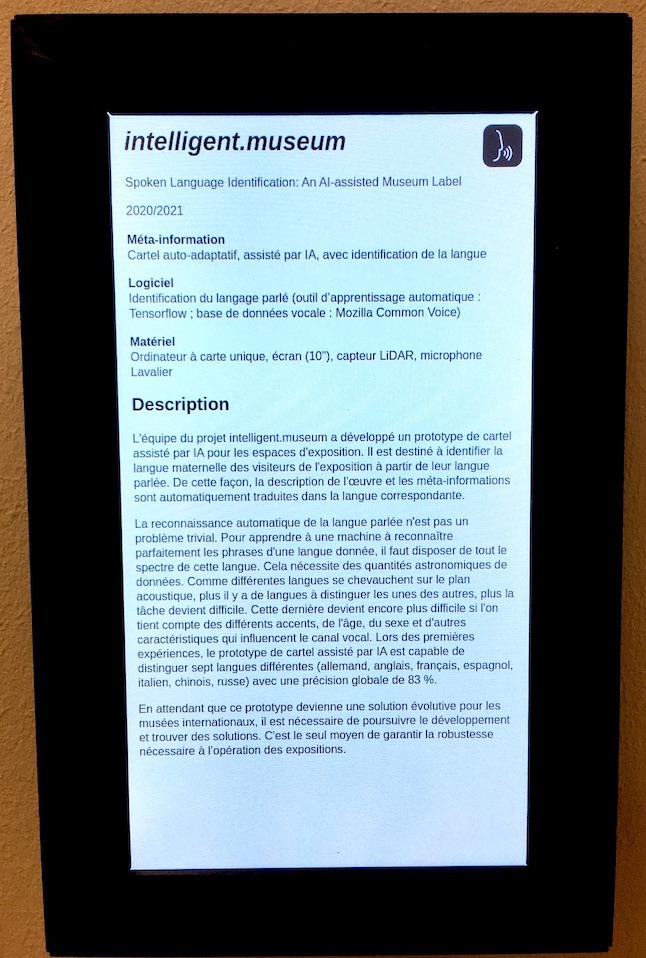
Images of the prototype installed for the BioMedien exhibition, fall 2021 at ZKM Karlsruhe. The empty frame to the left of the museum label is an artwork placeholder.
An artistic-curatorial field of experimentation for deep learning and visitor participation
The ZKM | Center for Art and Media and the Deutsches Museum Nuremberg cooperate with the goal of implementing an AI-supported exhibition. Together with researchers and international artists, new AI-based works of art will be realized during the next four years (2020-2023). They will be embedded in the AI-supported exhibition in both houses. The Project „The Intelligent Museum” is funded by the Digital Culture Programme of the Kulturstiftung des Bundes (German Federal Cultural Foundation) and funded by the Beauftragte der Bundesregierung für Kultur und Medien (Federal Government Commissioner for Culture and the Media).
As part of the project, digital curating will be critically examined using various approaches of digital art. Experimenting with new digital aesthetics and forms of expression enables new museum experiences and thus new ways of museum communication and visitor participation. The museum is transformed to a place of experience and critical exchange.


