By: BP
End User
- What Is This?
- Map Packs
- Installing The Browser
- Uninstalling The Browser
- Installing Maps
- Managing Maps
- Installing Custom Backgrounds
- Removing Custom Backgrounds
- Overwriting Error
Level Designer
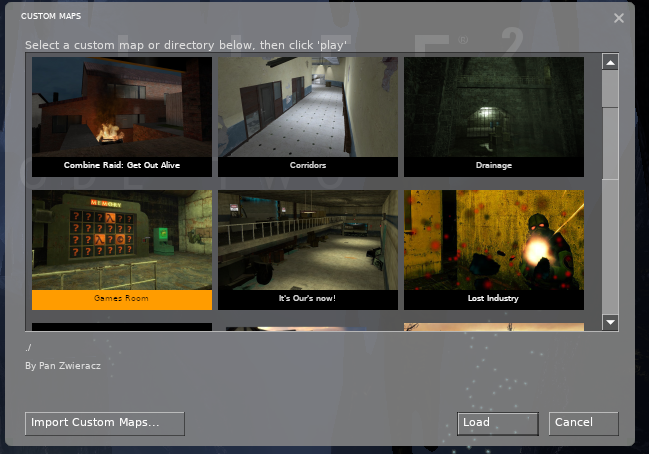
For those who have played a good amount of custom Half-Life 2 maps, you may understand that most level designers have you enter their map through means of the console. While this is the standard, it isn't a user-friendly approach. Some other people try to solve the issue by instead turning their map packs into mods. But, if the player wants to swap to a different map, not made by the developer, they would need to leave the game. That's where this tool comes in to help solve that problem.
Using the power of Source's Bonus Map feature, we now have a means of sorting all of our installed custom maps in a single place!
With this browser, level designer are able to:
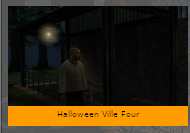
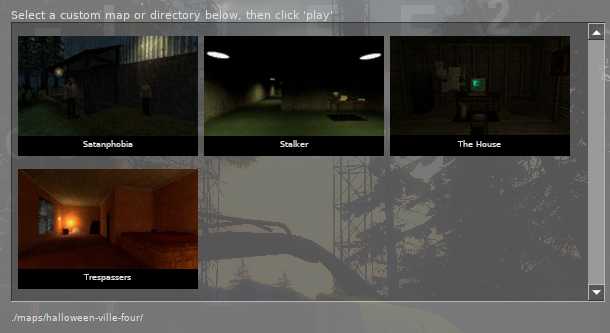
- Create map packs, where the player can browse subdirectories filled with maps.
- Packs inside of packs are also available for even more map!
- Catch player's attentions with the use of thumbnails.
- With the compiling tool automatically generating the correct thumbnail specs.
- Credit themselves with the use of the comments.
- And the best part, no more needing to see an ugly bsp-friendly name. Add spaces, colons, and other characters to the name of your map!
You can even pack your maps into aBmz support will not be added as it goes against this project's spirit of modular install/uninstall using.bmzfile for easier installation on the end user's side!./custom.
Along with browsing single maps, by creating a subdirectory inside of ./maps allows you to have a specified map pack in which you can give your own name, comment, and thumbnail.
This allows for a much cleaner and modular experience for the end user.
TIP: You can lock maps, which can then be unlocked when playing other maps to allow for a progression similar to that seen for the game's chapter select.
Adding the map browser to your own game is extremely easy and unintrusive. Simply:
- Copy the folder
./custom-map-explorerto[Steam Directory]/common/Half-Life 2/hl2/custom/
And you're done.
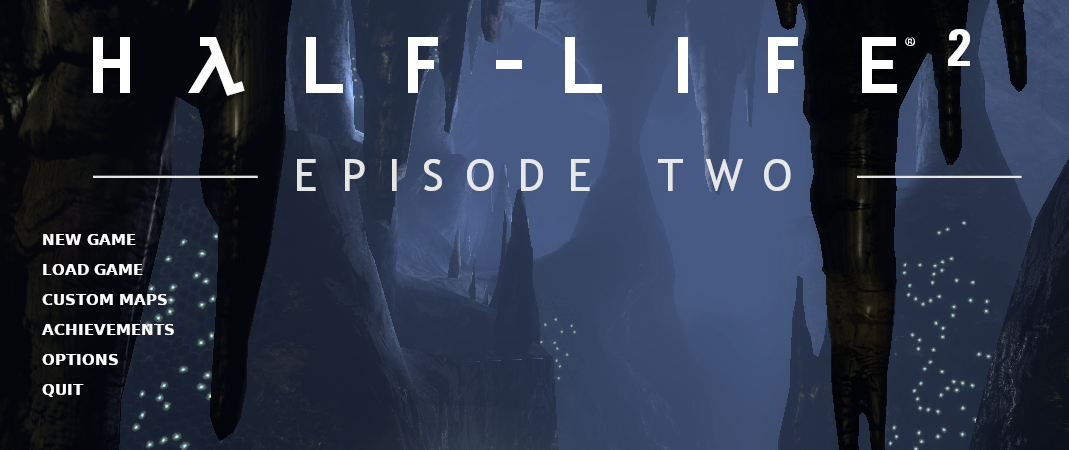
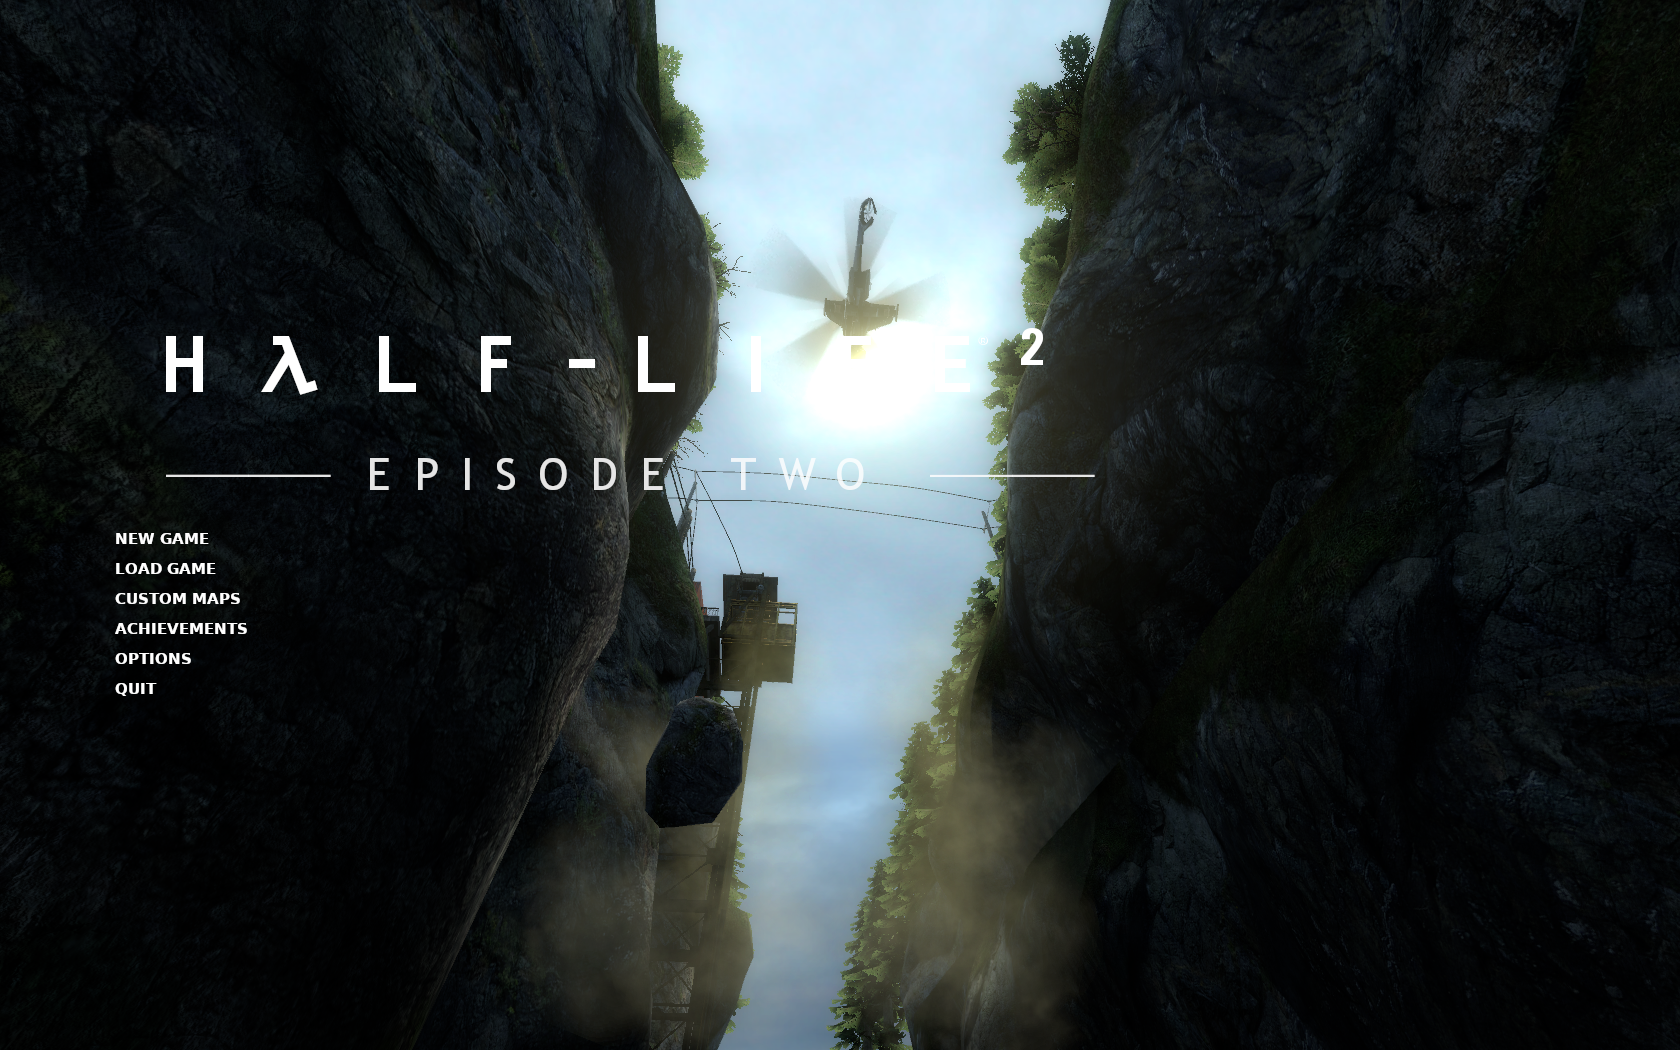
Next time you boot up your game you will see a new menu option:
WARNING: For users playing in a language other than English, you will be missing localization! To fix this, check out
./custom-map-explorer/resource/gameui_english.txtto see what keyvals you will need to change for your own language.
WARNING: Some custom maps/packs may overwrite
./cfg/game.cfgand./cfg/modsettings.cfgin order to allow for warning you about the given pack's other overwriting warnings.
Deleting the browser is just as easy as installing. Just:
- Delete
[Steam Directory]/common/Half-Life 2/hl2/custom/custom-map-explorer
And now you're game is back to factory settings.
Reminder: The level designer must of made a folder using this tool in order for it to work. You cannot just drag and drop a
.bspfile and get the same result.
Unless it's specified by the level designer, it's best to play all of the maps in Half-Life 2: Episode 2. Because of this, be sure to:
- Copy the given folder into
[Steam Directory]/common/Half-Life 2/ep2/custom/
With that done, it should now show up in the browser.
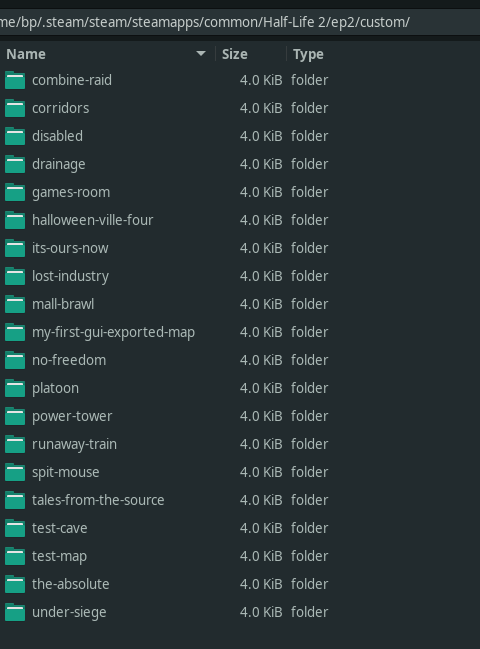
As we know, when it comes to the standard way of managing custom maps, end users drag and drop the .bsp into their maps/ directory without a thought. Sometimes, there's extra assets which need to be installed into materials/ and models/. This leads to very messy folders.
With the power of the Source Engine's custom/ directory, for overwriting and adding assets, we can separate each map into their own folder to allow for easy installation and deletion of custom maps.
TIP: In order to allow you to quickly disable addons without uninstalling, add in a
./custom/disabledirectory and cut/paste the addons into there.
If you ever browse into your addon and you see a script called AddCustomBackground, you're in for a good time!
The level developer was nice enough to create a background map which you can add to your own rotation of startup menu maps. Just run the script.
TIP: After you finish, the next time you boot up the game, be sure to run the command
sv_unlockedchapters 99to expand the background map pool. This will unlock all of the chapters in New Game.
WARNING: While I have provided a bash script that is completely safe to run, always be cautious about running any scripts on your machine that you don't fully trust, ESPECIALLY IF YOU ARE RUNNING AT A HIGHER PRIVLAGE!
In the case where you want to remove the custom backgrounds, you have two different options:
This is the more simpler option.
Practically the same as the previous option, but this will at least preserve the addon.
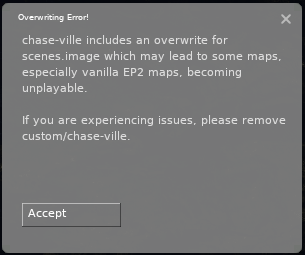
Are you getting this pop-up whenever you start your game?
Don't worry, that's apart of this browser! Sometimes, due to the way Source works, level developers may need to overwrite important files that other maps rely on, to let the level developers do more complex scenes in their own maps. In order to work out all edge cases that may appear for this browser, this pop-up was added to give you a warning.
While the problem may be benign most of the time, it's recommended to disable or delete the addon after you have finished playing with it.
Alright, now for the fun part. Level designers, you wanna use this tool to spice up your presentation? I know you do. :)
Before we start, I'd like to tell any and all of you ambitious level designer to NEVER USE CAPITAL LETTERS IN DIRECTORIES OR FILES! While everything looks fine on Windows, UNIX systems, where files are CaSE senSitive will make these directories completely unreadable.
To get started, this tool hasn't been frozen yet, so you will need to install Python in order to run the program. Python was chosen as I am on a Linux, and would like for this tool to be as portable as possible.
WARNING: You will need to install PIL in order to run the program. To install this Python Package, simply:
python -m pip install pillowTo check out all arguments available, open a terminal in this directory and run the command:
python ./CustomMapCompiler.py --helpFor all you independent, empowered terminal nerds who don't need no GUI, you can still use this tool through arguments. The procedure compared to the GUI is different when it comes to creating packs, but it's still possible through the use of the -json argument.
All single maps require at the very least a:
- -s: To clarify that you are compiling a single map.
- --name: To allow for building directories.
- --map: To give a path to a
.bspfile.
There are also the optional:
- --comment: To allow for flavor text.
- --image: To give your map a thumbnail.
- --lock: To flag that this map needs to be unlocked by playing another map.
- --output: To change the output directory. Default is
./exports - --json: To instead output or add onto a json file with the data of this map. Used for creating map packs.
Let's say we have a map which is located in a folder on our desktop. Along with that, we took a screenshot and cropped it to what we want. What we would do is open a terminal in the this program's directory and:
python ./CustomMapCompiler.py -s -n "The Coolest Map Ever" -c "This map was made by: BP" -m "/home/Desktop/my-map/my-example-map.bsp" -i "/home/Desktop/my-map/my-screenshot.png"The finished product will now be found in ./exports.
- Told the tool we are compiling a single map -s
- Gave it the name The Coolest Map Ever -n
- Gave it the comment This map was made by: BP -c
- Gave the map's path at /home/Desktop/my-map/my-example-map.bsp -m
- Gave the thumbnail's path at /home/Desktop/my-map/my-screenshot.png -i
All map packs require at the very least a:
- -p: To clarify that you are compiling a map pack.
- --name: To allow for building directories.
- --json: To give a list of maps which are apart of the pack.
There are also the optional:
- --comment: To allow for flavor text.
- --image: To give your map pack a thumbnail.
- --lock: To flag that this map pack needs to be unlocked by playing another map.
- --output: To change the output directory. Default is
./exports
Before we begin with making the pack, we must first make a .json file with all of the maps which will be inside of the pack. Let's use our map in the previous example.
python ./CustomMapCompiler.py -s -n "The Coolest Map Ever" -c "This map was made by: BP" -m "/home/Desktop/my-map/my-example-map.bsp" -i "/home/Desktop/my-map/my-screenshot.png" -j "./my-map-pack.json"- Gave it the json path ./my-map-pack.json -j
This prevents the tool from compiling a single map. Do this with all of your other maps, giving it the -j argument to add onto it.
It's self explanatory, just like compiling a map. But, we swap out the -s flag for a -p and never use the -m argument. We replace it out with the -j argument as the input.
python ./CustomMapCompiler.py -p -n "The Coolest Map Pack Ever" -c "This pack was made by: BP" -j "./my-map-pack.json" -i "/home/Desktop/my-map-pack/my-screenshot.png"That's all! You are now prepared to make your own maps and map packs for this browser!
This is a more verbose explanation of all of the available arguments.
- A more user friendly way of compiling custom maps and packs for the browser.
- It also allows for a much easier means of creating thumbnails.
-g- Tells the tool that you will only be compiling a single map.
-s- Tells the tool that you will be compiling a map pack.
-p- Sets the name of the map. Along with this, it will also be used when naming your addon.
-n "The Great Mod Which Is Awesome!"- Sets the text for the comment. Shown right below the path in the map browser.
-c "Made by: BP"- The file path to your map (
.bsp) file.
-m "~/Desktop/Half-Life 2/maps/my-map.bsp"- When used on a map it will open that
.jsonfile and append its data into it instead of creating a compiled folder. - When used on a pack it's the contents of that map's pack. All maps within the
.jsonwill be compiled into a single folder.
-j "./the-cool-map-pack.json"- The file path to an image file that will be used for the thumbnail.
NOTE: The tool will happily scale down your image to the required size, but the thumbnail's aspect ratio is 9:5. If you want your image to look exactly like what you want, be sure to crop it beforehand.
-i "~/Desktop/Screenshots/my-map-screenshot.png"- Tells the game that this should be locked until a point_bonusmaps_accessor is fired that unlocks it.
-l- Change the directory in which we output the compiled bonus map folder. The default directory is
./exports
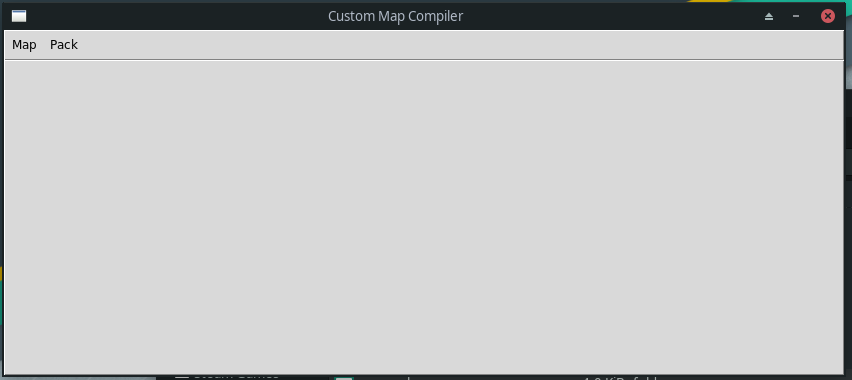
-o "~/Desktop"It's understandable that working on the CLI is a pain for most. With the added confusion with how to set up thumbnails, it's even worse. Because of that, by running the program without any arguments, it will launch directly into the GUI tool.
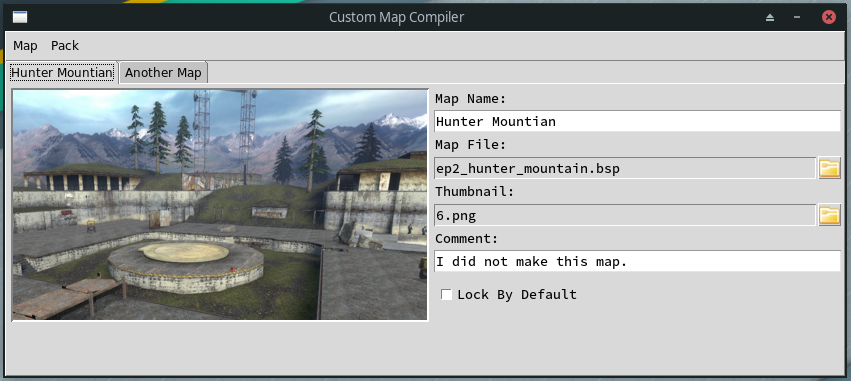
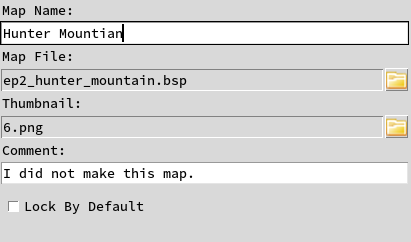
python ./CustomMapCompiler.pyMaking maps and setting up thumbnails are a breeze in this interactive editor! To start, go into the menu and select:
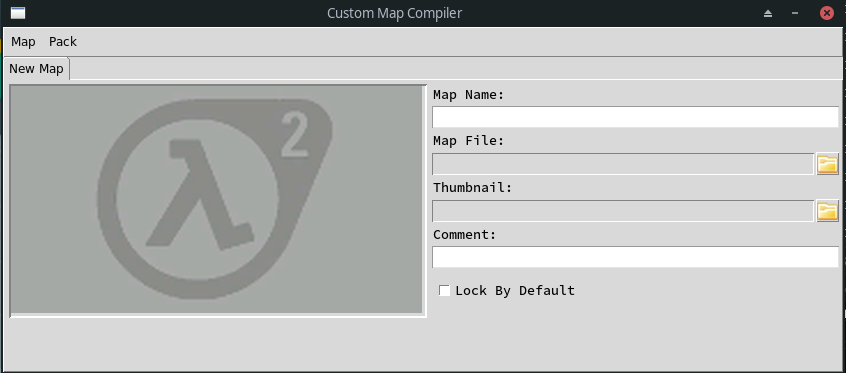
Map -> New Map
This will create a tab for a custom map instance. Filling out the data for the custom map is made simple with the given text/file prompts on the right hand side. The thumbnail viewer can be seen on the left hand side. More information on how to utilize the viewer will be gone over later.
NOTE: The bare minimum needed to export a map is a Name and Map File. Everything else is optional.
When you are ready to compile the map simply select the tab of the map you want to export and:
Map -> Export
If the project already exists, it will ask you if you'd like to delete and overwrite it. After that, you will find the usable map in ./exports. It's already set up to be a custom folder. So, you can easily add in all the custom assets into the project's folder and place it in [Game's Directory]/custom/
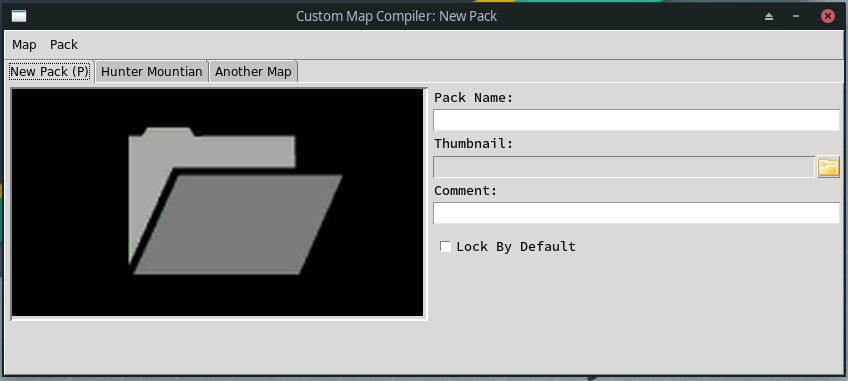
Along with the ability to create/export single maps, the GUI tool also allows for the creation and exporting of map packs. To start, in the menu, toggle:
Pack -> Map Pack
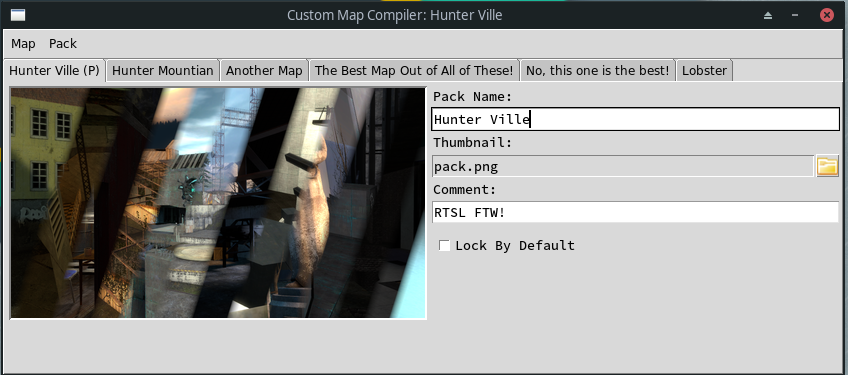
This will create a tab to the front of the set which will represent the pack's data. Just like with the map tabs, you have text/file prompts which can be filled out to give more details about your map pack.
NOTE: At the very least, a pack needs a Name. Everything else is optional.
Once you stylize the pack itself, be sure to also add in all the maps you want inside of the pack in the other tabs. If you want one map to be in front of another map, or vise-versa. Select the map's tab that you want to move and:
Pack -> Move [Left/Right]
After you feel that everything is in place, it's time to export. Simply select the pack's tab and:
Pack -> Export
If the project already exists, it will ask you if you'd like to delete and overwrite it. After that, you will find the usable maps and the pack in ./exports. It's already set up to be a custom folder. So, you can easily add in all the custom assets into the project's folder and place it in [Game's Directory]/custom/
In order to allow for quick thumbnail creation, the added viewer acts as an editor as well. You can:
- Drag the image to pan.
- Scroll with the mouse to zoom / unzoom.
There are three different types of entry fields in the editor.
Allows you to input in text. Pretty self explanatory.
Requires a specific file. By clicking on the folder icon, it will bring up the file browser. Clicking on the entry field, itself, will clear that entry.
This is only used to dictate if the map/pack should be locked. Please stop by the Wiki to understand how this feature works..
If you'd like to get back to work on a project, instead of exporting, you can save. What differs this from the conventional export is all of the data is saved into a .json file, and the files inputted only reference the path to where they originate.
You can save a map / pack by selecting the tab you want to save and:
[Map / Pack] -> Save [Map / Pack]
When loading a map, it will iterate over all maps in the given .json file and append each one to a new tab.
Be careful when loading a pack as it will clear all tabs and replace it with the data inside of the given .json.
If you are an ambitious level developer who wants to go above and beyond the call of duty when publishing your work, you have the ability to add in a custom background map to the end user's start menu rotation.
Place your background map and background materials in their respective directories.
After, copy and paste the provided script ./addon-tools/custom-background/AddCustomBackground.sh into your addon's root directory.
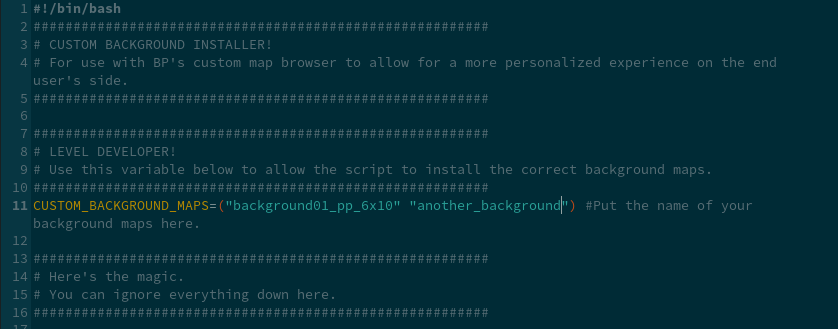
Finish up by opening up the file and putting in all the names of the background maps inside of line 11. Each within their own string.
Run the script at least once while it's inside the ./custom directory to check and see if everything works correctly. If a new addon, custom-backgrounds, appears everything should be good.
It's understandable that sometimes, you can't get your map to work properly without overwriting existing assets. For example, any .VCD files made in the Faceposer must be compiled into a single scenes.image file, shared by all .vcd's and only loaded at startup.
We do not want to change these files behind our end user's back, or else they may experience difficulties in the vanilla maps or some other custom map. Because of this, the map tool also comes with the needed files to warn our user.
To add this pop-up to your own pack, copy and paste the contents inside of ./addon-tools/overwrite-error inside of your addon.
Next, go into ./[YOUR PACK]/resource/gameui_english.txt in your favorite text editor and change the square brackets [] to whatever should go there.
WARNING: Be sure the localization file is encoded in UTF-16LE, not UTF-8 or ASCII.
The warning should now show up in game!
With all that being said, you should be equipped to add or port all of your maps to this amazing browser! While it's a little late to the party, I do hope this becomes a standard tool for any HL2 level developer in order to help allow their maps to stand out and give the players an easier way to browse their own collection.
BP - Practically the entire program.
Mark James - Folder Icon
Valve Developer Wiki Community - Amazing documenting of the game
