A Slack app that enables you and your team to schedule your messages, and to never bother your teammates in their free time while still not forgetting important stuff!
After following this setup, the installed Slack Bot will listen to the following commands:
/later <message> (at|in) <time>in order to create a new scheduled message- Examples:
/later Hey @john.doe! Are you free today? Need your help. at next Monday 9am/later I got an issue, are you free? in 1 hour
- Examples:
/later listto list all your scheduled messages in a channel/later helpprints a help message to inform you about the different commands/later examplesprints out some examples on how to schedule messages
Of course, after scheduling a message, you will get a confirmation with the message text and the scheduled timestamp. Also, you'll get the opportunity to cancel your scheduled message.
Same goes for listing all scheduled messages.
This application is the corresponding server for your Slack App which will listen to incoming events.
- Go to the Slack Web API and login with your Slack account.
- Click Create new App and select a name and the workspace you're developing the app for.
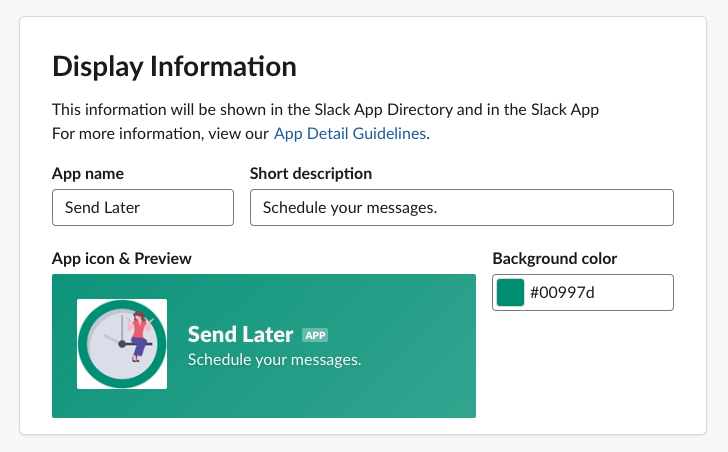
- Scrolling down the page, find the Display Information section and fill in a name, a short description and a logo for your app, and hit Save Changes.
Last, you need to deploy this application. You will have to set the environment variables
that are listed in .env.example accordingly.
In the Slack Web API, select your app's Basic Information and
scroll down to App Credentials. Copy your Slack app's Client ID, Client Secret, and
Signing Secret and paste them into the ENV variables SLACK_CLIENT_ID, SLACK_CLIENT_SECRET,
and SLACK_SIGNING_SECRET.
(Don't forget the BASE_URL which has to equal your domain you used when configuring the Slack App.)
- To setup the permissions, go to Features > OAuth & Permissions
- In the first section of the page, click on Add New Redirect URL,
enterhttps://nice-domain.com/slack/oauth_redirect(of course by using your domain),
and hit Save URLs - Scroll down a bit to Scopes and add the following scopes:
- Bot Token Scopes
channels:readchat:writecommandsusers:read
- User Token Scopes
channels:readchat:writegroups:readim:readmpim:read
- Bot Token Scopes
- Now, go to Features > App Home and activate App Home.
- Then, scroll down to Show Tabs and activate both ticks for Home Tab and Message Tab
- Then, go to Features > Interactivity & Shortcuts and activate the toggle
- In the text field Request URL, enter the domain of the server application
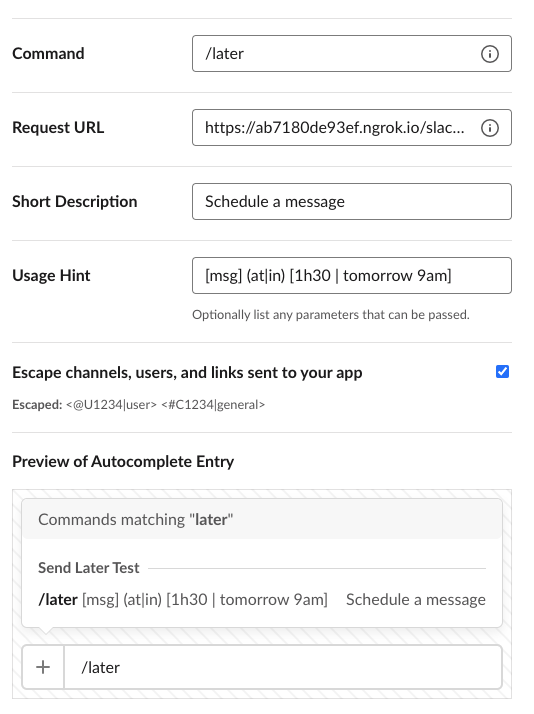
suffixed by the path/slack/events, i.e.,https://nice-domain.com/slack/events - Next, go to Features > Slash Commands and hit Create New Command
- Set it up as specified in the image (or to your liking),
but remember to set your Request URL tohttps://nice-domain.com/slack/events
and to tick Escape channels, users, and links sent to your app - Hit Save Changes
- Then, go to Features > Event Subscriptions and activate the toggle Enable Events
- As above, set the Request URL to
https://nice-domain.com/slack/events - Click on the accordion Subscribe to bot events and add the following events:
app_home_openedtokens_revoked
- Hit Save Changes and you've completed the first half!
In case, you want to test the app or add further functionalities, follow this setup.
- node >= 12.6
- a running postgres instance.
- An ngrok account with the ngrok CLI
- A Slack account and a Slack workspace (you can use to develop and test)
- Install dependencies:
yarn install - Create a Slack App, but leave the links out
- Setup ENV variables
- run
cp .env.example .env - refine your database ENV variables if you like
- copy your Slack app's Client ID, Client Secret, and Signing Secret
and paste them into the ENV variablesSLACK_CLIENT_ID,SLACK_CLIENT_SECRET,
andSLACK_SIGNING_SECRET - Choose or generate a secret and paste its value into the variable
STATE_SECRET
(It can be literally anything)
- run
- Setup your database
- create your database with
npx sequelize-cli db:create - run database migrations with
npx sequelize-cli db:migrate
- create your database with
- Run server with
yarn start - Create a tunnel to your localhost with
ngrok http 3000(or the respective port you chose) - When setting up your Request URLs in the step Create a Slack App,
you have to setup the same paths, except you will be using the hostname of your ngrok tunnel (preferably, the HTTPS one) - Open the URL
https://<YOUR NGROK HOSTNAME GOES HERE>.ngrok.io/slack/install
and click on the Add to Slack button. - Follow the OAuth flow to install the app to your test workspace
- Now, the user that added the Slack App has automatically authorized the app.
Other users will have to authorize when running their first/later-command - Happy coding!
TailwindCSS is used within this application in a very minimalistic version.
Hence, if you want to utilize this framework and adapt some views, you will have to run
npx tailwindcss-cli@latest build -o public/assets/tailwind.css in order to utilize all utility classes.
If you want to deploy your modified version, you will have to run first
NODE_ENV=production npx tailwindcss-cli@latest build public/assets/tailwind.css -o public/assets/tailwind.css to minify your tailwind stylesheet.
This app is based on the offical Slack package: @slack/boltjs.

