Write ROS nodes to implement core functionality of the autonomous vehicle system, including traffic light detection, control, and waypoint following.
-
Clone the project repository
-
Install python dependencies
cd CarND-Capstone
pip install -r requirements.txt- Download necessary model files if they are missing from folder:
\ros\src\tl_detector\light_classification\model
frozen_inference_graph_mobilenet.pb
frozen_inference_graph_rfcn_resnet101.pb
Extract the .pb files to the specified folder, and rename them as above.
- Make and run styx
cd ros
catkin_make
source devel/setup.sh
roslaunch launch/styx.launch- Run the simulator
The code and folder structures follow the basic pipeline provided by Udacity as shown below.
Like the name suggests, this node first processes the base waypoints of the map, current position of the car, and traffic light state. Then, propose a set of waypoints for the car to follow. To save overhead computation, we shortened the number of waypoints to 100, and also removed every other waypoint before publishing them. When coming close to a yellow/red light, the node checks for its current velocity and distance to the stopline, and calculate appropriate deceleration rate. If the traffic light just turns yellow when the car is approaching, the node will determine if the distance is long enough to brake safely.
Our code contains two PID controllers, one for throttle, and one for brake. The throttle PID is mostly limited by the maximum throttle set in the code so the acceleration is very smooth and comfortable. For brake PID, we use a set of parameters that will provide smooth and comfortable deceleration, which can be observed in the video provided in the Results section. Below are our PID parameters proven to be very smooth on acceleration/deceleration.
Throttle:
Kp = 0.1
Ki = 0.02
Kd = 0.0
mn = 0.0 #min throttle
mx = 0.23 #max throttle
Brake:
Kp_b = 60.0
Ki_b = 0.0
Kd_b = 10.0
mn_b = 0.0 #min brake
MAX_BRAKE = 700
The waypoint follower from the starter code results in car steering right and left around the waypoints. This is the result from having higher thresholds before waypoint follower corrects itself to follow the waypoints. We modified the parameters under pure_pursuit_core.h under waypoint_follower node. With the modified parameters as below, the wobbling steering is reduced while the burden on overhead computing is still reasonable.
displacement_threshold_(0.1)
relative_angle_threshold_(2.0)
We divided the job of tl_detector in two parts.
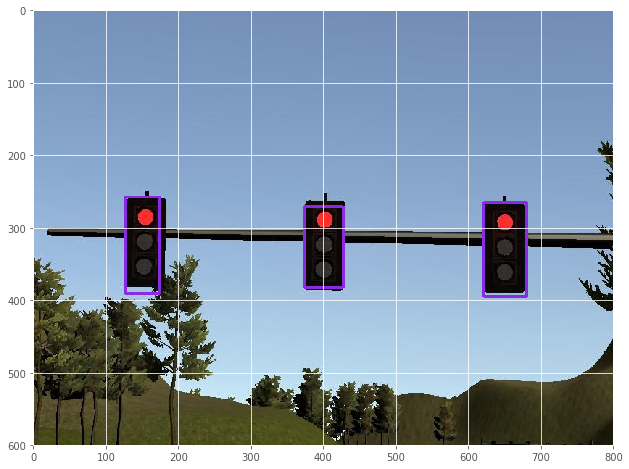
- Find the bounding box for traffic light in the incoming image.
- Find color of signal in the extracted bounding box.
Based on exercises in object detection lab, we found various pre-trained models from TensorFlow's Model zoo extremely useful to detect and extract Traffic signal from the image. All these models are pre-trained on COCC data set and can be useful for out-of-the-box inference if you are interested in categories already in COCO (e.g., humans, cars, etc). We experimented with different models from zoo on accuracy and speed of detection. We found ssd_mobilenet model performed best for the images from Simulator, however it was not able to detect the traffic lights in Udacity's track images. We decided to use different models for site vs. simulator. After exploration, we found rfcn_resnet101 was good enough compromise on accuracy and speed.
Output filtering and transformation
The output of the inferring step is a bounding box that marks the part of the image. We then resize it to 32x32x3 and feed into the classifier.
The classifier takes as input the previous selected region by the inference process and determines the light color {RED, YELLOW, GREEN}
Choosing a simple CNN
Given that there are only three classes to choose from, and there is substantial similarity between the input samples, it makes sense to use a simple CNN for the classification task. As such we use a LeNet style CNN programmed in keras. This is the graph of the CNN:
Training CNN
We trained this CNN on two separate dataset and generated two models for simulator and site. We extracted around 5000 images from Simulator and 2000 images from Udacity ros-bag and trained them separately. We trained the CNN on 52 epochs and 30% validation split and validation loss < 0.001.
Our car is able to smoothly follow waypoints at speed limit, detect traffic light signals using object detection and image classifier to stop the car before stopline at very smooth and comfortable deceleration. Video link is below:
Our object detection uses frozen inference graph from SSD MobileNet V1 COCO 11.06.2017. Detected traffic light images are resized to 32x32 pixel images and fed into custom trained CNN with layers displayed in tl_detector node section above. For more information on our LeNet CNN, the code is stored under Capstone-Project/ros/src/tl_detector/light_classification/
As mentioned in tl_detector node, we found that MobileNet is not adequate for real traffic light iamge inference, so another frozen inference graph, RFCN ResNet101 COCO 11.06.2017 is used. Also another custom CNN model was trained with real traffic light images. When launching ROS with stie.launch, these are used instead of MobileNet.
RFCN ResNet is more power and accurate, but it takes more computation power to run in real time. Since our ROS setup is in VM, we cannot utilize our GPU for running inferences. We instead extracted all images from rosbag provided by Udacity and tested offline.
The Team:
Danfeng Xu (danfenx@g.clemson.edu)
Roopak Ingole (roopak.ingole@gmail.com)
Ying Tang (tangtang_com@hotmail.com)
Wayne Chen (waynecoffee@hotmail.com)


