This README file is a step-by-step tutorial on how to add and use ROS on a Yocto image for Raspberry Pi 4. In the process of research, I have found that the "official" meta-ros layer is depricated, full of bugs, and most importantly has no support for the latest LTS version of The Yocto Project: Kirkstone---at the time of writing this (2/2024). So, here I will document the entire process of building it: starting from cloning poky and openembedded to running roscore on the Pi.
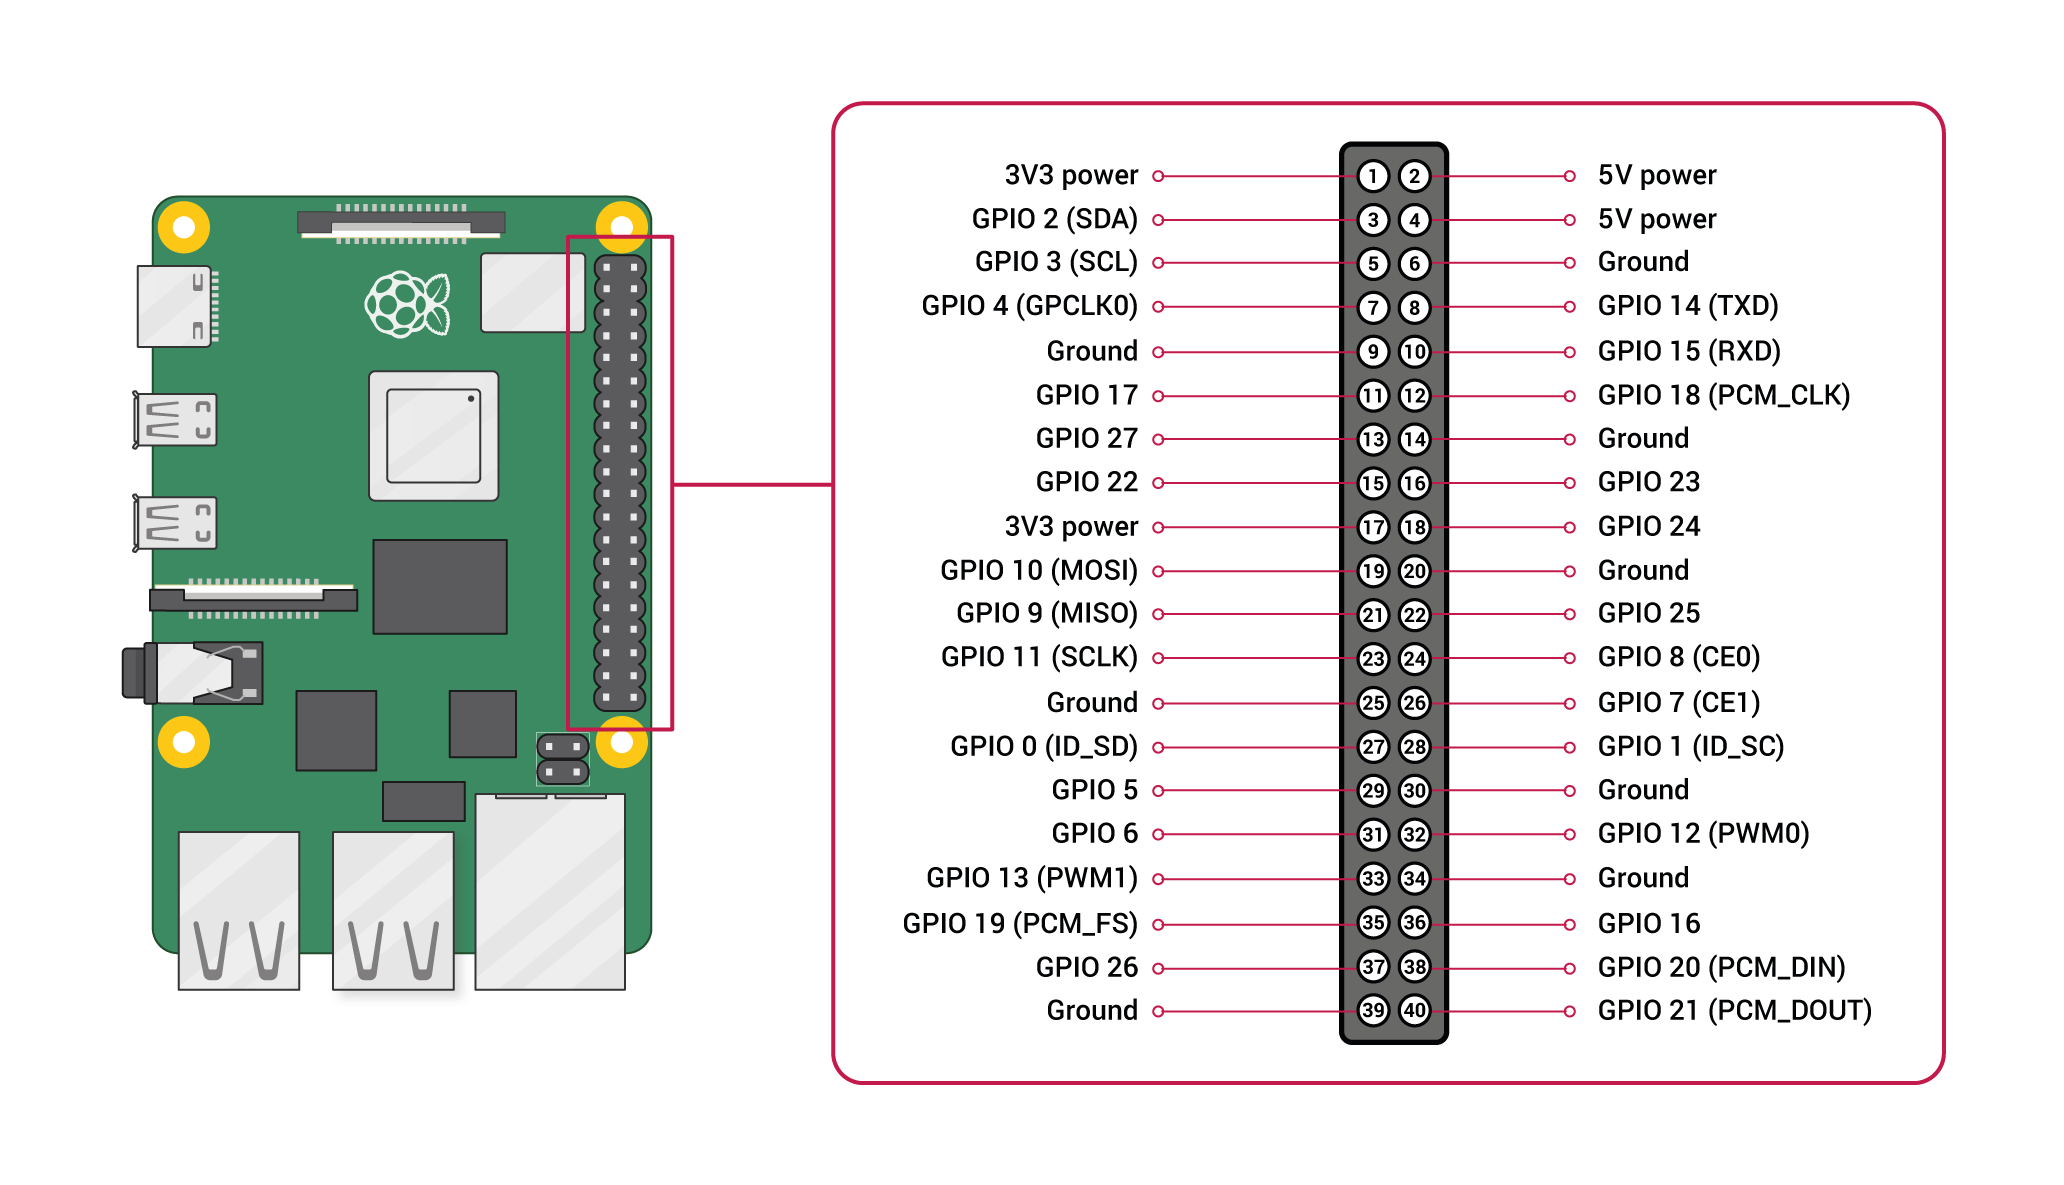
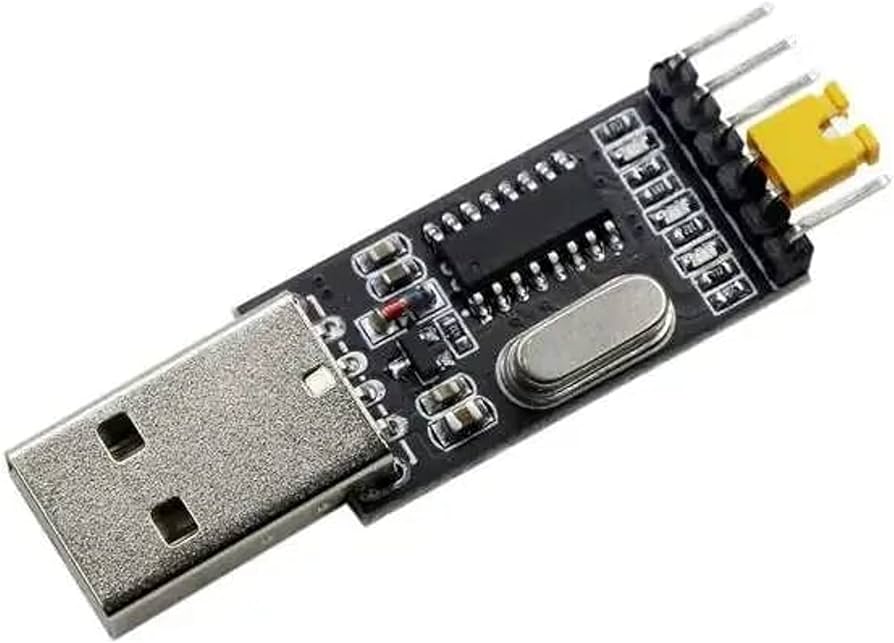
As stated earlier, the target hardware is a Raspberry Pi 4 8GB Rev 1.5C with the following pin configuration. Knowing the pin configuration will be important later on in order to communicate with the Pi later on via a serial terminal like gtkterm using a USB-to-TTL device as shown below.


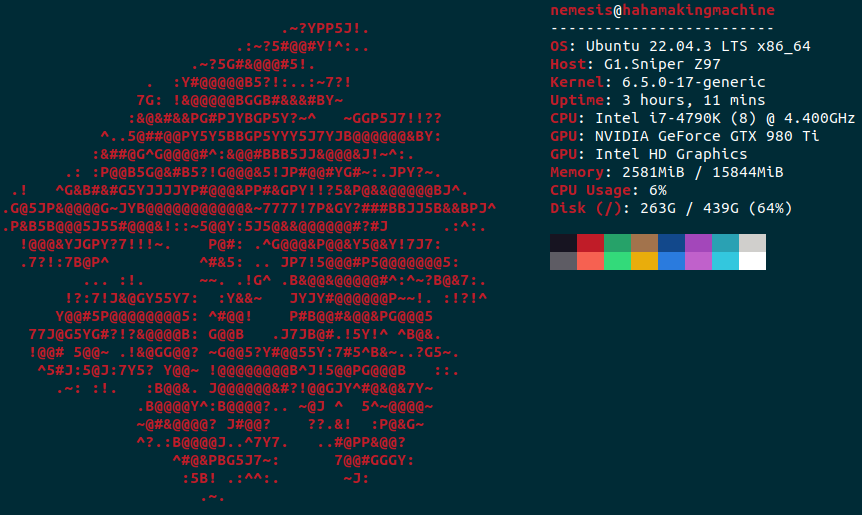
I have built this Yocto image on a PC with the specifications stated below. I made sure to record the time it took me to build the image for reference. Bare in mind that performance may differ duo to multiple reasons such as: temperature---a laptop is more likely to throttle than a PC; disk speed---I built it entirely on an SSD and it took over 2 hours, I can hardly imagine how long it would take to build an image on an HDD; and lastly the performance of your machine---I am running a native/real Ubuntu 22.04 machine, not a VM.

With all the exposition out of the way, let us begin.
-
Start things off with by updating and upgrading packages.
sudo apt update && upgrade -y -
The Yocto Project documentation recommends installing the following packages.
sudo apt install gawk wget git diffstat unzip texinfo gcc build-essential chrpath socat cpio python3 python3-pip python3-pexpect xz-utils debianutils iputils-ping python3-git python3-jinja2 libegl1-mesa libsdl1.2-dev python3-subunit mesa-common-dev zstd liblz4-tool file locales libacl1
-
Now, in the project folder, clone the reference distro
poky.https://github.com/yoctoproject/poky.git -
Next, in the same project folder (beside
poky), clone theopenembeddedlayer repository.https://github.com/openembedded/meta-openembedded.git -
Since the target hardware is a Raspberry Pi board, it is time to clone the Board Support Package (BSP) made for Raspberry Pi---
meta-raspberrypihttps://github.com/agherzan/meta-raspberrypi.git -
Finally, it is time to clone the star of the show:
meta-ros. As stated earlier, the "official"---as in the one you can find in Openembedded Layer Index---is deprecated and full of bugs; so I will not use it. Luckily, RethinkRobotics-opensource forked a repository that was forked from a fork of the originalmeta-rosthat is up-to-date and fully functional. Huge shoutout to them. For now, I will simply clone their repository.https://github.com/RethinkRobotics-opensource/meta-ros.git
As of the time this tutorial is written, the latest LTS version of The Yocto Project is Kirkstone. So, I will be using that. Make sure to checkout the correct branch in each of the layers we had cloned.
- To see which branch you are currently on:
git status - To view all the branches available in said repository:
git branch -a - To checkout a branch in a repository:
git checkout BRANCH_NAME_Kirkstone
VIMP: For the meta-ros layer, since I want to use ROS1 Noetic, make sure to checkout the branch superflore/noetic/2023-09-15.
-
Change directory into the project folder where all layers' folders are visible to you.
-
Source the script located in the
pokyfolder to startbitbakeand create a new image folder. Here, I named my imagebuild-RPi4-ROS. Conventionally, all image names start withbuildto make them distinct. Sourcing this script will change your directory to a new folder named the same as the image name and start bitbake.source poky/oe-init-build-env build-RPi4-ROS -
The layers added to the image can be viewed by inserting the command:
bitbake-layers show-layers -
Next, we will start adding layers one by one to the image using the command
bitbake-layers add-layer. Note thatmeta-raspberrypidepends on other layers to function correctly, hence they will be added before it. Same story goes tometa-ros. Ergo, add the layers in the same order as written here to avoid any unnecessary errors.bitbake-layers add-layer ../meta-openembedded/meta-oe bitbake-layers add-layer ../meta-openembedded/meta-python bitbake-layers add-layer ../meta-openembedded/meta-networking bitbake-layers add-layer ../meta-openembedded/meta-multimedia bitbake-layers add-layer ../meta-raspberrypi bitbake-layers add-layer ../meta-ros/meta-ros-common bitbake-layers add-layer ../meta-ros/meta-ros1 bitbake-layers add-layer ../meta-ros/meta-ros1-noetic
-
Change directory to where
local.confis located in the image folder.cd conf -
Open
local.confusing a text editor. Here, I open it usinggeditgedit local.confComment any line that specifies a certain
MACHINEand add this one:## Machine Name: MUST INCLUDE MACHINE = "raspberrypi4-64"UART must be enabled in order to be able to communicate with the Pi using serial terminal.
ENABLE_UART = "1"Expanding the size of root filesystem can be beneficial. I have set mine to 5GB since I used a 64GB SD card.
## Extend Root Filesystem Size to 5GB (size written in bytes) IMAGE_ROOTFS_EXTRA_SPACE = "5242880"-
You can add certain applications to your image via the command
IMAGE_INSTALL:append. Make sure to add ones that do not need you to create a recipe to fetch and install them. Here, I addedconnman-client,htop, andnano. Bro Tip: gotocto is an online tool that helps you create a recipe.## Additional Packages IMAGE_INSTALL:append = " htop" IMAGE_INSTALL:append = " nano" IMAGE_INSTALL:append = " connman-client" -
There are multiple options that range from enabling communication protocols like UART, SPI, and I2C; to enabling support for a CAN module and a camera. In order to explore all of these options, feel free to explore the meta-raspberrypi Official Documentation.
-
You can add extra software features like SSH using the command
EXTRA_IMAGE_FEATURES. I enabled SSH and added features like package management---although I could not get it to work yet, it is worth including for now.## Features like SSH ENABLE_SSH_SERVER = "1" EXTRA_IMAGE_FEATURES ?= "debug-tweaks ssh-server-openssh package-management" -
Another feature that I could not get to work is making
bashthe default shell in the yocto image. I will add the lines used to enable this feature and hopefully update them when I succeed.## Change Default Shell to Bash INITSCRIPT_NAME = "bash" BB_ENV_PASSTHROUGH_ADDITIONS = "SHELL" SHELL = "/bin/bash"
-
Now, all that remains is to run a single command and leave your machine to build the image for the next few hours.Change directory to the build-RPi4-ROS folder and run the following command:
time bitbake ros-image-core
My PC took just over 3 hours to complete it as shown below.
Once the previous step is complete, go to the directory YOUR_YOCTO_DIR/build-RPi4-ROS/tmp/deploy/images/raspberrypi4-64. A file named ros-image-core-noetic-raspberrypi4-64.wic.bz2 should be present. This is the final image that will be burned to the SD card.
The best tool to do this is balena etcher. You can download it by clicking here.
Then, follow the steps:
- Open the downloaded
balena etcherfile. Make sure that the file is given the permission to be executable. - Choose the file named
ros-image-core-noetic-raspberrypi4-64.wic.bz2. - Choose the installation medium (SD card).
- Wait for it to finish---it took about 30 minutes in my case.
- Remove the SD card and insert it in the Pi.
-
My serial terminal of choice is
gtkterm. In order to install it, simply:sudo apt install gtkterm -y -
A common problem with USB-to-TTL devices is that they keep getting disconnected once it is connected to the PC. To solve this, write:
sudo apt remove brltty -
Another common issue is
gtksaying permission denied for this user. To solve this, add your user to the dialout group:sudo usermod -a -G dialout YOUR_USERNAME
- Insert the SD card into the Pi.
- Connect the Pi to USB-to-TTL as follows:
- GND --> GND
- Tx --> Rx
- Rx --> Tx
- Connect USB-to-TTL to the PC via USB.
- Launch
gtktermusing the following command:gtkterm -p /dev/ttyUSB0 -s 115200 - Power on the Pi. You should see the starting screen on
gtkterm.
See for yourself :D
Pi_C.mp4
You can use connmanctl to connect to wifi. To do so, follow the steps:
connmanctl
enable wifi
agent on
scan wifi
connect wifi_LOTS_OF_GIBBIRISH_managed_psk
WIFI_PASSWORD
quit
That's all, folks!
