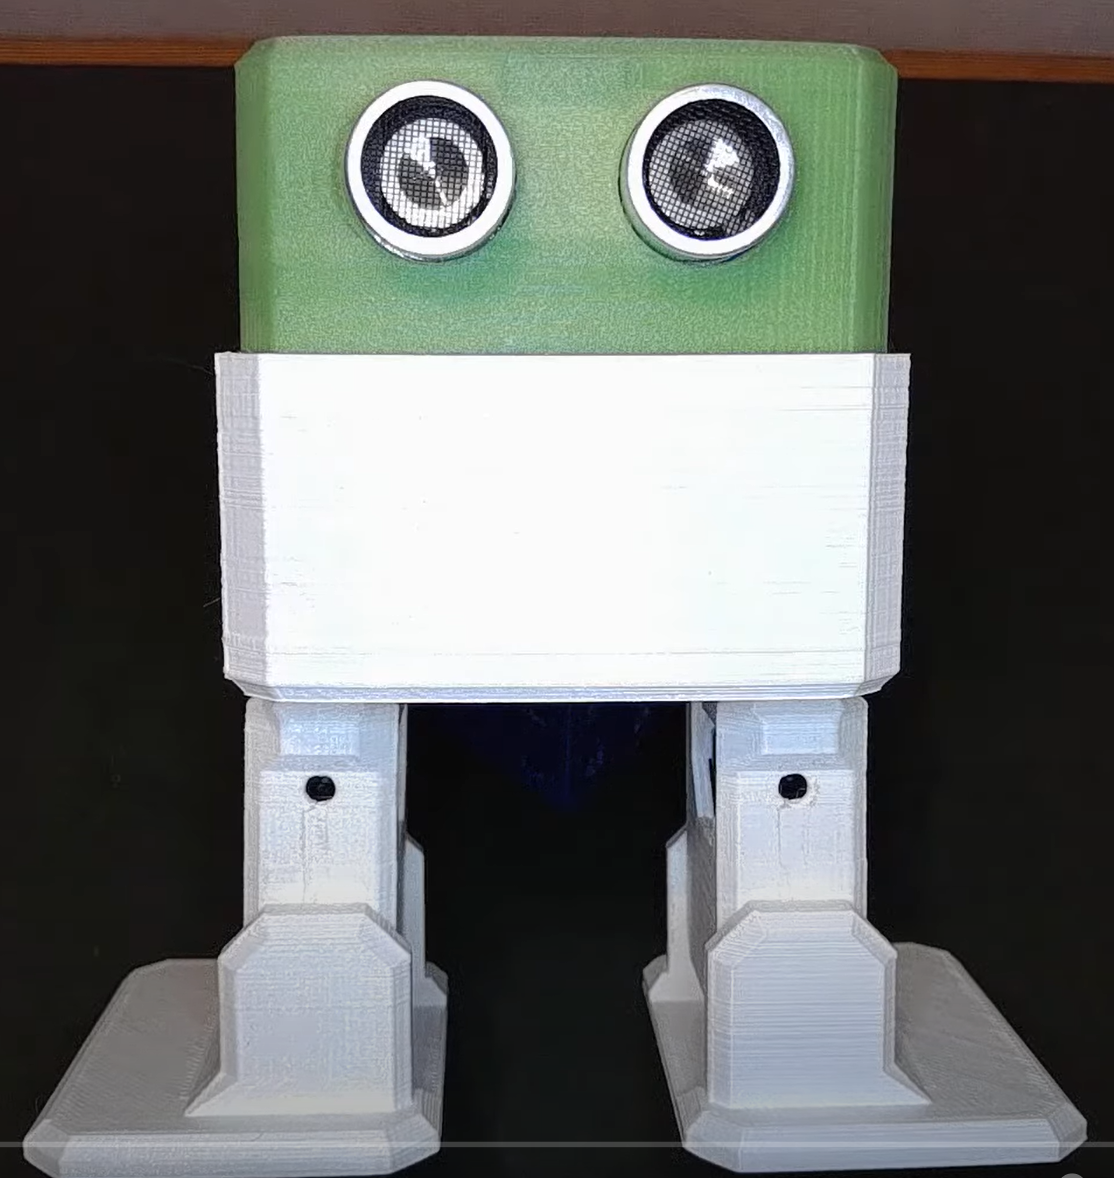
Otto Plus builder construction, programming and expansion notes.
This is not a How To guide it is a set of notes to help when this project is referenced in the future.
To view a PDF version of this document click this Link
The GitHub Repository is located at this Link
The GeekMustHave Blog Post (where all the Videos and files are available) is located at this Link
|
Note
|
When viewing this from GitHub there will be No embedded videos. |
|
Note
|
When viewing this from GitHub some of the local files and videos may not be available because they are too large. |
This is the first project for 2022. Happy New Year, hopefully, soon, we will be out of the Human Malware (Covid-19).
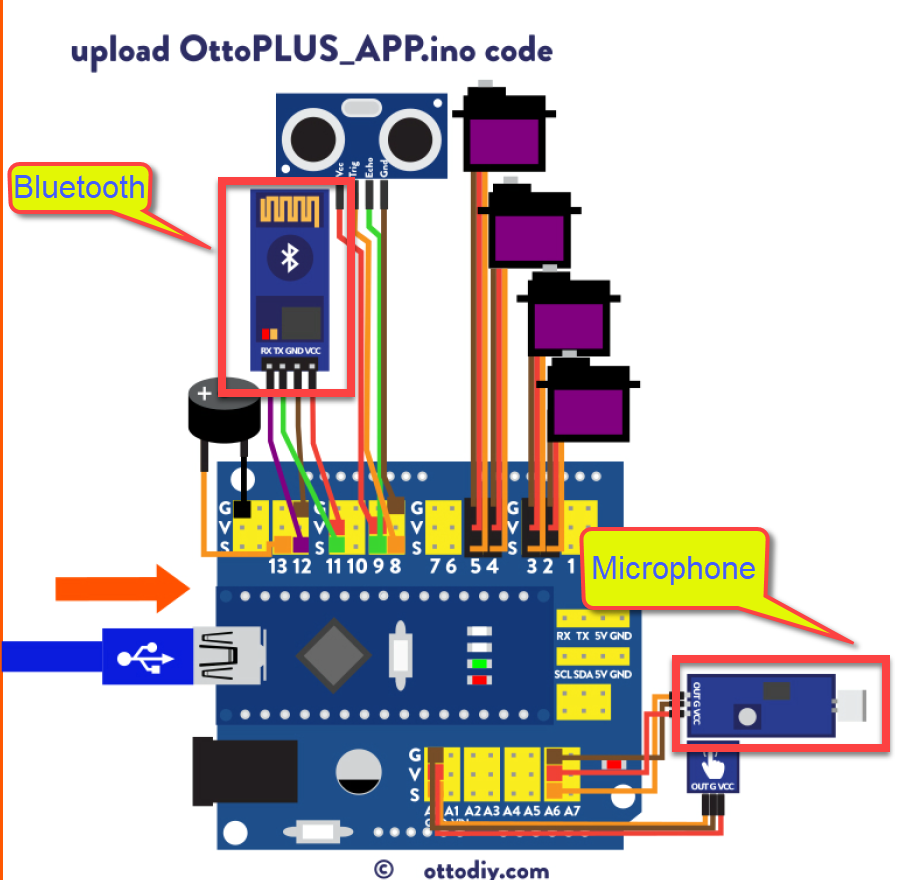
The how to build videos and examples were a bit difficult to understand. There didn’t appear to be any reference to the Microphone and Bluetooth modules.
A Otto repository was created to capture everything about Otto in one place. This will include PDF rendered documents, YouTube Videos and software libraries.
I need one place I can go to in order to get files and videos related to the project.
This is not a 2 hour build, it is more like a 3-4 day build.
The screwdriver provided with the kit is nice but you might need the following
-
A better screwdriver
-
Diagonal cutter, flush cut
-
Rotary Tool
-
Extra screws (They seem to vanish into another dimension)
-
Hot glue
-
UV Glue
-
Hobby knife
-
Hammer (Utter frustration)
Some observations on the construction
-
Test fit ALL parts like buzzer, on/off switch. There will be sanding or dremel required
-
Trim and clean up all the 3d printed parts, it will go much easier later
-
Build the bottom first, align the servos
-
Enlarge the holes for the power jack and USB jack, they do not align easily
-
Get a better screwdriver or end up with a lot of useless phillips head screw difficult to get out
-
Test fit the motor control board into the case with NO jumpers attached
-
Touch sensor needs to be installed, taped in place, before fitting motor controller board
-
Testing the alignment may cause a leg to get stuck and in turn strip the servo arms.
Some of the modifications done
-
Made the jumpers between the bottom abd top longer to make wiring simpler and more reliable
-
Glue (UV Glue for me) the jumpers to the Piezo speaker
-
Place the Bluetooth module on top of the Motor controller board
-
Glue(UV Glue saves the day) the power switch, Test it first before glueing, I destroyed the switch that came with the kit
-
Test the Motor control board with just the servos attached, do alignment, then wire the rest of the modules
The following videos from Robot Creation are very useful in the build process.
The video above can be viewed offline from this Link:/videos/OttoDIY%20build%20Pt-2.mp4[Otto servo positioning]
The following are segments of videos that help in some critical tasks
The Otto Plus has two extra modules
-
Bluetooth communication
-
Microphone
One of the frustrating things was the locating the wiring diagram for these two modules.
The diagram was located in the V10 construction Guide, which is at this offline link
The actual wiring diagram is on page 18.
Otto can be programmed using Arduino or Blockly (GUI), started with Arduino because I’m a masochist.
Blockly is a great alternative if you are not comfortable with Arduino, just be prepared for some of the example sketches to not work properly.
Blockly sketches can be viewed and the generated Arduino C++ code can be viewed, and used directly in the Arduino IDE.
|
Note
|
Use the Blockly generated Arduino C++ code as templates to help build a powerful Arduino script |
The most current version of the Arduino IDE as of this document date is 1.8.19 and can be downloaded from this Link There is a new Version 2.o of ths Arduino IDE but at this date it is still in beta.
To download the most current version of the Arduino IDE use this web Link
In order to use Arduino to upload code to Otto the Arduino libraries need to be installed.
There is a video on How to Calibrate Otto DIY outlines the Arduino libraries process.
The How to Calibrate Otto DIY video can be viewed or downloaded from this Video Link
Download the latest version of the Otto library from GIT at this Link
There is a local copy of the Arduino library in these notes at this Link
-
Download the .zip Otto libraries here Download
-
Open Arduino IDE and navigate to Sketch → Include Library → Add .ZIP Library. At the top of the drop down list, select the option to
Add .ZIP Library -
Select the library. Navigate to the .zip file’s location, that you just downloaded and open it.
-
In the main window you will see in the bottom back area a message that it has been installed.
-
To verify they are properly installed, go to Sketch → Include Library menu. The library should be listed at the bottom of the drop-down menu That means is ready to use Otto example codes! They are at File → Examples → OttoDIYLib for more details or other way to install libraries visit this link
|
Tip
|
Set the device to Arduino Nano for Otto.
|
|
Tip
|
The Boot loader is the AtMega 328 (Old Boot loader) because the mini in Otto is a clone. |
The Arduino IDE when used with the USB Port is assigned to a Comm port.
Open the Device Manager and then click on the Ports (Comm & LPT) there may be some ports already assigned to other serial devices.
Plug in Blockly to a USB port, listen for the Window beep acknowledging Blockly, and watch the Ports (Comm & LPT) for a new comm port to be assigned.
|
Tip
|
The Comm port number may change over time as the number of Serial devices are used on desktop |
There is a very small script that will cycle the Servos, this is like a confidence script that the Nano is working and the code is getting loaded.
link:files/Otto_ServoTest.ino[role=include]A offline copy of the servo test can be downloaded from this link
This test will move the servos to the Left, then to the right, then back to center.
|
Caution
|
This script could cause the legs to rotate to far to the left or right causing the servo arm to get stripped. PITA. |
Alignment is Critical!!, this step can not be skipped.
The legs are aligned separately from the feet.
There are two arduino scripts to help with the alignment process,
Alignment Serial - Align the legs and feet and write the settings into Otto memory. These settings are used to set Otto to default home position when a new BLOC is started.
Alignment Walk - Test Otto walking, check Otto walks straight as possible.
|
Tip
|
Use some graph paper to help verify legs are parallel to the body. |
After the alignment of the legs/Feet are complete the setting must be written into memory, so when the Otto is restarted it has the proper Home position.
There are two BLOC example scripts to help test the assembled Otto.
These two scripts are in the Examples of Blockly
There are other BLOC’s to test the Piezo speaker, touch sensor and the ultrasonic sensor
The Dance BLOC is a very good script to show Otto dancing, great way to check Otto working
By combing the Dance, touch sensor and Piezo BLOCs together the BLOC below was designed.
This OTTO BLOC can be downloaded from this Link
When the BLOC is converted to C++ to Otto it looks like
Insert code hereA special Arduino script is required for using the OTTO app on the cellphone.
Insert code hereThe OTTO app must be downloaded into the phone. This app has functions to do movements, play sounds, and if an LED matrix is attached show emoticons. The code examples can be used to integrate Bluetooth into new scripts.
There is an Arduino script to upload to OTTO, which will enable the Bluetooth function.
It is located in the Arduino examples under OttoDIYLib / Bluetooth / Otto_PLUS_APP_V9.ino.
There is also a Blockly BLOC for testing the bluetooth functions.
include:files/xxyyzzdummy.txt
How to customize the physical Otto 4 easy ways to design your own robot
|
Note
|
Not all of the file in the table below will be available from the GitHub site as there is a 50MB limit. |
| Description | Type | Download |
|---|---|---|
Calibration Video |
Video MP4 |
|
OTTO Arduino library |
Zip |
|
OTTO BLockly program |
EXE |
|
Arduino V1.0 IDE |
EXE |
|
OTTO Blockly requires current Java runtime |
EXE |
|
OTTO Servo test |
Arduino Code |
|
3D Printing STL file for extra body for OTTO |
3D STL |
|
Robot Creations Video Part 2 of 4 |
Video MP4 |
|
Robot Creations Video Part 3 of 4 |
Video MP4 |
|
Robot Creations Video Part 4 of 4 Best! |
Video MP4 |
This document was created using ASCIIDoctor Markdown. More information on ASCIIDoctor can be found at https://asciidoctor.org/
If you are interested in the ASC Doctor (ADOC) markdown behind this document, it can be downloaded at this Link
| Date | Version | Author | Description |
|---|---|---|---|
01/31/2022 |
V2.1e |
JHRS |
Updated all file references, used largefiles directory to avoid GitHub issues |
01/30/2022 |
V2.1d |
JHRS |
Updates after the rework of the construction and valid testing |
01/25/2022 |
V2.1c |
JHRS |
Updates after initial construction and testing |
01/13/2022 |
V2.1b |
JHRS |
Initial version |


