SHEDIO [ Σχέδιο ] -- noun
- from Greek origin meaning 'plan', 'drawing', 'scheme'
IAAC - MRAC 01
DRAWING BOT - HARDWARE II SEMINAR
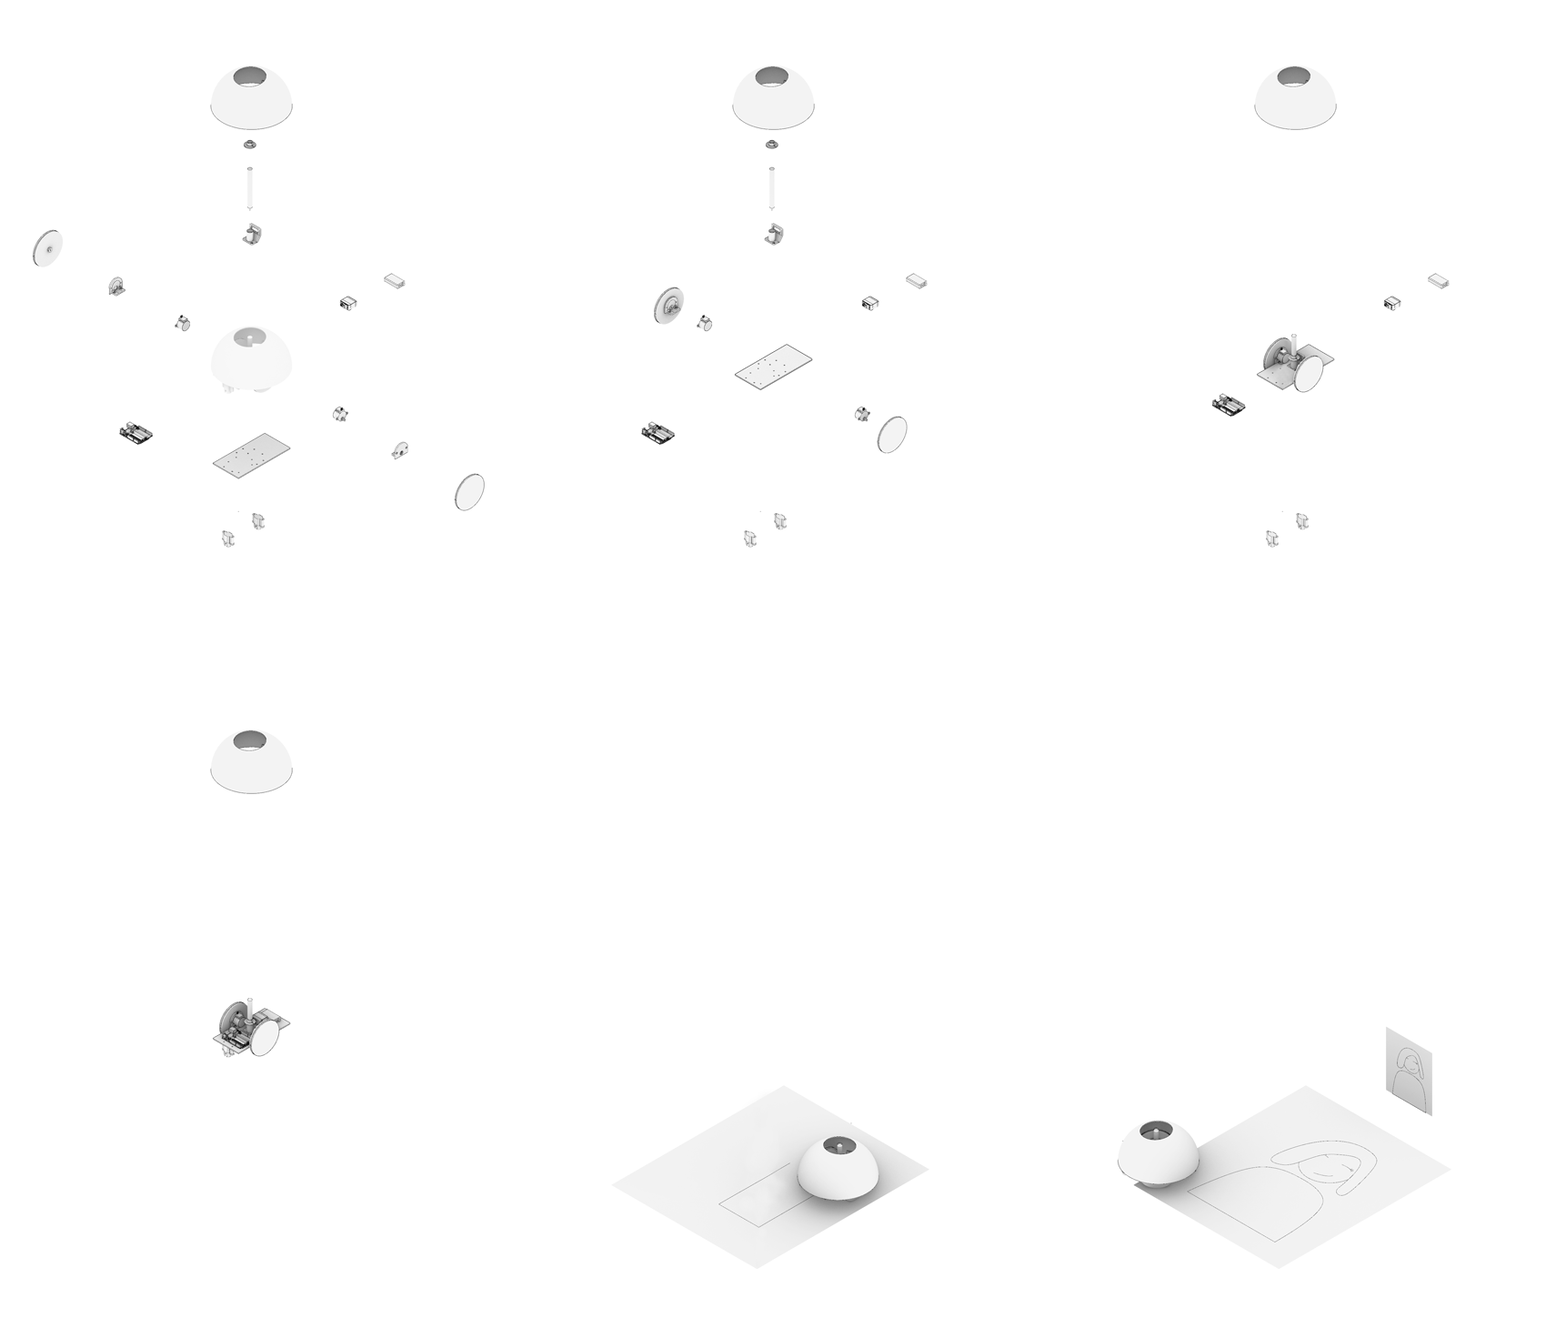
- A minibot that draws contours of images on flat surfaces -
The Drawing Bot
GETTING STARTED
Note
For this DIY project, a separate setup of the piCamera (in a box) is in charge of taking the photo that is to be traced by the mini bot.
Let's do it!
00. HARDWARE
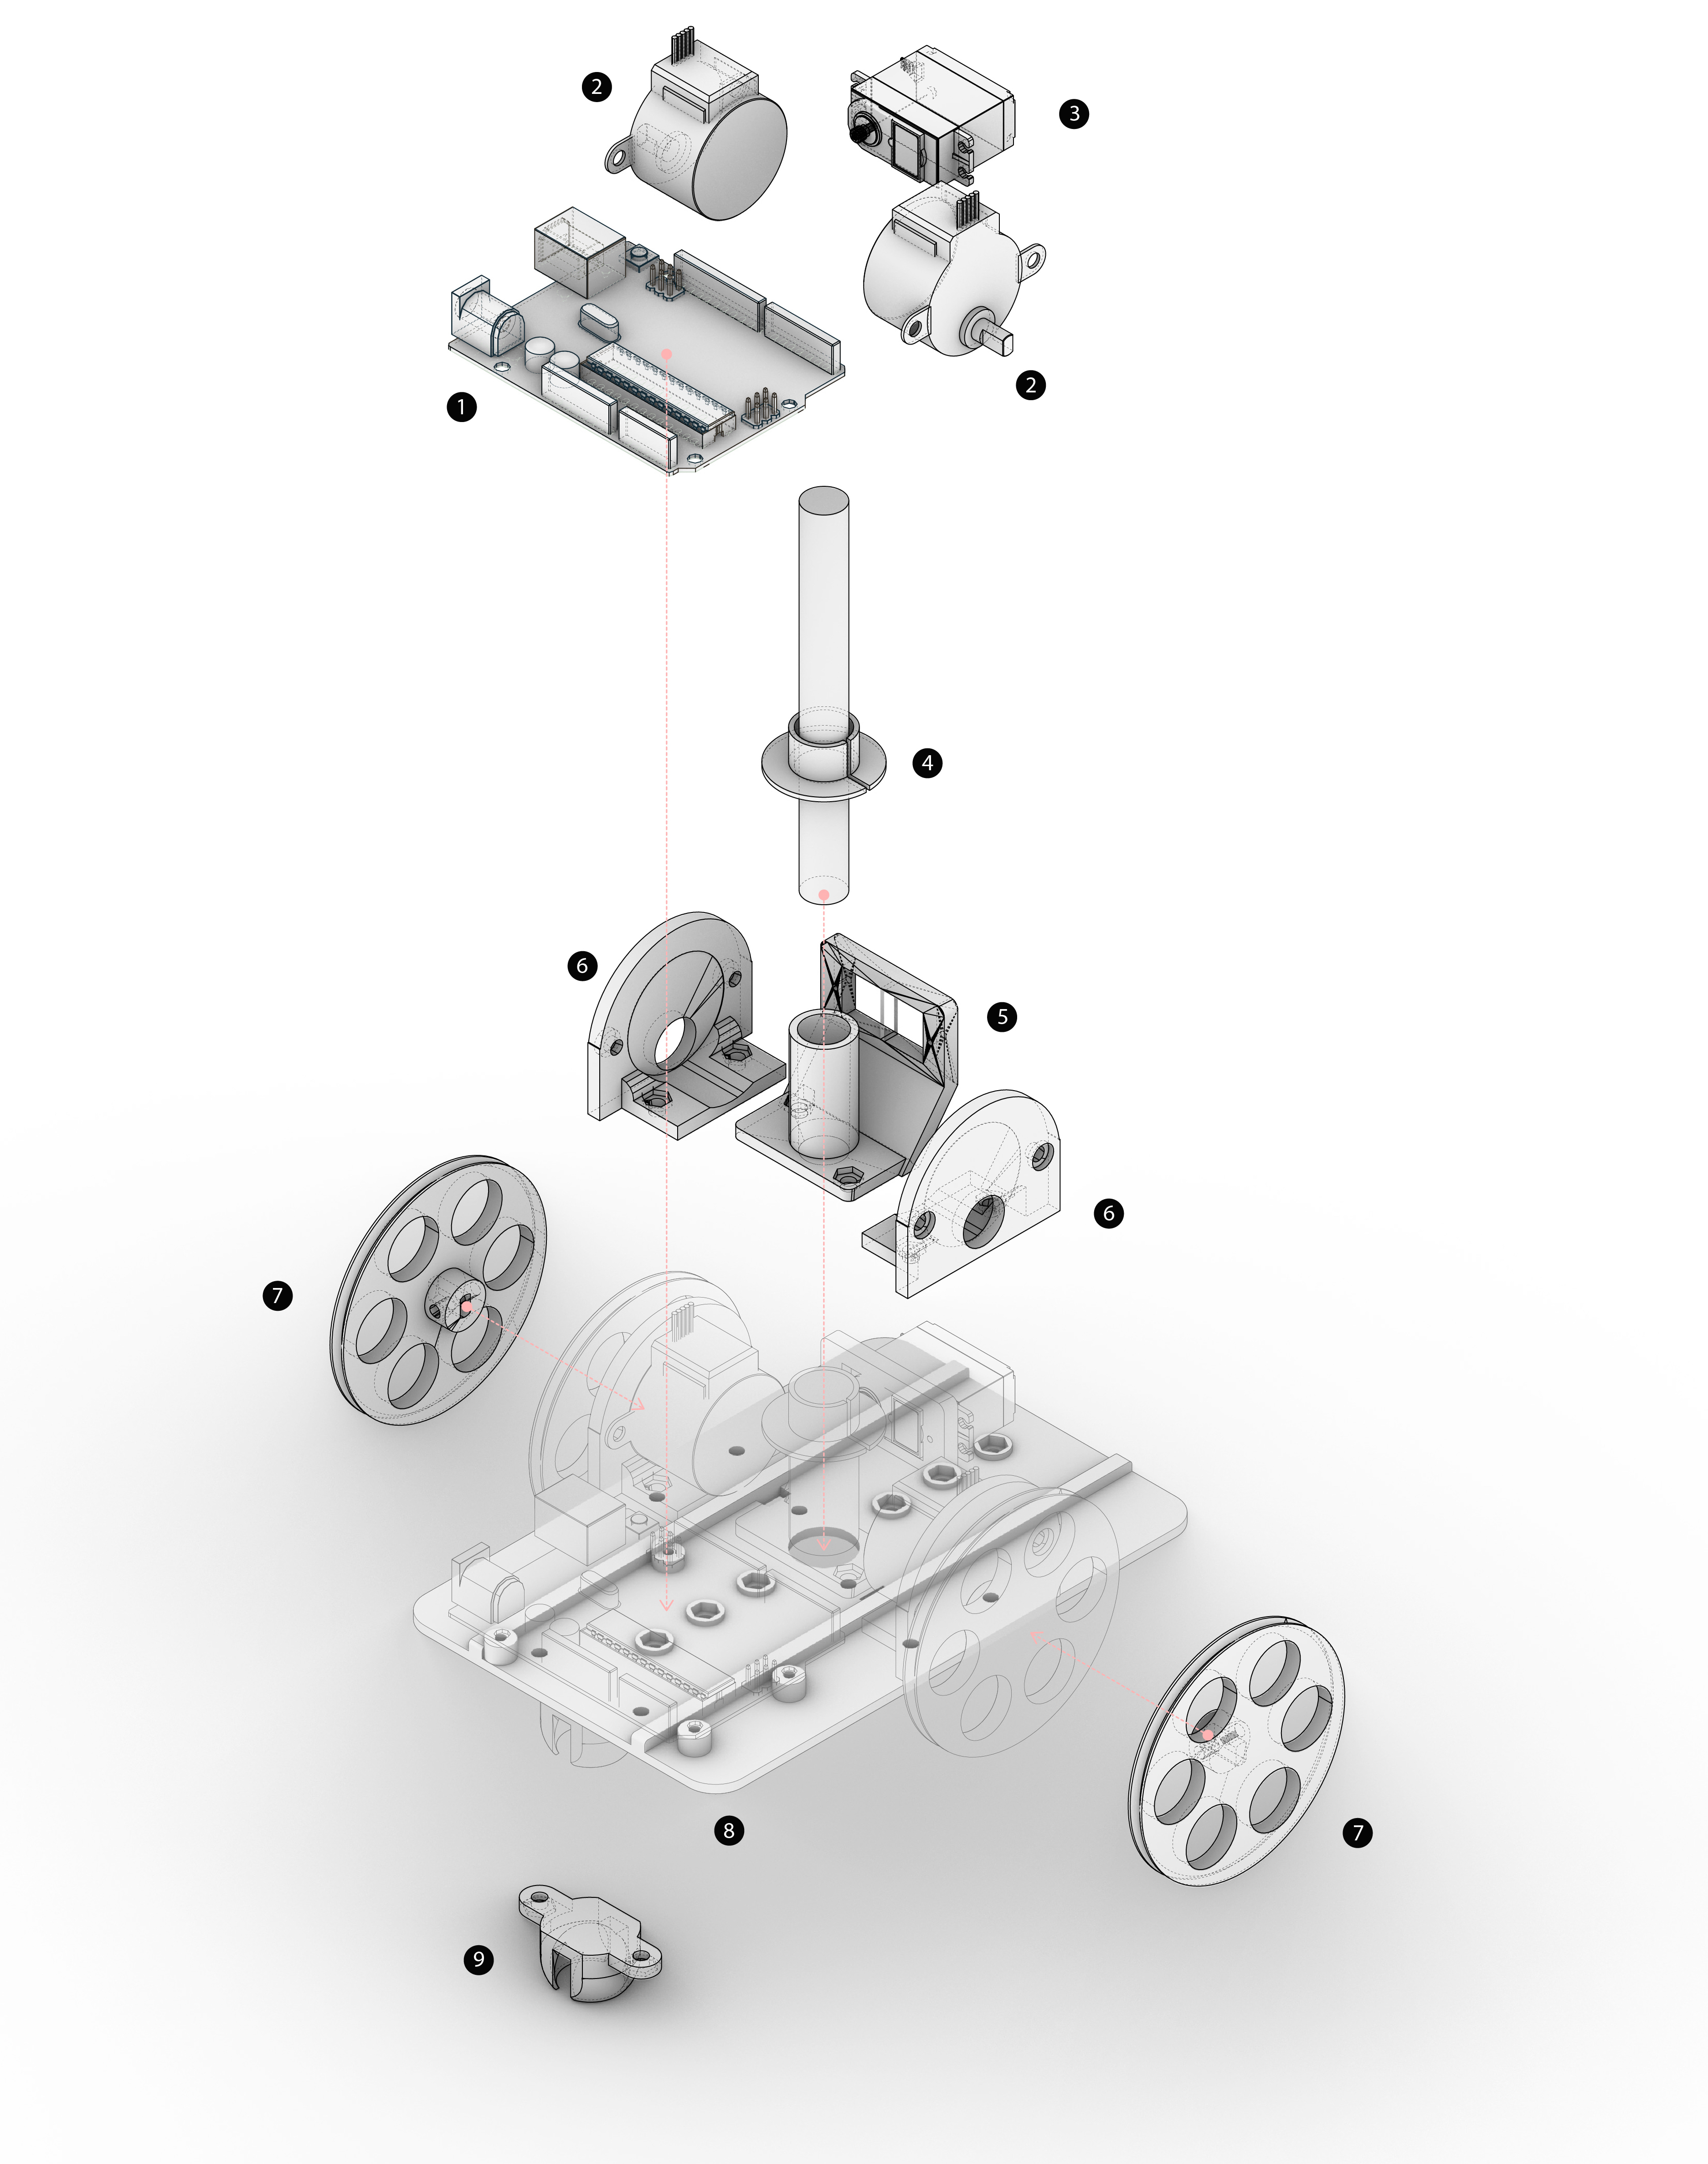
First Iteration Parts:
(1) Arduino Uno
(2) 28byj-48 Stepper Motor (x2)
(3) Mini Servo Motor
(4) Pen Holder
(5) Servo Motor Holder (controlling the pen’s movement)
(6) 3D Printed Wheels (x2)
(7) 3D Printed Board
(8) Base Plate
(9) Ball Bearing Holder
Note
An updated model with the latest parts can be found in the _Hardware folder here.
01. ARDUINO
CALIBRATING THE ROBOT & UNDERSTANDING THE SCRIPT
First things first, we need to translate string commands into wheel movements (controlled by the motors) to be able to establish a clear language with the mini bot. For that, we also need to calibrate it properly.
Follow the tutorial through this link.
All necessary arduino codes can be found here with comments.
02. RASPBERRY PI
Operating System: Raspbian GNU/ Linux 10 (buster)
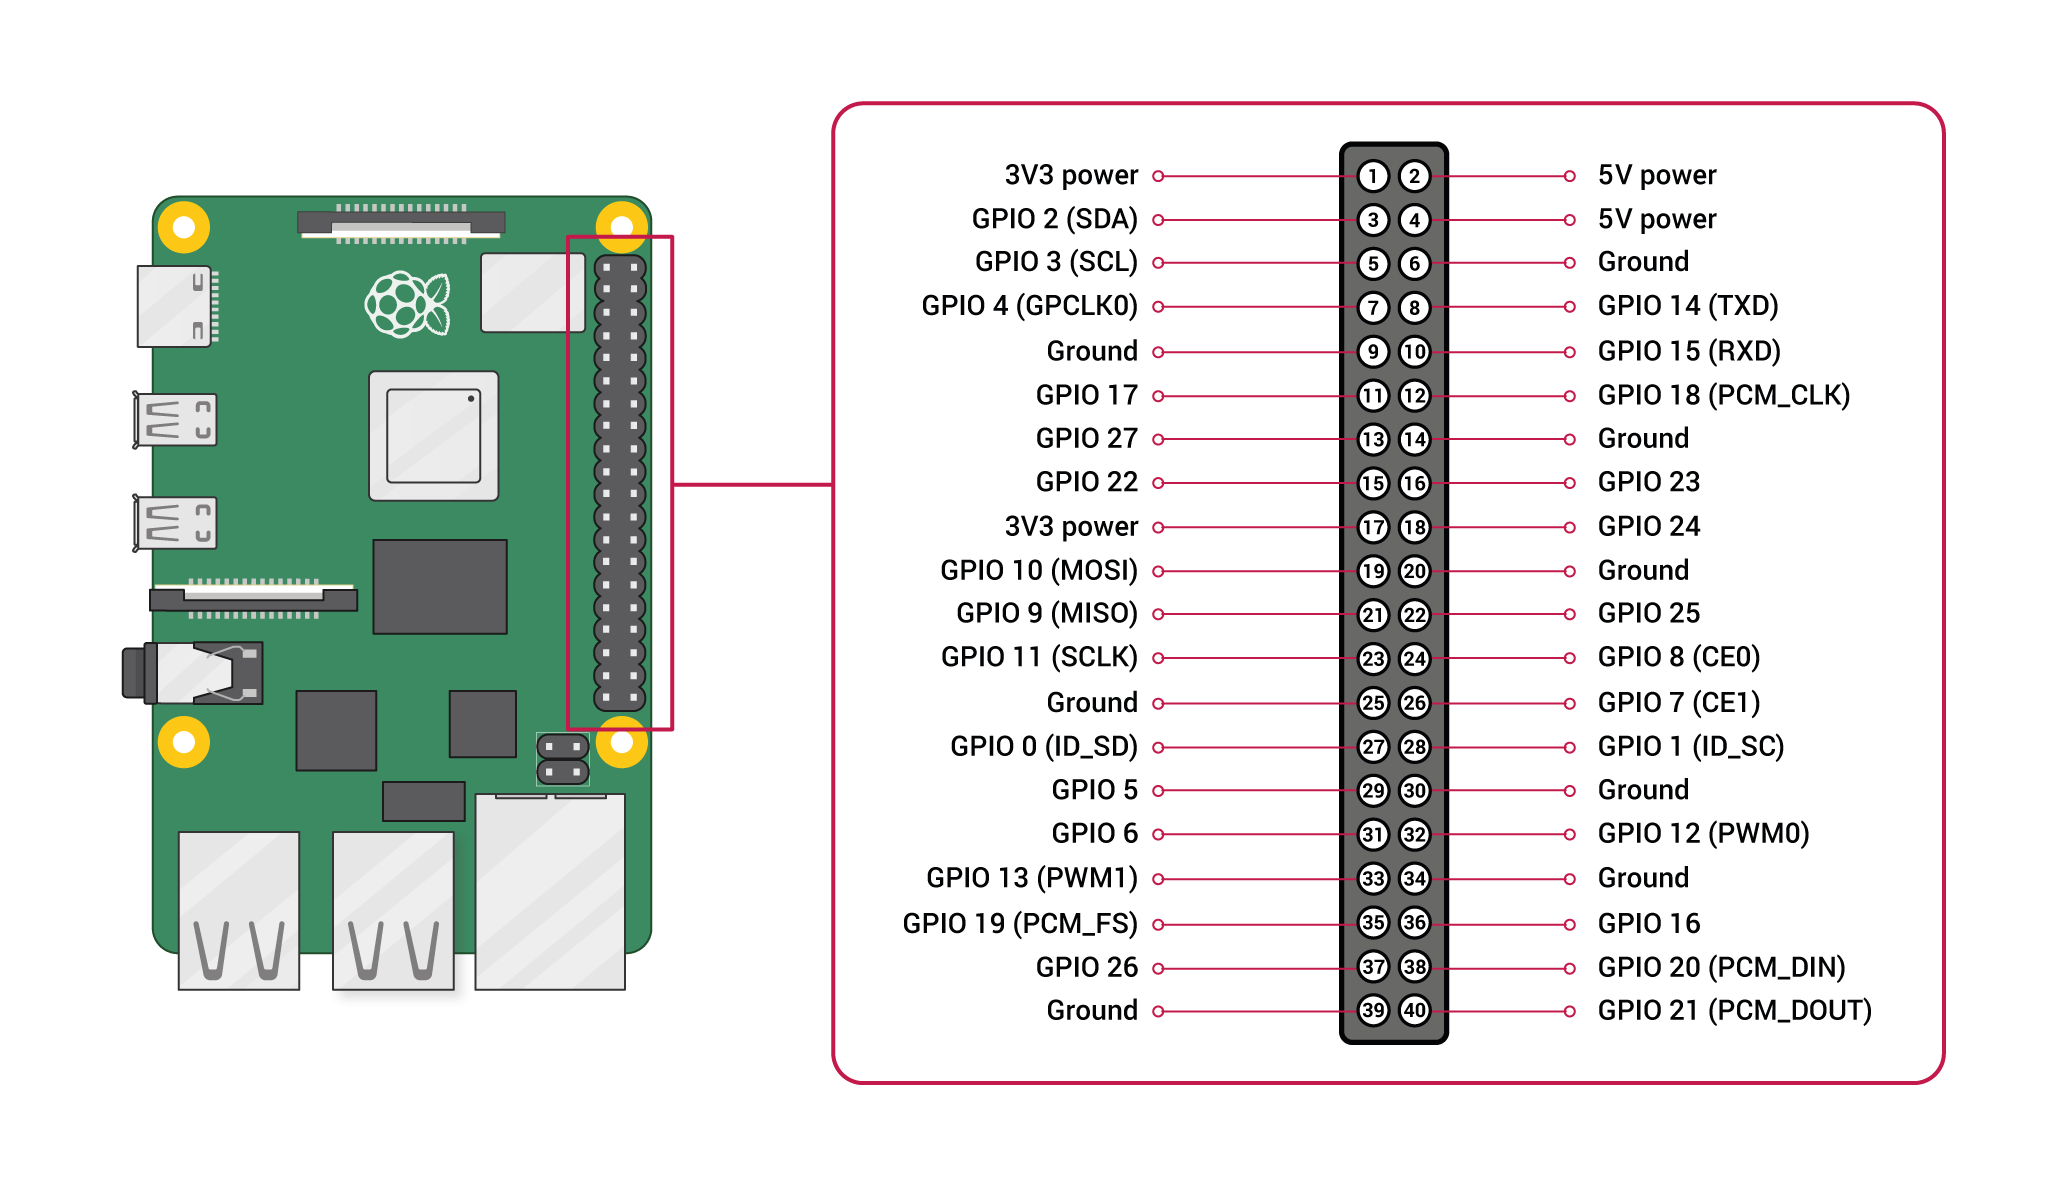
For beginners in Raspberry Pi, this link will be useful to download the imager in order to flash a microSD card with the Raspberry Pi OS. The documentation tab in the official raspberry pi website is very useful to set up the pi. In the diagrams folder, there is an image of the pinout diagram for the Raspberry Pi 4.
The scripts folder should contain a test script to run the pi camera with a touch sensor/ button and another test script for the LED's.
Some links we used on top of the general set up are as follows:
- PI CAMERA SETUP: https://projects.raspberrypi.org/en/projects/getting-started-with-picamera/2
- BUTTON EXAMPLE: https://raspberrypihq.com/use-a-push-button-with-raspberry-pi-gpio/
BLUETOOTH SETUP
Seting up bluetooth to connect to the HC-06 on the arduino: This takes a couple of steps to get it to work properly. First, you will have to make sure your Pi is set up with bluetooth properly.
Open a terminal and type
bluetoothctl
agent on
default-agent
scan on
This will show you a list of available bluetooth networks nearby. You will have to locate the name of your bluetooth and copy the IP address.
Open a new terminal and do the following:
sudo nano /etc/bluetooth/rfcomm.conf
add the following and replace the device ip address with yours
rfcomm0{
    bind yes;
    device AA:BB:CC:DD:EE:FF
    channel 1;
    comment "connection to bluetooth serial module";
}
This will create the necessary file in order for the Raspberry Pi to recognize and connect with the HC-06 Bluetooth Module. You will need to reboot your pi, and once restarted, type the following:
bluetoothctl
agent on
default-agent
scan on
And in a new terminal:
sudo rfcomm connect hci0 AA:BB:CC:DD:EE:FF
Now you should be connected to your bluetooth device. In order to connect to your bluetooth module using python, you will have to download the pyserial package and your serial port should be defined as (in your python script):
/dev/rfcomm0
The name is rfcomm0 because that is the name we wrote in the rfcomm.conf file in order for the Raspberry Pi to recognize the bluetooth module. If you need to check, you can type the following into a terminal, which will give you a list of devices connected to your Raspberry Pi via serial port.
lsusb
In order to take a picture and translate that into directions, run the final_script.py file and then to operate the drawing bot, run the send_all_the_instructions_to_arduino.py file (that is where you might have to change the serial port)
NOTE: The scripts are explained below, and there are notations in each file
OTHER USEFUL LINKS
Some other links regarding connecting to the Raspberry Pi remotely
To set up a usb connection between the pi and your laptop:
To set up putty:
To set up VNC Viewer:
03. PYTHON
Note
During this project, the following OS and code editors (not necessary) were used:
Operating Systems: macOS, Microsoft Windows and Linux
Editor 1: Visual Studio Code, found here
Editor 2: Pycharm, found here
For beginners in Python, the official website offers getting started tips.
Socratica's fun youtube tutorial also provides a step by step guide into the basics of Python.
This code uses Python 3.9.
First start by creating a custom environment for this project, to eventually install necessary libraries. Follow the tutorial on how to do so here.
For this code, available in the _Scripts folder of the repository here, you will need to install the following libraries:
Understanding the basic of how to find and draw contours using the OpenCV library can be found here. A simple code can be found here.
A visual introduction to Numpy can be found here for a better understanding of the library and how it works.
A basic explanation of the logic of the code and how it works can be found in this blogpost under "Python Script".
Note
The current Python script does not work properly yet, meaning that the robot does not draw the contours properly. We were not able to fully develop the code in the time frame we had so any notes or advice are welcome. We will continue to work on it and update this repo during our free time.
04. FABRICATION
The necessary parts for this bot were 3D printed. Find the catalogue of parts here.
You will need:
- x1 base
- x2 wheels
- x2 stepper motor holders
- x1 pen holder
- x1 servo motor holder
- x2 ball bearing holder
- x2 ball bearing extentions
- x1 cap
You will also need:
- x6 screws [M3 x 10] for the base
- x4 screws [M3 x 30] for the extensions
- x10 M3 nuts
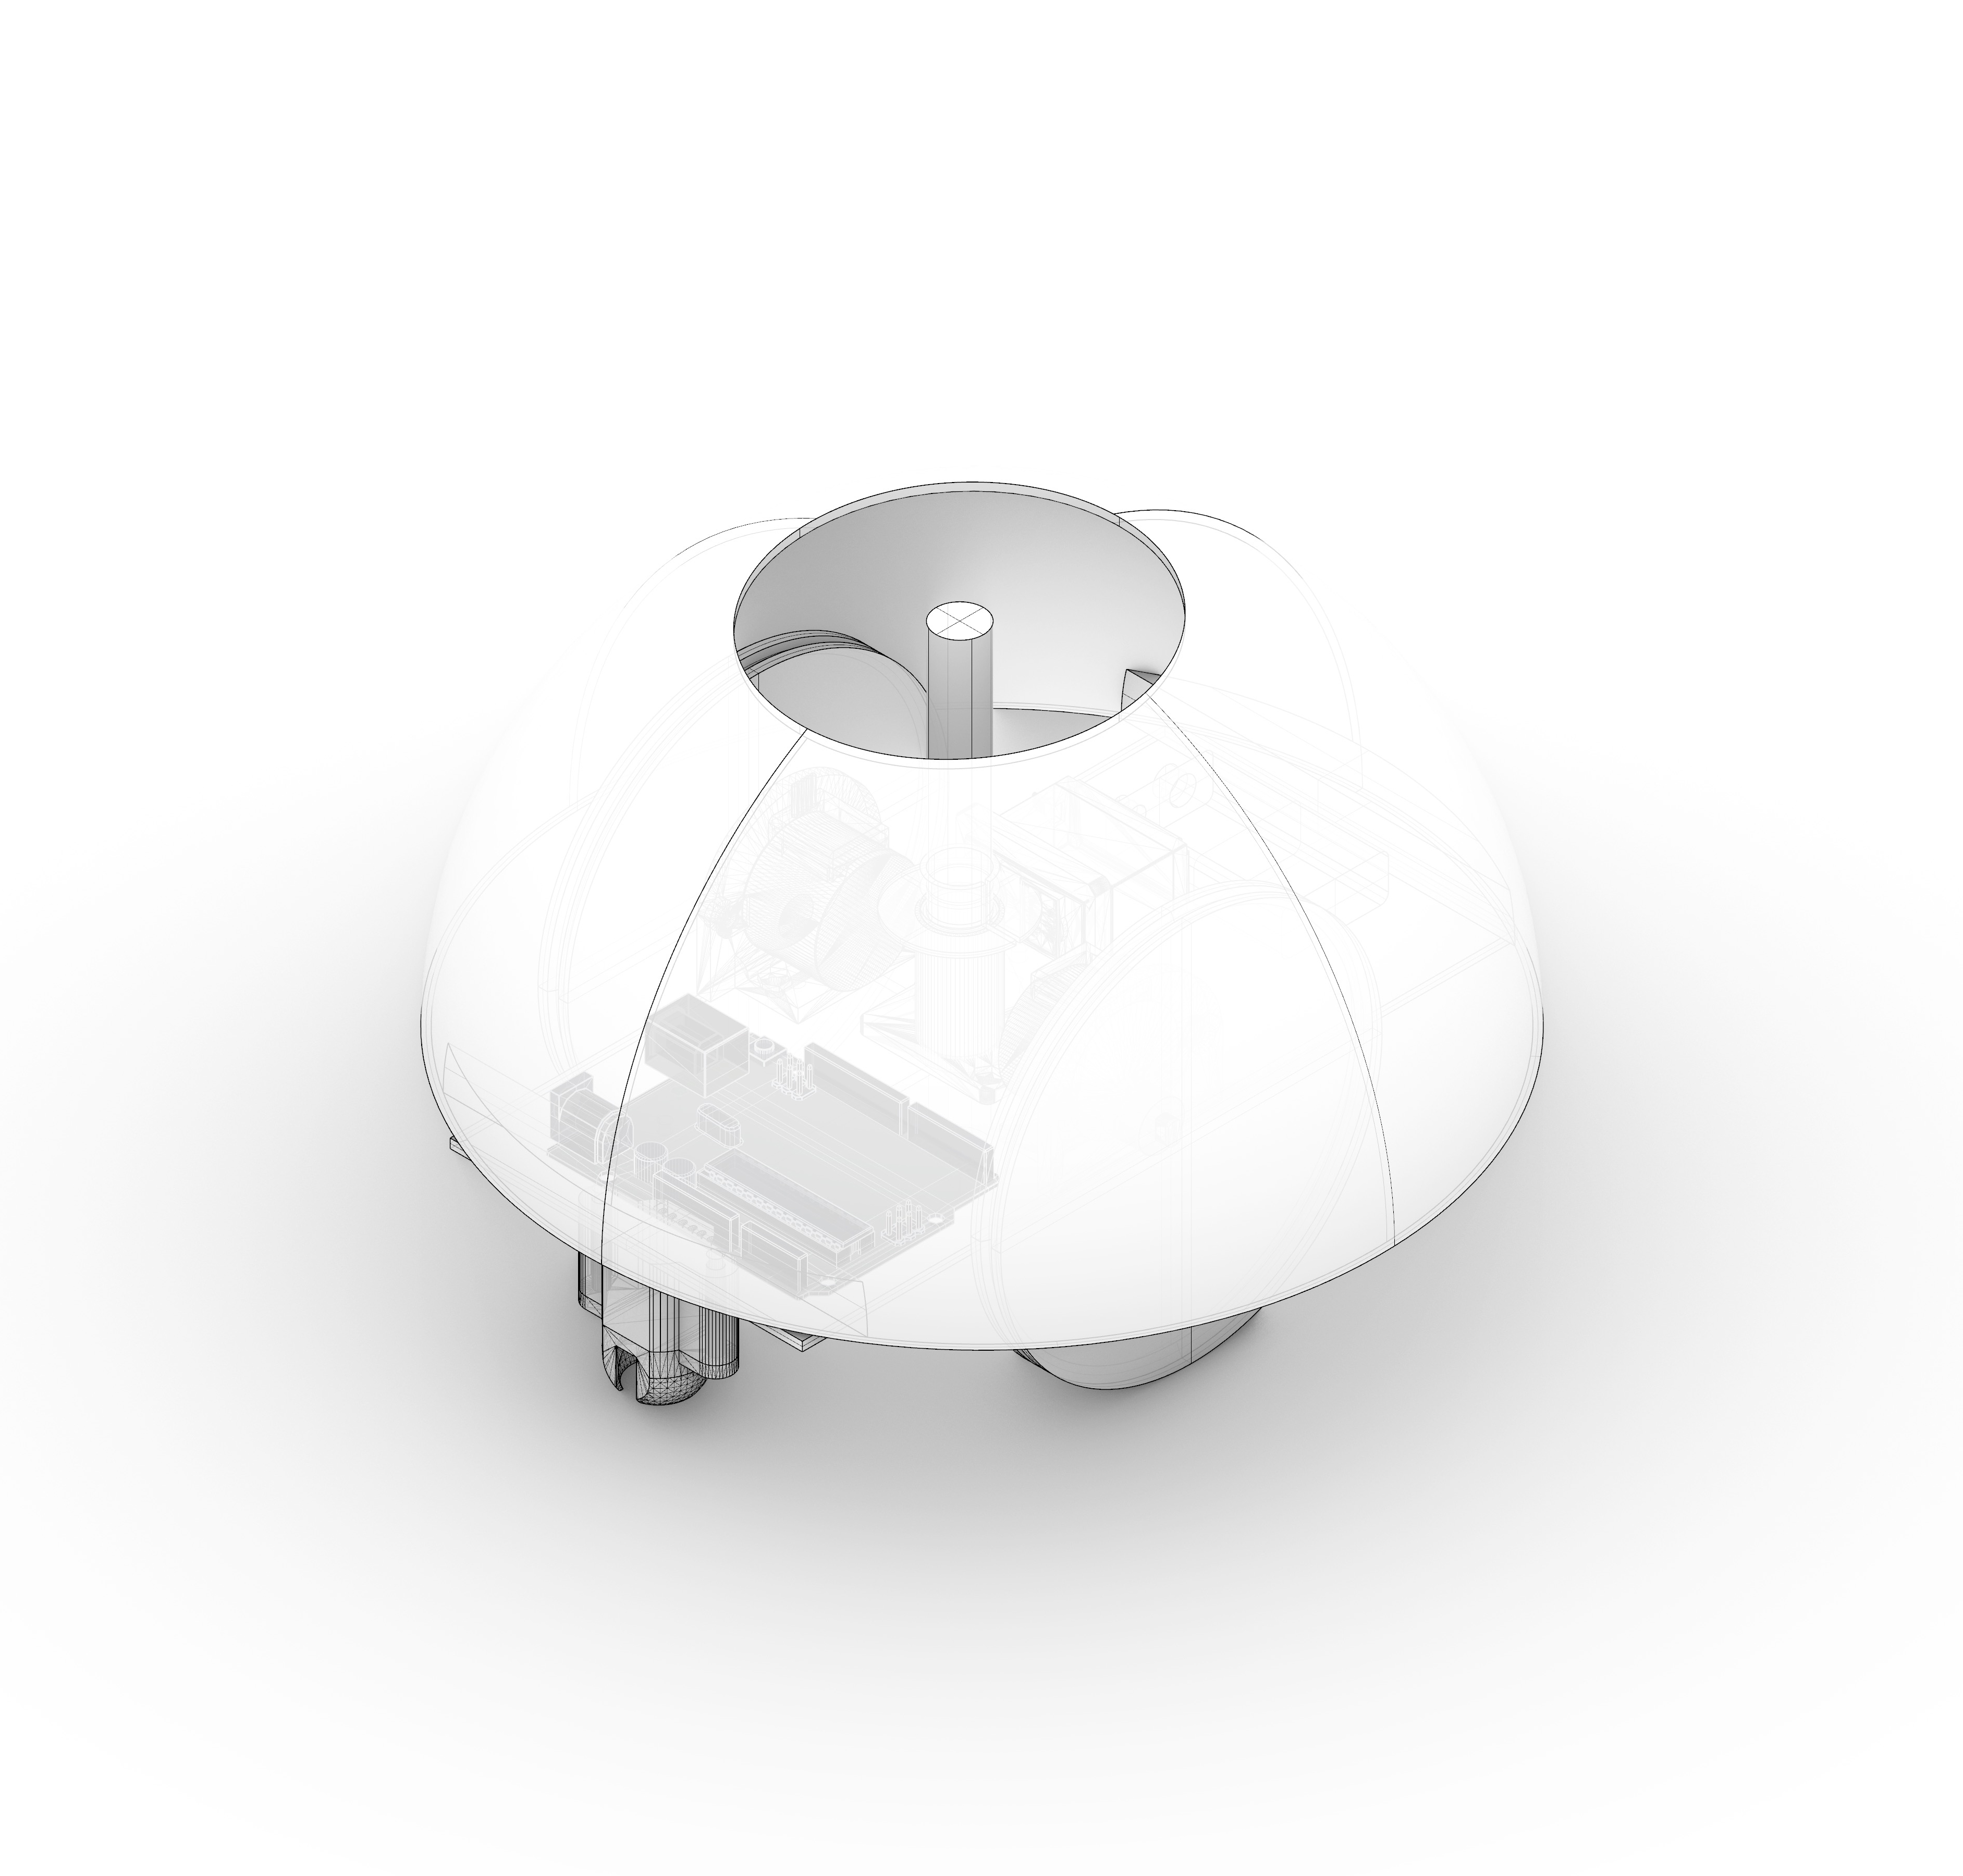
The final model should look like this:
piCamera Box:
The piCamera Box can be fabricated through CNC or Lasercut. We chose to CNC and eventuallty sand the parts to create the frost effect.
Note
You might need to adjust the Lasercut dimensions should you choose a different material (we used 6 mm acrylic).
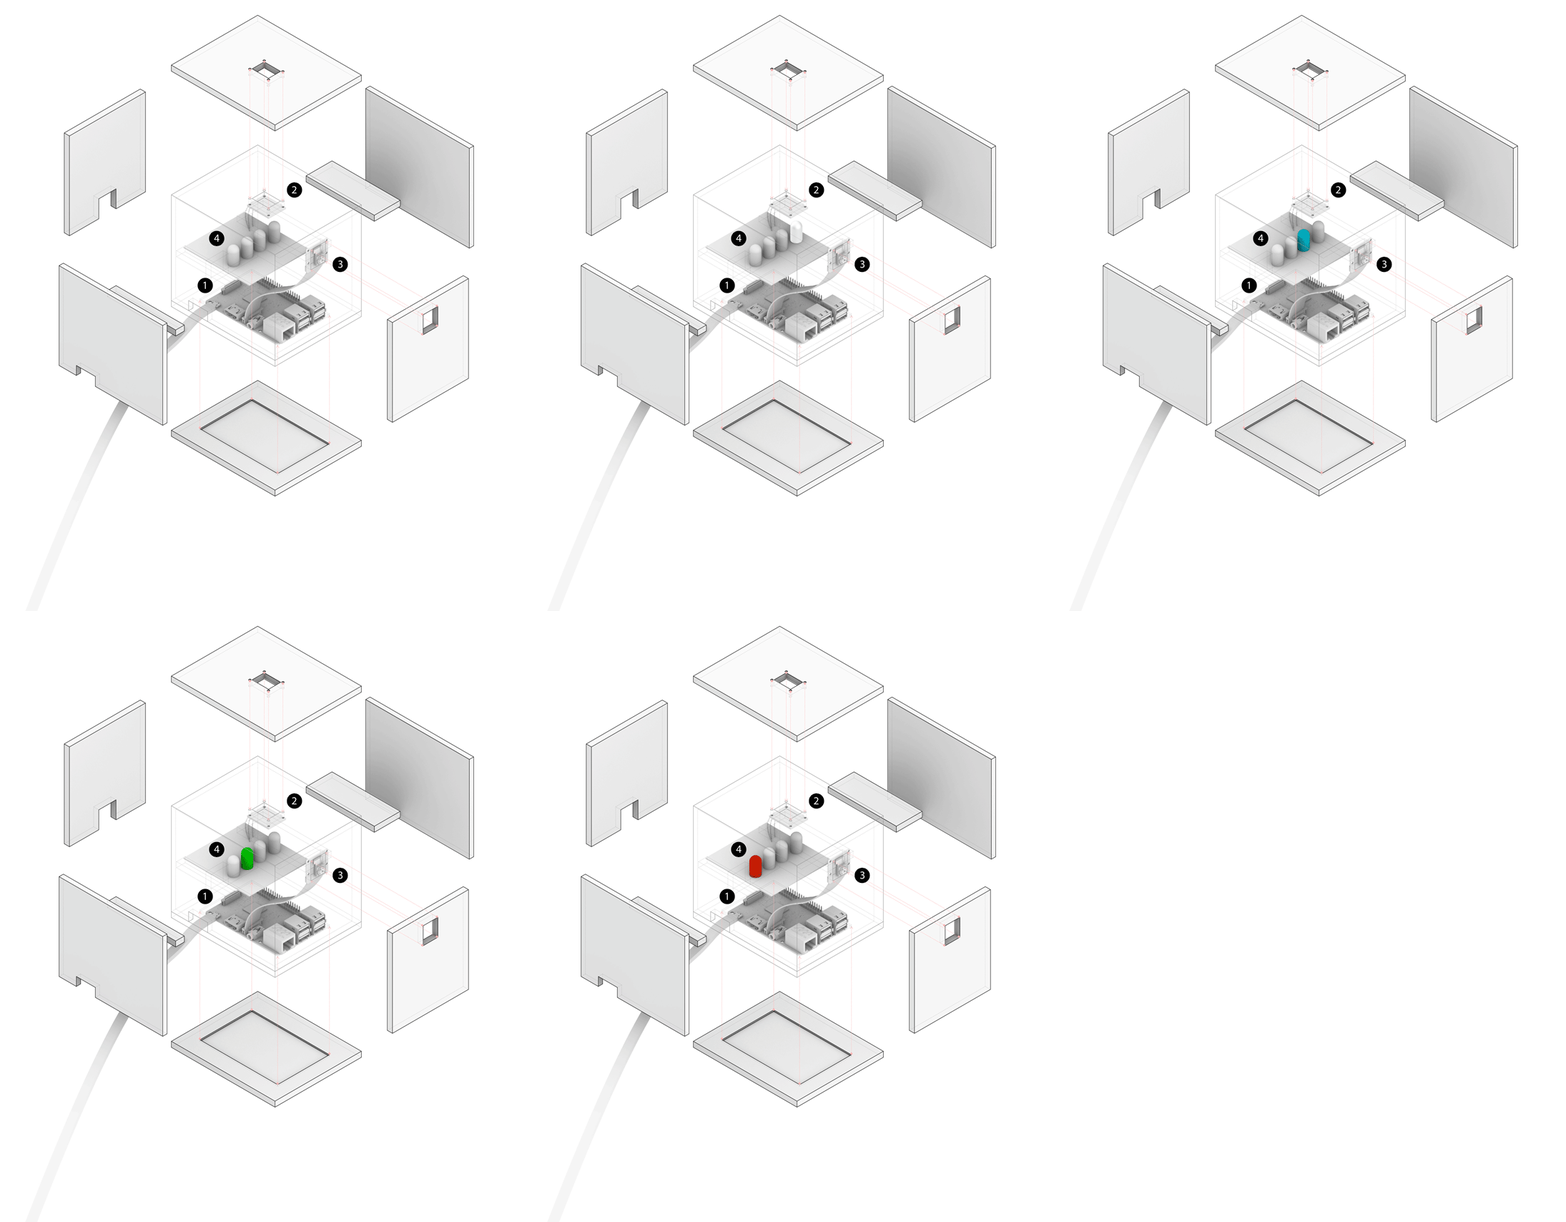 (1) Raspberry Pi 4B
(2) Touch Sensor
(3) PiCamera
(4) Board of LEDs
CREDITS
DRAWING BOT - HARDWARE II SEMINAR is a project of IAAC, Institute for Advanced Architecture of Catalonia, developed in the Master in Robotics and Advanced Construction in 2020/2021 by:
Students: Aslinur Taskin, Helena Homsi and Juan Eduardo Ojeda
Faculty: Oscar Gonzalez
Faculty Assistant: Antoine Jaunard
Reach us at:
Aslinur Taskin: aslinur.taskin@students.iaac.net
Helena Homsi: helena.homsi@students.iaac.net
Juan Eduardo Ojeda: juan.eduardo.ojeda@students.iaac.net
