Welcome to the ROS2 humble tutorial for the ROS4HRI framework. This tutorial walks you through the basics for setting up a person identification pipeline that can be used for. Using this information, you'll be able to perform different human-robot interactions. All the nodes used in the tutorial are REP-155 compliant.
We are gonna using a docker with the following packages and their dependecies already installed:
- hri_face_detect
- hri_face_identification
- hri_body_detect
- hri_face_body_matcher
- hri_person_manager
- hri_rviz
We'll use docker compose to launch a tutorial docker container based on this image (link). The image is based on ROS 2 humble and comes with all the necessary deps installed!
xhost +
sudo apt install docker-compose
git clone https://github.com/OscarMrZ/ros4hri-tutorials.git
cd ros4hri-tutorials
sudo chmod +x start.sh
./start.sh
We will work with different terminal windows for executing the different processes. The docker container has been prepared to work with terminator, making easy to open multiple windows inside it. The most useful shortcuts are:
- Ctrl+Shift+O -> Split terminal horizontally
- Ctrl+Shift+E -> Split terminal vertically
- Ctrl+Shift+W -> Close terminal
You can also just right click and select an option.
This node simply reads the input from the webcam and the camera intrinsics and publishes the images under image_raw and the camera parameters under camera_info.
ros2 run usb_cam usb_cam_node_exe
ros2 run tf2_ros static_transform_publisher 0 0 1.0 -0.707 0 0 0.707 world default_cam
We also have to publish an approximate position of the camera for visualization purposes.
The hri_face_detect package performs fast face detection using YuNet face detector and Mediapipe Face Mesh. This node publishes under the /humans/faces/<faceID>/ topic different info about the detected face, such as the ROI.
Also, it will publish the list of tracked faces be published under the /humans/faces/tracked
Importantly, this ID is not persistent: once a face is lost (for instance, the person goes out of frame), its ID is not valid nor meaningful anymore. To cater for a broad range of applications (where re-identification might not be always necessary), there is no expectation that the face detector will attempt to recognise the face and re-assign the same face ID if the person reappears.
There is a one-to-one relationship between this face ID and the estimated 6D pose of the head. The node publishes a head pose estimation with a TF frame named face_<faceID>.
Let's start the face detection node:
ros2 launch hri_face_detect face_detect.launch.pyYou should immediately see on the console that some faces are indeed detected. Let's visualise them.
We can check that the faces are detected and published at ROS message by simply typing:
ros2 topic echo /humans/faces/tracked
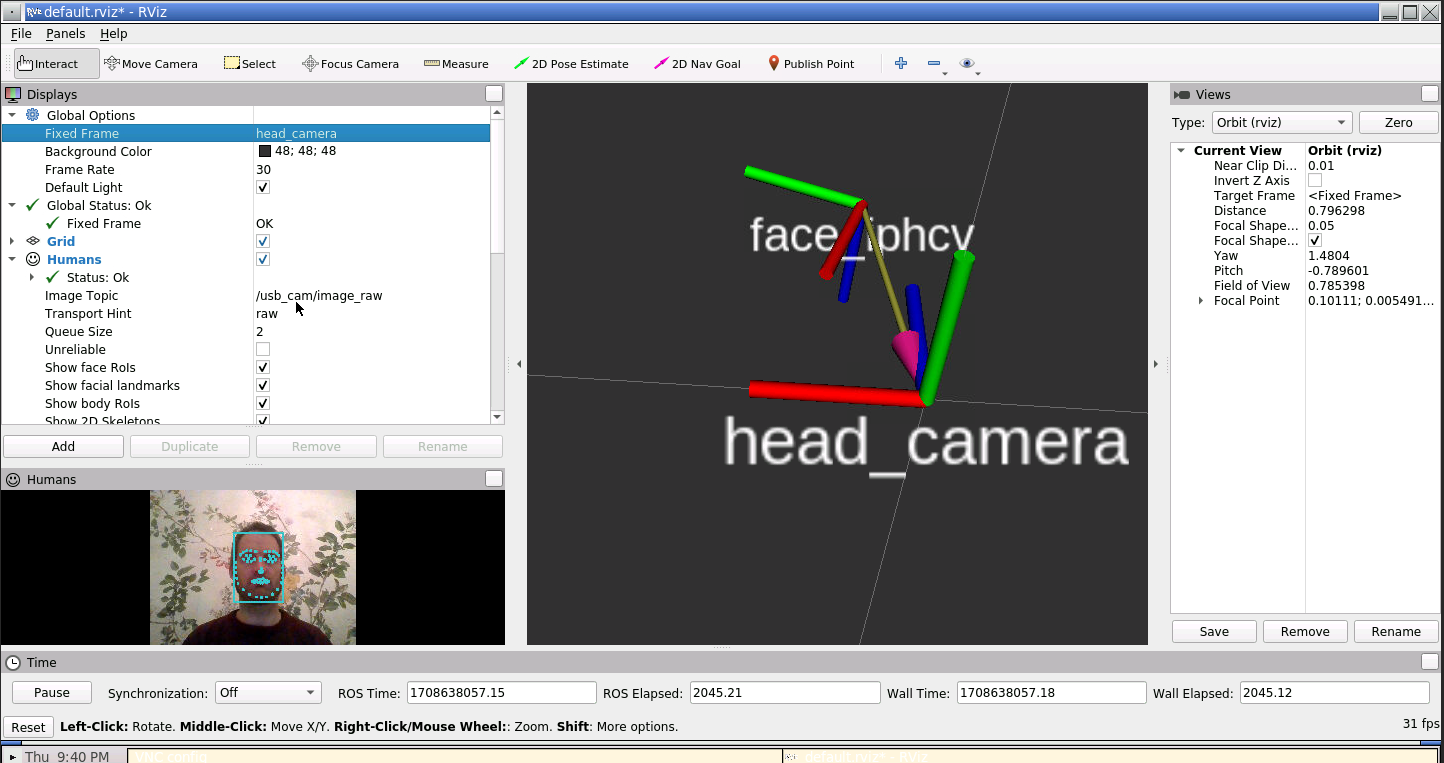
We can also use rviz2 to display the faces with the facial landmarks.
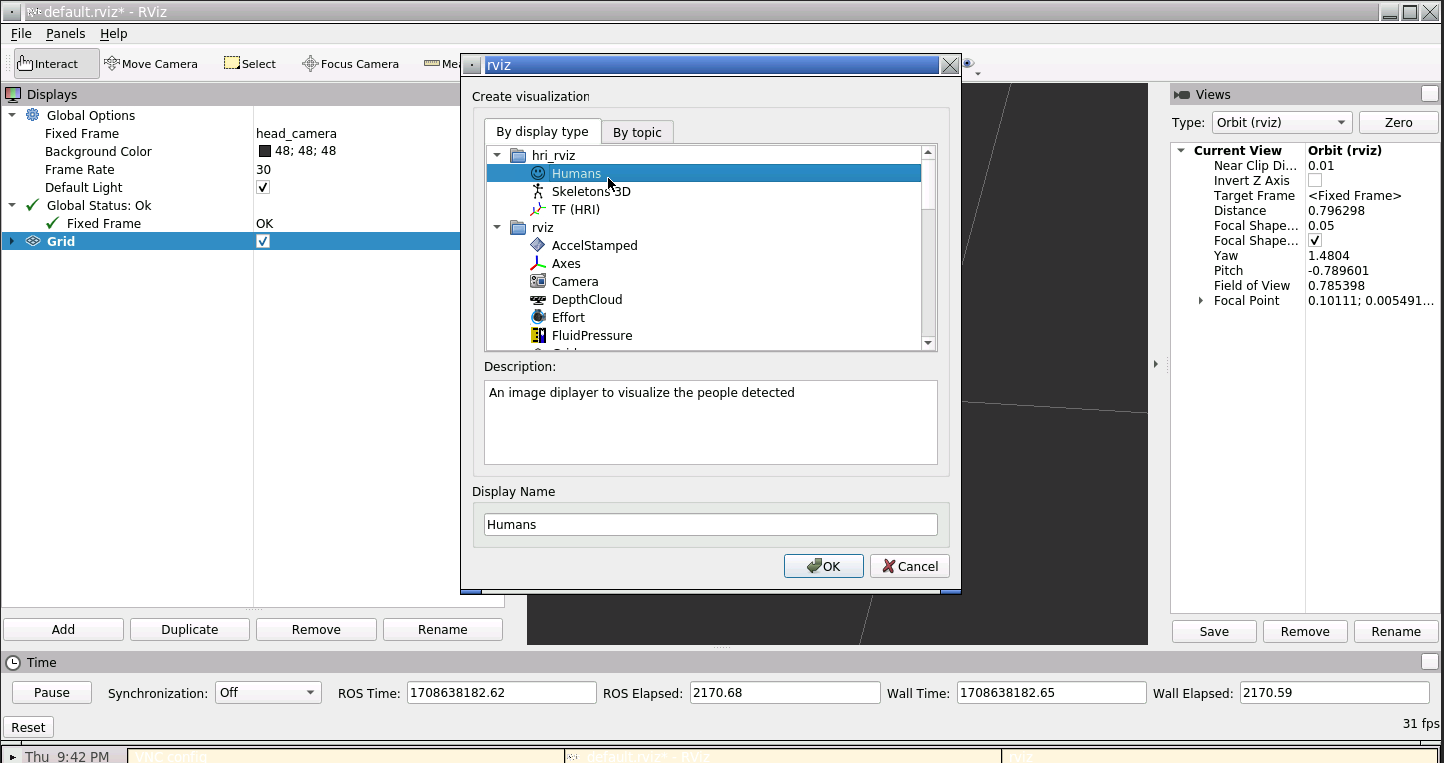
Then, in rviz2, set the fixed frame to head_camera, and enable the Humans and TF plugins:
Configure the Humans plugin to use the /image_raw topic. You should see the face being displayed with the landmarks. Also, set up the TF plugin in order to see the face position in 3D.
We are effectively running the face detector, extracting features and 3D position in a Docker container, no GPU needed!
For body detection, the robot uses the hri_body_detect ROS node, based on Google Mediapipe 3D body pose estimation. It works for multiple bodies at the same time.
First, open yet another terminal connected to the docker.
Start the body detector:
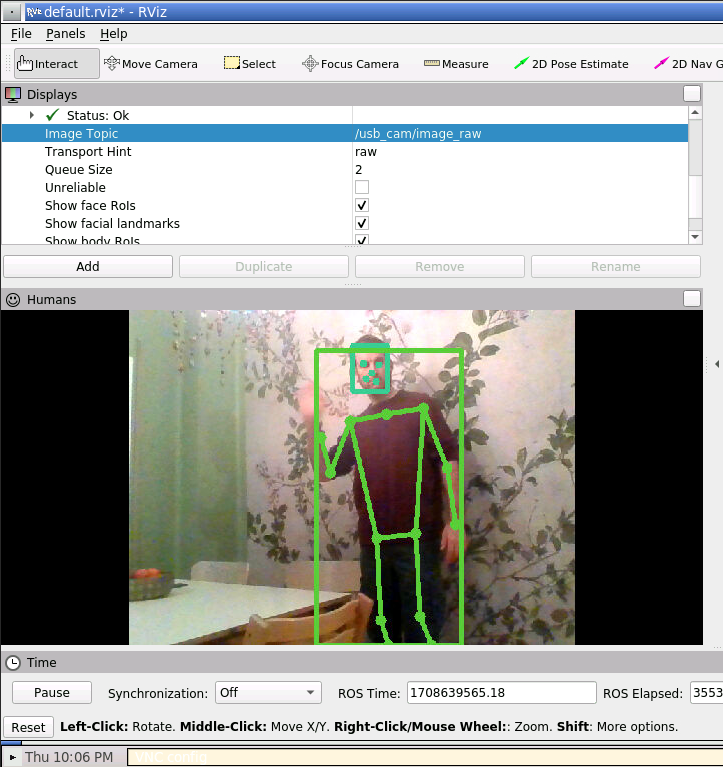
ros2 launch hri_body_detect hri_body_detect_with_args.launch.py use_depth:=FalseIn rviz you should now see the skeleton being detected, in addition to the face:
Now that we have a face and a body, we can build a 'full' person.
Until now, we were running two ROS4HRI perception module: hri_face_detect and
hri_body_detect.
The face detector is assigning a unique identifier to each face that it detects (and since it only detects faces, but does not recognise them, a new identifier might get assigned to the same actual face if it disappears and reappears later); the body detector is doing the same thing for bodies.
Next, we are going to run a node dedicated to managing full persons. Persons are also assigned an identifier, but the person identifier is meant to be permanent.
ros2 launch hri_person_manager person_manager.launch.py robot_reference_frame:=default_camThe person manager aggregates information about detected faces, bodies and voices into consistent persons, and exposes these detected persons with their links to their matching face, body, voice.
If the face and body detector are still running, you might see that
hri_person_manager is already creating some anonymous persons: the node
knows that some persons must exist (since faces and bodies are detected), but it
does not know who these persons are.
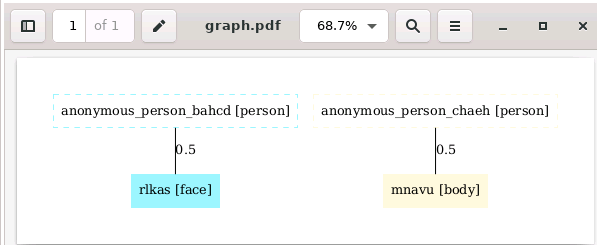
We can use a small utility tool to display what the person manager understand of the current situation.
In a different terminal, run:
ros2 run hri_person_manager show_humans_graph
mupdf /tmp/graph.pdf
You should see a graph similar to:
Note that the person manager will generate as many anonymous people as new faces and bodies.
Please take a screenshot for the next steps.
First, let's manually tell hri_person_manager that the face and body are
indeed parts of the same person. TO do so, we need to publish a match between
the two ids (in this example, rlkas (the face) and mnavu (the body), but
your IDs might be different, as they are randomly chosen).
In a new terminal (with ROS sourced):
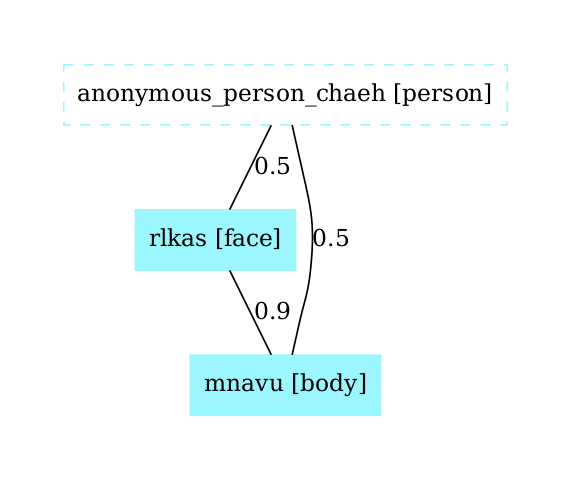
ros2 topic pub /humans/candidate_matches hri_msgs/IdsMatch "{id1: 'rlkas', id1_type: 2, id2: 'mnavu', id2_type: 3, confidence: 0.9}"
The graph updates to:
⚠️ do not forget to change the face and body IDs to match the ones in your system!
💡 the values
2and3correspond respectively to a face and a body. See hri_msgs/IdsMatch for the list of constants.
To turn our anonymous person into a known person, we need to match the face ID (or the body ID) to a person ID:
For instance:
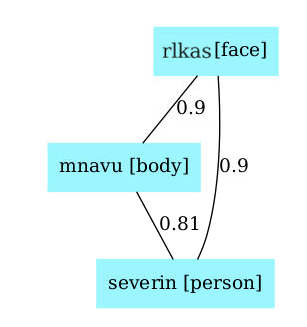
ros2 topic pub /humans/candidate_matches hri_msgs/IdsMatch "{id1: 'rlkas', id1_type: 2, id2: 'severin', id2_type: 1, confidence: 0.9}"
The graph updates to:
Now that the person is 'known' (that is, at least one person 'part' is associated to a person ID) the automatically-generated 'anonymous' person is replaced by the actual person. Note that we only need to id one person part to start connecting the graph, but we could have multiple ids (face, body or even voice)
We are doing it manually here, but in practice, we want to do it automatically.
To get 'real' people, we need a node able to match for instance a face to a unique and
stable person: a face identification node. Luckily, we have one of those in the docker: hri_face_identification, a ROS4HRI identification module. This node will publish candidates between a faceID and a personID for us. Importantly, this node won't manage assembling the person, it only publishes matches. It will be the task of the person manager to assemble the person feature graph, as we tested manually.
ros2 launch hri_face_identification face_identification_with_args.launch.py
In the same way that hri_face_identification automatically publishes matches between a face and a person, we have available another identification node, called hri_face_body_matcher, that publishes possible matches between given face and a body. This will allow us to fully connect a person with its face and body.
Note that in this case, no connection is directly created with the person, as this node matches bodies and faces, not bodies and person.
ros2 launch hri_face_body_matcher hri_face_body_matcher.launch.py
The algorithm used by hri_person_manager exploits the probabilities of match
between each and all personal features perceived by the robot to find the most
likely set of partitions of features into persons.
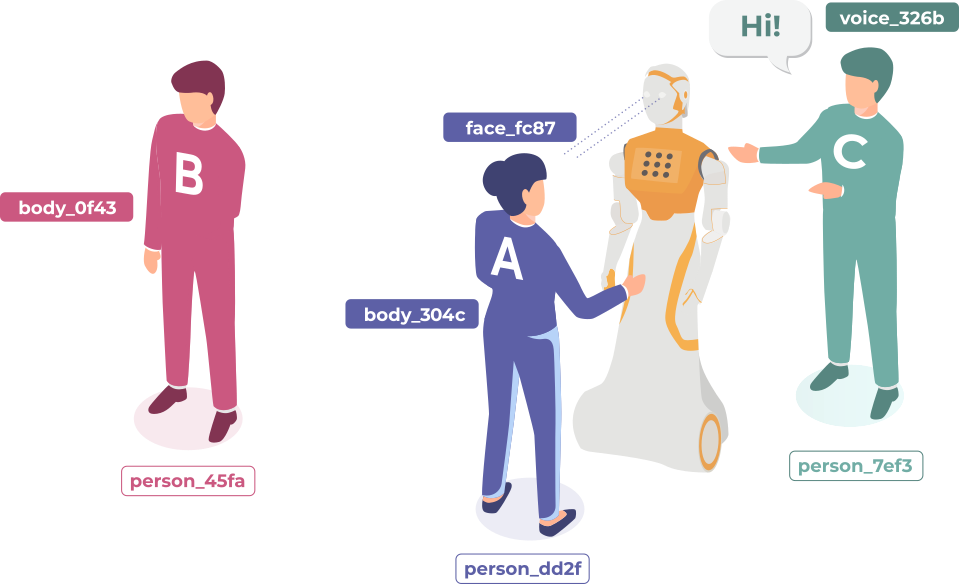
For instance, from the following graph, try to guess which are the most likely 'person' associations:
Response in the paper (along with the exact algorithm!): the 'Mr Potato' paper.
Now we have information to properly identify individual people, let's use it to do some HRIs using a the expressive_eyes package, which simulates the head of a Tiago Pro:
- Store and recognize the first person that is identified. The robot will only interact with this person, from now on, the target, ignoring the rest. Here you have an starting point. Optional: gree the target once when it enters the FOV of the robot.
- Show a positive expression when the person in from of the robot is the target and a sad emotion otherwise.
- Follow the target person with the robot gaze.
In order to quickstart the workshop, there is already a started package where you can start your tests. Let's build and source it.
cd ws
colcon build --symlink-install
source install/setup.bash
You can simply run your solution with: bash
ros2 run target_person target_person
ros2 launch target_person launch_simulated_head.launch.py
Tips:
- You can publish where the robot is looking publishing a PointStamped in /robot_face/look_at
- You can publish a Expression msg in */robot_face/expression *
Happy coding!
- You may check the
pyhriAPI documentationhere, and the C++libhriAPI documentation here. - You can check the messages definitions here
