This package is meant to help me understand how to use MoveIt! to control a robotic arm inside Gazebo.
To use this package you need to instal
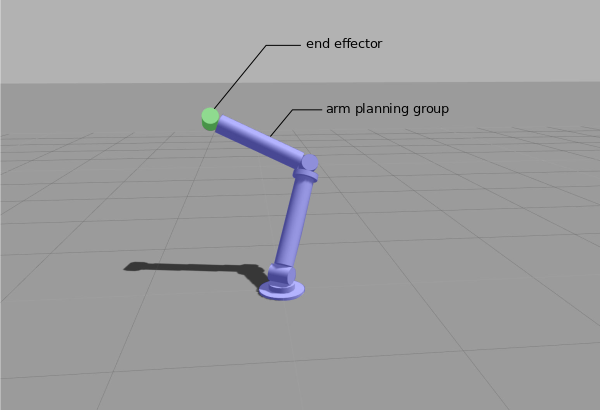
This package contains a simple robotic arm consisting of two arms and a end effector link as can be seen on the picture bellow.
The MoveIt! planning is now using a IKFast plugin of type TranslationDirection5D generated by following this tutorial. It makes the planning faster. The solver can be changed in robotic_arm_moveit_config/config/kinematics.yaml file. (change this line: kinematics_solver: robotic_arm_arm_kinematics/IKFastKinematicsPlugin for a solver of your choosing. For example kinematics_solver: kdl_kinematics_plugin/KDLKinematicsPlugin)
You can start the robotic arm in Gazebo using command.
roslaunch robotic_arm_gazebo empty_world.launch
You can run rviz and see planned trajectories between different positions of the robotic arm using command
roslaunch robotic_arm_moveit_config moveit_planning_execution.launch
and adding the MotionPlanning display to the rviz inside the GUI.
You can set the starting and end positions and then click the 'plan and execute button' and the robotic arm will move to the end position both in Rviz and in the Gazebo.
You can set the individual joint position by calling a service.
Launch Gazebo:
roslaunch robotic_arm_gazebo empty_world.launch
Launch MoveIt!:
roslaunch robotic_arm_algorithm move.launch
Run service:
rosrun robotic_arm_algorithms set_joint_states_service.py
Set joint states:
rosrun robotic_arm_algorithms set_joint_states_client.py <base_forearm_joint_angle> <forearm_0_1_joint_angle> <forearm_arm_joint_angle> <arm_0_1_joint_angle>
| joint | range |
|---|---|
<base_forearm_joint_angle> |
[-3e+307, 3e+307] |
<forearm_0_1_joint_angle> |
[-1.4, 1.4] |
<forearm_arm_joint_angle> |
[-3e+307, 3e+307] |
<arm_0_1_joint_angle> |
[-1.4, 1.4] |
