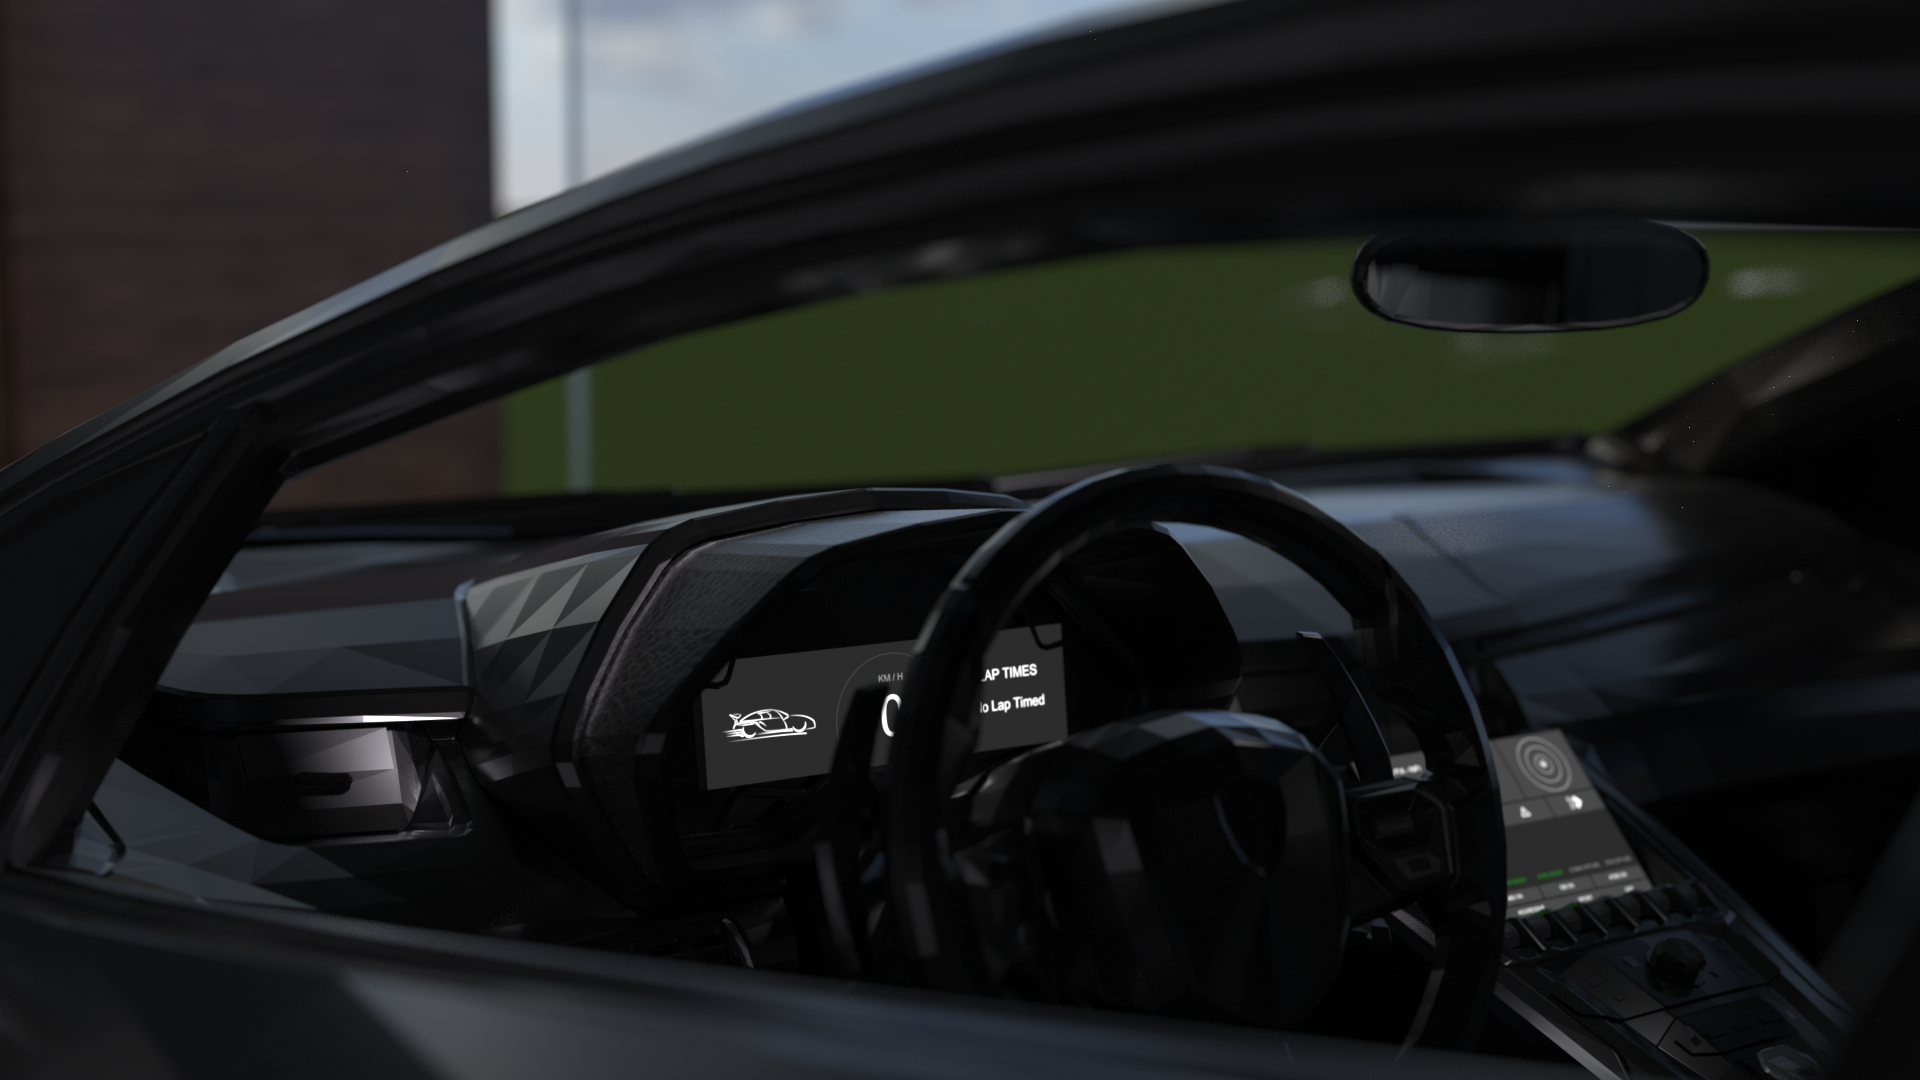
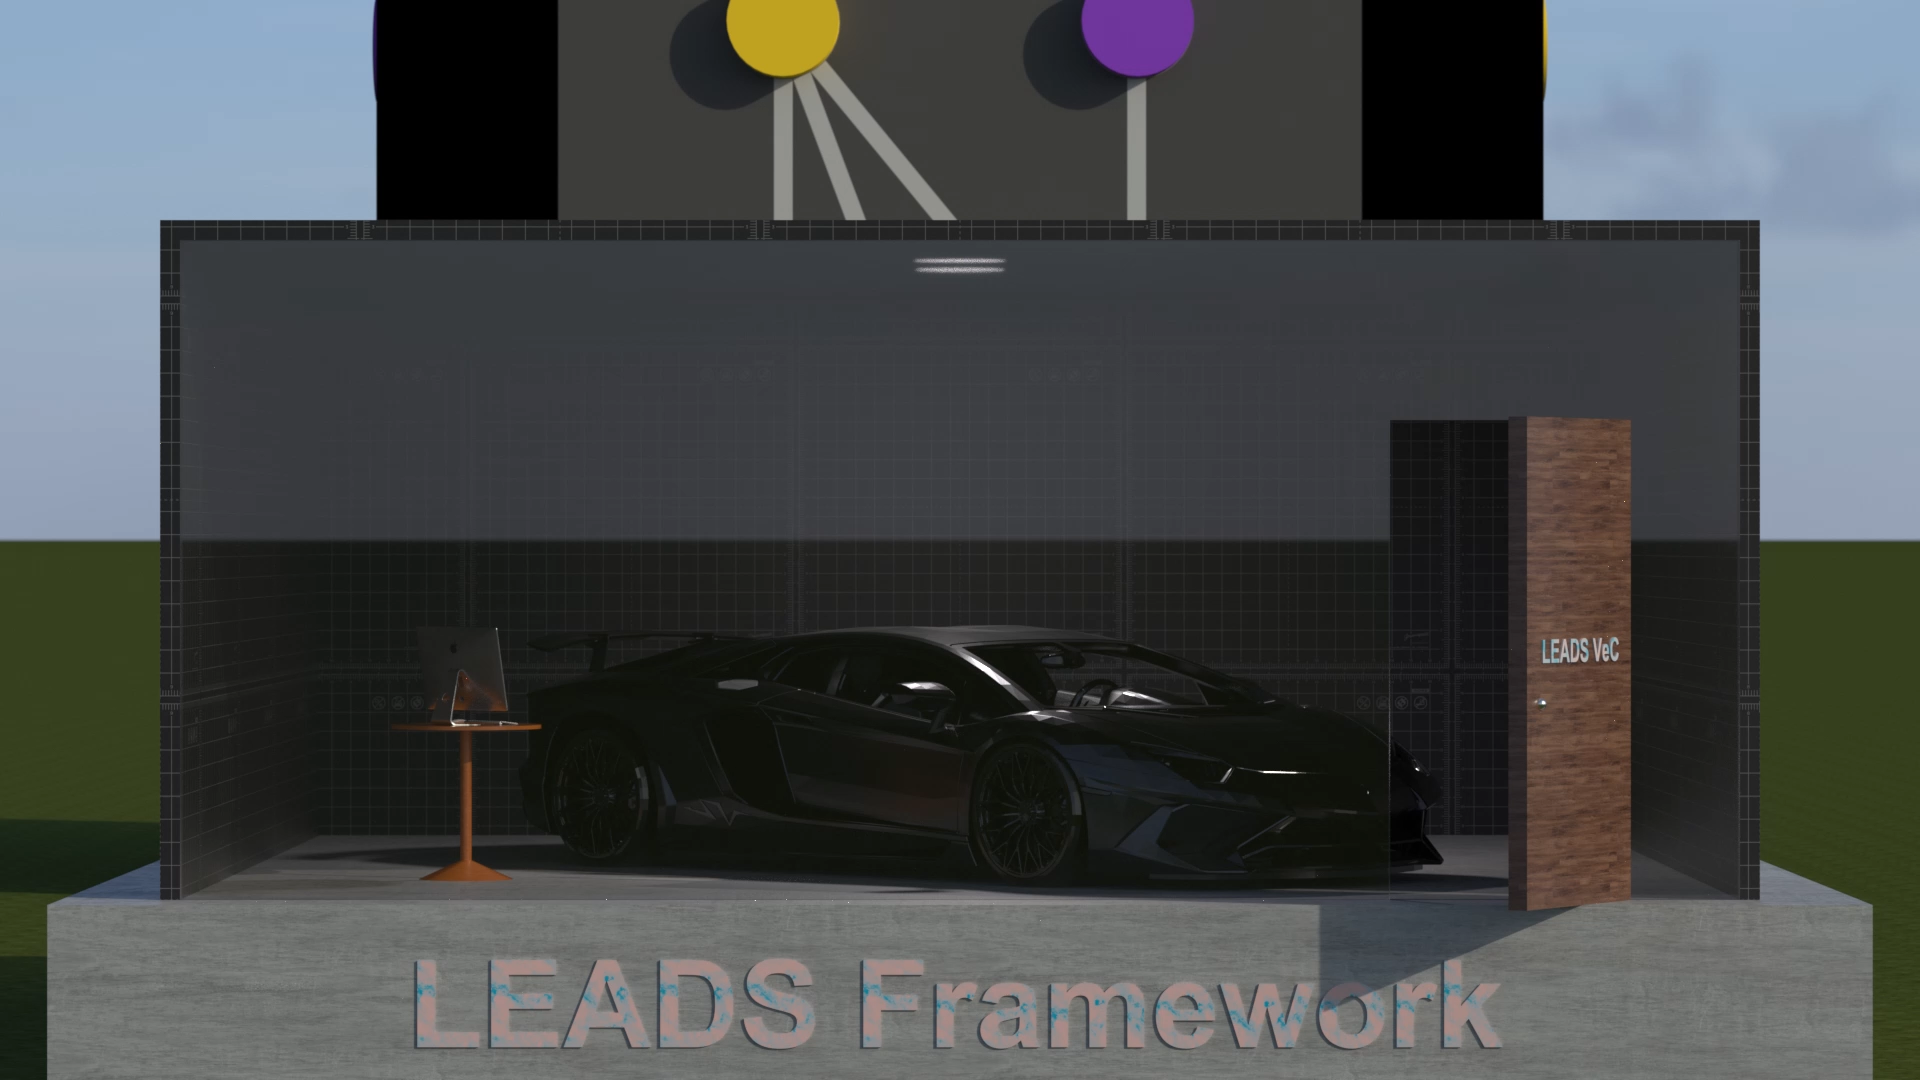
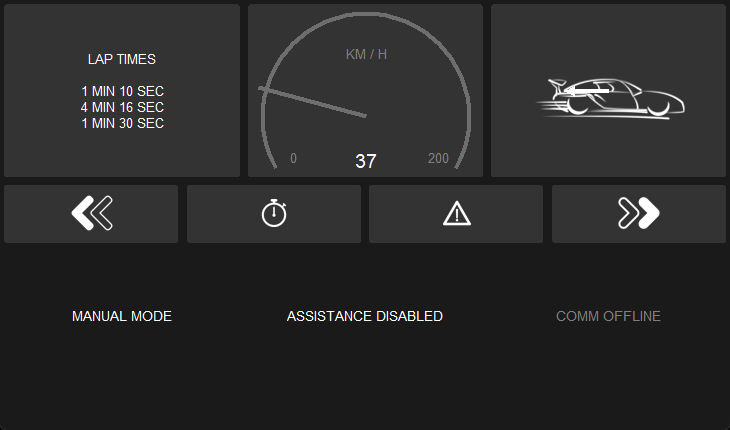
LEADS is a lightweight embedded assisted driving system. It is designed to simplify the development of instrumentation, control, and analysis systems for racing cars. It is written in well-organized Python and C/C++ and has impressive performance.It is not only out-of-the-box but also fully customizable. It provides multiple abstract layers that allow users to pull out the components and rearrange them into a new project. You can either configure the existing executable modules (LEADS VeC) simply through a JSON file or write your own codes based on the framework as easily as building a LEGO.
The hardware components chosen for this project are geared towards amateur developers. It uses neither a CAN bus (although it is supported) nor any dedicated circuit board, but generic development kits such as Raspberry Pi and Arduino instead. However, as it is a high-level system running on a host computer, the software framework has the ability to adapt to any type of hardware component with extra effort.
This document will guide you through LEADS VeC. You will find a detailed version here.
🔗 Home
🔗 News
🔗 Docs
🔗 LEADS VeC Remote Analyst Online Dashboard
Rich ecology
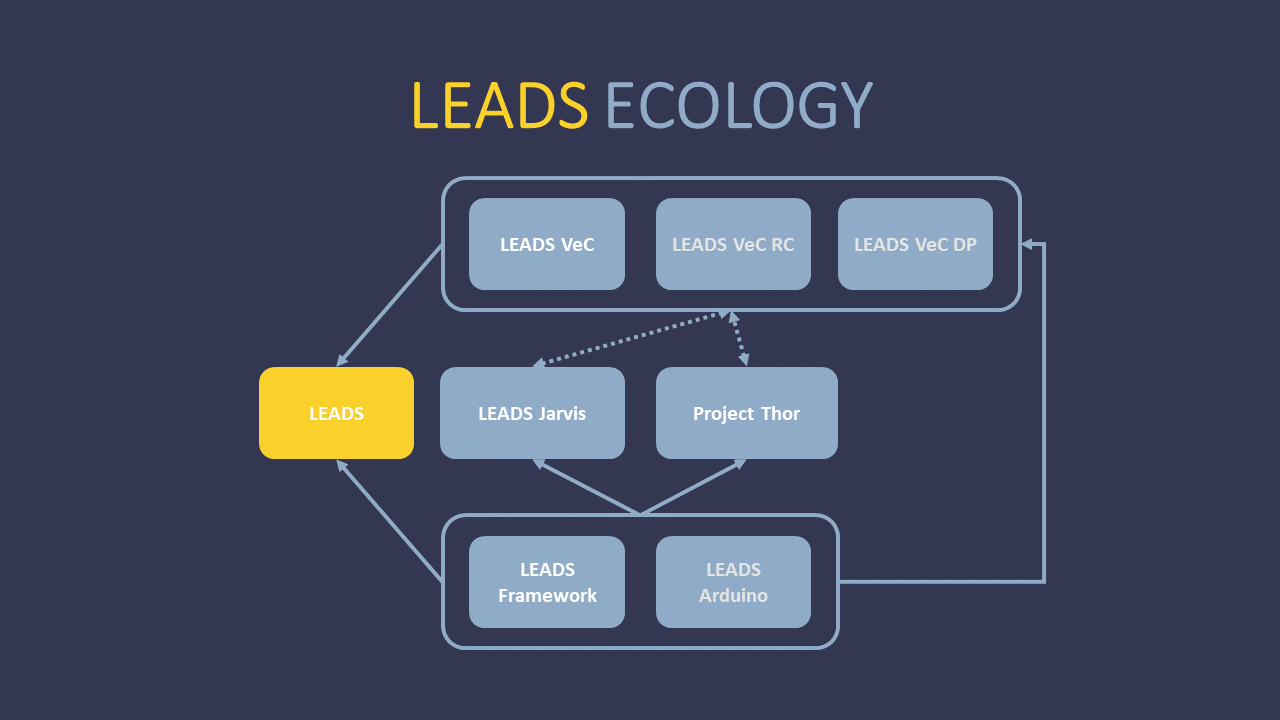
LEADS
In a narrow sense, LEADS refers to the LEADS framework, which consists of an abstract skeleton and implementations for various businesses. The framework includes a context that interacts with the physical car, a device tree system, a communication system, a GUI system, and many specifically defined devices.
LEADS VeC
LEADS VeC composes a set of executable modules that are designed for the VeC (Villanova Electric Car) Project. These modules are customizable and configurable to a certain extent, yet they have limitations due to some assumptions of use cases. Compared to the LEADS framework, it sits closer to users and allows users to quickly test their ideas.
Accessories
Accessories contribute a huge portion to the richness of the LEADS ecosystem. These accessories include plugins that directly interact with the core programs, such as Project Thor, and standalone applications that communicate with LEADS through the data link, such as LEADS Jarvis.
As stated in its name, LEADS tries to keep a modular structure with a small granularity so that users have more flexibility in dependencies and keep the system lightweight. To do so, we split LEADS into multiple packages according to the programming language, platform, features, and dependencies, but generally, these packages are grouped into 3 types: LEADS (LEADS framework), LEADS VeC, and accessories.
Robust framework and good compatibility
The LEADS framework ensures that its applications, including LEADS VeC, have extremely high standards. They usually provide promising safety, but still, always keep our Safety Instructions in mind.
Most of the codes are written in Python and the dependencies are carefully chosen so that LEADS runs everywhere Python runs. In addition, on platforms like Arduino where we must use other programming languages, we try hard to keep consistency.
Modern GUI design
Dark mode support
LEADS inherently supports dark mode. You can simply change your system preference and LEADS will follow.
High performance
Even with extraordinary details and animation, we still manages to provide you with incredible performance.
| Test Platform | Maximum Frame Rate (FPS) |
|---|---|
| Apple MacBook Pro (M3) | 260 |
| Orange Pi 5 Pro 8GB | 200 |
| Raspberry Pi 5 8GB | 100 |
| Raspberry Pi 4 Model B 8GB | 60 |
External screens
LEADS supports an unlimited number of displays. You can enable a specific number of displays simply through a configuration.
Powerful ESC systems
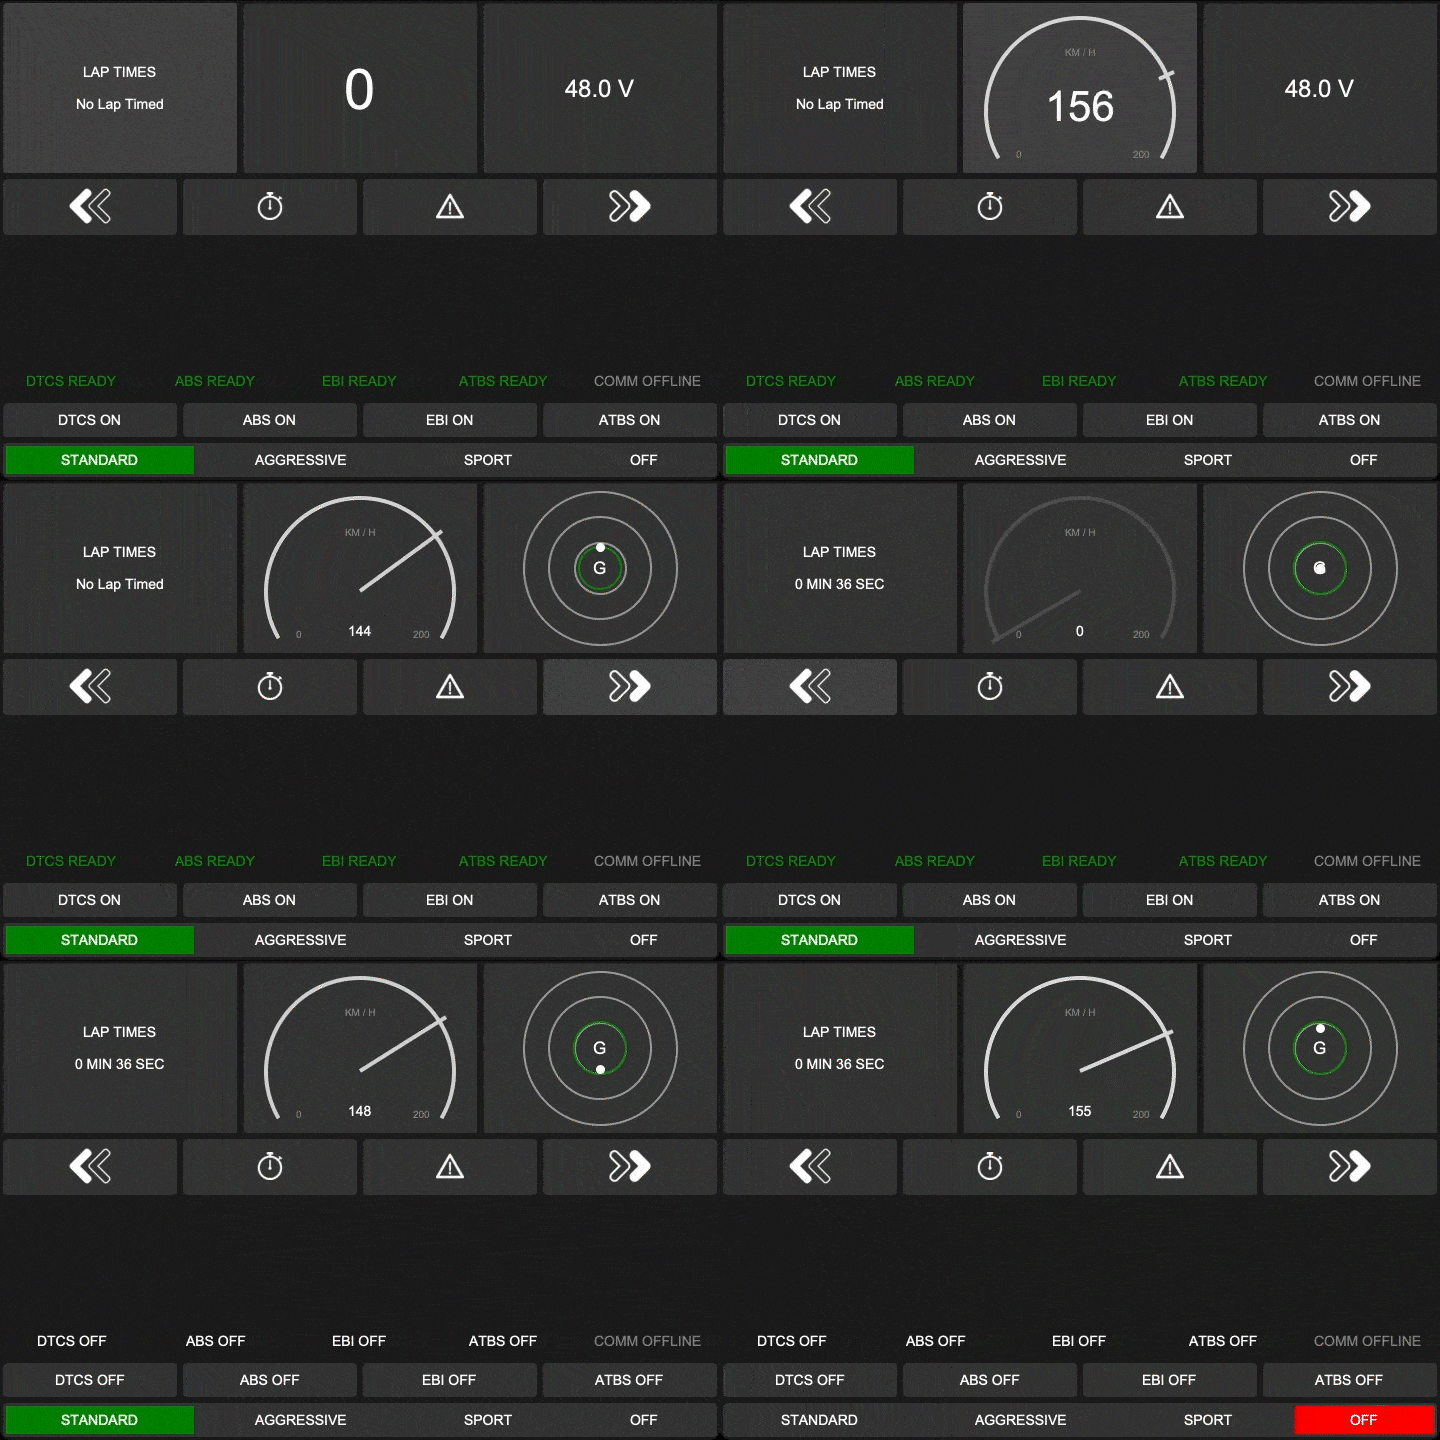
DTCS (Dynamic Traction Control System)
DTCS helps you control the amount of rear wheel slip by detecting and comparing the speed difference between all wheels. It allows a certain amount of drift while ensuring grip.
ABS (Anti-lock Braking System)
ABS allows the driver to safely step on the brakes to the bottom without locking the brakes. Although this may increase braking distances, it ensures you always have the grip.
EBI (Emergency Braking Intervention)
EBI is available on most modern family cars. It actively applies the brakes at the limit of the braking distance. This system greatly reduces the probability of rear-end collisions.
ATBS (Automatic Trail Braking System)
ATBS monitors the steering angle and adjusts the brakes in time to ensure that the front of the car obtains the corresponding downforce. Its intervention will avoid under-steers (pushing the head) or over-steers (drifting).
Manual mode
It is not surprising that some racing events do not allow control of the vehicle beyond the driver. Therefore, we
provide a manual mode where all assistance is forcibly disabled. You can simply set configuration manual_mode to
True to enable this mode.
Plugins can be easily customized and installed in LEADS. It also comes with several existing ones including 4 ESC plugins that realize 4 ESC systems. All 4 systems have 4 calibrations: standard, aggressive, sport, and off. Their intervention comes later than the previous respectively.
Real-time data sharing and persistence platform
Thanks to our built-in TCP communication system, we are able to establish a powerful data link where the vehicle is the server and can connect to multiple clients. All data collected through LEADS can be distributed to the pit crew or anywhere far from the vehicle within an unnoticeable time, and that is not the end of the data's travel.
We are a big fan of data collection. With our data persistence technologies, all data are saved in popular formats such as CSV and processed in an intuitive way by LEADS VeC Data Processor.
During the development of LEADS, we have accumulated massive amounts of real-world data that can be made into public road datasets.
Live video streaming
As an organization that is deeply rooted in AI, visual data has special meaning to us. In LEADS, we value visual inputs more than any other framework. Our official support of low-latency video encoding and streaming has made LEADS natively suitable for AI applications.
LEADS is one of the few solutions on embedded single-board computers that support multiple cameras with an excellent performance.
Transparency between the driver and the pit crew
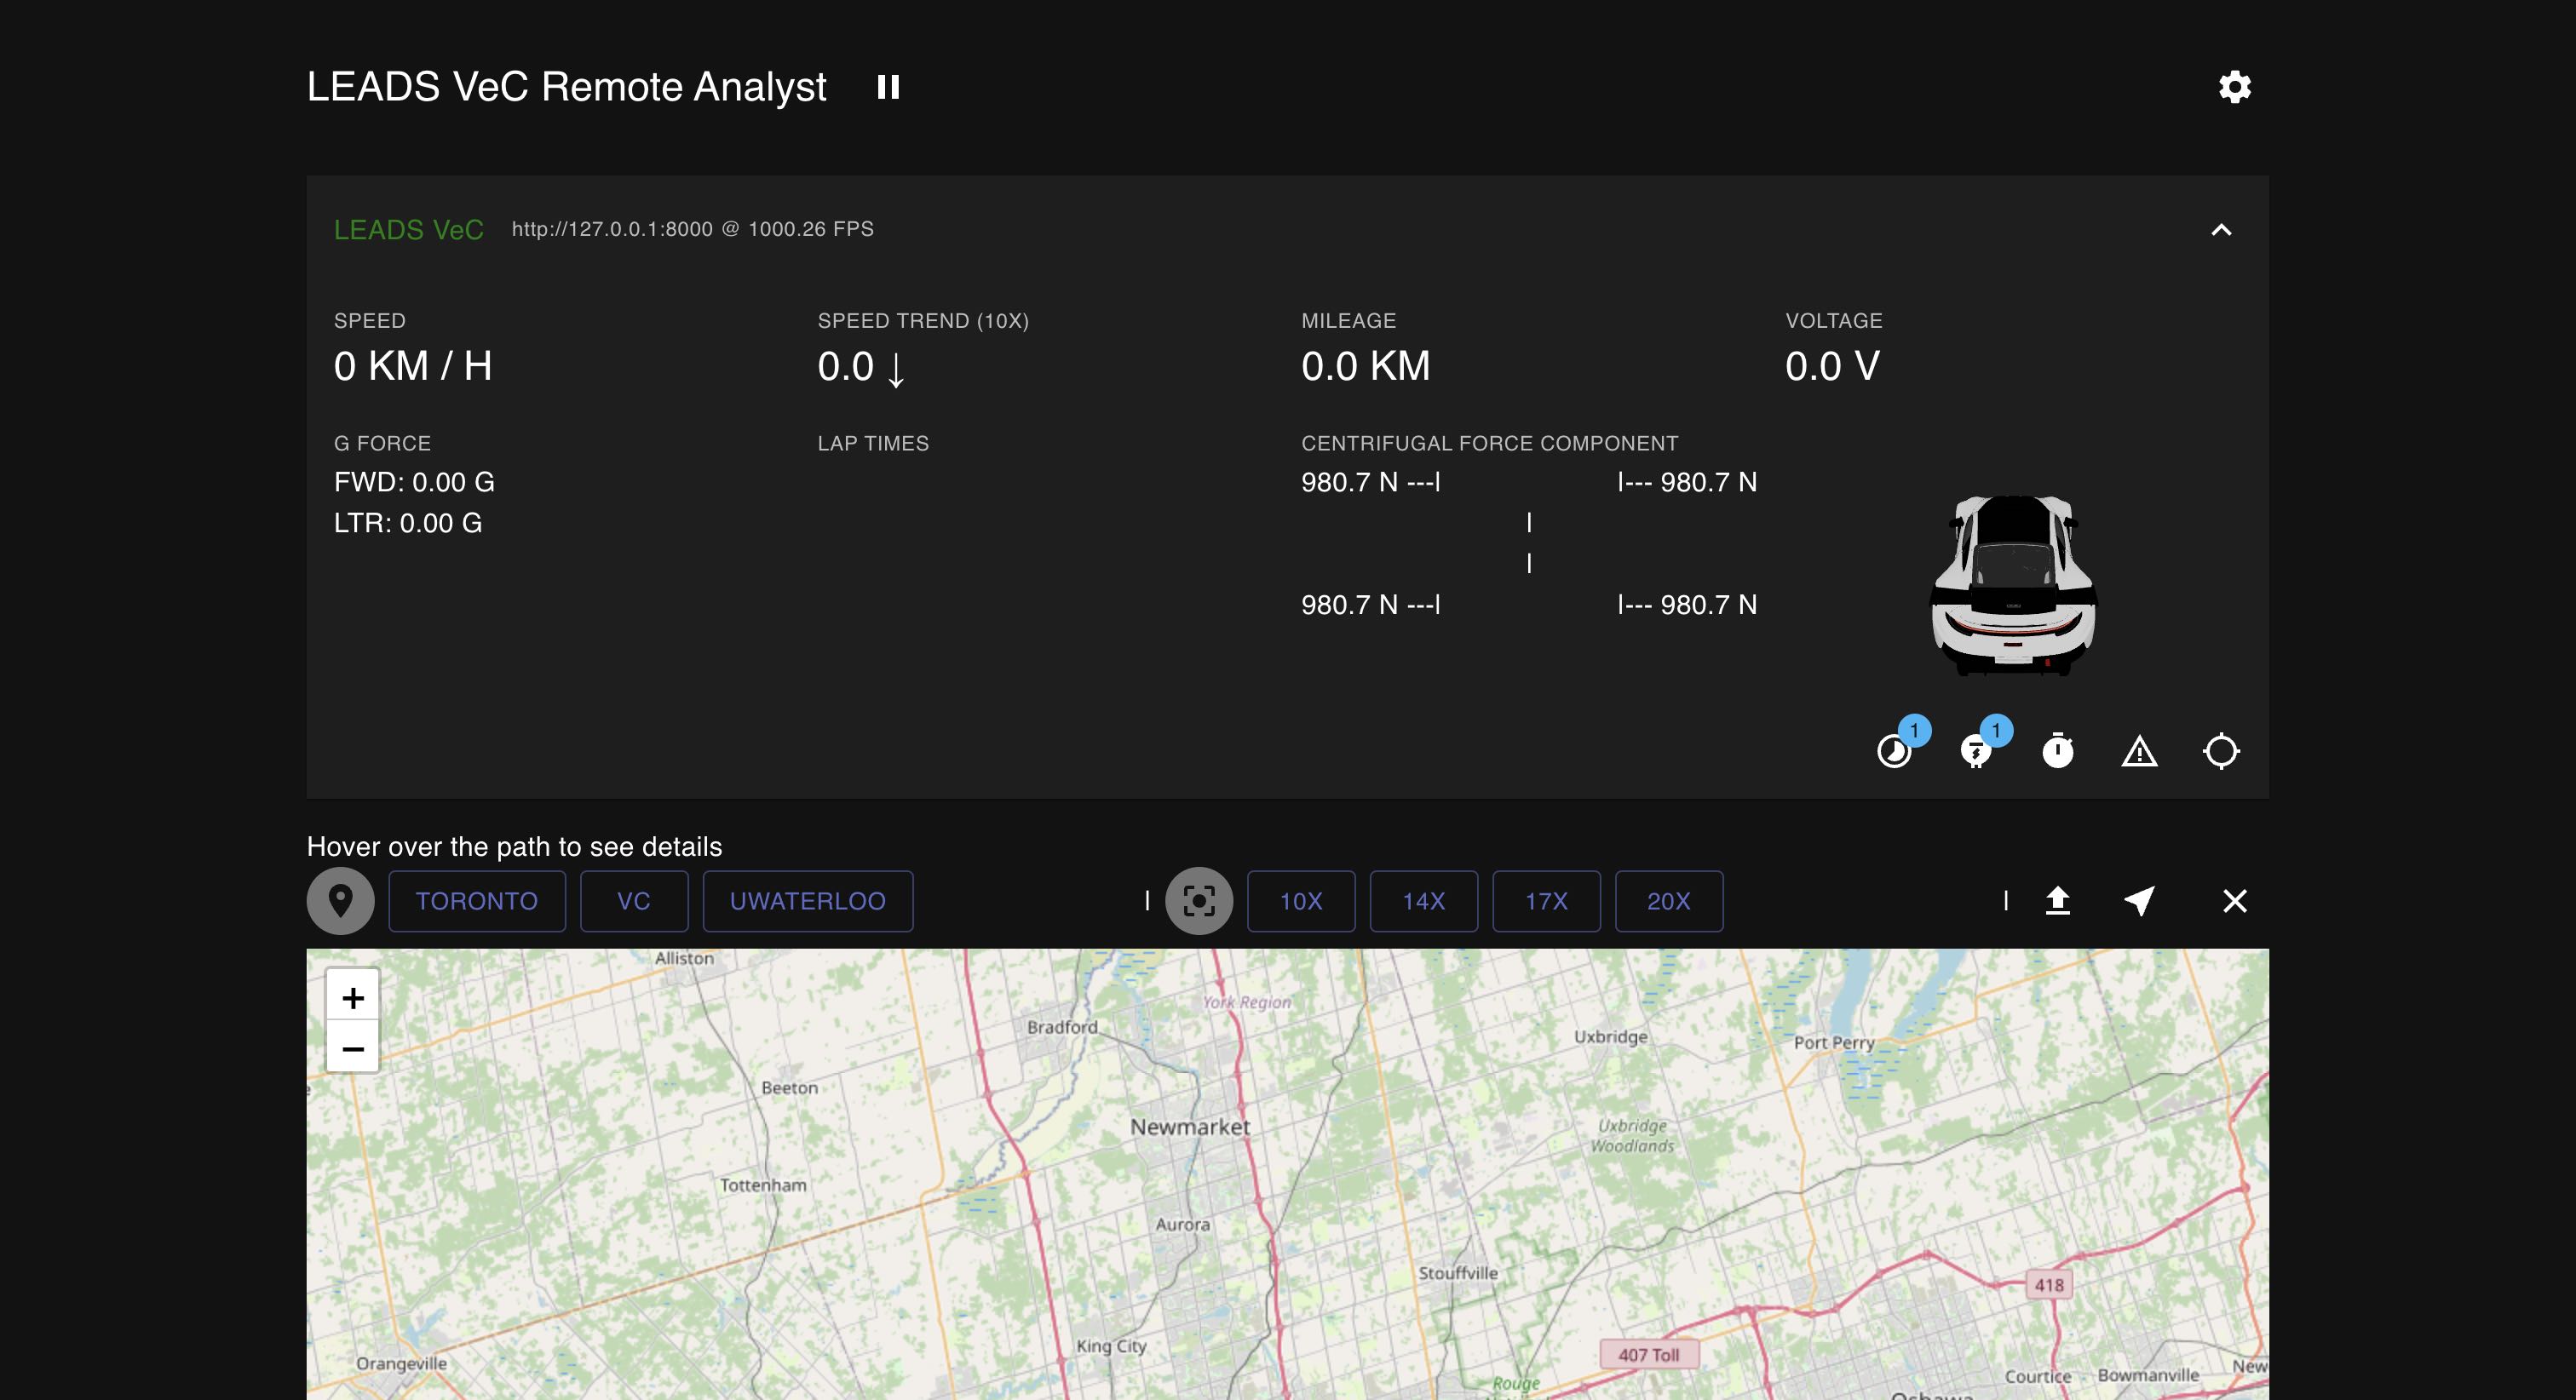
LEADS VeC Remote Analyst
LEADS VeC Remote Analyst is designed so that the pit crew can track the vehicle. It consists of a local web server and a frontend website.
With the LEADS, what the driver sees and feels is all shared with the pit crew in real time through our data link. The pit crew now masters every single bit of detail of the vehicle. This advantage will help the team avoid 99% of communication barriers.
Time machine with recorded data
Having the data saved by our data platform, you can easily run LEADS on a laptop and travel back to the time when the data was recorded.
AI-enhanced data analysis and driver training
Powered by rich datasets, our ambition is to change car racing as a whole, just as AlphaGo changed Go. This blueprint has never been such easy as today thanks to AI.
Should you find our work helpful to you, please cite our publication.
@misc{fu2024leadslightweightembeddedassisted,
    title = {LEADS: Lightweight Embedded Assisted Driving System},
    author = {Tianhao Fu and Querobin Mascarenhas and Andrew Forti},
    year = {2024},
    eprint = {2410.17554},
    archivePrefix = {arXiv},
    primaryClass = {cs.SE},
    url = {https://arxiv.org/abs/2410.17554},
}Note that LEADS requires Python >= 3.12. To set up the environment on Ubuntu by only a single line of command, see Environment Setup.
pip install "leads[standard]"If you only want the framework, run the following.
pip install leadsThis table lists all installation profiles.
| Profile | Content | For | All Platforms |
|---|---|---|---|
| leads | Only the framework | LEADS Framework | ✓ |
| "leads[standard]" | The framework and necessary dependencies | LEADS Framework | ✓ |
| "leads[gpio]" | Everything "leads[standard]" has plug lgpio |
LEADS Framework | ✗ |
| "leads[vec]" | Everything "leads[gpio]" has plus pynput |
LEADS VeC | ✗ |
| "leads[vec-no-gpio]" | Everything "leads[standard]" has plus pynput |
LEADS VeC (if you are not using any GPIO device) | ✓ |
| "leads[vec-rc]" | Everything "leads[standard]" has plus "fastapi[standard] |
LEADS VeC Remote Analyst | ✓ |
| "leads[vec-dp]" | Everything "leads[standard]" has plus matplotlib and pyyaml |
LEADS VeC Data Processor | ✓ |
You can install LEADS Arduino from Arduino Library Manager. Note that it is named "LEADS", not "LEADS-Arduino", in the index.
See Read the Docs for the documentation of how to customize and make use of the framework in your project.
leads-vec runleads-vec infoleads-vec replayReplaying requires "main.csv" under the data directory. It as well accepts all optional arguments listed below.
leads-vec benchmarkRun the following to get a list of all the supported arguments.
leads-vec -hleads-vec -c path/to/the/config/file.json runYou can use ":INTERNAL" to replace the path to
leads_vec. For example, instead of typing ".../site-packages/leads_vec/devices_jarvis.py", simply use ":INTERNAL/devices_jarvis.py".
If not specified, all configurations will be default values.
To learn about the configuration file, read Configurations.
leads-vec -d path/to/the/devices.py runYou can use ":INTERNAL" to replace the path to
leads_vec. For example, instead of typing ".../site-packages/leads_vec/devices_jarvis.py", simply use ":INTERNAL/devices_jarvis.py".
To learn about the devices module, read Devices Module.
leads-vec -m path/to/the/main.py runYou can use ":INTERNAL" to replace the path to
leads_vec. For example, instead of typing ".../site-packages/leads_vec/devices_jarvis.py", simply use ":INTERNAL/devices_jarvis.py".
Function main() must exist in the main module, otherwise an ImportError will be raised.
It needs to have the identical signature as the following.
def main() -> int:
    """
    :return: 0: success; 1: error
    """
...leads-vec -r config runThis will generate a default "config.json" file under the current directory.
leads-vec -r systemd runThis will register a user Systemd service to start the program. The service script is usually located at "/usr/local/leads/venv/python3.12/site-packages/leads_vec/_bootloader/leads-vec.service.sh". Edit the file to customize the arguments.
To enable auto-start at boot, run the following.
systemctl --user daemon-reload
systemctl --user enable leads-vec
You will have to stop the service by this command otherwise it will automatically restart when it exits.
systemctl --user stop leads-vecUse the following to disable the service.
systemctl --user disable leads-vecleads-vec -r reverse_proxy runThis will start the corresponding reverse proxy program as a subprocess in the background.
leads-vec -r splash_screen runThis will replace the splash and lock screen with LEADS' logo.
leads-vec -mfs 1.5 runThis will magnify all font sizes by 1.5.
leads-vec --emu runThis will force the program to use emulation even if the environment is available.
leads-vec --auto-mfs runSimilar to Magnify Font Sizes, but instead of manually deciding the factor, the program will automatically calculate the best factor to keep the original proportion as designed.
leads-vec-rcGo to the online dashboard at https://leads-vec-rc.projectneura.org.
Run the following to get a list of all the supported arguments.
leads-vec-rc -hleads-vec-rc -p 80If not specified, the port is 8000 by default.
leads-vec-rc -c path/to/the/config/file.jsonIf not specified, all configurations will be default values.
To learn about the configuration file, read Configurations.
leads-vec-dp path/to/the/workflow.ymlTo learn more about workflows, read Workflows.
This section helps you set up the identical environment we have for the VeC project. A more detailed guide of reproduction is available here. After the OS is set up, just run the one-line commands listed below. You may also choose to clone the repository or download the scripts from releases (only stable releases provide scripts).
These scripts currently only support apt as the package manager.
If you install Python using the scripts, you will not find python ..., python3 ..., pip ..., or pip3 ... working
because you have to specify the Python interpreter such that python-leads ... and pip-leads ....
You can simply run "setup.sh" and it will install everything including Python 3.12 all the optional dependencies of LEADS for you.
bash "setup.sh$(wget -O setup.sh https://raw.githubusercontent.com/ProjectNeura/LEADS/main/scripts/setup.sh)" && rm setup.sh || rm setup.shIf you are using a GPIO board that is not a Raspberry Pi, you need to set the environment variable
GPIOZERO_PIN_FACTORY to mock.
export GPIOZERO_PIN_FACTORY=mockIf you have registered the Systemd service, this line should be added to the service script as well like shown.
# adjust the arguments according to your needs
export GPIOZERO_PIN_FACTORY=mock
leads-vec -c /usr/local/leads/config.json runpython-install.sh will only install Python 3.12 and Tcl/Tk.
bash "python-install.sh$(wget -O python-install.sh https://raw.githubusercontent.com/ProjectNeura/LEADS/main/scripts/python-install.sh)" && rm python-install.sh || rm python-install.shWe use FRP for reverse proxy. This is optional if you do not need public connections. If you want, install it through "frp-install.sh".
bash "frp-install.sh$(wget -O frp-install.sh https://raw.githubusercontent.com/ProjectNeura/LEADS/main/scripts/frp-install.sh)" && rm frp-install.sh || rm frp-install.shTo configure FRP, use "frp-config.sh".
bash "frp-config.sh$(wget -O frp-config.sh https://raw.githubusercontent.com/ProjectNeura/LEADS/main/scripts/frp-config.sh)" && rm frp-config.sh || rm frp-config.shThere are 4 arguments for this script, of which the first 2 are required.
bash "frp-config.sh$(...)" {frp_server_ip} {frp_token} {frp_port} {comm_port} && rm frp-config.sh || rm frp-config.shTo uninstall LEADS, we provide an easy solution as well. However, it uninstalls a component only if it is installed through the way listed in Environment Setup.
bash "uninstall.sh$(wget -O uninstall.sh https://raw.githubusercontent.com/ProjectNeura/LEADS/main/scripts/uninstall.sh)" && rm uninstall.sh || rm uninstall.shThe configuration file is a JSON file that has the following settings. You can have an empty configuration file like the following as all the settings are optional.
{}Note that a purely empty file could cause an error.
| Index | Type | Usage | Used By | Default |
|---|---|---|---|---|
w_debug_level |
str |
"DEBUG", "INFO", "WARN", "ERROR" |
Main, Remote | "DEBUG" |
data_seq_size |
int |
Buffer size of history data | Main | 100 |
width |
int |
Window width | Main | 720 |
height |
int |
Window height | Main | 480 |
fullscreen |
bool |
True: auto maximize; False: window mode |
Main | False |
no_title_bar |
bool |
True: no title bar; False: default title bar |
Main | False |
theme |
str |
Path to the theme file | Main | "" |
theme_mode |
bool |
"system", "light", "dark" |
Main | False |
manual_mode |
bool |
True: hide control system; False: show control system |
Main | False |
refresh_rate |
int |
GUI frame rate | Main | 30 |
m_ratio |
float |
Meter widget size ratio | Main | 0.7 |
num_external_screens |
int |
Number of external screens used if possible | Main | 0 |
font_size_small |
int |
Small font size | Main | 14 |
font_size_medium |
int |
Medium font size | Main | 28 |
font_size_large |
int |
Large font size | Main | 42 |
font_size_x_large |
int |
Extra large font size | Main | 56 |
comm_addr |
str |
Communication server address | Remote | "127.0.0.1" |
comm_port |
int |
Port on which the communication system runs on | Main, Remote | 16900 |
comm_stream |
bool |
True: enable streaming; False: disable streaming |
Main | False |
comm_stream_port |
bool |
Port on which the streaming system runs on | Main, Remote | 16901 |
data_dir |
str |
Directory for the data recording system | Main, Remote | "data" |
save_data |
bool |
True: save data; False: discard data |
Remote | False |
use_ltm |
bool |
True: use long-term memory; False: short-term memory only |
Main | False |
For device-related implicit configurations, please see the devices module.
This only applies to LEADS VeC Data Processor. Please find a more detailed version here.
dataset: "data/main.csv"
inferences:
  repeat: 100  # default: 1
  enhanced: true  # default: false
  assume_initial_zeros: true  # default: false
  methods:
    - safe-speed
    - speed-by-acceleration
    - speed-by-mileage
    - speed-by-gps-ground-speed
    - speed-by-gps-position
    - forward-acceleration-by-speed
    - mileage-by-speed
    - mileage-by-gps-position
    - visual-data-realignment-by-latency

jobs:
  - name: Task 1
    uses: bake
  - name: Task 2
    uses: process
    with:
      lap_time_assertions: # default: []
        - 120  # lap 1 duration (seconds)
        - 180  # lap 2 duration (seconds)
      vehicle_hit_box: 5  # default: 3
      min_lap_time: 60  # default: 30 (seconds)
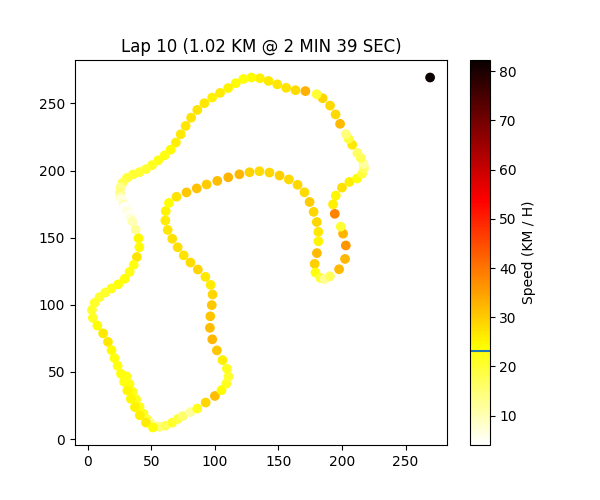
  - name: Draw Lap 5
    uses: draw-lap
    with:
      lap_index: 4  # default: -1
  - name: Suggest on Lap 5
    uses: suggest-on-lap
    with:
      lap_index: 4
  - name: Draw Comparison of Laps
    uses: draw-comparison-of-laps
    with:
      width: 0.5  # default: 0.3
  - name: Extract Video
    uses: extract-video
    with:
      file: rear-view.mp4  # destination to save the video
      tag: rear  # front, left, right, or rear
  - name: Save
    uses: save-as
    with:
file: data/new.csvfrom leads import controller, MAIN_CONTROLLER
from leads_emulation import RandomController
@controller(MAIN_CONTROLLER)
class MainController(RandomController):
passThe devices module will be executed after configuration registration. Register your devices in this module using AOP paradigm. A more detailed explanation can be found here.
These versions were used in practical races:
0.9.5 (Villeneuve)- 2024-10-05 University of Waterloo EV Challenge
Our team management completely relies on GitHub. Tasks are published and assigned as issues. You will be notified if you are assigned to certain tasks. However, you may also join other discussions for which you are not responsible.
You can have a look at the whole schedule of each project in a timeline using the projects feature.
See CONTRIBUTING.md.


