![]()
SWaG(Synthetic Waste Generator) is an automated synthetic data generation pipeline that creates an unlimited amount of high-fidelity image data for training AI-powered MSW(Municipal Solid Waste) recognition model. It consists of two main steps:
- 3D MSW Model Generation via DPS
- 2D MSW Image Data Generation via Omniverse Replicator
With the help of adjustable parameters, SWaG can be customized, such that unique images of MSW can be created under different lighting conditions, object textures and conveyor belt settings to meet specific customer demands.

In the first step, SWaG takes arbitrary original object models from ShapeNet as input and automatically outputs their counterparts as MSW via DPS(Deformed by Physical Simulation) technology. Specifically, we use Houdini as DPS backend to implement plastic deformation of rigid bodies for generating synthetic 3D MSW models.
- Houdini 19.5
- Python 3.8
We first introduce how to generate single 3D MSW model via DPS in Houdini.
- Select a 3D shape(usually in .obj format) from ShapeNet.
- Build the Houdini network as shown below:
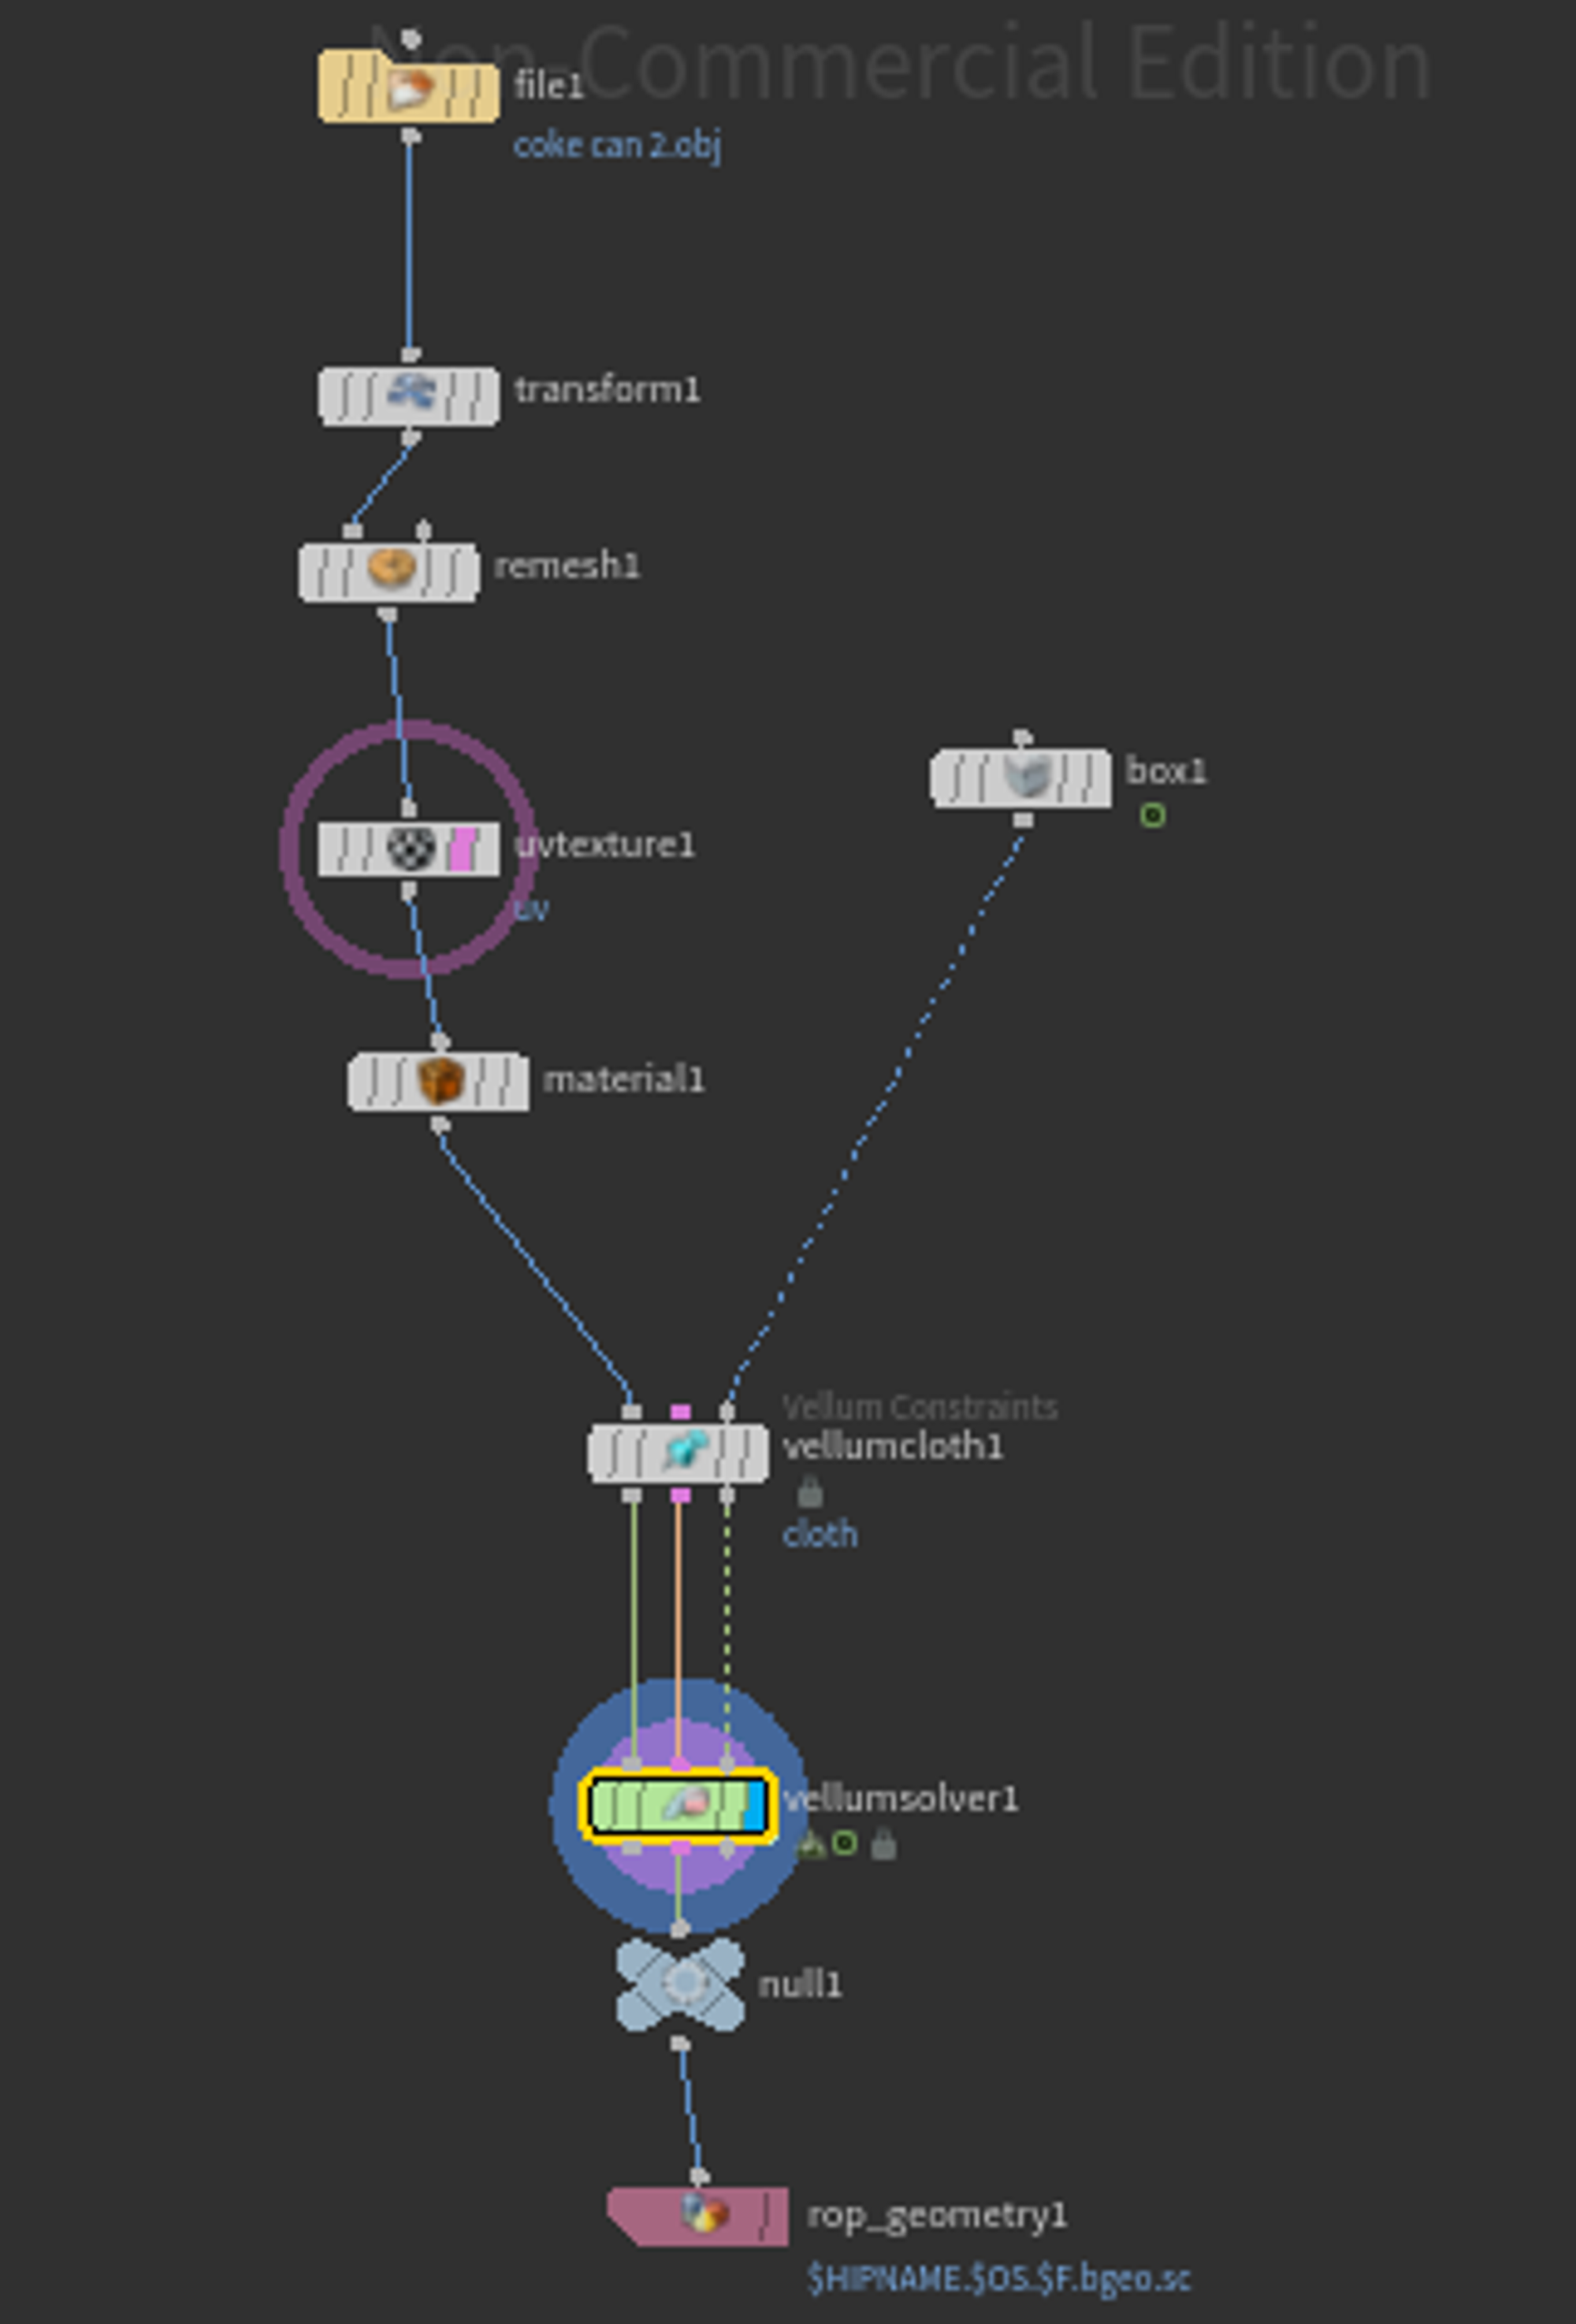
- Import the path of the selected 3D shape as the parameter of
filenode in the Houdini network, set the parameters of the other nodes properly. Details of parameter settings for different nodes can be found here.


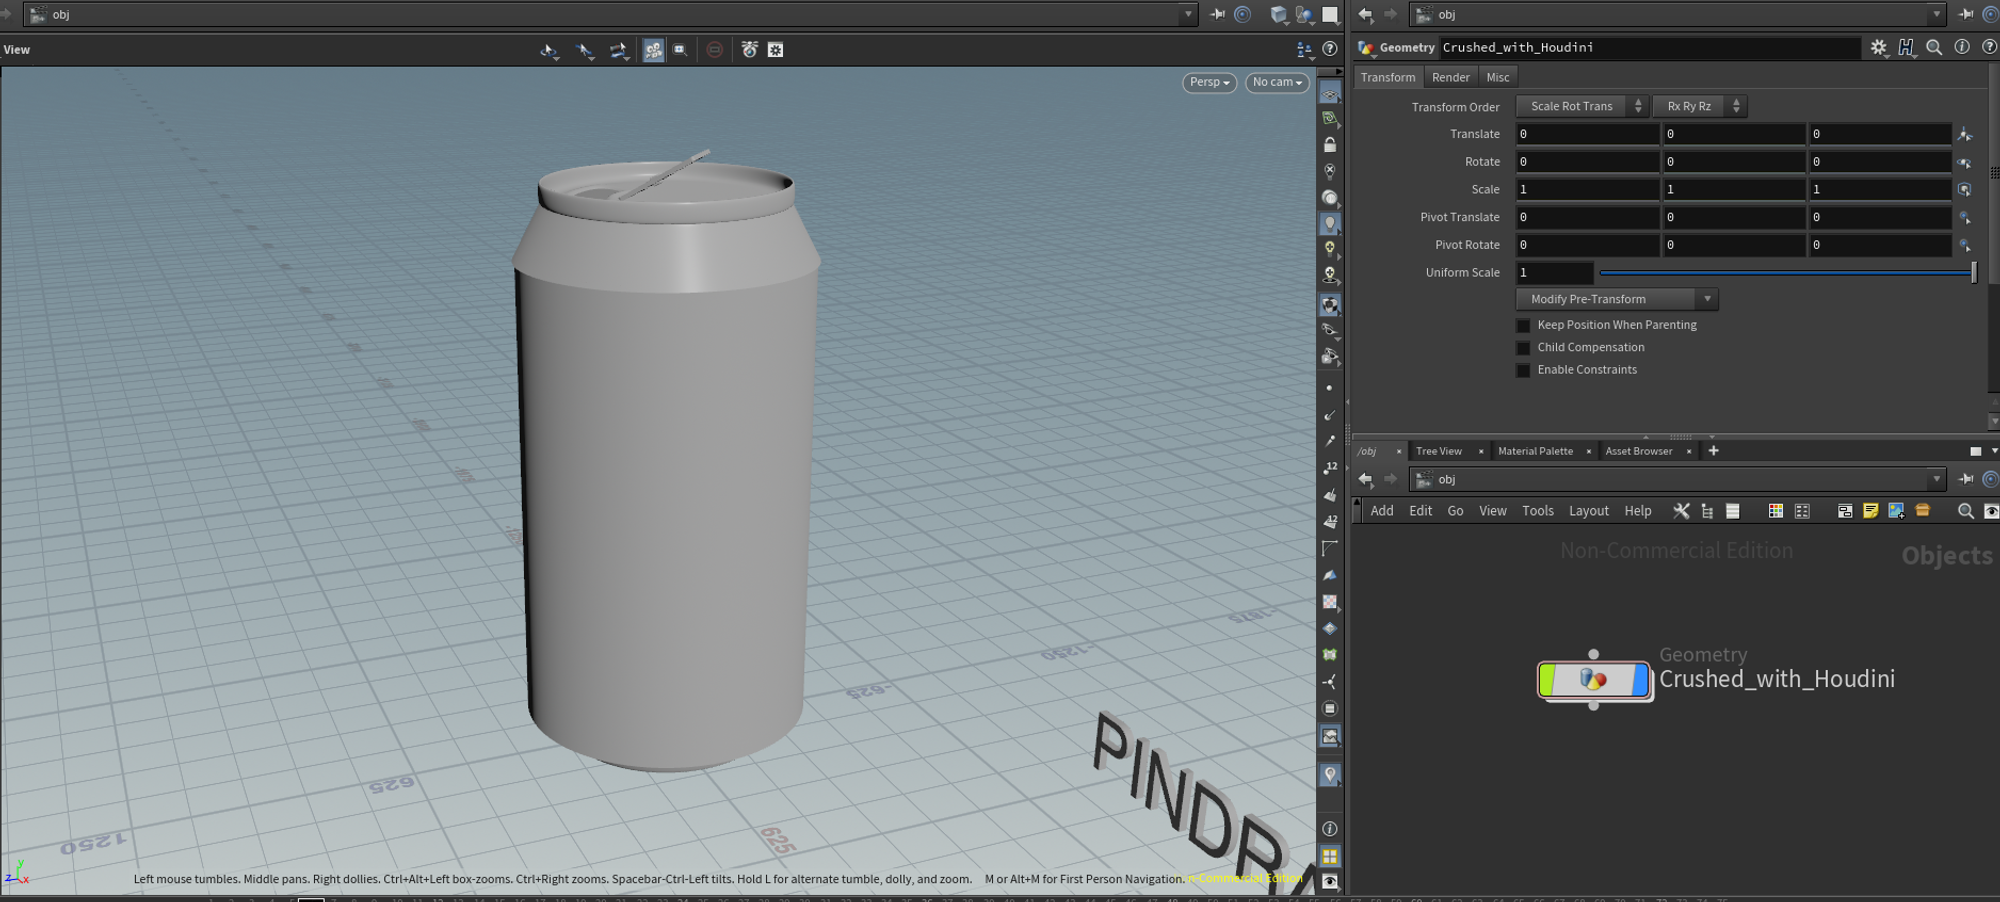
To start the DPS process for a Single MSW Model, you just need to launch the Houdini simulation after completing the above steps. We select a coke can with a customized texture as an example:

To improve the efficiency of Single 3D MSW model DPS process, we use the Python API provided by Houdini to generate MSW models in batch from 3D shapes.
- Launch
External Python Editorin Houdini.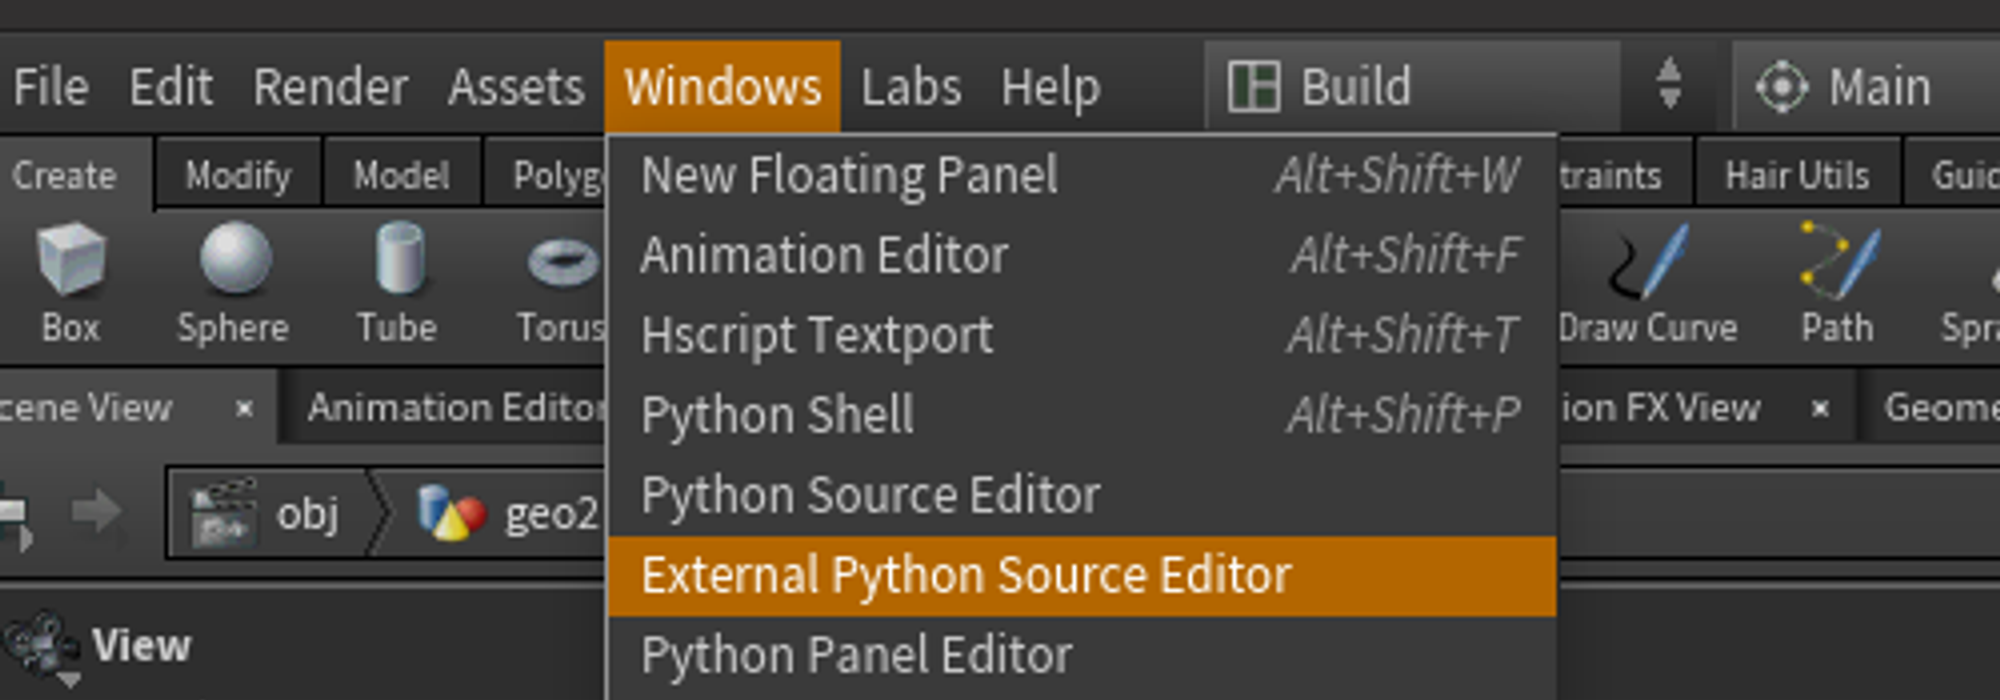
- Copy
./3D_model_generation/shapenet_can_crushing_dps.pyintoExternal Python Editorand modify the parametersshapenet_category_pathanddps_saved_pathaccording to your local path. - Add
Python shellin Houdini command window. - Run the command in
Python shellto generate MSW models in batch:>>> dps = hou.session.Crushing_DPS() >>> dps.run()

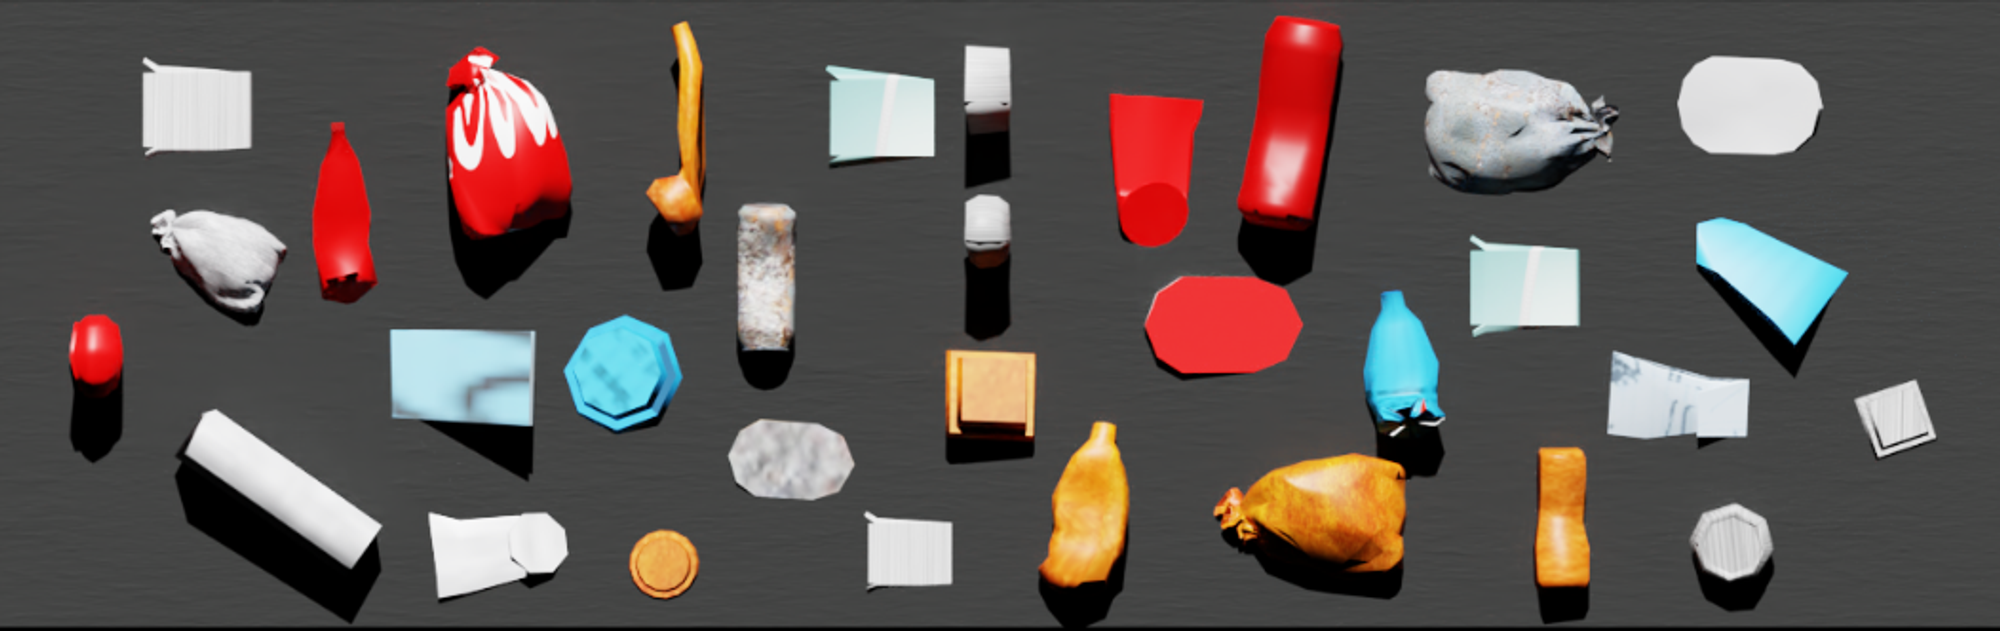
Similarly, to start the batch DPS process for MSW Models, you just need to launch the Houdini simulation after completing the above steps. We select the 3D shapes of the can category in ShapeNet as an example for generating MSW models in batch:

You can use the visualization script to visualize the generated MSW models in Houdini. It is useful when you want to check the quality of the MSW Models and remove defectives.
In the second step, SWaG takes the generated 3D MSW models as input and directly outputs large-scale photorealistic MSW image data for training Mask R-CNN-based recognition model to enable automated composition analysis and sorting of MSW. Thanks to the superiority of RTX Rendering and Synthetic Data Generation (SDG) technology in NVIDIA Omniverse platform, we could produce large-scale photorealistic MSW image data from the generated 3D MSW models using Omniverse Replicator SDK.
- Isaac Sim-2022.2.0
- Omniverse Replicator-1.6.4
We first show how to apply Domain Randomization(DR) when using Replicator to enable SDG of MSW.
- Install Isaac Sim and Omniverse Replicator extension in Omniverse Launcher. Considering the code compatibility of this repo, we strongly recommend that you install the same version as decalred in
Requirments. - Import the generated 3D MSW models into Isaac Sim. Note that Isaac Sim uses .usd as the defult model format, thus you need to first convert the format of MSW models from .obj to .usd:
- Add semantic labels for the MSW models using
Semantic Schema Editorin Isaac Sim: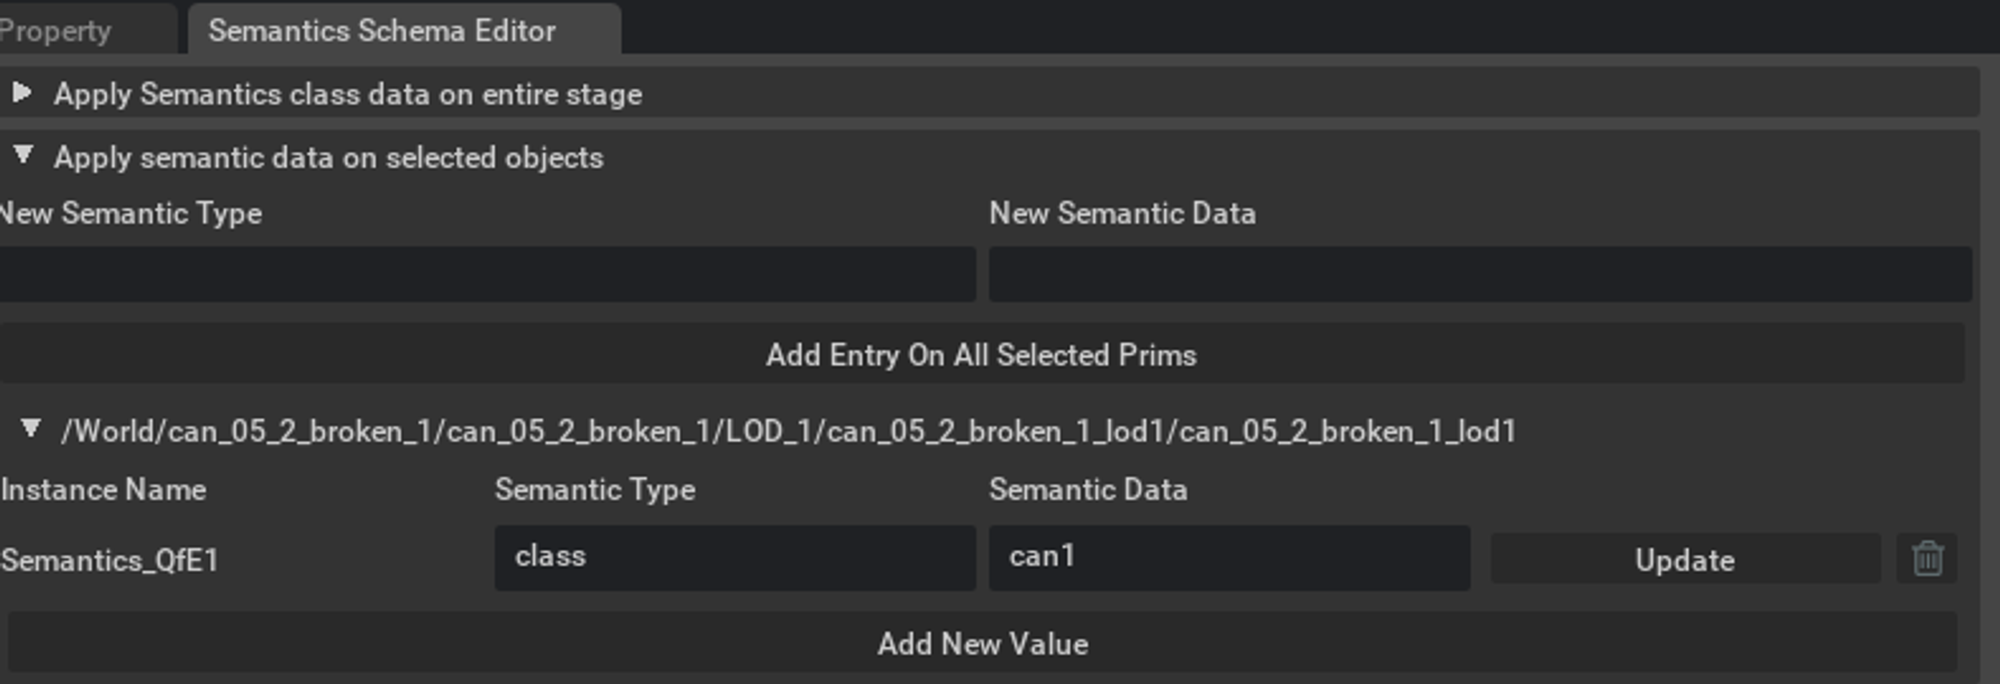
- Copy the scripts in
./2D_image_generation/dr_examplestoScript Editorwindow and click on the Run (Ctrl + Enter) button at the bottom of the Script Editor Window. This creates all the necessary nodes needed to run the DR workload of MSW SDG in Isaac Sim. - To executes these nodes to generate the randomized msw image data, click on the top left corner on Replicator in Isaac Sim. Details of the execution process as shown in here.


Here we demonstrate some DR examples when using Replicator to generate msw image data in isaac ism:
- Texture Randomization + Light Source Randomization: copy
./2D_image_generation/dr_examples/dr_texture_light.pytoScript Editorwindow and click on the Run button to launch DR process:
- Texture Randomization + Light Source Randomization + Pose Randomization: copy
./2D_image_generation/dr_examples/dr_texture_light_pose.pytoScript Editorwindow and click on the Run button to launch DR process:


Since you have added semantic labels when importing the MSW models, you can visualize the annotation results of the generated msw image using synthetic data sensor button in Isaac Sim UI surface:

Based on the functionalities of Replicator and Isaac Sim, we are able to generate randomized and unique MSW image data in batch via its Pthon API.
- Python Environment Installation: Isaac Sim provides a built-in Python 3.7 environment that packages can use. To use this Python environment when running the MSW Image Data generation scripts, you first need to move the whole
2D_image_generationpackage to~/.local/share/ov/pkg/isaac_sim-2022.2.0/. - Mesh Converting: Before generating the 2D MSW image data, you need to batch convert the 3D MSW models format from .obj to .usd using the following command:
- set a variable to tell the script where to find the generated 3D MSW models locally
export SHAPENET_LOCAL_DIR=<path/to/dps_saved_path>
- With the SHAPENET_LOCAL_DIR variable set, run the following script. Note, this will create a new directory at
{SHAPENET_LOCAL_DIR}_nomatwhere the geometry-only USD files will be stored.
cd .local/share/ov/pkg/isaac_sim-2022.1.1
./python.sh 2D_image_generation/scripts/utils/usd_convertor.py --categories can bottle --max_models 100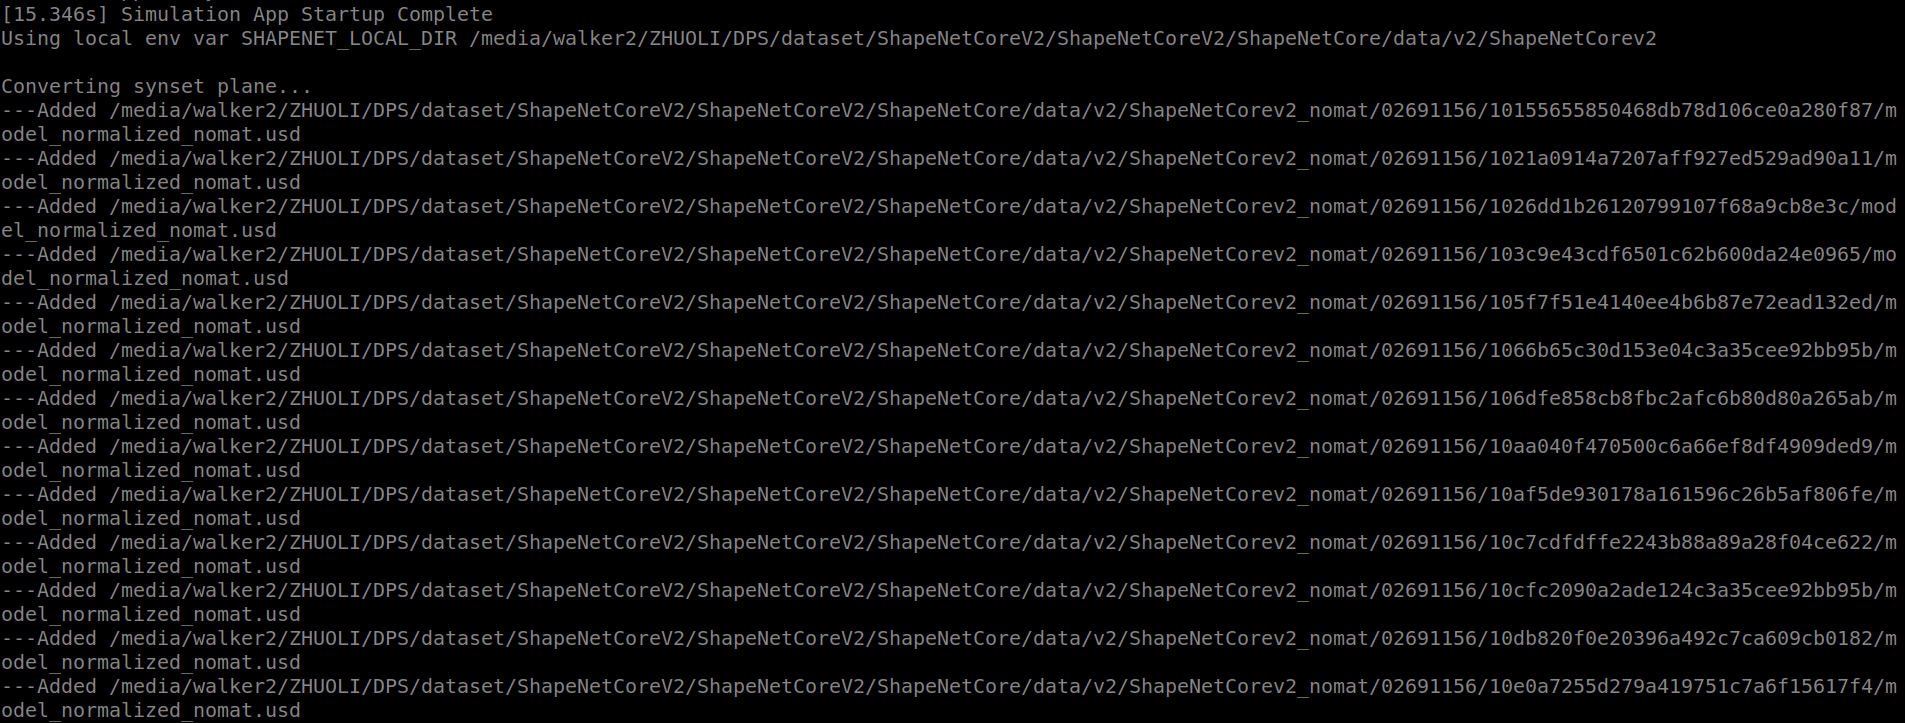
- MSW Image Dataset Generation: Use the data generation script to create an unlimited amount of high-fidelity MSW image data:
cd .local/share/ov/pkg/isaac_sim-2022.2.0
./python.sh ./2D_image_generation/scripts/generate_msw_wastenet.py --root $WASTENET_LOCAL_DIR'_nomat' --categories can bottle --max_asset_size 50

Examples of the automatically generated MSW images and annotations are shown below:

After generating large-scale photorealistic MSW image data, it is required to validate the effectiveness of the synthetic data by training and testing the MSW Recognition Model.
Use the training script for training the model with the synthetic data:
cd .local/share/ov/pkg/isaac_sim-2022.2.0/
./python.sh 2D_image_generation/scripts/train_msw_recognition_model.py --root $WASTENET_LOCAL_DIR'_nomat' --categories can bottle --visualize --max_asset_size 50
where --visualize is an optional flag. If given, the evaluation results for a certain iteration round of the trainig process will be saved in 2D_image_generation/assests/_out_train_imgs. For example, the evaluation results of iteration 150 round is shown below:

After training the model, you can use the inference script to test the model on a batch of real-world MSW images and visualize the results. You need to finish the model training process and store a .pth file under 2D_image_generation/models. Or you can use the pretrained model for inference:
-
Download the pretrained model and put it under
2D_image_generation/models. -
Test the model with the following command:
cd .local/share/ov/pkg/isaac_sim-2022.2.0/
./python.sh 2D_image_generation/scripts/msw_recognition.py --root --visualize --categories can bottle
where --visualize is an optional flag. If given, the recognized results will be saved in 2D_image_generation/assests/_out_recognized_imgs. --root is an defult parameter that specifies the root directory containing the real-world msw images. This script will load the images one-by-one and display both the raw image and the recognized results:

SWaG is developed and maintained by the CLOVER Lab (Collaborative and Versatile Robots Laboratory), CUHK.