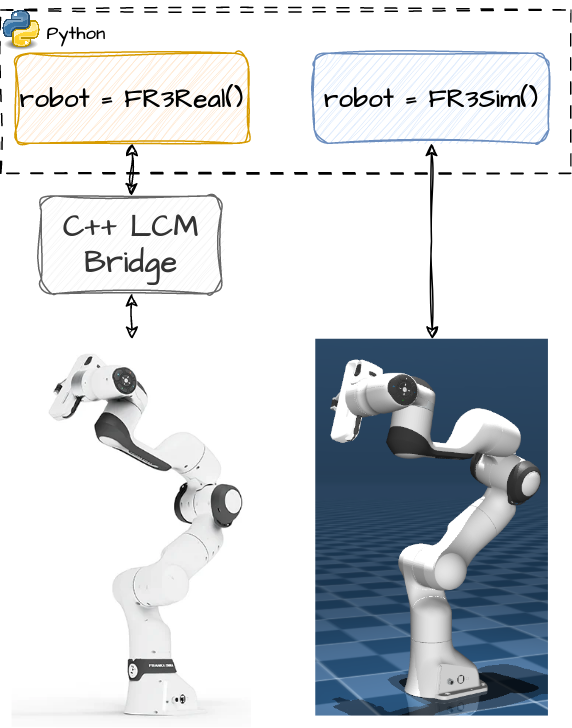
FR3Py is unified Python simulation and hardware communication environment for Franka FR3 robots. The motivation of this project is to remove the burden of developing an easy interface for the robot, and minimize the effort required for going from simulation to real-world by provides an identical Python class to interface with simulation and the real robot. All you need to do, is changing one class!
The C++ bridge should be excuted on a computer with preempt-RT kernel patch applied and docker installed. This computer communicates with the robot on one end and interracts with the FR3Py python class running on the same computer or any other computer on the same network.
Install the preempt-RT Linux kernel as instructed on the Franka official Linux installation procedure here.
Make sure docker is installed as instructed here.
FR3Py provides the .devcontainer configuration files required for easy and quick installation of the development environment. This requires the Dev Containers extension to be installed in your VSCode.
Enable the Multicast for the interface connected to the robot's network. To do so, first identify the name of that interface based on the IP address of the robot:
ifconfigThen run the unicast_config.py file in the tools directory of this repository with the identified interface name as the argument:
sudo python3 tools/multicast_config.py <interface_name> # e.g. eth0Open the repository folder inside your VSCode. Then press SHIFT+CTRL+P and choose Rebuild and Reopen in Container. After the completion of the build process open a terminal inside the container and run the FR3 C++ bridge:
fr3_joint_interface <robot_ip> <unique_robot_ID> <interface_type>The unique_robot_ID is a unique name used to determine the name of the LCM topics corresponding to the robot with IP robot_ip. Furtheremore, interface_type determines how we want to control the robot. Currently, joint torque (torque) and joint velocity (velocity) types are supported.
Note: Step1 assumes that the FCI interface is enabled through the Desk and the robot's FCI ethernet port (the port on the main control box and not the robot base) is connected to the local network of the development PC.
The robot is now ready to take commands from your python script. It is as easy as:
from FR3Py.robot.interface import FR3Real
from FR3Py.robot.model import PinocchioModel
robot = FR3Real(robot_id='fr3_robot1') # The same ID used when running the bridge
model = PinocchioModel()
while running:
    state = robot.getStates()
    info = model.getInfo(state['q'], state['dq'])

    #User control computations to compute the joint velocity or torque command u ...

robot.sendCommands(u)The simulation API is exactly the same as that used for controlling a real robot. Simply enable xhost request access in a system terminal by running:
xhost + Then open the repository folder inside your VSCode and press SHIFT+CTRL+P and choose Rebuild and Reopen in Container. After the completion simulate the robot simply by changing the robot object in your python code with the simulation opject:
from FR3Py.robot.interface import FR3Real
from FR3Py.robot.model import PinocchioModel
robot = FR3Sim(interface_type='velocity') # Simulation with joint velocity and joint torque interfaces are supported.
model = PinocchioModel()
while running:
    state = robot.getStates()
    info = model.getInfo(state['q'], state['dq'])

    #User control computations to compute the joint velocity or torque command u ...

robot.sendCommands(u)A set of examples and tutorials are provided here to get you up and running quickly.
