此版本添加了中文注释以便学习和理解,欢迎指正
-
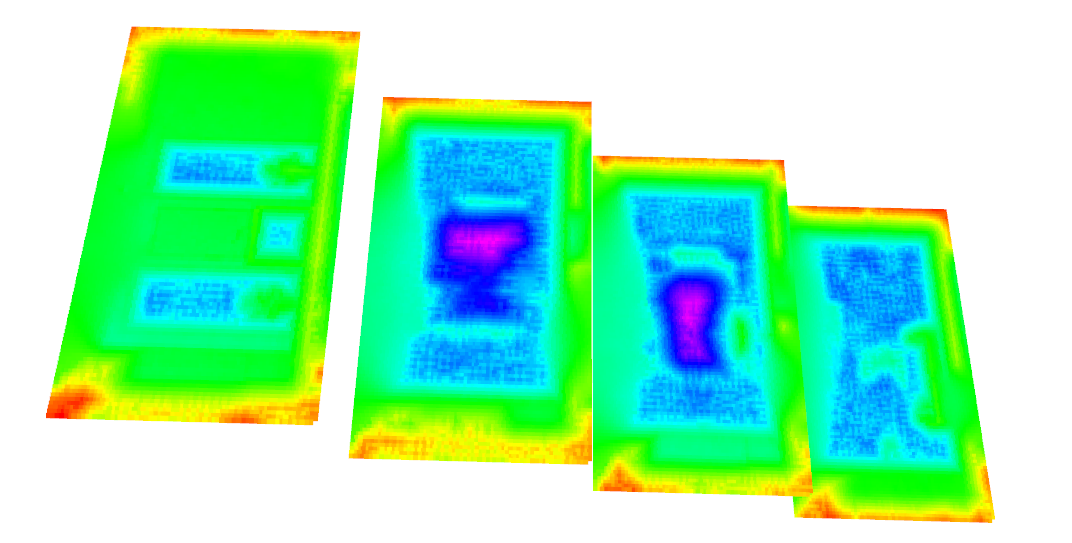
增加ros可视化训练过程中SDF切片
运行训练代码之前需要先启动
roscore,然后启动rviz,即可见SDF -
增加从rosbag生成数据集的脚本
python2 generate_dataset_from_rosbag.py直接在脚本中修改参数, 该脚本会解析rosbag中的
odom_topic_name,image_topic_name,depth_topic_name,分别写入output_dir中的poses.txt,/images,/depth_filtered. -
增加与realsense实物数据对应的Dataset Class:
realsense_dataset.py
以下为原作者(Jingwen Wang)ReadMe(含修改)
GO-Surf: Neural Feature Grid Optimization for Fast, High-Fidelity RGB-D Surface Reconstruction
Jingwen Wang, Tymoteusz Bleja, Lourdes Agapito
3DV 2022 (Oral)
This repository contains the code for GO-Surf, a direct feature grid optimization method for accurate and fast surface reconstruction from RGB-D sequences.
- 📣 Main training code and data [2022-09-11].
- 📣 Extracting colored mesh [2022-11-13].
- 📣 Sequential Mapping.
GO-Surf uses multi-level feature grids and two shallow MLP decoders. Given a sample point along a ray, each grid is queried via tri-linear interpolation. Multi-level features are concatenated and decoded into SDF, and used to compute the sample weight. Color is decoded separately from the finest grid. Loss terms are applied to SDF values, and rendered depth and color. The gradient of the SDF is calculated at each query point and used for Eikonal and smoothness regularization.
git clone https://github.com/JingwenWang95/go-surf.git
cd go-surf
The code is tested with Python 3.9 and PyTorch 1.11 with CUDA 11.3. GO-Surf requires smooth_sampler, which is a drop-in replacement for PyTorch's grid sampler that support double back-propagation. Also the following packages are required:
Dependencies (click to expand)
- torch
- pytorch3d
- scikit-image
- trimesh
- open3d
- imageio
- matplotlib
- configargparse
- tensorboard
- opencv-python
- opencv-contrib-python
You can create an anaconda environment with those requirements by running:
conda env create -f environment.yml
conda activate go_surf
Then install the external Marching Cubes dependency in the same environment:
# compile marching cubes
cd external/NumpyMarchingCubes
python setup.py install
We use the synthetic dataset from NeuralRGB-D which contains 10 synthetic sequences with GT meshes and camera poses. You can download it from here (8.8 GB). You can also find the original link in NeuralRGB-D's Github repo from here.
The data of each scene is organised as follows:
<scene_name>            # args.scene in command line args
├── depth               # raw (real data) or ground truth (synthetic data) depth images (optional)
    ├── depth0.png
    ├── depth1.png
    ├── depth2.png
    ...
├── depth_filtered      # filtered depth images
    ├── depth0.png
    ├── depth1.png
    ├── depth2.png
    ...
├── depth_with_noise    # depth images with synthetic noise and artifacts (optional)
    ├── depth0.png
    ├── depth1.png
    ├── depth2.png
    ...
├── images              # RGB images
    ├── img0.png
    ├── img1.png
    ├── img2.png
    ...
├── focal.txt           # focal length
├── poses.txt           # ground truth poses (optional)
├── trainval_poses.txt  # camera poses used for optimization
├── gt_mesh.ply         # ground-truth mesh
├── gt_mesh_culled.ply  # culled ground-truth mesh for evaluation
Note that poses.txt contains gt poses defined in the same world coordinate as gt mesh, while trainval_poses.txt contains initial camera poses estimated by BundleFusion which are aligned with the first camera pose. In our dataloader we pre-align all the BundleFusion poses to the world coordinate for simplicity. Also note that both poses follow the OpenGL convention (right-upward-backward).
We also tested our code on real-world sequences from ScanNet. You can download the sequences following the instructions on their website.
Don't forget to change the datasets_dir in the config files to the dataset root directory after downloading the datasets!
You can start training by running:
python train.py --scene grey_white_room --exp_name test
Note that scene must correspond to the config files defined under configs/. For the list of scenes you can refer to here. After training, the log files and checkpoints will be saved under logs/${scene}/${exp_name}
从上次的checkpoint开始训练:
python train.py --scene grey_white_room --exp_name test --i_save 100 --i_print 10 --start_iter 100
i_save:保存checkpoint对应的训练循环次数i_print:打印训练数据的循环次数start_iter:从上次的多少次训练循环的checkpoint开始训练
To extract the mesh of trained scene, simply run:
python reconstruct.py --scene grey_white_room --exp_name test
The extracted mesh will be saved under the directorylogs/${scene}/${exp_name}/mesh/.
If you want colored mesh, simply add the option --color_mesh:
python reconstruct.py --scene scene0000_00 --exp_name test_color --color_mesh
You may want to switch off the use_view_dirs in color decoder if you want a good-looking colored mesh.
从指定的checkpoint生成mesh:
python reconstruct.py --scene grey_white_room --exp_name test --color_mesh --target_iter 100
target_iter:指定的checkpoint对应的训练循环次数
生成Mesh之后可以直接下载MeshLab,在MeshLab中打开logs/${scene}/${exp_name}/mesh/路径下的文件,方便查看
For evaluation, run:
python eval_mesh.py --scene grey_white_room --exp_name test --n_iters 10000 --remove_missing_depth
which will first re-align and cull the original mesh, and then do the evaluation. Intermediate meshes and evaluation results are saved under logs/${scene}/${exp_name}/mesh/
-
git+https://github.com/tymoteuszb/smooth-samplerReport Error直接从github clone 下来,repo里面有setup.py文件,表示这个pkg是能够安装的,将这个包拷贝到anaconda3/pkgs/目录,运行:
python setup.py install -
conda有下载速度慢、找不到包的情况,都需要换源
conda config --add channels
https://mirrors.tuna.tsinghua.edu.cn/anaconda/pkgs/free/
查看当前源:
conda config --show-sources可以直接修改源配置文件:
sudo gedit ~/.condarc -
conda安装上述依赖中指定版本的pkg指令
conda install tensorboard==2.9.1
conda install trimesh=3.12.8=pyh6c4a22f_0
If you use this code in your research, please consider citing:
@inproceedings{wang2022go-surf,
  author={Wang, Jingwen and Bleja, Tymoteusz and Agapito, Lourdes},
  booktitle={2022 International Conference on 3D Vision (3DV)},
  title={GO-Surf: Neural Feature Grid Optimization for Fast, High-Fidelity RGB-D Surface
  Reconstruction},
  year={2022},
  organization={IEEE}
}
Some code snippets are borrowed from neurecon and NeRF-pytorch. The Marching Cubes implementation was from NeuralRGB-D. Special thanks to Dejan Azinović for providing additional details on culling and evaluation scripts!


