Autonomous Exploration and Semantic Updating of Large-Scale Indoor Environments with Mobile Robots
Sai Haneesh Allu, Itay Kadosh, Tyler Summers, Yu Xiang
Please cite this work if it helps in your research
@inproceedings{allu2024semanticmapping,
      title={Autonomous Exploration and Semantic Updating of Large-Scale Indoor Environments with Mobile Robots},
      author={Allu, Sai Haneesh and Kadosh, Itay and Summers, Tyler and Xiang, Yu},
      journal={arXiv preprint arXiv:2409.15493},
      year={2024}
    }
For any questions regarding this work, contact Sai Haneesh Allu. For any issues regarding this code, please raise an issue.
- Installation
- Initialization
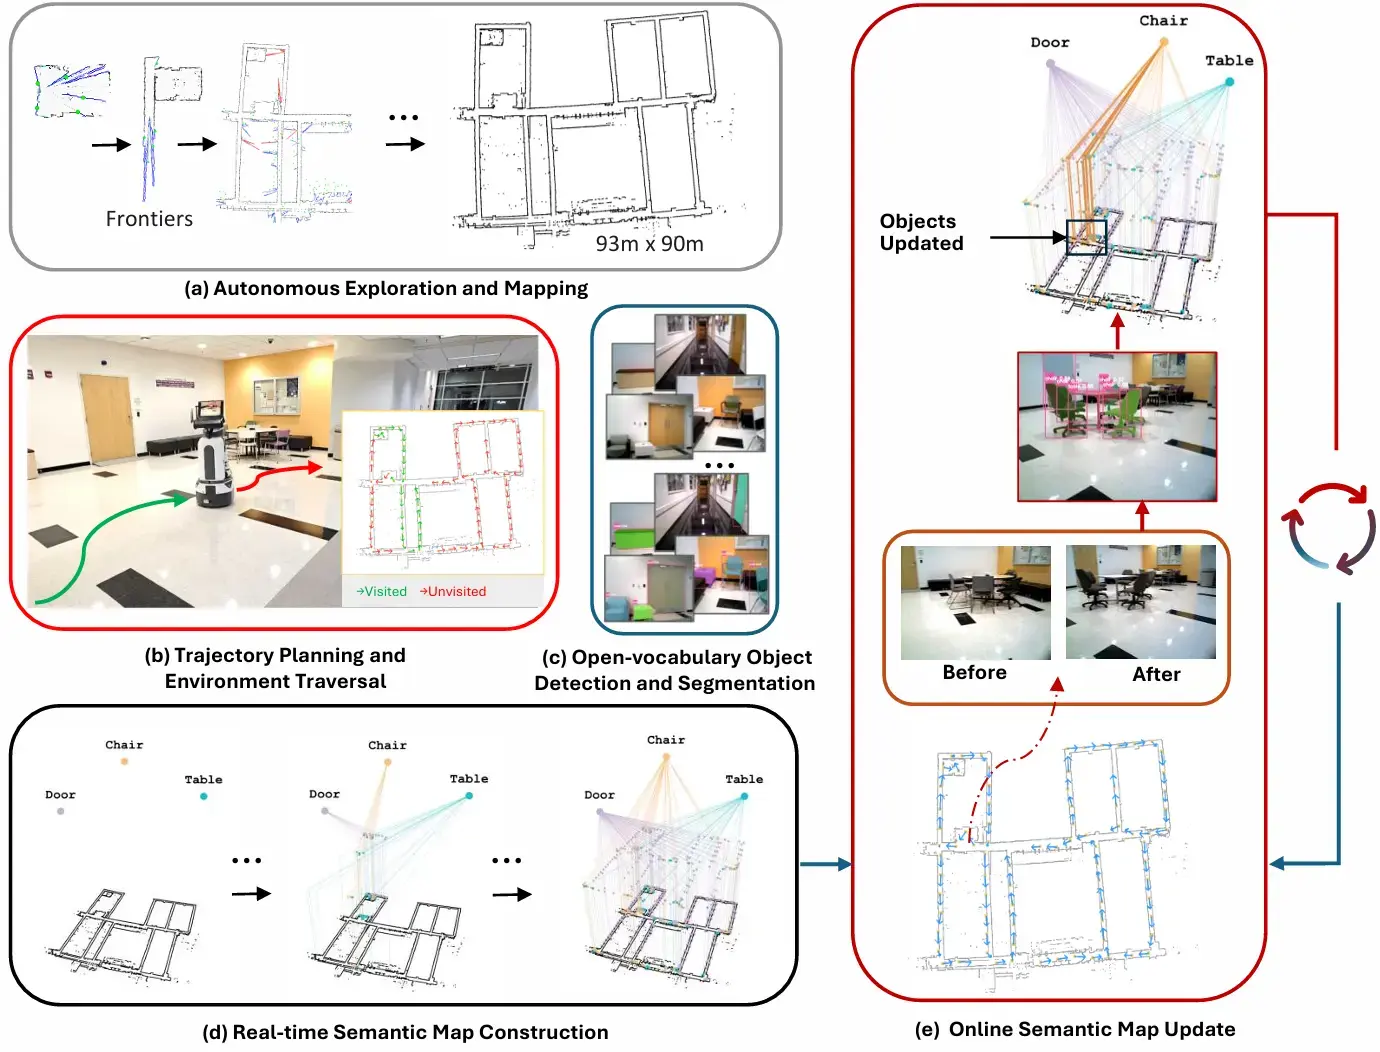
- Mapping and Exploration
- Environment Traversal planning
- Semantic Map Construction and Update
- Running on a real robot system
- Real World Demo
The following subsections provides detailed installation guidelines related to workspace setup, dependencies and other requirements to test this work effectively.
This code is tested on ros noetic version. Detailed installation instructions are found here.To install ROS Noetic, execute the following commands in your terminal:
sudo sh -c 'echo "deb http://packages.ros.org/ros/ubuntu $(lsb_release -sc) main" > /etc/apt/sources.list.d/ros-latest.list'

sudo apt install -y curl

curl -s https://raw.githubusercontent.com/ros/rosdistro/master/ros.asc | sudo apt-key add -

sudo apt update

sudo apt install -y ros-noetic-desktop-full

echo "source /opt/ros/noetic/setup.bash" >> ~/.bashrc

source ~/.bashrc
For compatibility with ROS Noetic, Gazebo 11 is recommended. Detailed installation instructions are found here.
sudo sh -c 'echo "deb http://packages.osrfoundation.org/gazebo/ubuntu-stable `lsb_release -cs` main" > /etc/apt/sources.list.d/gazebo-stable.list'

wget https://packages.osrfoundation.org/gazebo.key -O - | sudo apt-key add -

sudo apt-get update

sudo apt-get install -y gazebo11
We strongly recommend using a virtual environment for this work, preferably Anaconda or Miniconda. Create a new environment as follows:
conda create -n sem-map python==3.9
conda activate sem-map
git clone https://github.com/IRVLUTD/AutoX-SemMap.git
cd AutoX-SemMap
This script will install the ROS dependencies required for this work.
./install_ros_dependencies.sh
Next, install the python modules required.
pip install -r requirements.txt
Compile and source the ROS workspace using the following commands:
cd fetch_ws
catkin_make
source devel/setup.bash
If the compilation doesn't conisder python3 by default, compile with the following command. Make sure to use correct python path.
catkin_make -DPYTHON_EXECUTABLE=/usr/bin/python3
source devel/setp.bash
Please refer to the instructions here to install the robokit module. Robokit is a stand alone module for running object detection and segmentation. It is not related to the ROS workspace here. Therefore, do not source the ROS workspace during installation or while running Robokit.
NOTE: Make sure to activate the conda environment and source the workspace in each terminal. (do not source the workspace for robokit)
conda activate sem-map
cd AutoX-SemMap
source fetch_ws/devel/setup.bash
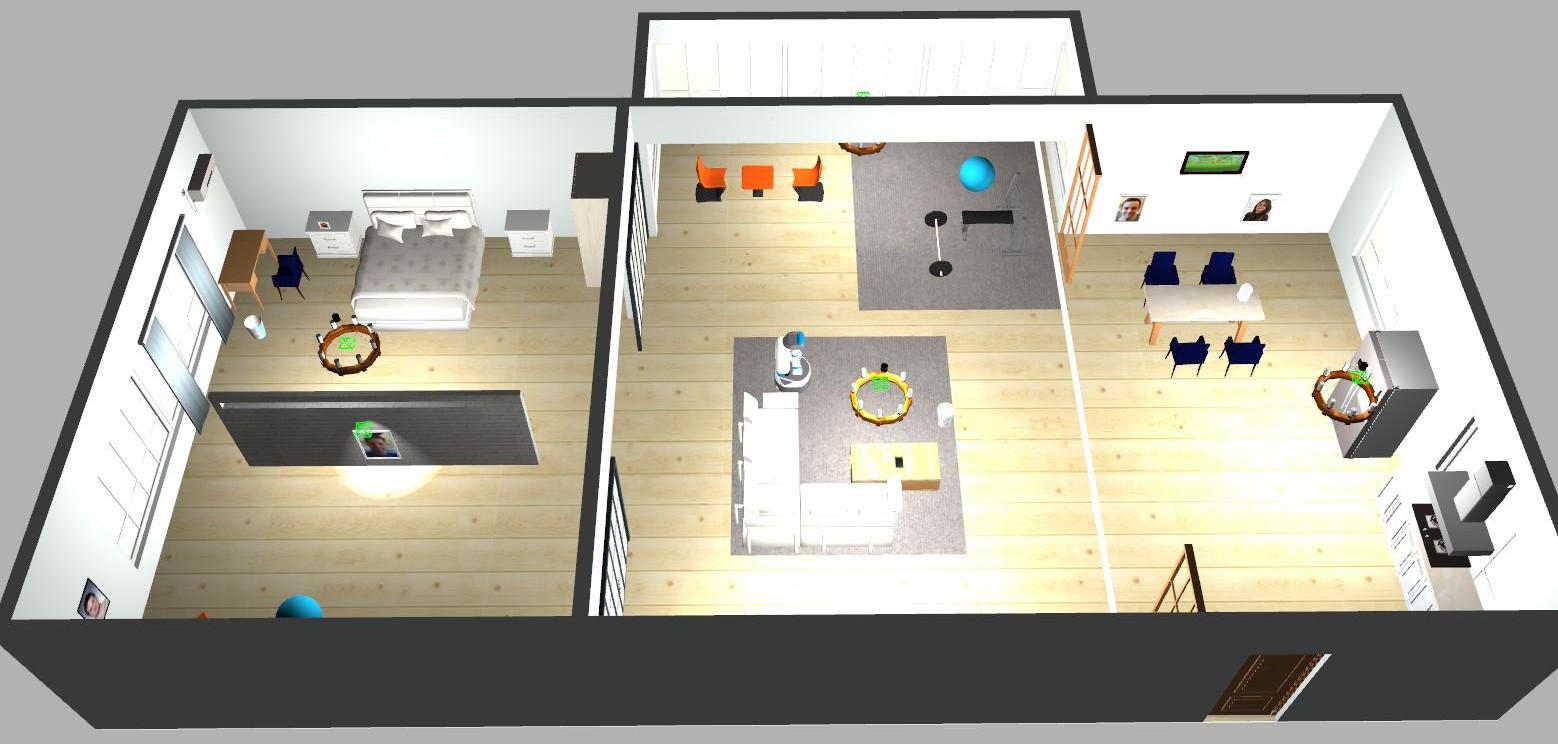
This section covers the steps to start the simulation environment and spawn the robot in the scene. Run the following commands, each in a separate terminal. You should be able to see the fetch robot spawned in the environment.
roslaunch aws_robomaker_small_house_world small_house.launch gui:=true
roslaunch fetch_gazebo spawn_robot.launch
Once the robot is spawned, run the following scripts to tuck the arm and set it's head position.
cd AutoX-SemMap/fetch_ws/src/fetch_gazebo/fetch_gazebo/scripts
python tuck_arm.py
python set_head.py
Once the initialization is done successfully, you should see the following scene.
Once system has been initialized, we proceed to explore and map the environment, while also recording robot's camera pose and base_link pose. To achieve this, follow the steps below in this sequence.
Run rviz to visualize next steps.
cd AutoX-SemMap/fetch_ws
rosrun rviz rviz -d experiment.rviz
Starts the GMapping ROS node.
roslaunch fetch_navigation fetch_mapping.launch
This script first creates a data-folder of format <Year-month-date_Hour-Minute-Seconds>/pose. Then saves the data points in pose folder, in .npz format. Specify the time-interval (in seconds) between consecutive data points as the argument. You may set the time interval to be 1 as a nominal value.
cd AutoX-SemMap/scripts
python save_data.py <time-interval>
This command launches the exploration node. When the exploration ends, it saves map.pgm and map.yaml files in the user's HOME directory.
roslaunch explore_lite explore_n_save.launch
exploration.mp4
This section describes how to plan the robot's traversal through the environment. When the map has been built, robot does not need to explore the environment again. So from the explored trajectory, we compute a low cost trajectory ( sequence of points) for the robot to visit the entire evnvironment. Copy the map.pgm and map.yaml files saved after exploration, from the home directory to this scripts. Update the image path in map.yaml to reflect correct map.pgm image path.
cd AutoX-SemMap/scripts
From the saved data-folder at the end of exploration, first get the recorded robot poses. These poses will be saved by default in robot_trajectory.json file.
python extract_robot_trajectory.py <data-folder>
Next, sample the poses and plan the sequence to visit the sampled points at low cost, using a Traveling Salesman Problem fomrulation.
python tsp_surveillance_trajectory.py robot_trajectory.json
This saves the sequence of sampled points as surveillance_traj.npz and alos displays the seques as shown below.
traj_edit.mp4
To construct or update the semantic map, the robot first needs to localize itself in the built map and traverse the environment to see the things. For this, either move the robot to initial position (x=0, y=0, yaw=0) in gazebo or delete the robot in gazebo and spawn it again ( make sure to tuck and set the head pose).
Launch the localization module while specifying the saved map.yaml file path.
roslaunch fetch navigation fetch_localize.launch map_file:=<absolute-path-of-map.yaml>
In another terminal publish the initial pose of the robot. This helps the localization moduls to have better initial estimate.
rosrun fetch_navigation pub_initial_pose.py
To construct the semantic map, start the object detection and segmentation module, and perform object association while traversing the environment. Run the following scripts simultaneously in two terminals to construct the semnantic map while traversing the environment.
cd AutoX-SemMap/robokit
python semantic_map_construction.py
cd AutoX-SemMap/scripts
python navigate.py
Once the traversal is completed, close the scripts and the semantic map is stored as graph.json
semconstruct.mp4
Similar to construction phase, run the following scripts simultaneously in two terminals to update the semantic map while traversing the environment. You may delete, add or relocate objects in the gazebo environment.
cd AutoX-SemMap/robokit
python semantic_map_update.py
cd AutoX-SemMap/scripts
python navigate.py
Once the traversal is completed, close the scripts and the updated semantic map is stored as graph_updated.json
Since fetch robot doesn't have a GPU, we assume you have a remote system connected to Fetch robot via WiFi or Ethernet connection. You can use this repository as it is and follow the instructions to install it on your remote system. You can skip the installation of gazebo and the initialization section as you have the actual robot. Other than that you can run the sections Mapping and Exploration , Environment Traversal planning , Semantic Map Construction and Update as described.
We assume that either your robot has a GPU or you use a remote system with GPU and connect to robot, and have your ros workspace containing mapping and localization packages. Assuming you have the workspace named "catkin_ws".
-
Follow steps mentioned in Installation - B, C, D, F sections.
-
Clone the exploration package in your workspace and compile your workspace
cd catkin_ws/src
git clone https://github.com/IRVLUTD/dynamic-window-frontier-exploration.git
Compile your workspace.
-
Next, to run mapping and exploration, follow steps mentioned in Mapping and Exploration (skip section A in it and run your mapping module).
-
Next, follow the instructions in Environment Traversal planning, to generate the traversal trajectory.
-
Finally, to construct the semantic map and also perform the update step, follow the instructions in Semantic Map Construction and Update ( skip section A in this and run your localization module).
These videos showcase brief clips of experiments demonstrating autonomous exploration and mapping, and semantic map construction in a large indoor environment measuring 96m x 93m. Click to view the vidoes.

Video 1: Explorationand Mapping |

Video 2: Semantic Map construction |
This work was supported by the DARPA Perceptuallyenabled Task Guidance (PTG) Program under contract number HR00112220005 and the Sony Research Award Program. The work of T. Summers was supported by the United States Air Force Office of Scientific Research under Grant FA9550- 23-1-0424 and the National Science Foundation under Grant ECCS-2047040. We would like to thank our colleague, Jishnu Jaykumar P, for his assistance during the experiments.

