Project Page | Video | Paper
This repository contains code for DSP-SLAM, an object-oriented SLAM system that builds a rich and accurate joint map of dense 3D models for foreground objects, and sparse landmark points to represent the background. DSP-SLAM takes as input the 3D point cloud reconstructed by a feature-based SLAM system and equips it with the ability to enhance its sparse map with dense reconstructions of detected objects. Objects are detected via semantic instance segmentation, and their shape and pose are estimated using category-specific deep shape embeddings as priors, via a novel second order optimization. Our object-aware bundle adjustment builds a pose-graph to jointly optimize camera poses, object locations and feature points. DSP-SLAM can operate at 10 frames per second on 3 different input modalities: monocular, stereo, or stereo+LiDAR.
More information and the paper can be found at our project page.
DSP-SLAM: Object Oriented SLAM with Deep Shape Priors, Jingwen Wang, Martin Rünz, Lourdes Agapito, 3DV '21
If you find our work useful, please consider citing our paper:
@inproceedings{wang2021dspslam,
  author={Jingwen Wang and Martin Rünz and Lourdes Agapito},
  booktitle={2021 International Conference on 3D Vision (3DV)},
  title={DSP-SLAM: Object Oriented SLAM with Deep Shape Priors},
  pages={1362--1371}
  year={2021}
  organization={IEEE}
}
We have conducted most experiments and testings in Ubuntu 18.04 and 20.04, but it should also be possible to compile in other versions. You also need a powerful GPU to run DSP-SLAM, we have tested with RTX-2080 and RTX-3080.
We provide two building scripts which will install all the dependencies and build DSP-SLAM for you. Jump to here for more details. If you want to have a more flexible installation then please read through this section carefully and refer to those two scripts as guidance.
We have used many new features in C++17, so please make sure your C++ compiler supports C++17. For g++ versions, we have tested with g++-7, g++-8 and g++-9.
We use OpenCV for image related operations. Please make sure you have at least version 3.2. We have tested with OpenCV 3.4.1.
We use Eigen3 for matrix operations. Please make sure your Eigen3 version is at least 3.4.0. There is known compilation errors for lower versions.
Pangolin is used for visualization the reconstruction result. Dowload and install instructions can be found at: https://github.com/stevenlovegrove/Pangolin.
We use modified versions of the DBoW2 library to perform place recognition and g2o library to perform non-linear optimizations. Both modified libraries (which are BSD) are included in the Thirdparty folder.
As our shape reconstruction is implemented in Python, we need to enable communication between C++ and Python using pybin11. It is added as a submodule in this project, you just need to make sure you specify option --recursive when cloning the repository.
Our prior-based object reconstruction is implemented in Python with PyTorch, which also requires MaskRCNN and PointPillars for 2D and 3D detection.
- Python3 (tested with 3.7 and 3.8) and PyTorch (tested with 1.10) with CUDA (tested with 11.3 and 10.2)
- mmdetection and mmdetection3d
- Others: addict, plyfile, opencv-python, open3d
Compiling and installing mmdetection3d will require nvcc, so you need to make sure the CUDA version installed using conda matches the CUDA installed under your usr/local/cuda-*. e.g. If you have CUDA 10.2 installed under /usr/local/cuda and would like to install PyTorch 1.10, you need to install the prebuilt PyTorch with CUDA 10.2.
conda install pytorch torchvision torchaudio cudatoolkit=10.2 -c pytorch
You can check the supported CUDA version for precompiled packages on the PyTorch website. We have provided two example environment files which have CUDA 10.2/11.3 and PyTorch 1.10 for your reference. If you have CUDA 10.2 or CUDA 11.3 installed in your /usr/local, you can use it to set up your Python environment:
conda env create -f environment.yml
conda activate dsp-slam
Then you will still need to install mmdetection and mmdetection3d mannually. More details instruction can be found here.
Clone the repository:
git clone --recursive https://github.com/JingwenWang95/DSP-SLAM.git
For your convenience, we provide a building script build_cuda102.sh and build_cuda113.sh which show step-by-step how DSP-SLAM is built and which dependencies are required. Those scripts will install everything for you including CUDA (version is specified in the script name) and assume you have CUDA driver (support at least CUDA 10.2) and Anaconda installed on your computer. You can select whichever you want. e.g. If you your GPU is RTX-30 series which doesn't support CUDA 10 you can try with the one with CUDA 11.3.
You can simply run:
./build_cuda***.sh --install-cuda --build-dependencies --create-conda-env
and it will set up all the dependencies and build DSP-SLAM for you. If you want to have a more flexible installation (use your own CUDA and Pytorch, build DSP-SLAM with your own version of OpenCV, Eigen3, etc), Those scripts can also provide important guidance for you.
When building DSP-SLAM the following CMake options are mandatory: PYTHON_LIBRARIES, PYTHON_INCLUDE_DIRS, PYTHON_EXECUTABLE. Those must correspond to the same Python environment where your dependencies (PyTorch, mmdetection, mmdetection3d) are installed. Make sure these are correctly specified!
Once you have set up the dependencies, you can build DSP-SLAM:
# (assume you are under DSP-SLAM project directory)
mkdir build
cd build
cmake -DPYTHON_LIBRARIES={YOUR_PYTHON_LIBRARY_PATH} \
      -DPYTHON_INCLUDE_DIRS={YOUR_PYTHON_INCLUDE_PATH} \
      -DPYTHON_EXECUTABLE={YOUR_PYTHON_EXECUTABLE_PATH} \
      ..
make -j8
After successfully building DSP-SLAM, you will have libDSP-SLAM.so at lib folder and the executables dsp_slam and dsp_slam_mono under project root directory.
You can download the example sequences and pre-trained network model weights (DeepSDF, MaskRCNN, PointPillars) from here. It contains example sequences of KITTI, Freiburg Cars and Redwood Chairs dataset.
After obtaining the 2 binary executables, you will need to suppy 4 parameters to run the program: 1. path to vocabulary 2. path to .yaml config file 3. path to sequence data directory 4. path to save map. Before running DSP-SLAM, make sure you run conda activate dsp-slam to activate the correct Python environmrnt. Here are some example usages:
For KITTI sequence for example, you can run:
./dsp_slam Vocabulary/ORBvoc.bin configs/KITTI04-12.yaml data/kitti/07 map/kitti/07
For Freiburg Cars:
./dsp_slam_mono Vocabulary/ORBvoc.bin configs/freiburg_001.yaml data/freiburg/001 map/freiburg/001
For Redwood Chairs:
./dsp_slam_mono Vocabulary/ORBvoc.bin configs/redwood_09374.yaml data/redwood/09374 map/redwood/09374
If you supply a valid path to DSP-SLAM as the 4-th argument, after running the program you should get 3 text files under that directory: Cameras.txt, MapObjects.txt and MapPoints.txt. MapObjects.txt stores the reconstructed object(s) as shape code and 7-DoF pose. Before you can visualize the map, you need to extract meshes from shape codes by running:
python extract_map_objects.py --config configs/config_kitti.json --map_dir map/07 --voxels_dim 64
It will create a new directory under map/07 and stores all the meshes and object poses there. Then you will be able to visualize the reconstructed joint map by running:
python visualize_map.py --config configs/config_kitti.json --map_dir map/07
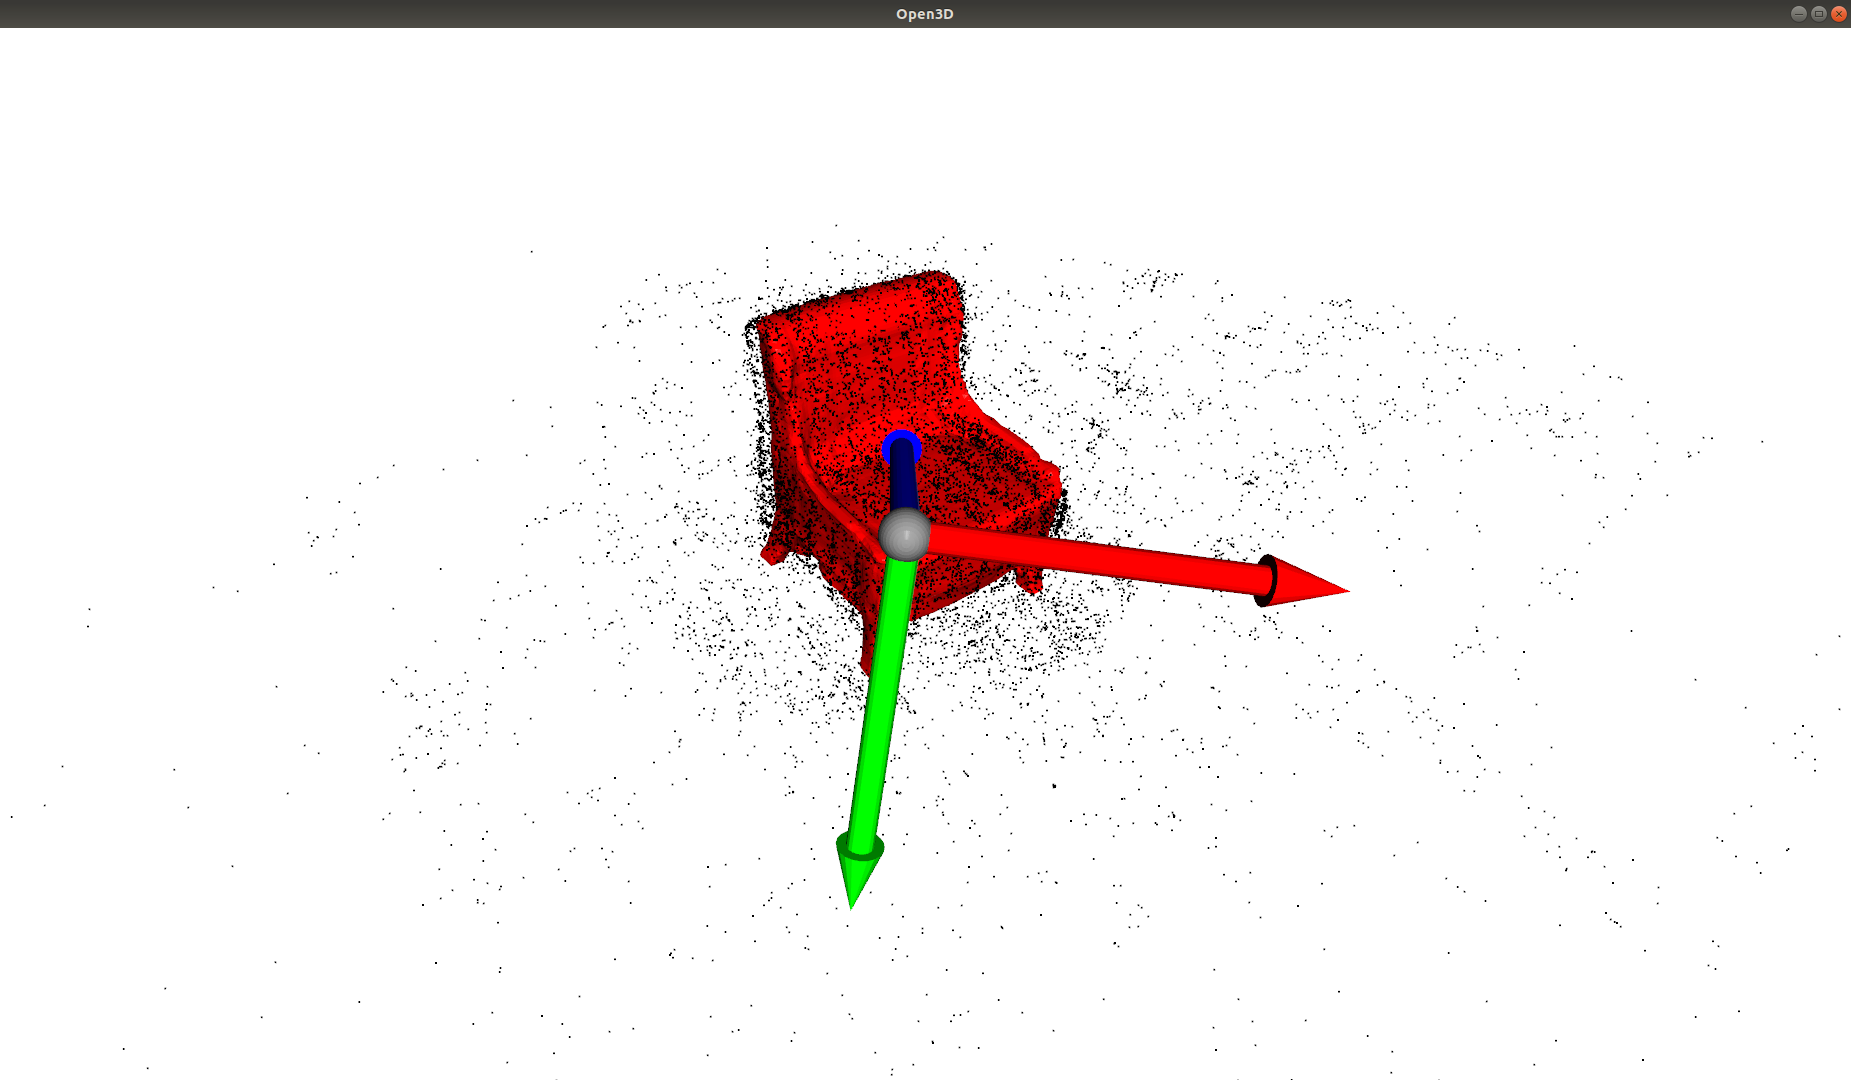
Then you will be able to view the map in an Open3D window:
We provide a Python script reconstruct_frame.py which does 3D object reconstruction from a single frame for KITTI sequences. Running it does not require any C++ stuff. Here is an example usage:
python reconstruct_frame.py --config configs/config_kitti.json --sequence_dir data/kitti/07 --frame_id 100
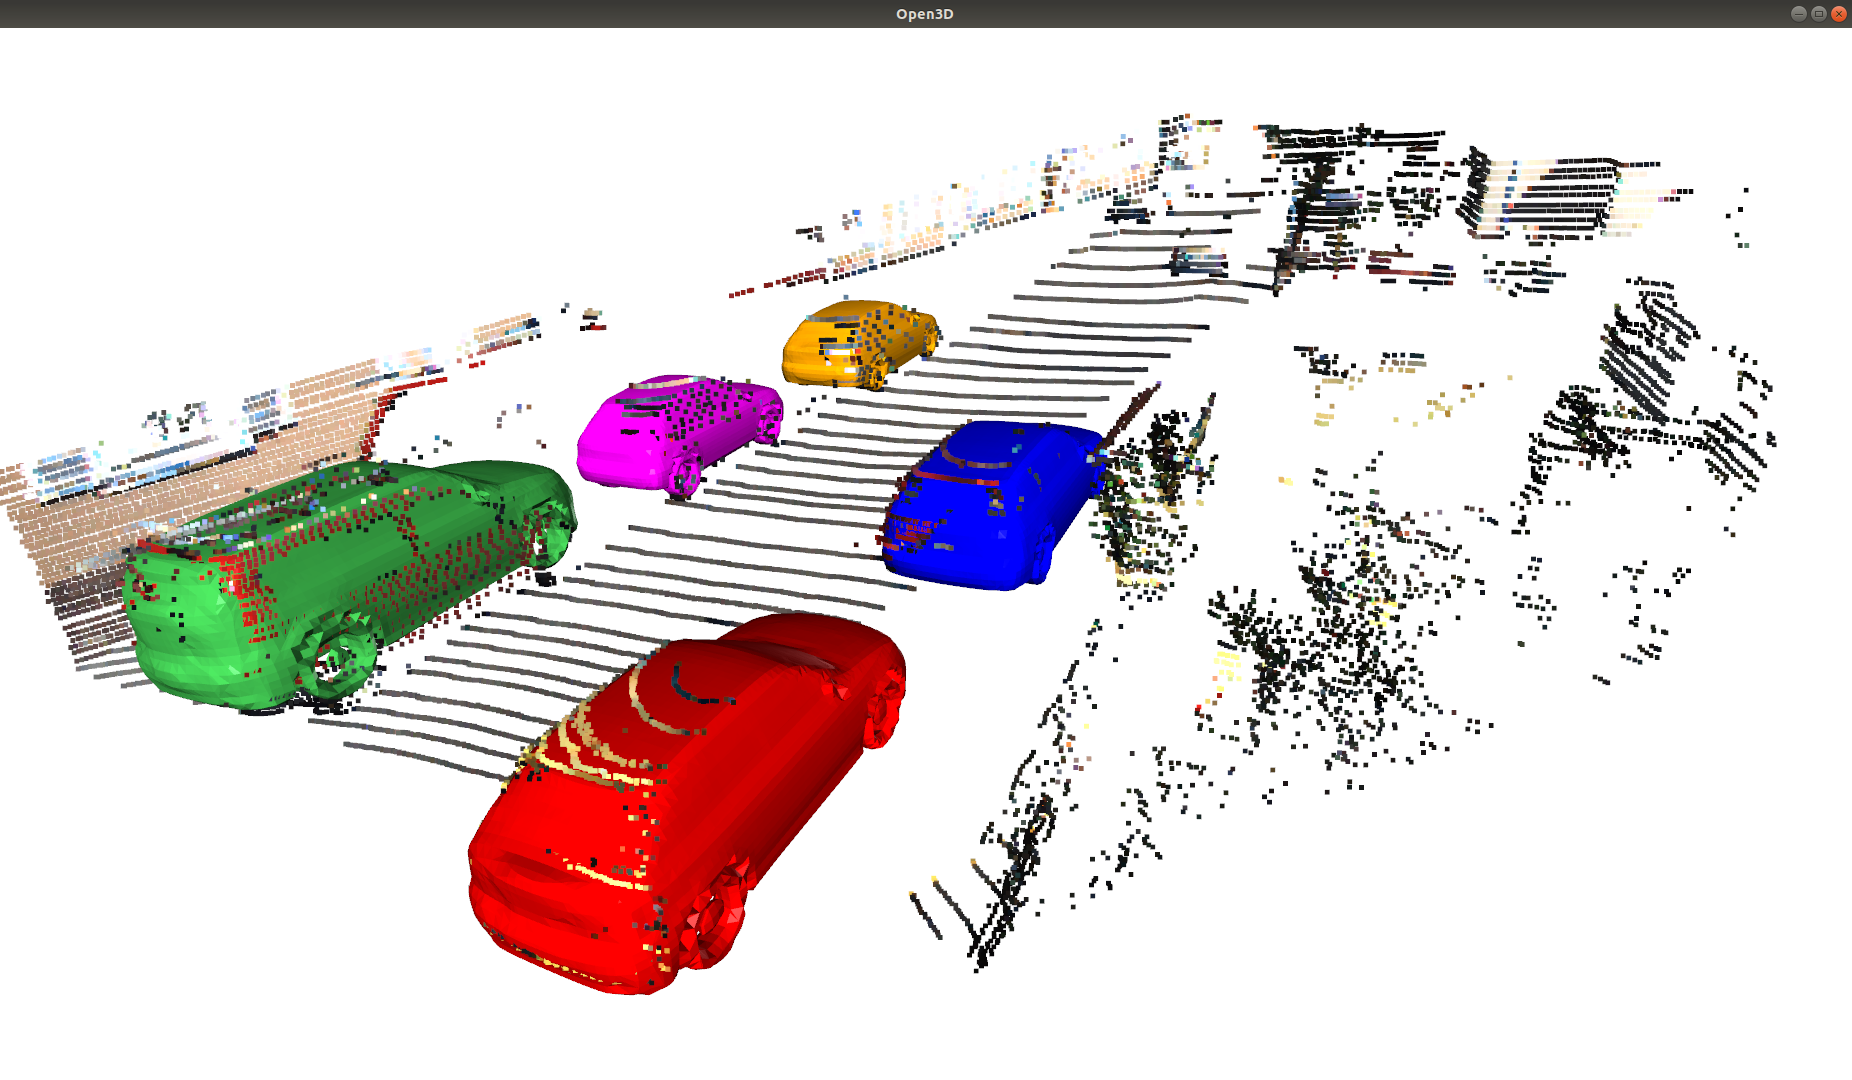
If you can run it smoothly you will see a Open3D window pop up. The figure below shows an example result:
If you can successfully build DSP-SLAM but get errors from Python side when running the program, then you can try supplying pre-stored labels and run DSP-SLAM with offline detector. We have provided 2D and 3D labels for KITTI sequence in the data. To run DSP-SLAM with offline mode, you will need to change the field detect_online in the .json config file to false and specify the corresponding label path.
If you want to create your own labels with your own detectors, you can follow the same format as the labels we provided in the KITTI-07 sequence.
- 3D labels contains 3D detection boxes under KITTI convention. Each
.lblfile consits of a numpy array of size Nx7, where N is the number of objects detected. Each row of the array is a 3D detection box: [x, y, z, w, l, h, ry]. More information about the KITTI coordinate system can be found from mmdetection3d or KITTI website. - 2D labels contains MaskRCNN detection boxes and segmentation masks. Each
.lblfile consists of of a dictionary with two keys:pred_boxesandpred_masks. Boxes and masks are stored as numpy array of size Nx4 and NxHxW.
If you have problem installing mmdetection3d but can run mmdetection smoothly, then you can start with mono sequences as they only require 2D detector.
DSP-SLAM includes the third-party open-source software ORB-SLAM2, which itself includes third-party open-source software. Each of these components have their own license. DSP-SLAM also takes a part of code from DeepSDF which is under MIT license: https://github.com/facebookresearch/DeepSDF.
DSP-SLAM is released under GPLv3 license in line with ORB-SLAM2. For a list of all code/library dependencies (and associated licenses), please see Dependencies.md.
Research presented here has been supported by the UCL Centre for Doctoral Training in Foundational AI under UKRI grant number EP/S021566/1. We thank Wonbong Jang and Adam Sherwood for fruitful discussions. We are also grateful to Binbin Xu and Xin Kong for their patient code testing!


