IPv6是旨在解决IPv4时代IP地址资源不足而提出的新一代互联网协议。今天,大多数高校校园网和运营商提供的4G/5G,应该都支持了IPv6+IPv4,并且为了鼓励IPv6的使用,我校(包括许多兄弟学校)校园网采取的收费模式是IPv4收费,IPv6免费。因此将流量转化为IPv6,可以合规地实现校园网免流上网。
依据上述思路,本文利用Google Cloud Plantform(GCP) 提供的免费额度,通过Vless(Reality)协议,搭建IPv6代理服务器以实现校园网免流量。
另外,由于代理服务器在境外,故此方案顺便可以翻墙,一举两得解决两大困难,解锁高校网络的最佳体验。因此特别适用于以下情况:
- 校园网流量不够用,又不想交包月费的同学
- 想要以最快速度,最安全,最自主可控的方案来翻墙(例如访问Google Scholar,Kaggle,OpenAI,以及YouTube,Google,Instagram等网站)的师生
- 对目前使用的第三方/学校提供公用的翻墙服务的性价比、安全性、隐私性、速度不满意的广大用户
已知缺点:
- 以Google机房为代理服务器,会被OpenAI发现,因此这个方法不能直接注册登录 ChatGPT,但其他第三方的GPT服务,如 poe.com 就没什么问题,因此也没什么影响。
- IPv6+Reality的方案比较新颖,部分流行的代理软件,如Clash-for-windows, ClashX支持不好。但值得一提的是,近期Clash系列项目风雨飘摇、前途未卜,不少项目删库跑路,众开发者在一夜间噤若寒蝉,在可见的将来社区或不再提供支持,故此时转向本文推荐的客户端,不失为好的契机。
Now Let’s Start!
-
A VISA/Master Debit/Credit Card
- Essential for GCP to obtain a $300 bonus for new users,
- AliPay might be Okay for other server providers, like Vultr)
- Refer to Appendix 1 for more information
-
A Computer
- Any System you like: Windows, MacOS, Linux…
- Connected to the global Internet (At least having access to Google, which means you need a so-called VPN for temporary use, if you don't use the GCP, other VPS providers may not need that)
- Your network has IPv6 access
-
A network cable (Optional)
VPS is short for a virtual private server, to make it easy, you can consider it as a remote computer that is on and connected to the internet 24/7. Domestic and international Internet giants provide such cloud services, the most famous ones are Amazon Web Services (AWS), Google Cloud Platform (GCP), Microsoft Azure, Alibaba Cloud, Tencent Cloud, and Huawei Cloud……
In order to go through the Great Fire Wall (GFW, the unofficial name for the censorship infrastructure set between China and the Internet, which bans you from Google), we might choose a VPS set out of China mainland. If you just need data fee-free domestic net access, you might choose a domestic VPS service. (Btw, you can use this method to pretend to be a resident in any province, to see if you will meet geographical discrimination on social media.)
Needless to say, the VPS must support IPv6. Internet Giants usually support IPv6. GCP has a $300-400 bonus for new users, so this time I will use it as an example.
-
Since all Google services have been locked by GFW since 2014, use any free VPNs temporally to go through the wall. If you don't know how to do it, consult your classmates.
-
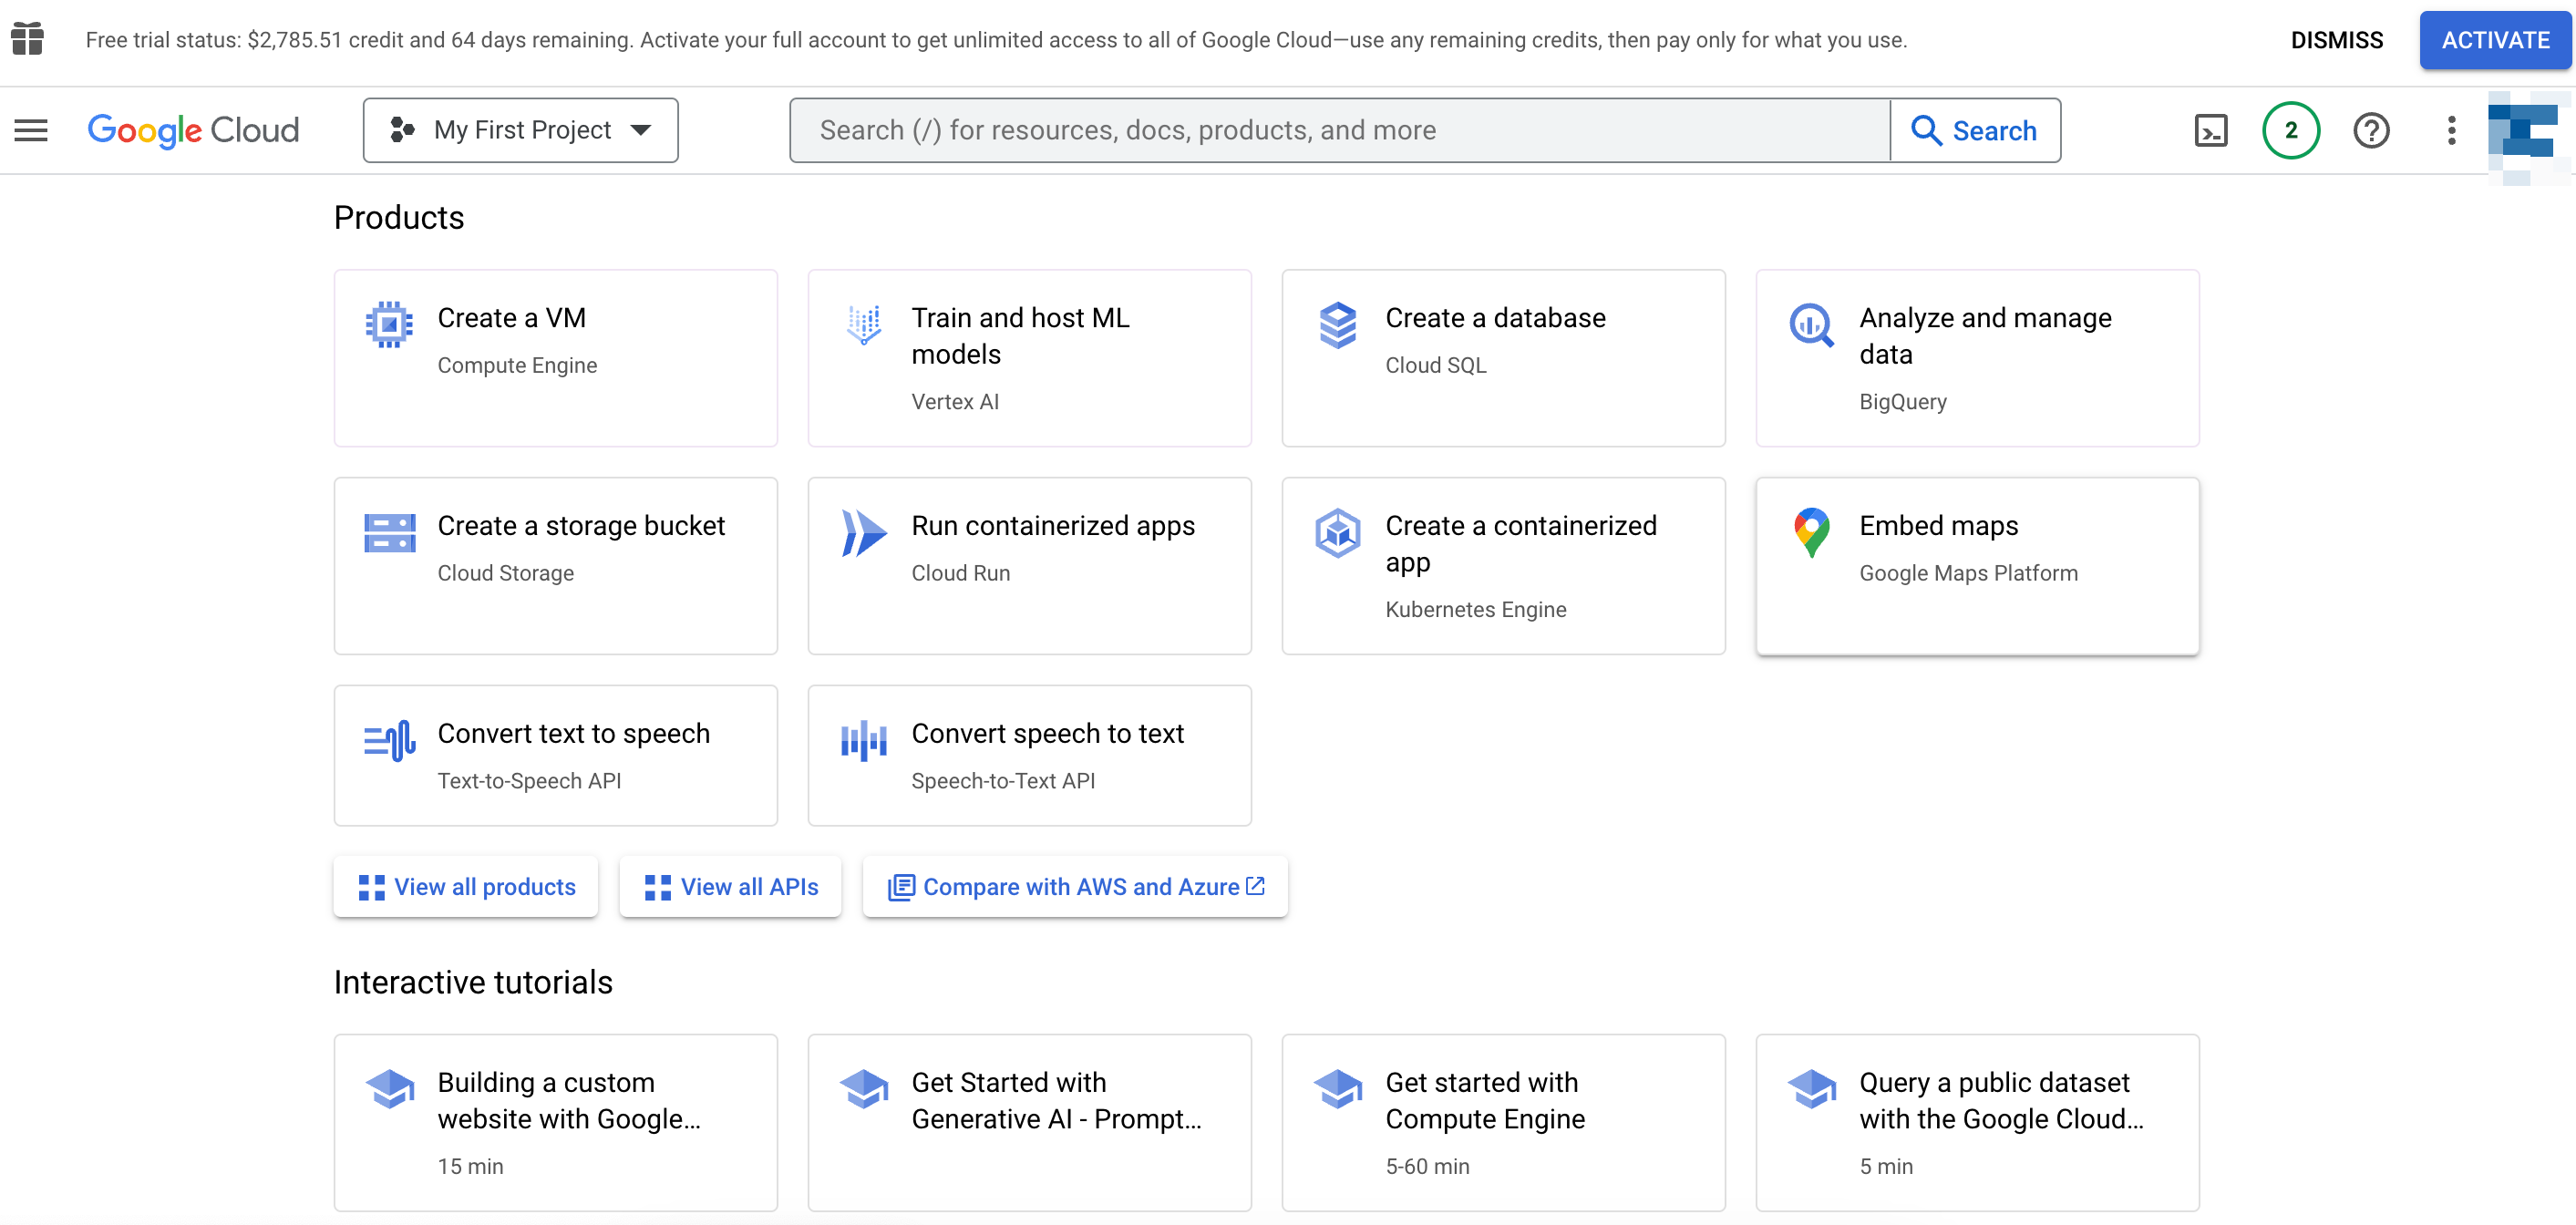
Click this link https://cloud.google.com to log in to Google Cloud Platform Using your Google account. (If you do not have a Google account, just sign one up.)
-
You will need your Visa/Master card in this step to verify your identity, just follow the procedure, and you can successfully log in to the following console.
-
Follow this document to open IPv6 support to your subnet. https://cloud.google.com/vpc/docs/create-modify-vpc-networks#subnet-enable-ipv6
If you don't see the IPv6 setting in this guide, which means the default VPC network doesn't support IPv6, create a new VPC network.
- Remember to open the ports that you need to use
-
Follow this document to set up a new VPS instance and configure IPv6 for instances https://cloud.google.com/compute/docs/ip-addresses/configure-ipv6-address
- Linux system supporting: Debian, Ubuntu, CentOS
- Arch: x86_64(amd64), aarch64(arm64)
Support any SSH Client (Putty, Xshell, Powershell, Terminal…..), the following code shows how to link to a remote VPS using the most traditional and common way, SSH in the terminal.
cd ~/.ssh
ssh-keygen cat id_rsa.pub
# Copy the key content printed on the screenhttps://cloud.google.com/compute/docs/connect/add-ssh-keys
https://cloud.google.com/compute/docs/connect/standard-ssh
# Ping the IPv6 IP address to check you can connect to the VPS
ping6 YOUR_IPV6_ADDRESS

# link to the VPS using SSH
ssh username@YOUR_IPV6_ADDRESSGoogle Cloud Platform also supports a modern browser shell, so you neither need to upload your public key nor need to use an SSH client for a secure connection. You can follow the document.
https://cloud.google.com/compute/docs/ssh-in-browser
When setting up your VPS on Google Cloud Platform (GCP), it's crucial to configure the firewall rules correctly. These rules control the incoming and outgoing network traffic to your VPS and ensure that only authorized traffic can access your server.
Keypoints
- Specify the target tags to apply the rule to the correct instances (your VPS).
- Define the source IP ranges. For IPv6, this will typically be your IPv6 address block.
- Set the allowed protocols and ports.
- For detailed information on how to set up and manage firewall rules, you can refer to Google Cloud's official documentation on Firewalls.
- Additionally, for examples of rules for common use cases and more intricate configurations, see Using Firewalls on Google Cloud.
Incorrect configuration of firewall rules can lead to vulnerabilities or access issues. For example, overly restrictive rules might block legitimate traffic, causing services to be unreachable and leading to errors like a 502 Bad Gateway. Conversely, too permissive rules might expose your server to potential threats. Always double-check your configurations and test them to ensure they work as expected.
- The following codes should be typed into the remote computer in its shell.
For Debian (Ubuntu included)
apt update -y
apt install curl wget -y
For CentOS (Red Hat)
apt update -y
apt install curl wget -yx-ui is a beautiful and convenient configuration panel that supports a lot of protocols. It is the link to the project. https://github.com/FranzKafkaYu/x-ui/
Install
# 中文版
bash <(curl -Ls https://raw.githubusercontent.com/FranzKafkaYu/x-ui/master/install.sh)
# for English users
bash <(curl -Ls https://raw.githubusercontent.com/FranzKafkaYu/x-ui/master/install_en.sh)if the command doesn't work try this break-up version instead.
# change the working directory
cd ~
# Download the script
curl -L https://raw.githubusercontent.com/FranzKafkaYu/x-ui/master/install.sh > install.sh
# add executive authority
sudo chmod +x install.sh
# run
sudo ./install.sh
If it goes properly, you may asked to set up a password and username, and then the x-ui interface is set.
To check the configuration of x-ui:
sudo x-uiYou will see:
  x-ui 面板管理脚本
  0. 退出脚本
————————————————
  1. 安装 x-ui
  2. 更新 x-ui
  3. 卸载 x-ui
————————————————
  4. 重置用户名密码
  5. 重置面板设置
  6. 设置面板端口
  7. 查看当前面板信息
————————————————
  8. 启动 x-ui
  9. 停止 x-ui
  10. 重启 x-ui
  11. 查看 x-ui 状态
  12. 查看 x-ui 日志
————————————————
  13. 设置 x-ui 开机自启
  14. 取消 x-ui 开机自启
————————————————
  15. 一键安装 bbr (最新内核)
  16. 一键申请SSL证书(acme申请)
  17. 配置x-ui定时任务

面板状态: 已运行
是否开机自启: 是
xray 状态: 运行
请输入选择 [0-17],查看面板登录信息请输入数字:
Type:
7You will see:
[INF] 当前面板信息[current panel info]:
面板版本[version]: 0.3.4.4:20230717
用户名[username]: XXXXX #remember it!
密码[userpasswd]: XXXXXXX #remember it!
监听端口[port]: XXXXX #remember it
根路径[basePath]: /XXXX/ #remember it- Go to the browser and type in the address block:
http://[YOUR_IPV6_ADDRESS]:port/basePath/
For example my IPv6 address is 2600:1900:1134:268:: , my port is 12345, my basePath is /hp23/, then I should type:
http://[2600:1900:1134:268::]:12345/hp23/
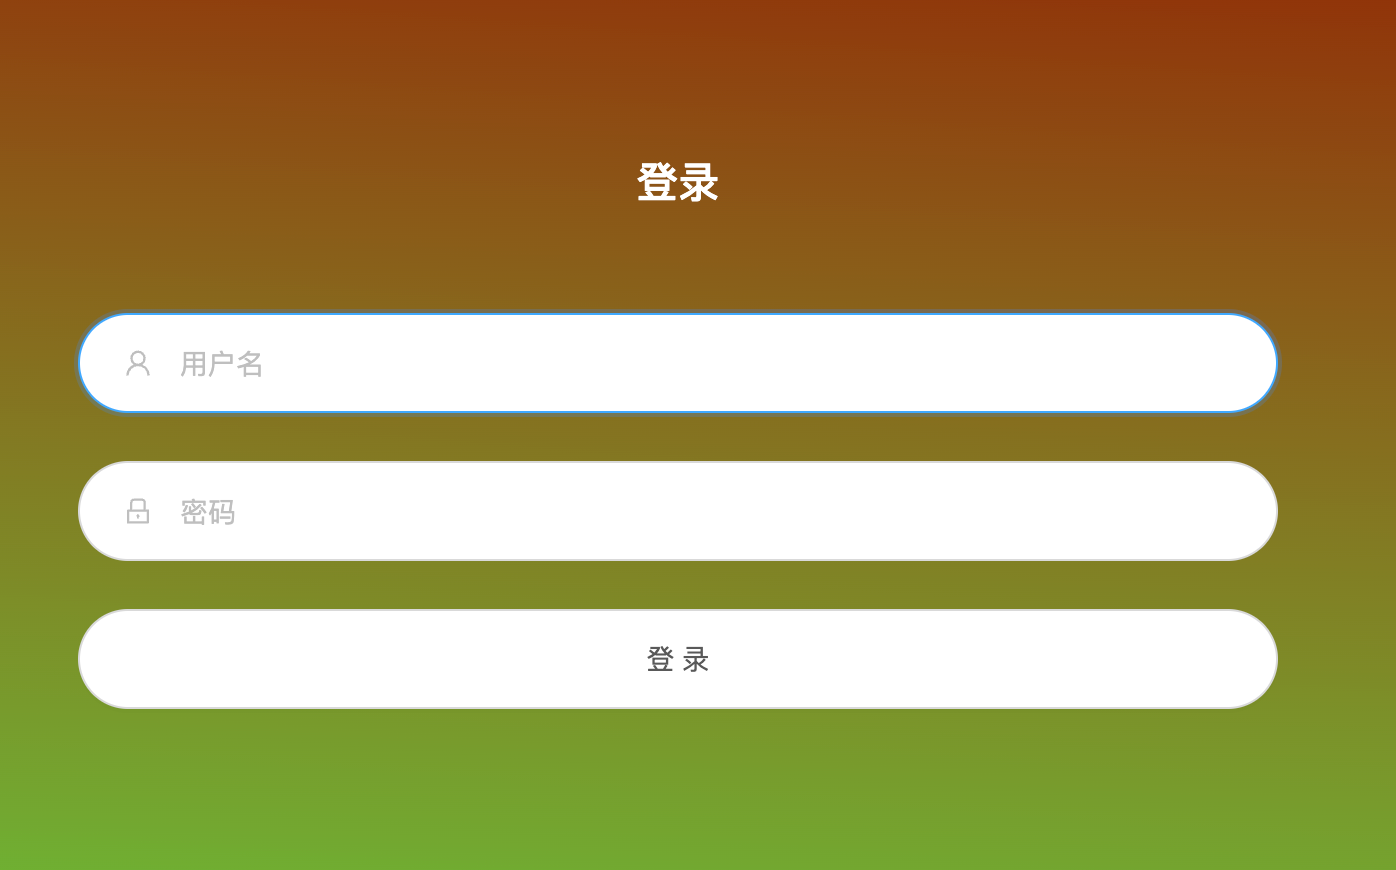
- Then you can see the following page:
Use your username and passcode to log in.
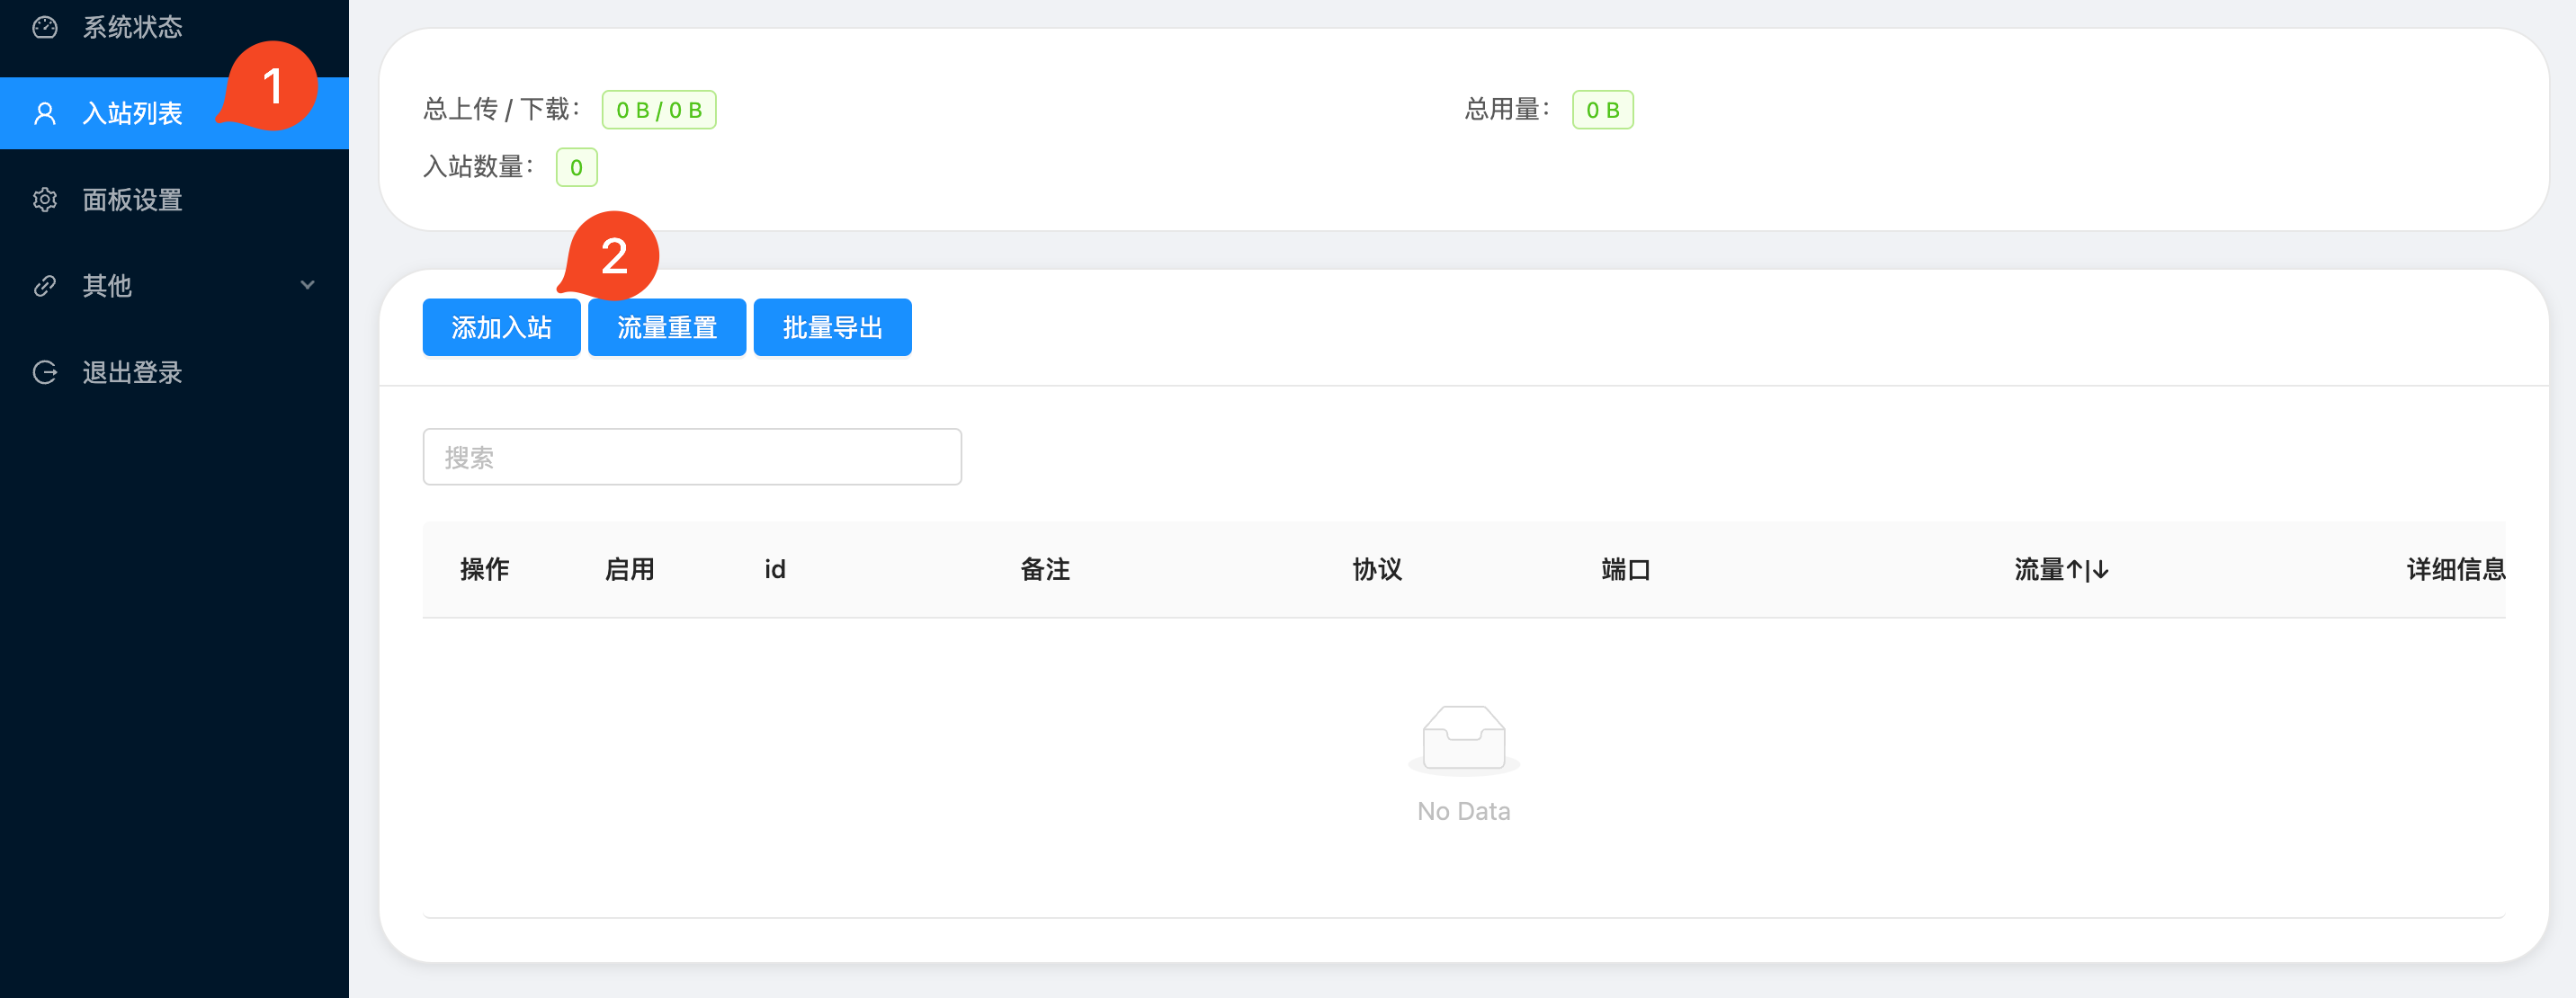
- Set up a node:
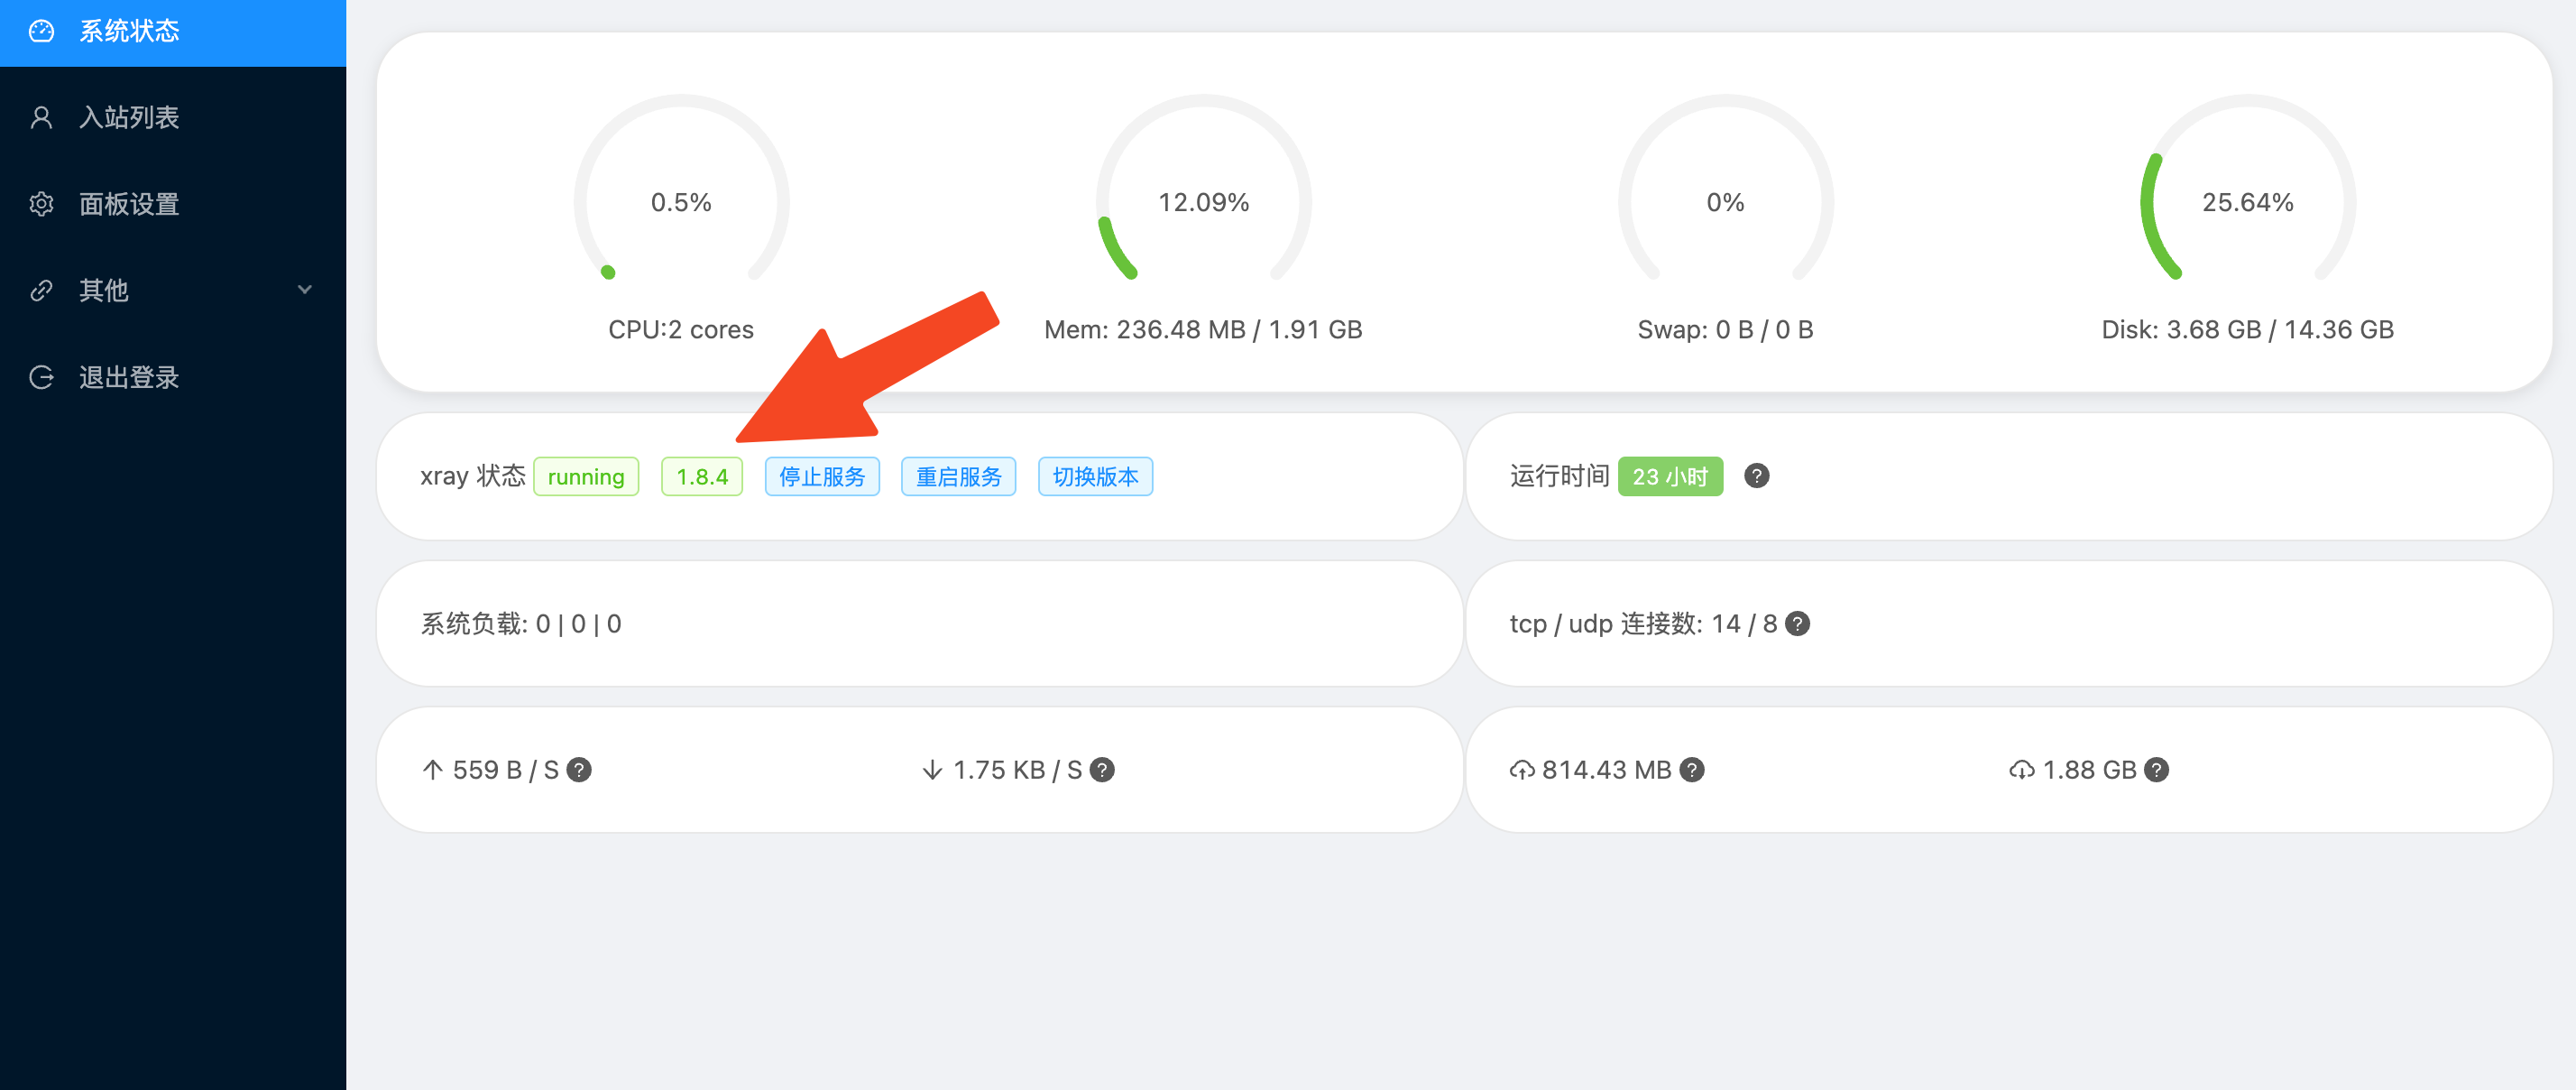
- check the core version and change to the most up-to-date version
- Add a node
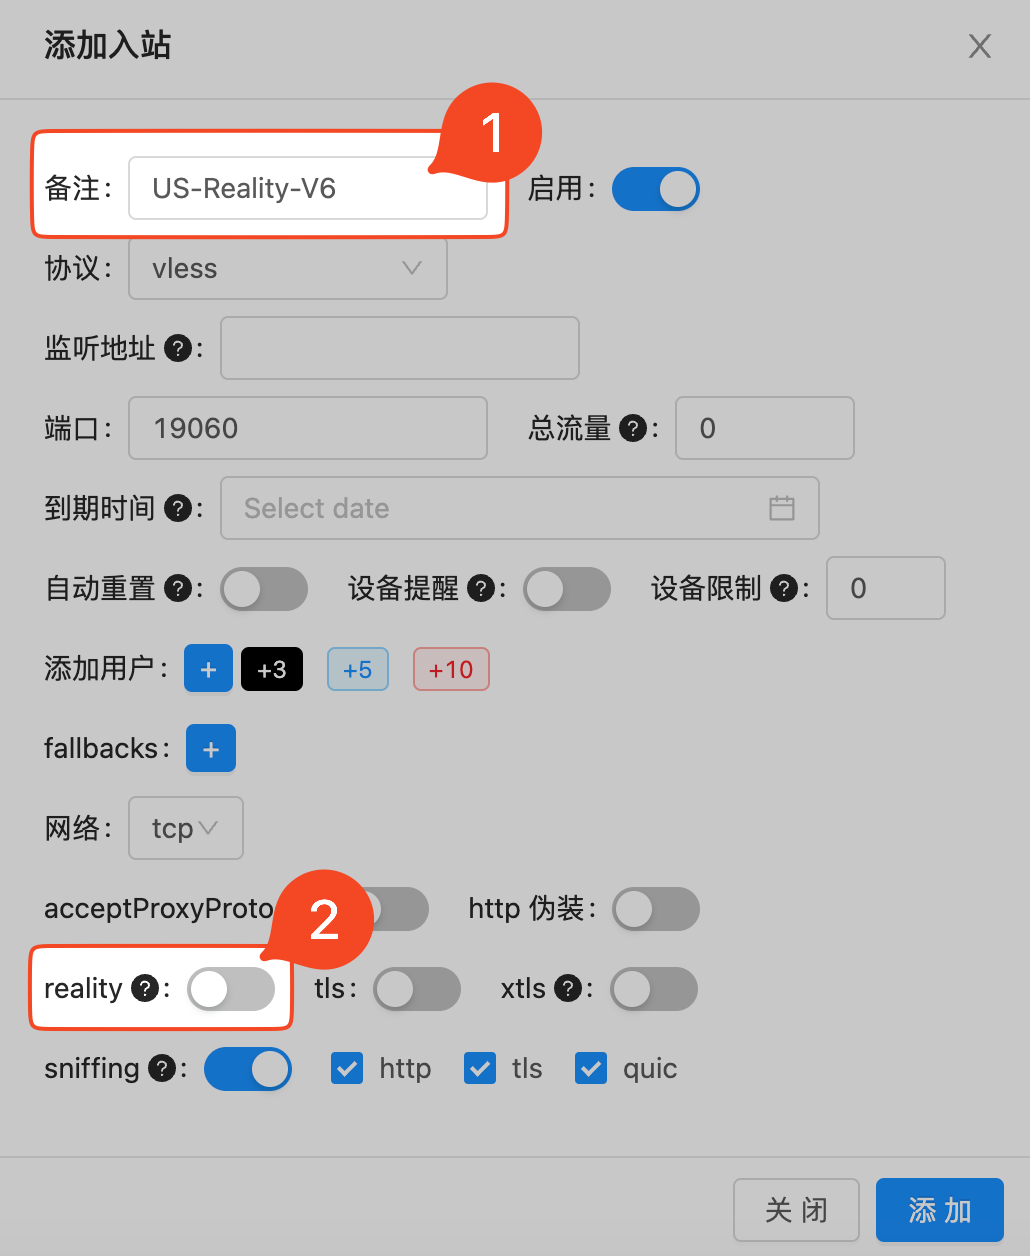
- Name the node and open Reality
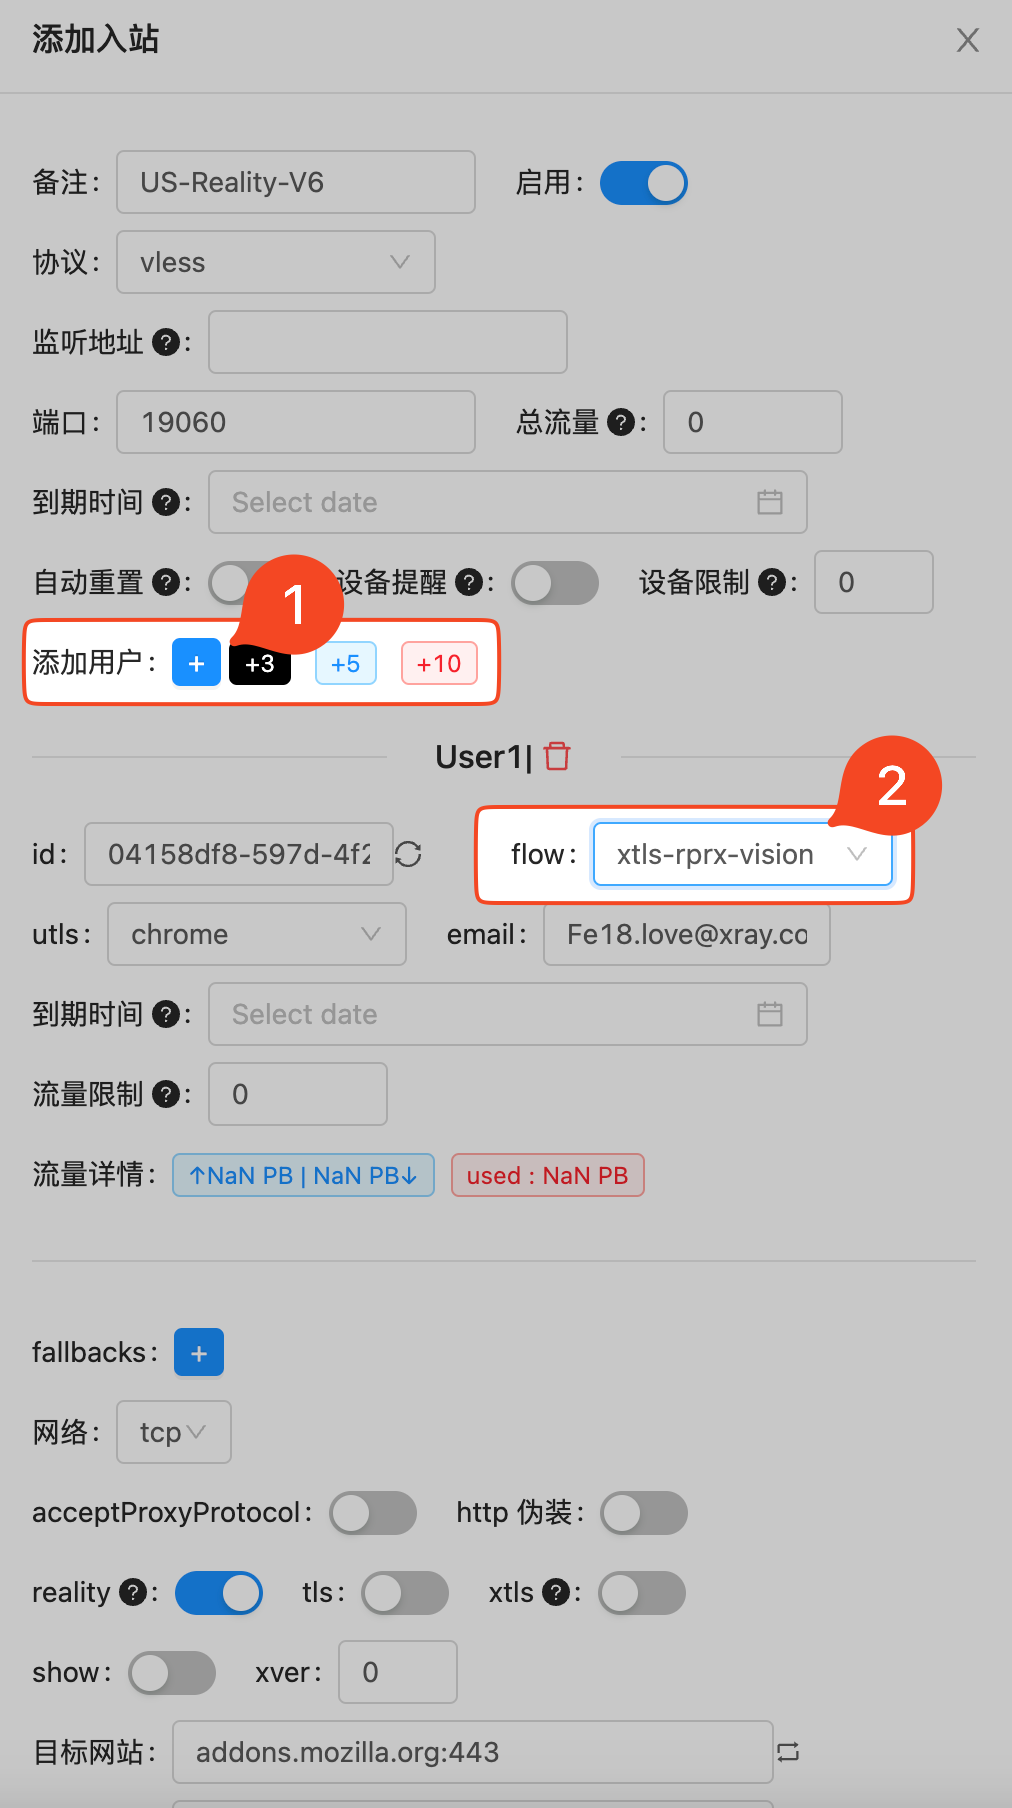
- Add user and set flow control system
- Save
BBR is a TCP congestion control algorithm designed by Google researchers and built for the congestion of the modern internet, it can boost your network speed.
Method 1
echo "net.core.default_qdisc=fq" >> /etc/sysctl.conf
echo "net.ipv4.tcp_congestion_control=bbr" >> /etc/sysctl.conf
sysctl -p
Method 2
wget -N --no-check-certificate "https://raw.githubusercontent.com/chiakge/Linux-NetSpeed/master/tcp.sh" && chmod +x tcp.sh && ./tcp.shV2rayN
Shadowrocket (iPad Version)
Shadowrocket
V2rayNG
Other clients may refer to Appendix 3.
Best Practice: (Speed Up to 1000Mbps!)
- Use a network cable to connect to an RJ45 Port in your Dormitory
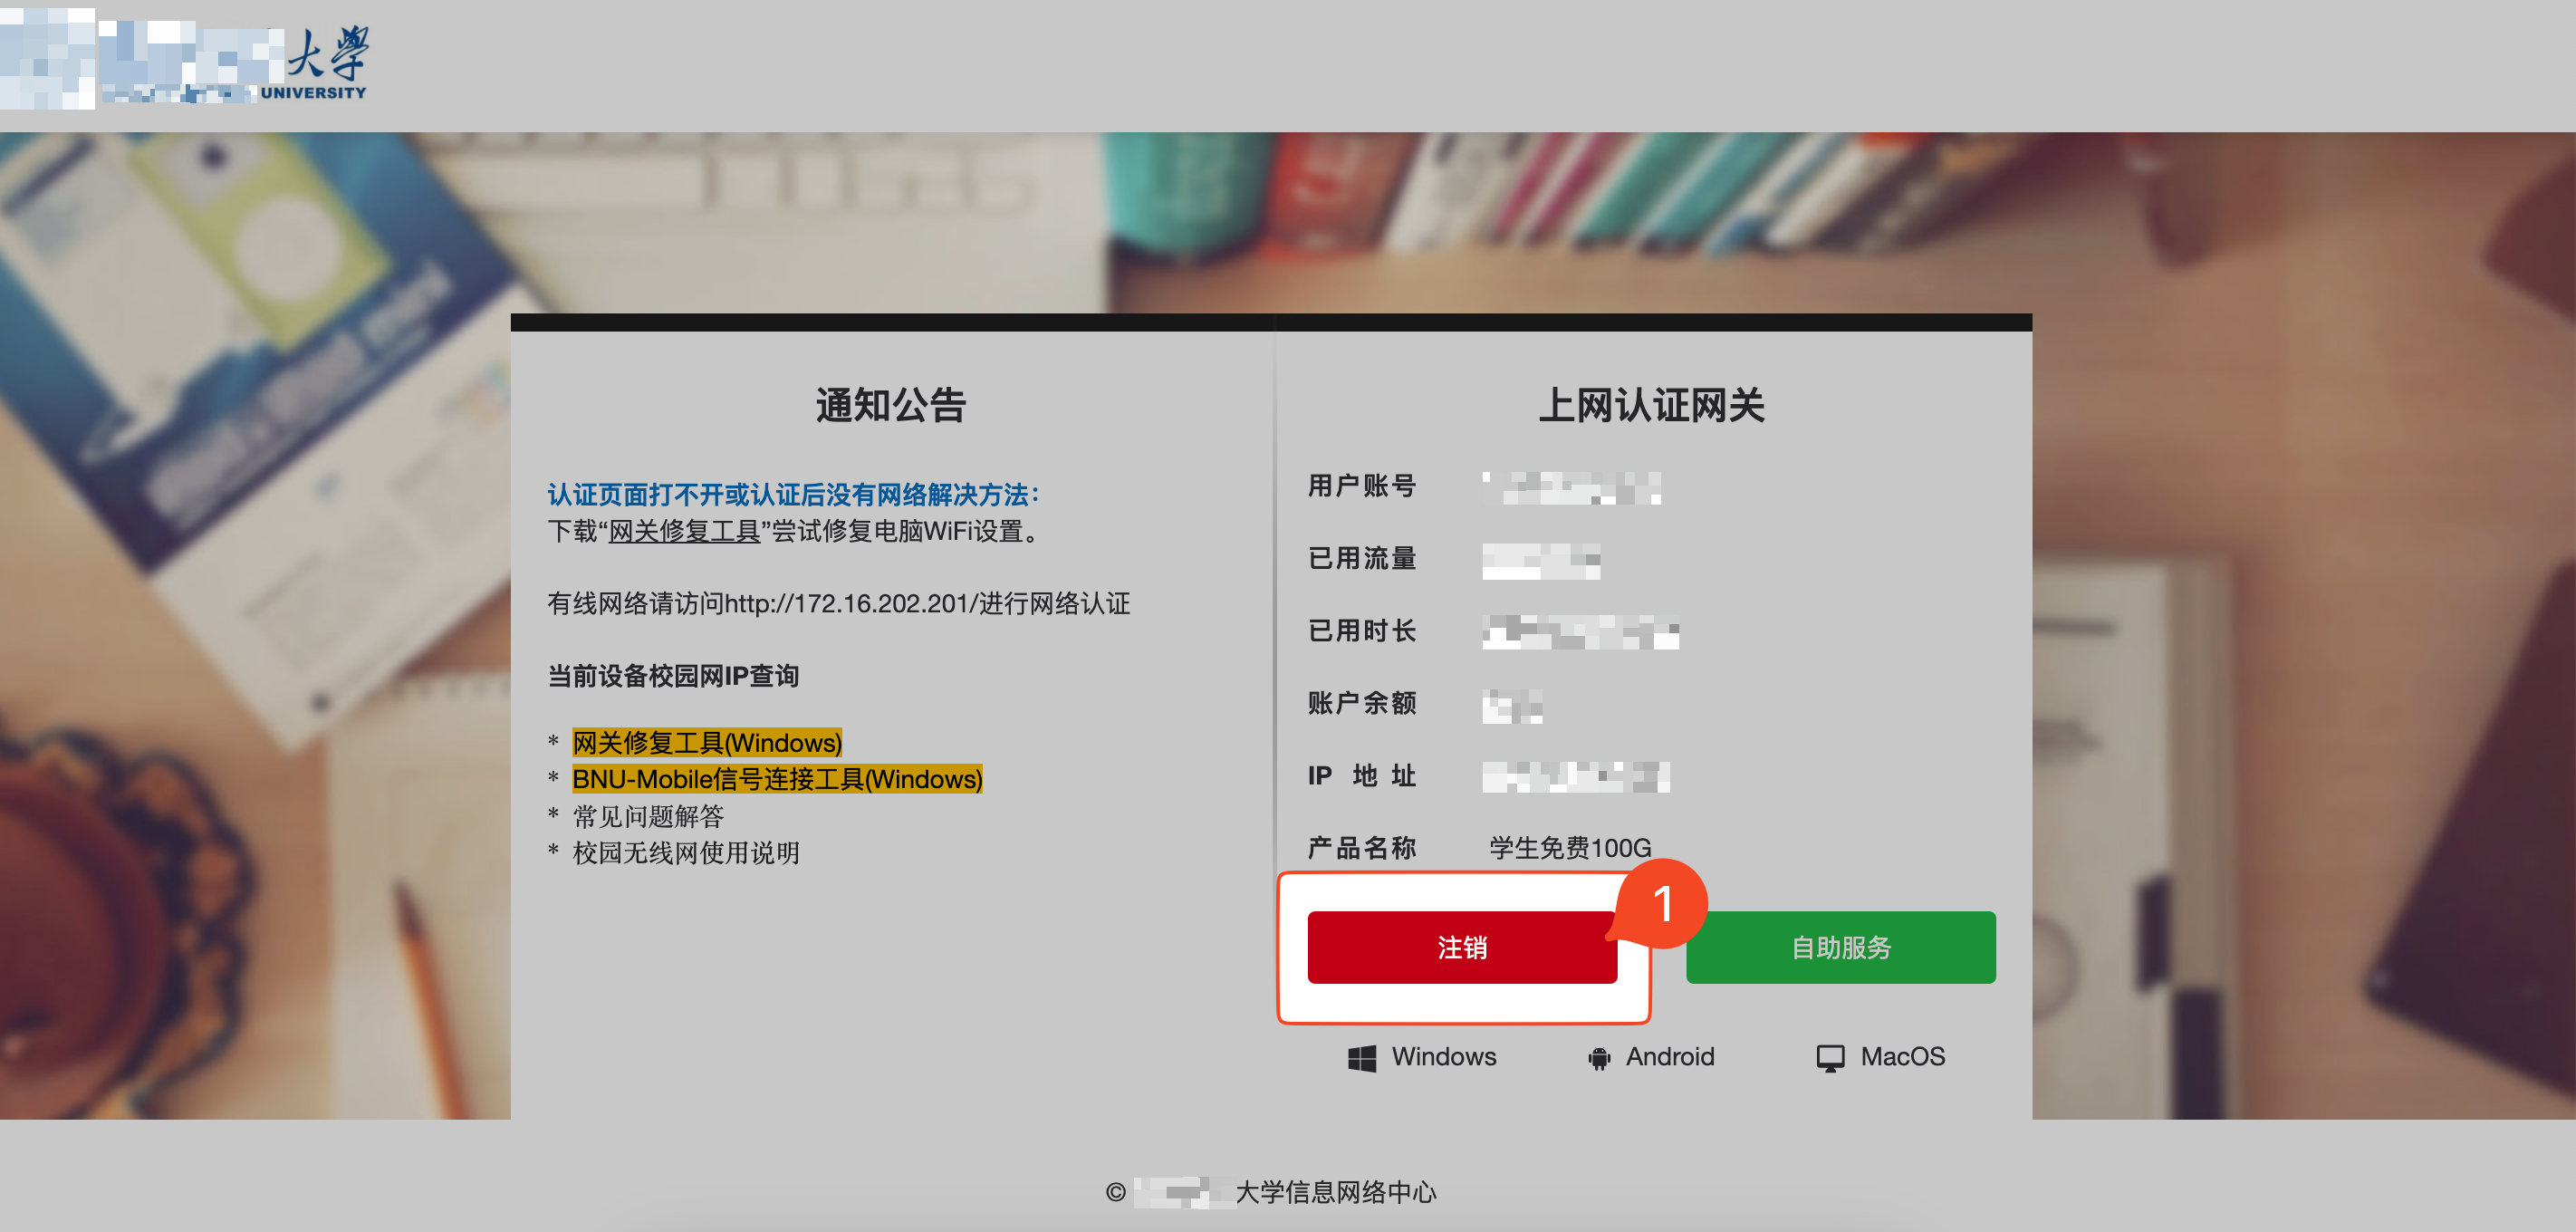
- Even no need to log in to the school internet gateway.
- Turn on the proxy client (For example, the V2rayN icon will turn red)
- Enjoy the FREE internet.
Other choices:
- Connecting to school wifi, like BNU-Mobile using your phone
- Turn on a proxy client like Shadowrocket.
- Enjoy the FREE internet.
- How to get a VISA/Master Card (For Chinese College Students)
Students who have traveled internationally, or gone online oversea shopping might be familiar with these VISA/Master Cards. That usually includes several categories, including Credit, Debit, and Prepaid Debit.
According to regulations, now it is nearly impossible for a student without a paid job to get a V/M credit card from banks in China Mainland alone. Most undergraduate students are only allowed to open a UnionPay credit card without any overdraft, to be honest, these "fake" UnionPay credit cards are useless.
I highly recommend opening an attached card of your parent's credit account. You can share the overdraft limit of your parent and get all the benefits and convenience of a credit card. Both you and your parent can pay the credit card bill. The only drawback is that your parent can monitor your consumption. If you can not get an attached card, another recommendation is to apply for a VISA/Master Debit card, one of the popular choices is BOC Monet Debit (Mastercard).
However, if you are going abroad or to HK SAR in the near future, you may easily open such accounts in their bank branches. In Bank of America, you may even get a cash-back credit card without an SSN (Social Secure Number, similar to an ID number). In HK, you can easily open a digital bank account (like ZA Bank) using your phone.
Another choice is a prepaid VISA/Master debit card. Fintech companies like Wise, PayPal, and Venmo not only provide low-cost and fast financial services but may also provide prepaid debit, and you can even buy a prepaid debit card from most convenience stores in the US. However, it's hard to activate unless you already have a foreign-issued card or a valid foreign address or residence ID.
Another category of easy-to-apply VISA/Master debit is called USDT card, it was first designed to help cryptocurrency holders consume or withdraw cash safely, and with the increasing needs of GPT-4.0 subscriptions for non-US Users, they have been gaining popularity. But remember many of the USDT card companies are in a gray area or, worse: high service fees, no deposit insurance, taking money and running, disobeying foreign exchange management law, selling your personal data (if KYC is needed), and even involving in money laundering, so unless you totally understand the industry, that can be nightmares for any green hand users out of the crypto circle.
- IPv6 Access Check
Open this link https://www.test-ipv6.com/ if you get 10 scores, then you have full access to the IPv6. OR Open https://byr.pt OR Manually check the network settings.
- Other GUI Clients
- OpenWrt
- Windows
- Android
- iOS & macOS arm64
- macOS arm64 & x64
- Linux
Others that support VLESS, XTLS, REALITY, XUDP, PLUX...
- iOS & macOS arm64
- Xray Tools
- Xray Wrapper
- XrayR
- Clash.Meta
- sing-box
[1] https://github.com/XTLS/Xray-core
