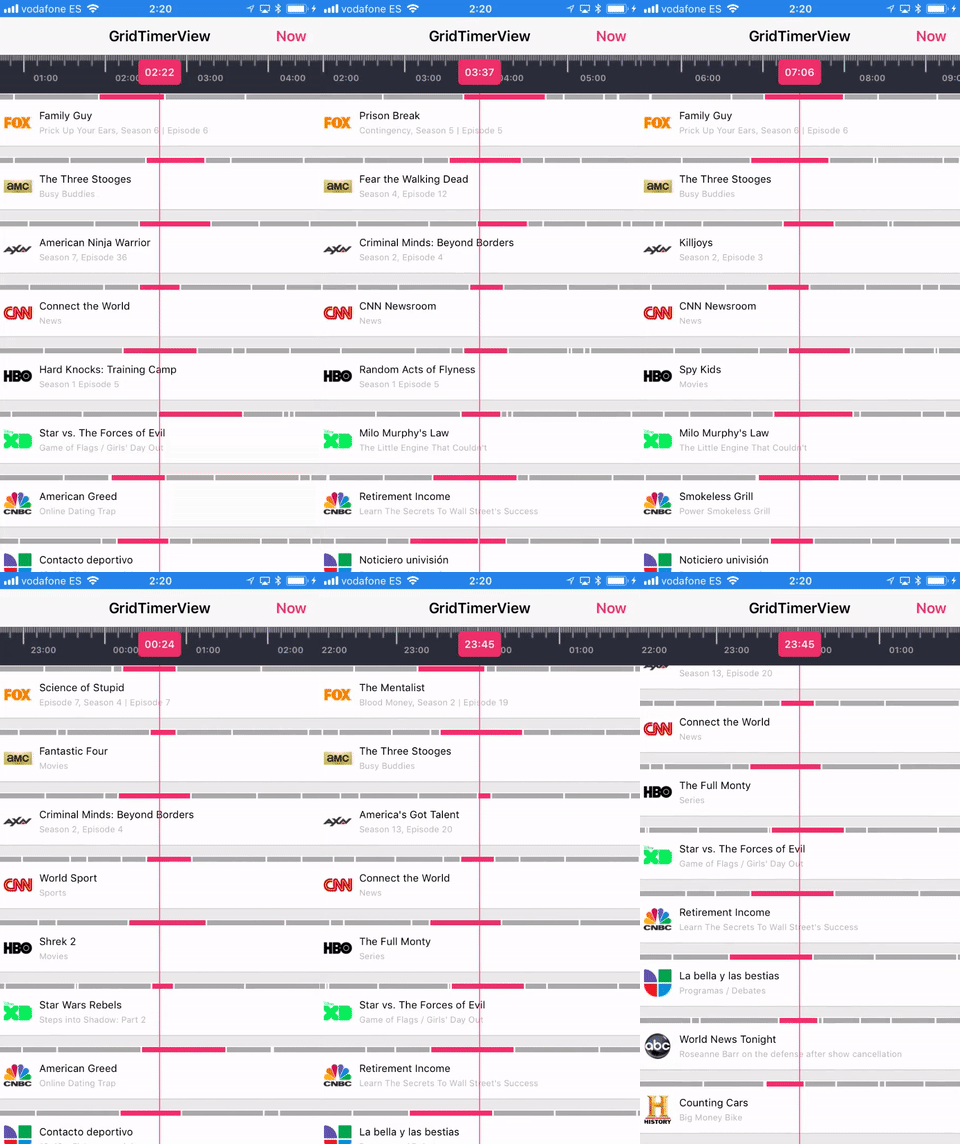
With GridTimerView you can show a schedule with timer controller. Each cell can manage multiple events with different durations. It's perfect for listing TV programs shows in a simulated table. And the good news is that you can customise most of these features with your own fonts, colors, sizes... and many more.
- Show multiple events for each cell
- Totally customizable
- Smooth scrolling experience
- Easy usage
- Supports iOS, developed in Swift 4
It is important to know that this pod is composed of rows. Each row has a set of events with start time and end time of type date. You must create a custom view to show in each row.
Once you've installed this pod, you can follow next steps. It's really simple:
Add a UIView in the xib where you want to place GridTimerView. Then you have to input the class name in the view, you can change this in the identity inspector of the interface builder. Remember to input GridTimerView in both (Class & Module)
Then, connect the IBOutlet in your UIViewController
@IBOutlet weak var gridTimerView: GridTimerView!Make your own custom item subclassing UIView. Then you can use it in DataSource protocol.
The first way to customize this GridTimerView is implementing delegate and datasource methods. These methods handle the most common use cases.
gridTimerView.dataSource = self
gridTimerView.delegate = selfYou can setup GridTimerViewwith your own parameters. See default values:
var configuration = GridTimerConfiguration()

// Font for timer labels in rule
configuration.ruleFont = UIFont.systemFont(ofSize: 10, weight: .semibold)

// Color for timer labels in rule
configuration.ruleTextColor = UIColor.lightGray

// Days before today for initial time
configuration.ruleDaysFrom = 1

// Days after today for end time
configuration.ruleDaysTo = 2

// Rule ticks color
configuration.ruleTicksColor = UIColor.white

// Rule background color
configuration.ruleBackgroundColor = UIColor.darkGray

// Font used in current time
configuration.timerFont = UIFont.systemFont(ofSize: 12, weight: .semibold)

// Background color used in current time
configuration.timerColor = UIColor.blue

// Text color used in current time
configuration.timerTextColor = UIColor.white

// Selected date line color
configuration.lineColor = UIColor.blue

// Current date line color
configuration.currentTimeLineColor = UIColor.blue

/// Current date line dashed
configuration.currentTimeLineDashed = false

// Selected highlight color on event
configuration.selectedItemColor = UIColor.blue

// Unselected color on event
configuration.unselectedItemColor = UIColor.lightGray

/// Selected highlight color when row cell touched
configuration.selectedColorOnTouch = UIColor.init(red: 0.95, green: 0.95, blue: 0.95, alpha: 1)

// Row separation
configuration.rowSeparation = 10.0

/// Enable refresh control when dragged down
configuration.enableRefresh = false
Is important to finally assign configuration to GridTimerView
gridTimerView.configuration = configurationIs needed to show your own cells with events in collection table.
// Needed for displaying rows. Returns number of rows in the table
func numberOfRows(inGridTimerView gridTimerView: GridTimerView) -> Int

// Needed for displaying rows. Returns height of custom row in the table
func heightForRow(inGridTimerView gridTimerView: GridTimerView) -> CGFloat

// Needed for displaying items in the timeline row. Returns height of highlighted items
func heightForTimelineRow(inGridTimerView gridTimerView: GridTimerView) -> CGFloat

// Needed for displaying items in the timeline row. Returns number of items in row
func gridTimerView(gridTimerView: GridTimerView, numberOfItemsAtRowIndex rowIndex: Int) -> Int

// Needed for drawing your custom row with item index and row index
func gridTimerView(gridTimerView: GridTimerView, viewForItemIndex itemIndex: Int, inRowIndex rowIndex: Int) -> UIView {

    let channelView = ChannelView()
    let channel = channels[rowIndex]
    var viewModel = ChannelView.ViewModel()

    if channel.events.count > 0 {
        viewModel.title = channel.events[itemIndex].title
        viewModel.subtitle = channel.events[itemIndex].subtitle
        viewModel.image = channel.channelImage
    }

    channelView.viewModel = viewModel
    return channelView
}

// Needed for drawing item in the timeline row
func gridTimerView(gridTimerView: GridTimerView, startTimeForItemIndex itemIndex: Int, inRowIndex rowIndex: Int) -> Date

// Needed for drawing item in the timeline row
func gridTimerView(gridTimerView: GridTimerView, endTimeForItemIndex itemIndex: Int, inRowIndex rowIndex: Int) -> Date

// Returns color by item in row.
// If returns nil, `selectedItemColor` in configuration will be the selected color
func gridTimerView(gridTimerView: GridTimerView, colorForItemIndex itemIndex: Int, inRowIndex rowIndex: Int) -> UIColor?In order to add more functionality in your app, you must implement te GridTimerViewDelegate and set delegate to your view controller instance.
// Called when item is highlighted.
func gridTimerView(gridTimerView: GridTimerView, didHighlightAtItemIndex itemIndex: Int, inRowIndex rowIndex: Int)

// Called when row is selected
func gridTimerView(gridTimerView: GridTimerView, didSelectRowAtIndex rowIndex: Int)

// Called when you refresh the table
func didPullToRefresh(inGridTimerView gridTimerView: GridTimerView)You can also use next methods for scrolling timer, registering and reuse your custom view row or end refreshing table when new data has loaded.
// Scroll the timer to single date programatically
func scrollToDate(date: Date)

// Obtain your custom view
func viewForRowIndex(rowIndex: Int) -> UIView?

// End refreshing table. Used when finish loading data
func endRefresh()

// Reload collection view data
func reloadGridData()

// Reload collection view data for row index
func reloadGridRowIndex(_ rowIndex: Int)GridTimerView is available through CocoaPods. To install it, simply add the following line to your Podfile:
pod 'GridTimerView'Alberto Aznar, info@alberdev.com
GridTimerView is available under the MIT liceßnse. See the LICENSE file for more info.

)


